How to Remove Blemishes From Photos for Free
No one is exempt from blemishes; however, sometimes that pesky pimple or attention-grabbing scar isn’t something you want featured front and center in your photo.
If you’ve got an imperfection that’s ruining your portrait, don’t fret. BeFunky’s free blemish remover app has got all of the tools and tricks you need to banish blemishes from your images for good. Keep reading, because we’ll show you how!
When Should You Remove Blemishes from Your Photos?
There are plenty of scenarios when you might want to use our free photo editor to remove blemishes. Perhaps you’ve just woken up with a pimple on the day of your big birthday celebration and want to ensure it’s not visible in your party photos. Or you’re a professional photographer and your model has asked you to remove a visible scar. Maybe you’ve just always had freckles and want to see what you’d look like without them.
While some associate blemish removal with the overly airbrushed and unrealistic 'Photoshopped' look, BeFunky’s unique technology allows you to be as subtle with your retouching as you want. Using a precise paint brush feature, you can adjust properties such as brush size, hardness, and strength to get your blemish removal just right.
How to Use BeFunky’s Free Blemish Remover Photo Editor
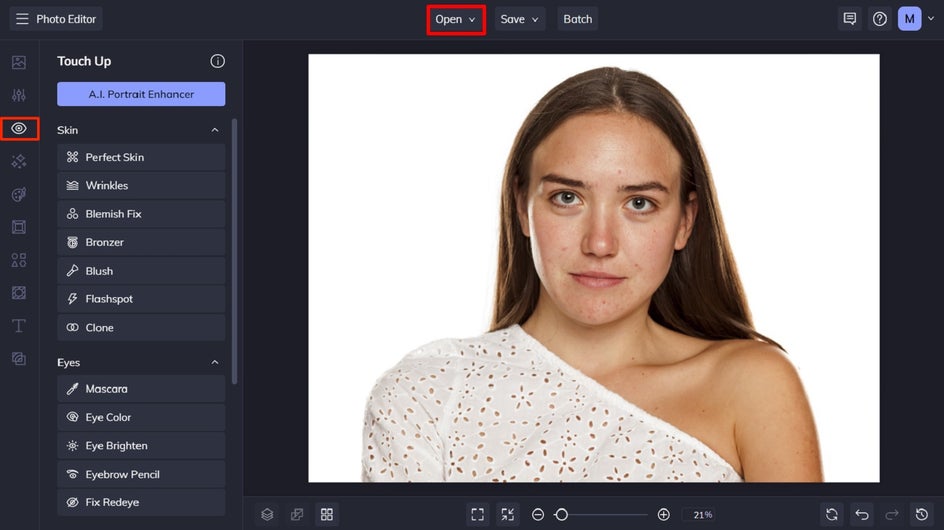
Ready to remove blemishes from your photos for free? Head to BeFunky’s Photo Editor, and this link will take you directly to our Touch Up section. Then, simply open the photo you wish to edit.
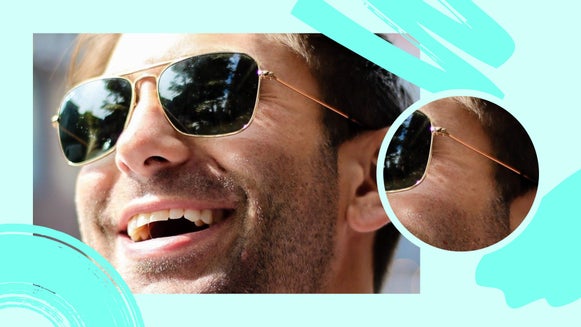
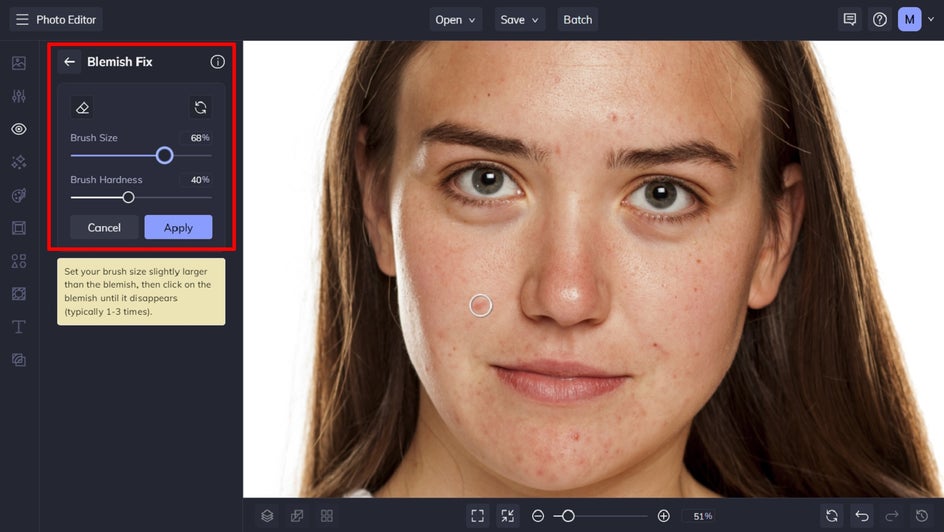
Step 1: Use the Targeted Blemish Fix Tool
Click Blemish Fix, and adjust your brush size and hardness by using their corresponding sliders. As a rule of thumb, you should set your brush size slightly larger than the blemish, then use your cursor to click on the blemish until it disappears (typically 1-3 times).
Repeat this process for as many blemishes as required, then click Apply to apply your changes.
The Clone tool also creates a similar effect, as it allows you to select an area of your photo (like the skin next to a blemish), then clone that section to cover up your blemish.
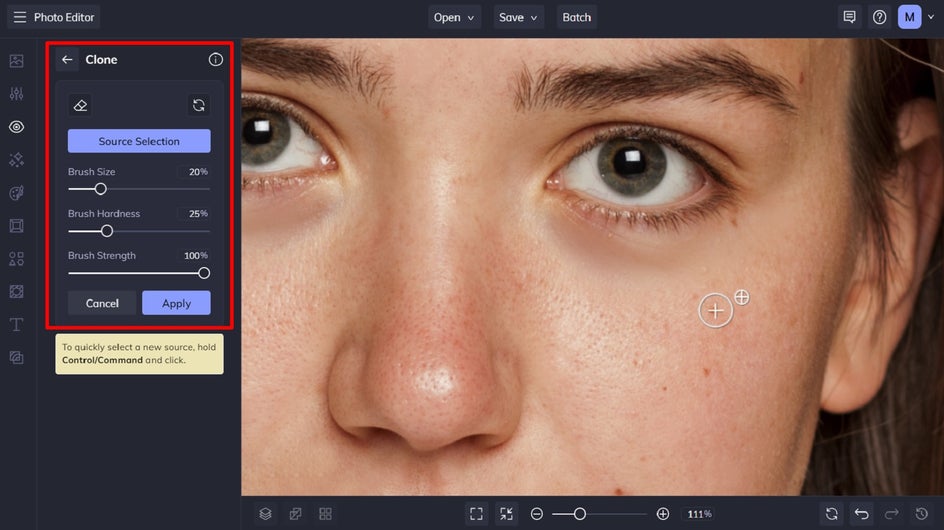
Pro Tip: When using the Touch Up tools to retouch photos, zoom in as much as possible so you don't miss any details.
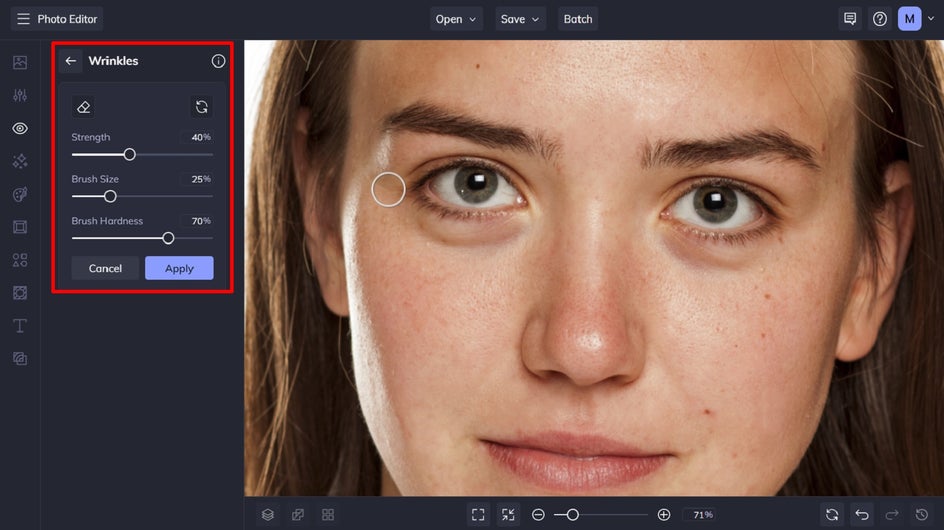
Step 2: Use the Wrinkle Tool to Remove Fine Lines
Whether they’re laugh lines or crow’s feet around your eyes, we’re all subject to wrinkles and fine lines at some stage or another. If you wish to remove them from your photo, then you can do so easily using the Wrinkles tool from the Touch Up menu.
Adjust the results by using the Strength, Brush Size, and Brush Hardness sliders. Then, use your cursor to apply the effect to the desired areas.
Finally, click Apply to save your changes.
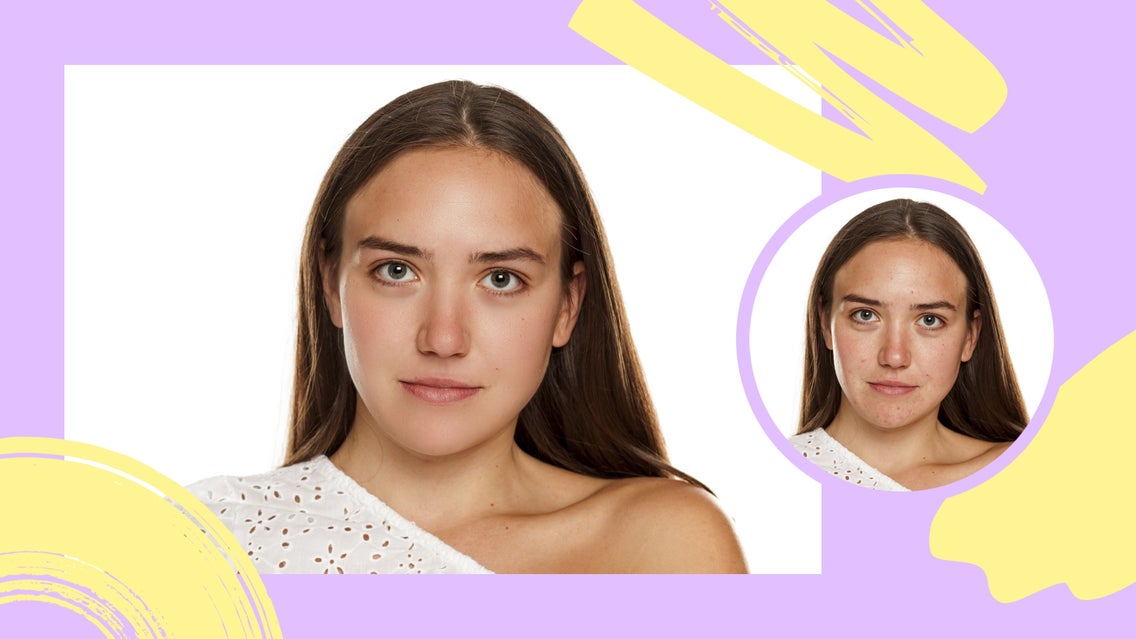
Step 3: Use the Perfect Skin Tool to Finish Your Look
By now, your photo is looking blemish-free, however, there’s one last step you can do to ensure your most photogenic and perfect skin. The Perfect Skin tool enhances the natural glow, tone, and texture of your skin, all in a single sweep of your mouse. Note that this tool is only available to Plus users.
Click on Perfect Skin, then adjust the Strength, Brush Size, and Brush Hardness to your liking. Using your cursor, apply the effect over your (or your subject’s) face, until you’re happy with the new and natural-looking new complexion. Then, click Apply.

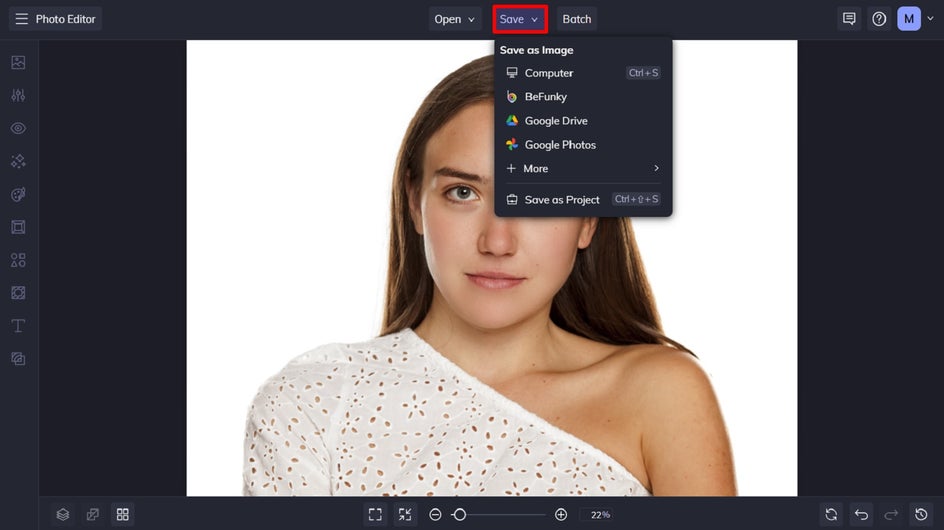
Step 4: Save Your Blemish-Free Photo
Once you’ve finished editing your photo, it’s time to save it so it’s ready to share in any way you see fit! Click Save at the top of the screen, then select your desired save location.
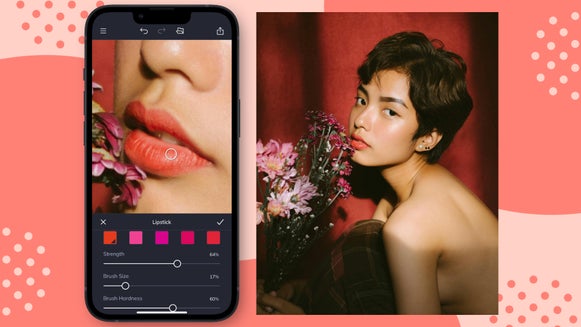
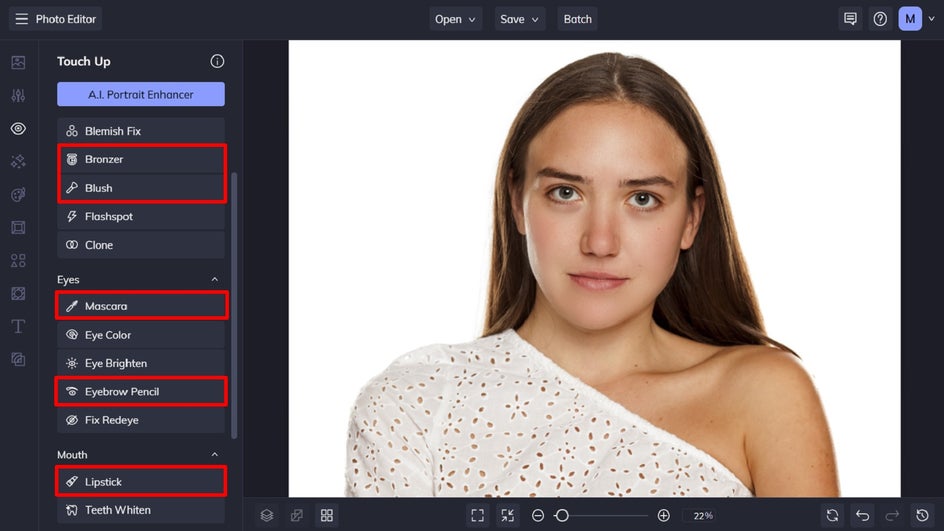
Don't Forget About Our Digital Makeup Tools!
BeFunky also contains a wide range of digital makeup for Plus users that allow you tp transform your photo even more! From lipstick and blush to mascara, bronzer, and more – you’ll find all of these in the Touch Up menu.
Let Your Natural Beauty Shine
Blemishes in photos can impact confidence or distract from other characteristics. Luckily, BeFunky’s free blemish remover tool allows you to minimize those blemishes – without taking away the natural beauty of your skin.
And did you know that BeFunky also has a handy mobile app for editing on the go? This means you can quickly and easily remove blemishes from photos on your phone before uploading them straight to your social media. All it takes is a few taps! Download the mobile app for blemish removal from your device, or head to the Photo Editor to try it out from your desktop!