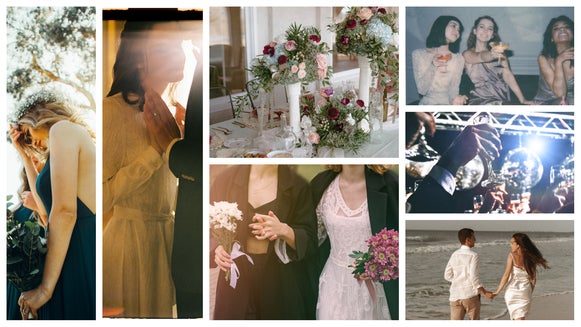
Designer Tutorial: Save The Date Cards
BeFunky's new Designer Toolset is incredibly powerful, but the good news is that it's also incredibly simple to use—even if you have little experience with design.
So when it comes to creating a Save the Date in the lead-up to your wedding, forget hiring a Graphic Designer or even spending hours trying to learn Photoshop. Everything you need is conveniently located in the freshly debuted Designer Toolset. Now that's one less thing you need to worry about in preparation for the big day!
Save the Date Design #1: Vintage Inspired Florals:
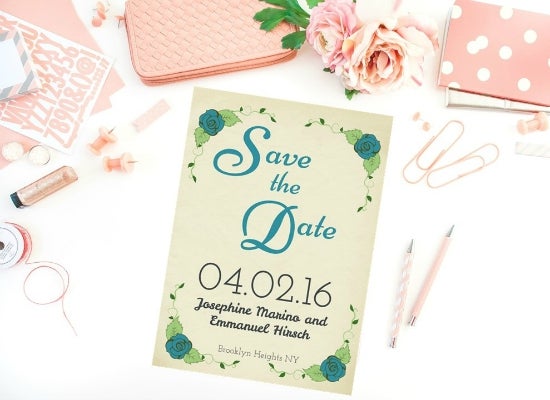
This Save the Date might look pretty impressive, but did you know that it only took just a few minutes to create? Thanks to the Designer Toolset's pre-made templates for Save the Dates, all it required was a little tweaking to create this look.
To locate this design, head on over to the Designer Toolset before clicking on 'Templates', then selecting 'Event Graphics' and choosing 'Save the Date'. This is Design 1, so you should spot it straight away!
You can change individual elements on the template simply by clicking on them. If you wish to alter the text, click on the text until it is highlighted blue and begin typing what you'd prefer it to say. For example, you might want to change the names, date, or location.
If you fancy using a different font, you can also click on the text you wish to modify and a floating toolbox will appear on the left hand side with various options such as font family, font size, spacing, paragraph alignment, color and more. You can also drag and drop elements in order to change their positions.
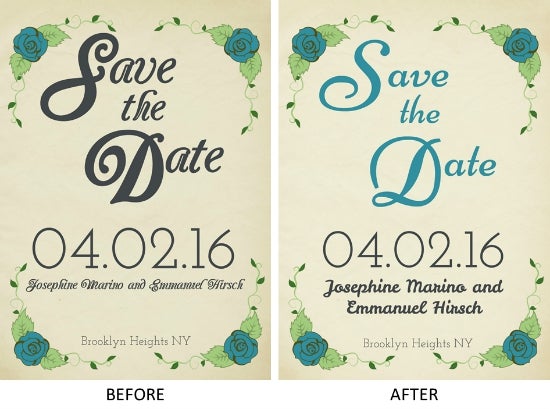
I changed the font of the Save the Date heading from Carrington to Niconne and also wanted to change the color of the heading to match the same shade of blue as the roses. To do this, I clicked on the text, selected 'Color' in the toolbox and then used the color picker icon to click on the rose and match the shade. I also changed the names font to LeckenliOne and made them larger so that they were more noticeable.
You can also modify the background of the Save the Date by clicking on it then either choosing a color overlay or a replacement image from your own pictures. I wanted to make the background a little lighter, so actually clicked on the 'Open Image in Editor' button before adjusting the image's brightness level.
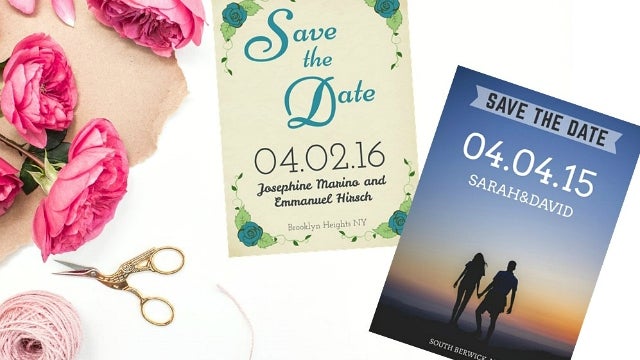
Save the Date Design #2: Couple at Sunset

For Design #2, I chose the second template. This one has a black and white theme, as well as a photo of the couple and text overlays. This is a popular design choice for modern Save the Dates.
Lets pretend this couple are the adventurous type—they love travelling and seeing the world together, so they chose a recent image from their last summer holiday as the background, featuring a beautiful sunset. To change the background image, I clicked on the photo provided in the template, then selected 'Replace Image' on the left hand toolbox, before selecting my new image straight from my own files.
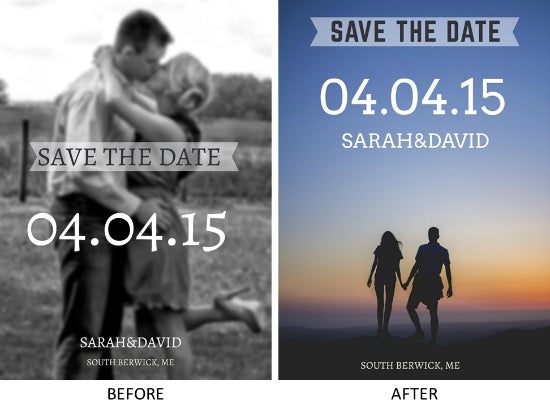
Then, all I had to do was rearrange the text to areas of the design where it wasn't obstructing our view of the couple! Finally, I chose different fonts for the text to experiment with the overall look and mix it up a little.
You can also create your own Save the Date templates completely from scratch, and there is a huge array of customizable options to help you make a Save the Date that you and your partner will love.
Want to learn more intriguing features of the Designer Toolset? You'll love this informative article about the new platform!
Itching to create your very own versions of a Save the Date? Have a play around with the Toolset here: