How to Make Your Own Shepard Fairey Hope Poster
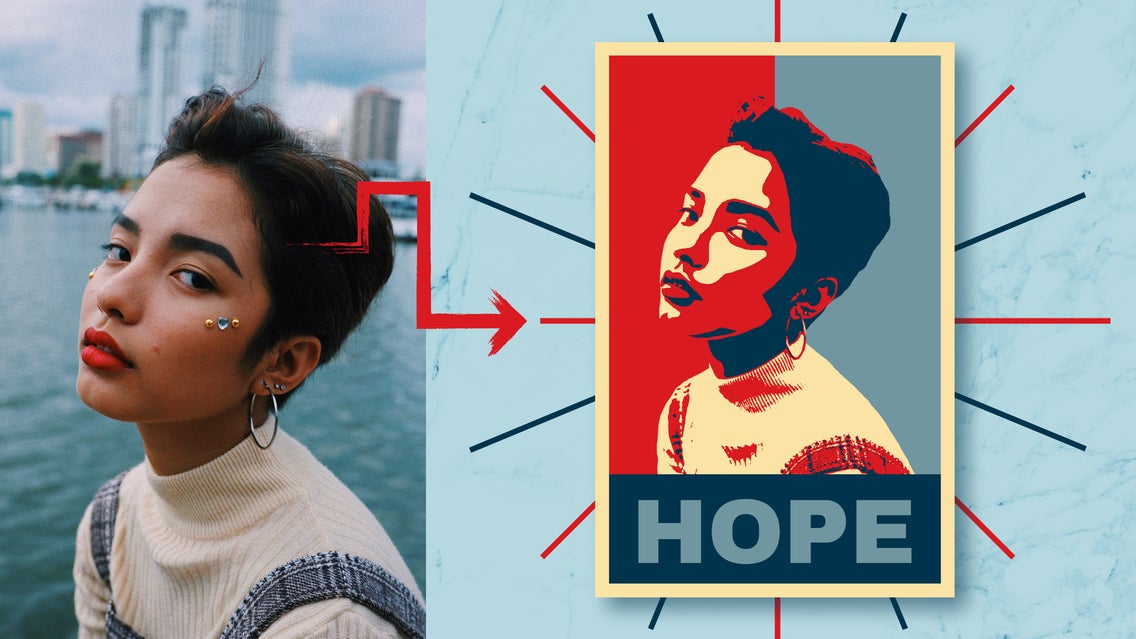
Cast your mind back to 2008, when an iconic, street art-inspired poster emerged in the lead-up to the U.S. election. That poster was none other than the Barack Obama "Hope" poster by artist Shepard Fairey, which featured the former president in the colors red, beige, and blue. With the word “Hope” emblazoned across it, the artwork transformed Obama from a presidential hopeful to a visionary icon in the eyes of many.
If you’ve ever wanted to recreate your very own version of this design using a portrait of your choosing, you’re in luck. BeFunky’s Photo Editor has the perfect Photo Effects and tools to get the job done – all within a few clicks! We’ll show you how.
How to Make a Shepard Fairey Hope Poster
Ready to get creative? Start by heading to BeFunky’s Photo Editor, then Open a portrait photo of your choice.
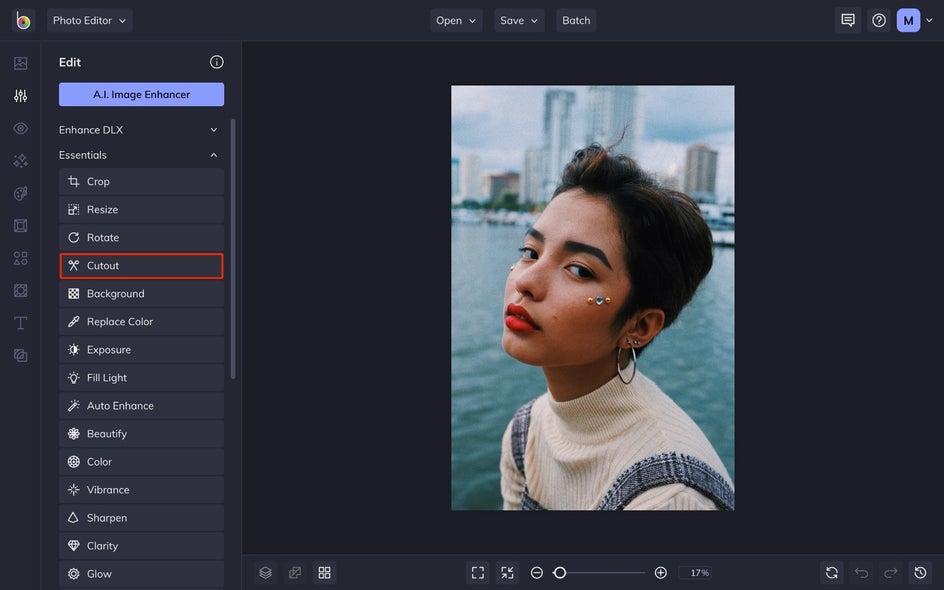
Step 1: Cut Out Your Subject
Head to the Cutout tool, found under the Edit tab, to cut out your image from the background.
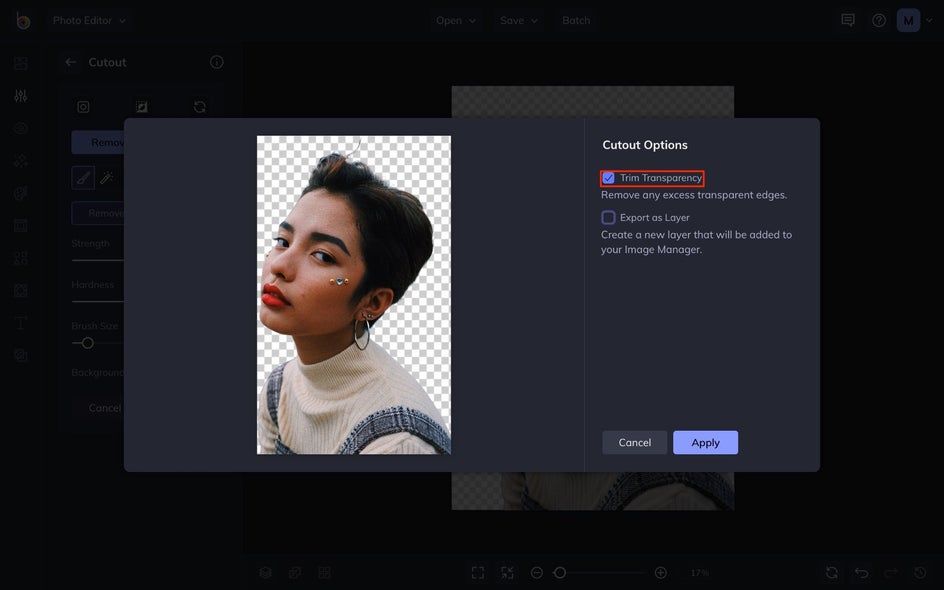
Click the Remove Background Button for instant results. The various brushes and settings allow you to adjust and customize the final look.

Once you're done, click Apply and check the Trim Transparency option to remove the edges of your image.
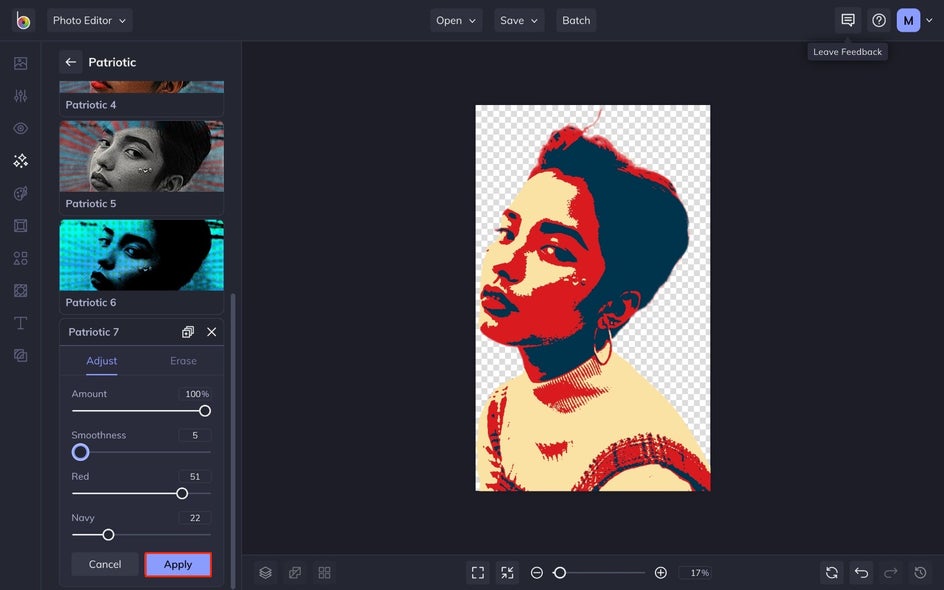
Step 2: Add the Patriotic Effect
Next, we're going to add a Patriotic effect to achieve that Hope poster aesthetic. Head to the Effect tab and navigate to Patriotic. Then, click on Patriotic 7.
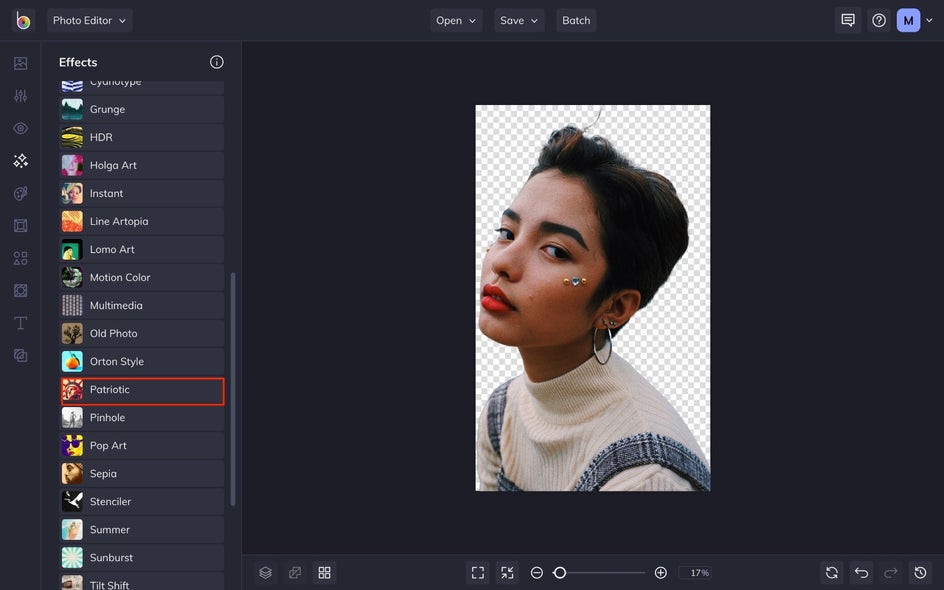
Adjust the effect by using the available sliders. You can change the amount, smoothness, and decide how much red or blue dominates the image.
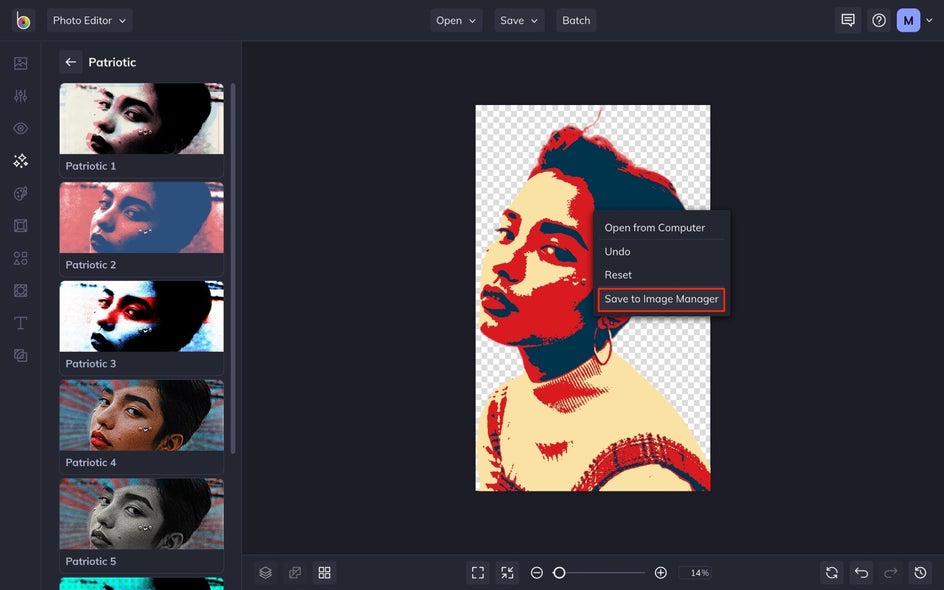
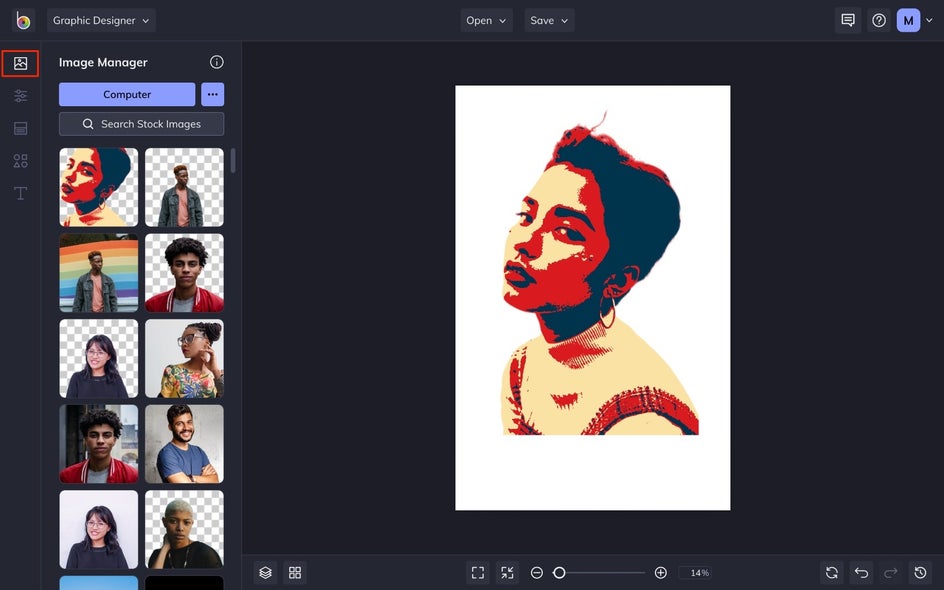
This next part requires you to right-click and save your image to the Image Manager. That's because we're going to assemble the rest of our Hope poster in the Graphic Designer.
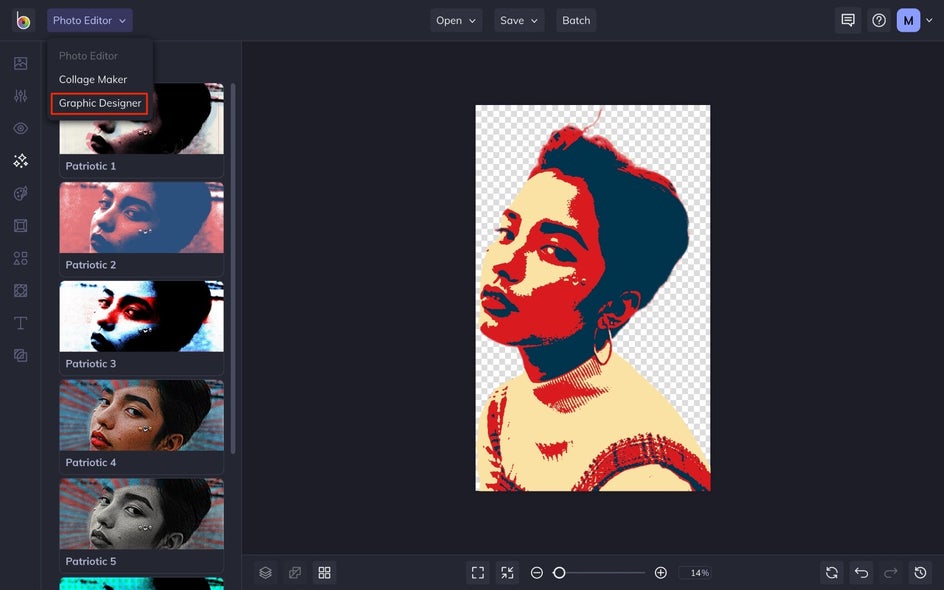
Step 3: Head to the Graphic Designer
Once you've saved your image, click on this link to open the Graphic Designer.
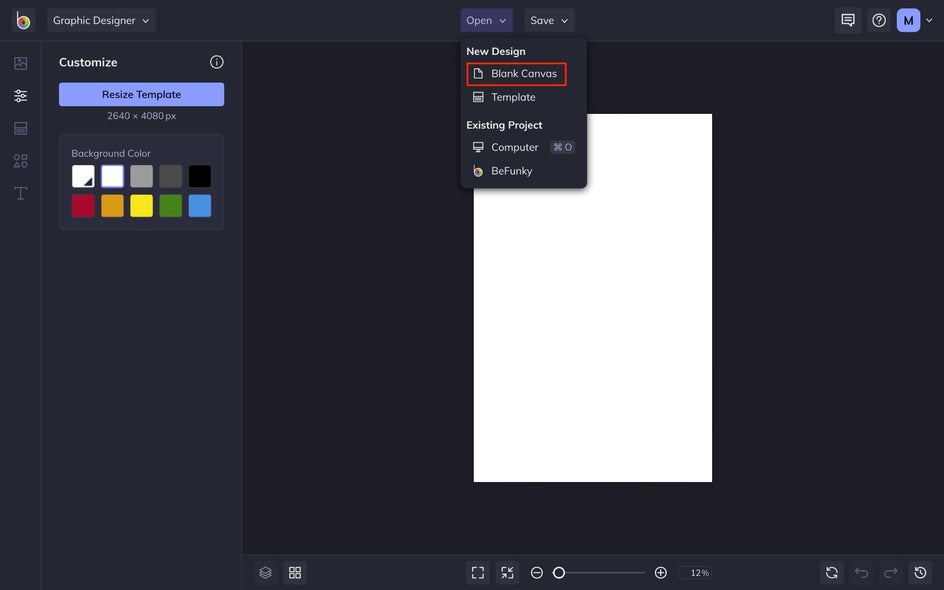
Step 4: Set up Your Canvas
Once you're in the Designer, click the Open tab at the top of your canvas, followed by Blank Canvas. Then, select the 11x7 Poster option. Though feel free to create your design in any size you want.
Firstly, head to your Image Manager and select your photo by dragging and dropping the thumbnail. Position it as centered as possible.
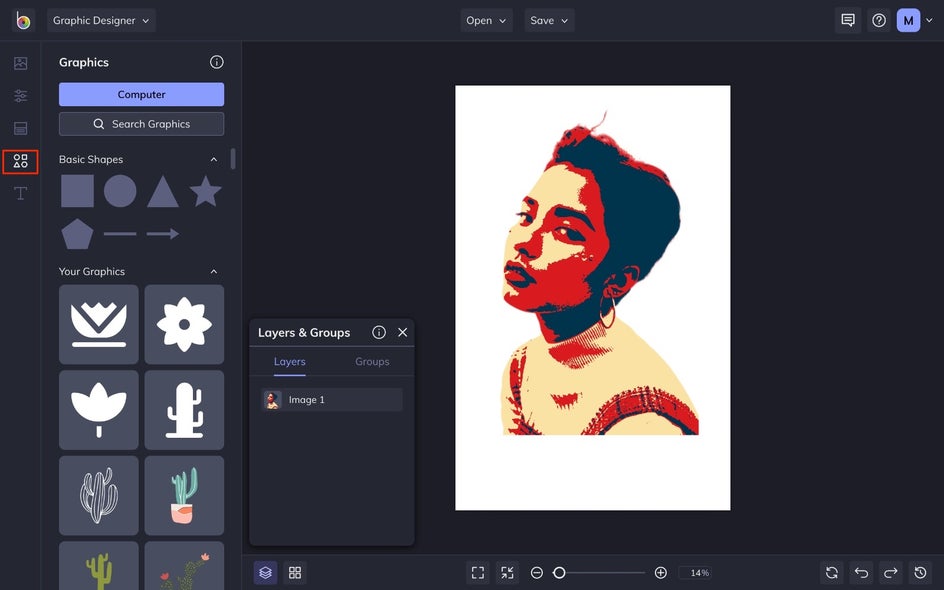
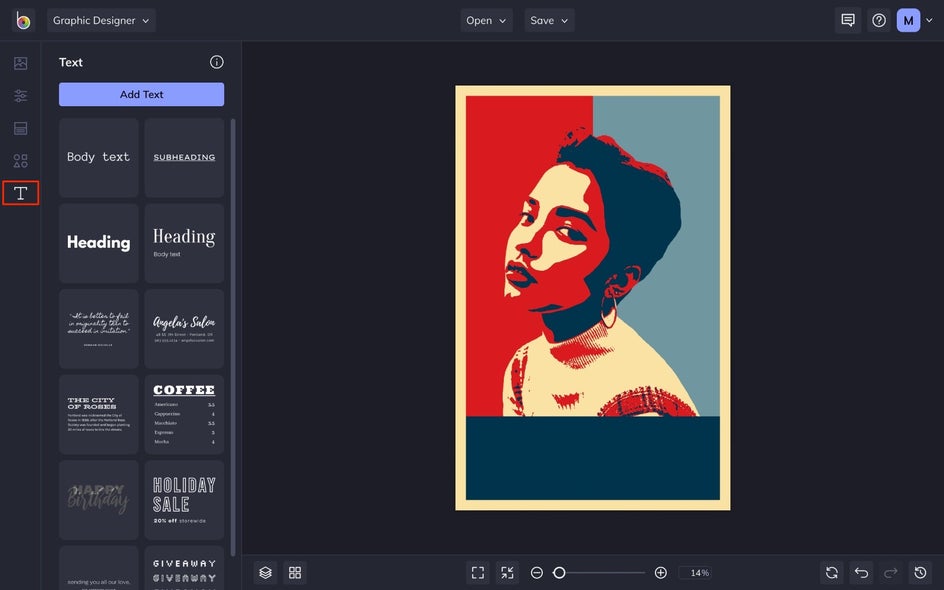
Step 5: Add Graphics
Next, we're going to head to the Graphics tab to add the background and space for text. Add the three necessary rectangular graphics by clicking the square graphic under Basic Shapes.
We're going to stretch out and position our rectangular graphics to split the background down the middle. The third rectangle will go along the bottom.
To change the color of your graphics, check the Fill option under the Rectangle Properties menu. The original poster's color palette is as followers: Prussian Blue (#003050), Desaturated Cyan (#7096A0), Silver Foil (#B0B7A7), Peach-Yellow (#FAE3AD), and Lava (#DA1415). Use these colors to fill your graphics.
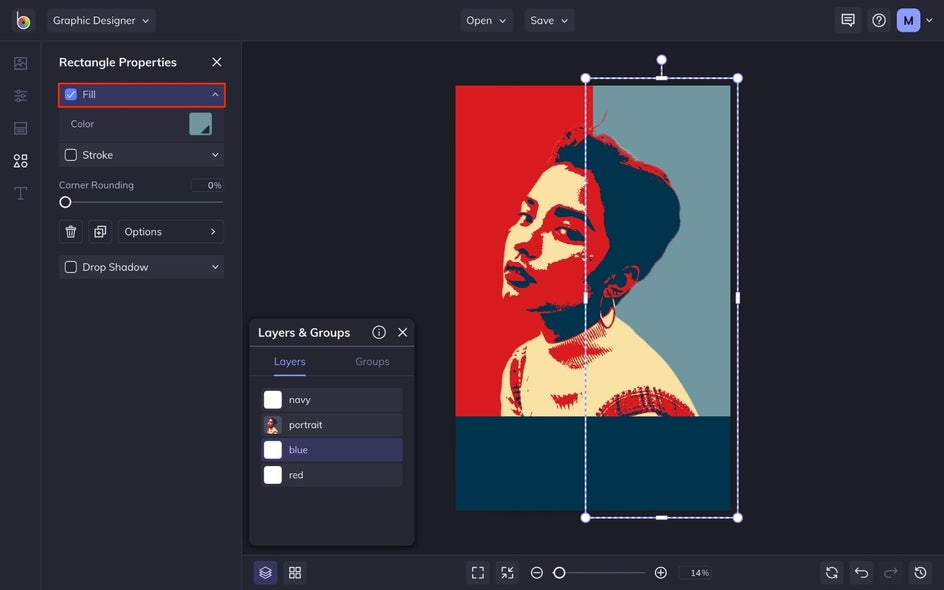
The finishing touch before we head to the text section of this tutorial is to add a border that’s identical to the original design. Add a fourth rectangle, remove the Fill, and check Stroke.

Change the Stroke color to #FAE3AD and adjust the Thickness slider until you are happy with its size. Then, apply your changes.
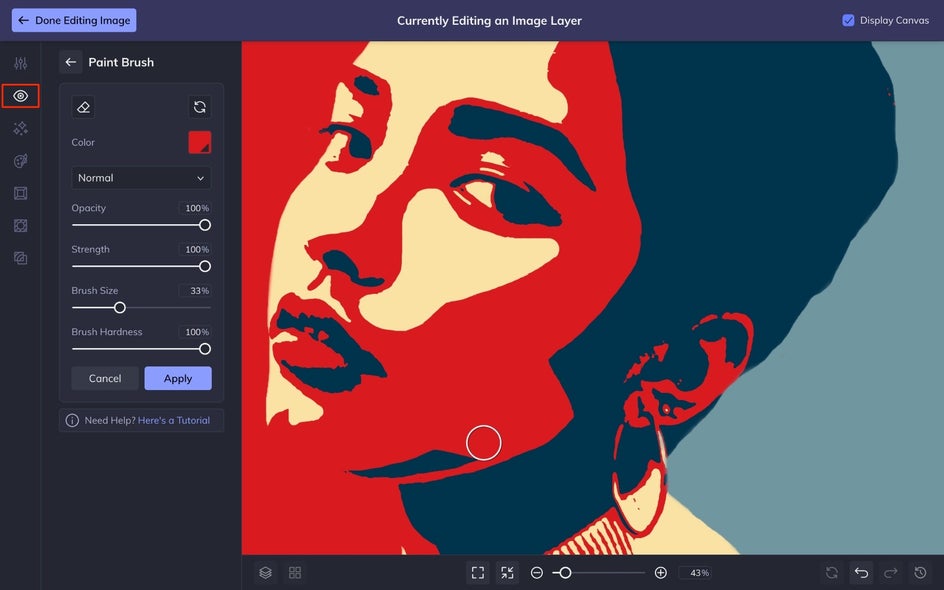
Step 6: Smooth Out the Color Blocking
Next, if you want to smooth out the color blocking of your subject to mimic the original and blend more seamlessly, head to the Touch Up tab and select Paint Brush. Here, you can use the Eye Dropper Tool found under Color to copy the color of the section you wish to paint. Smooth those edges and fill in any blank space by using our assortment of brush options.
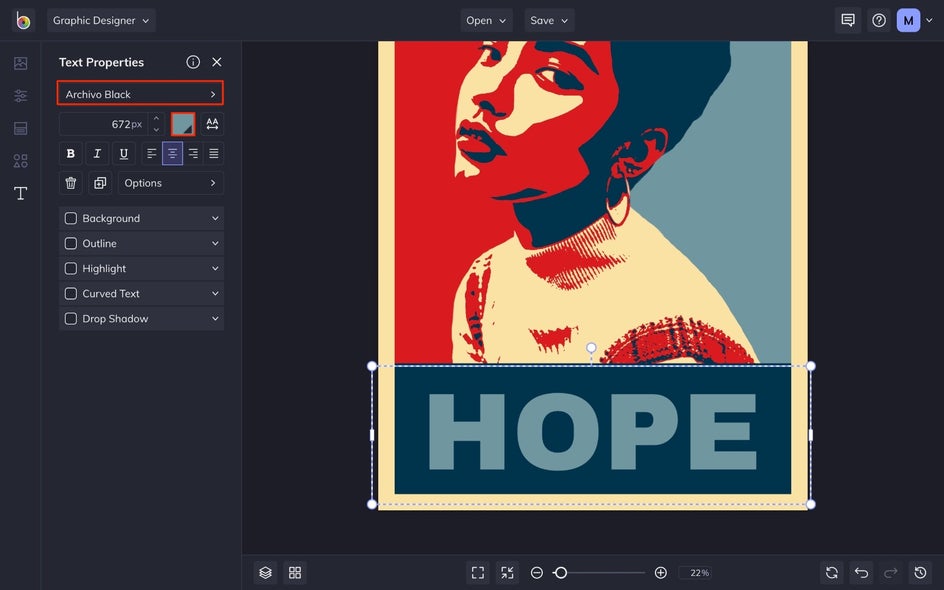
Step 7: Add Your Motivational Text
Next, navigate to Text in the menu on the left, then click Add Text. Double-click the text box and type your desired word, whether it be "Hope," "Dream," or anything else.
From the Text Properties tab, select your favorite font. ("Gotham" is the font used in the original poster.) Additionally, you can use the Eye Dropper Tool to select the light blue hue already present in your image, to further aid Shepard Fairey’s original street art-inspired design.
Using the Text Properties menu, you can change the color of your text, the boldness, add an outline, and more.
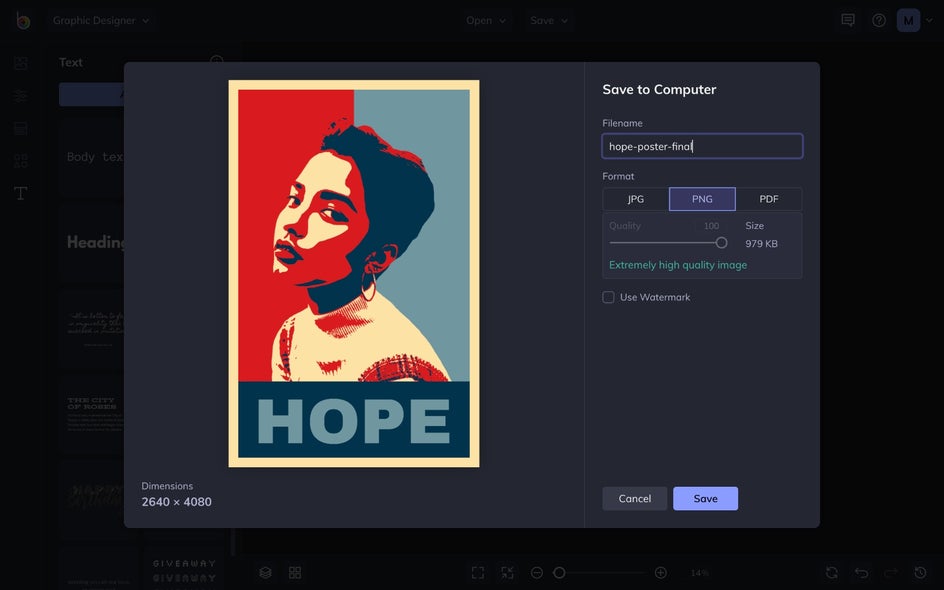
Step 8: Save Your Finished Poster
Last but not least, it’s time to save your poster so it’s ready to share with the world (or you know, your friends and family). Click Save at the top of the screen, then select your desired save location and format.
Spread Some Hope
There you have it! Now that you know how to use BeFunky’s Photo Editor as an Obama Hope Poster generator, there’s no limit to your creativity! Why not surprise your loved ones by creating additional posters featuring their own face? There is plenty of fun to be had!