DIY Holiday Cards In No Time With Our Collage Maker
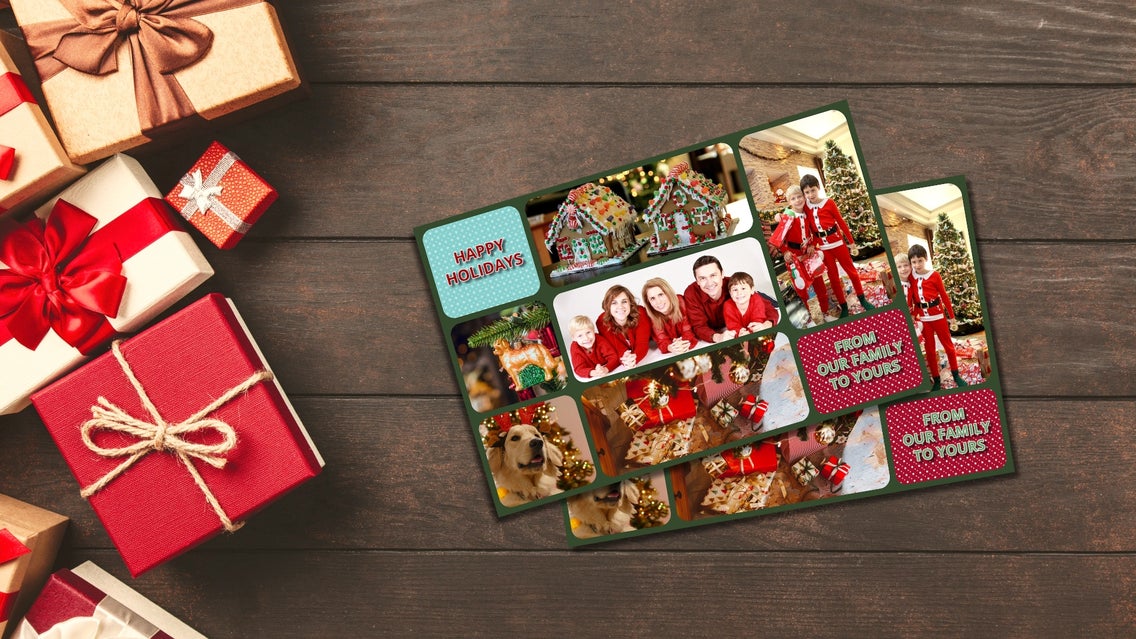
Some things never change, like the challenge of last-minute holiday gift shopping. Fortunately, the brilliance of gifting sentiment with a custom holiday card hasn’t changed either. While holiday cards used to be a gateway leading to scrap paper and glitter glue disasters, modern holiday cards are clean, crisp, and, most importantly, quick!
Create Your Own Holiday Card Collage
Thankfully, using BeFunky's Collage Maker is a quick and easy way to create a card and add some personal flair before sending it to your friends and family. But if getting started is the hardest part, here is a tutorial to get you on your way.
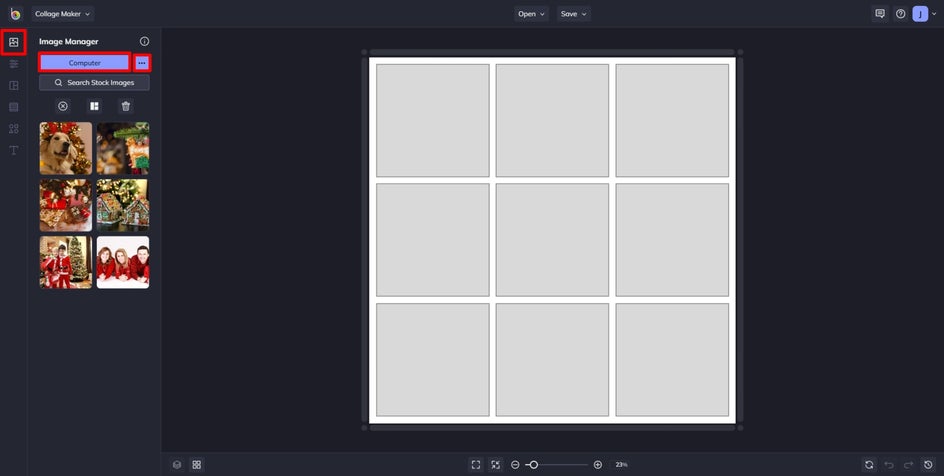
Step 1: Import Your Photos
Begin by navigating to the Collage Maker and starting a new project. Navigate to the Image Manager tab and use the Computer button to add all your family photos to the Image Manager.
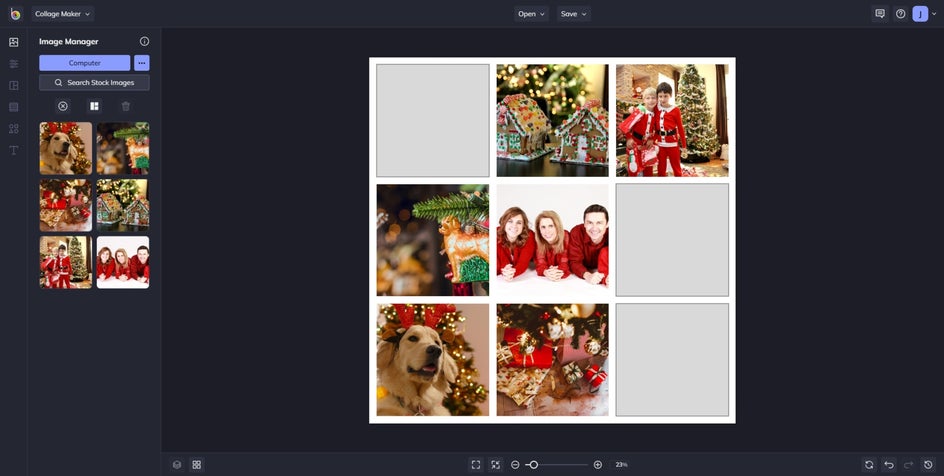
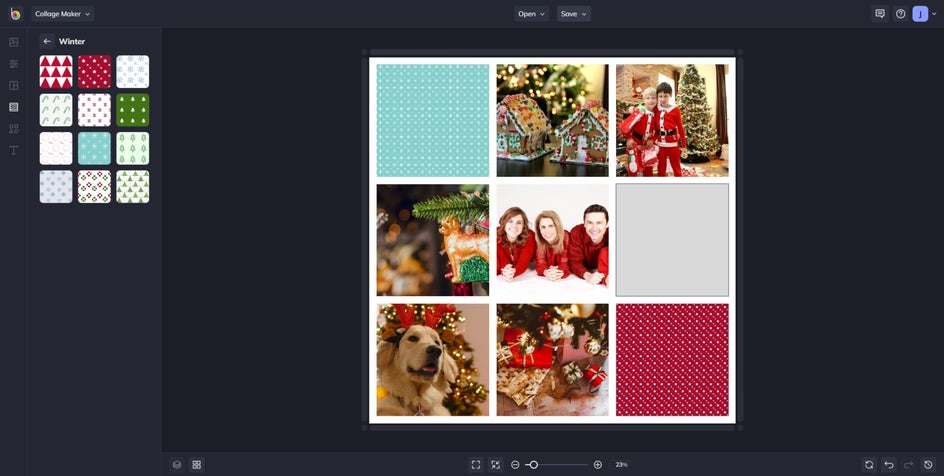
Step 2: Arrange Your Photos in Cells
Now, simply drag your photos and stock images into the cells of the collage to fill the template with your selections. Cells can be added by dragging images between two existing cells, and cells can be deleted by right-clicking an existing cell and selecting “Remove Cell.” This tutorial will fill six cells with images from the image manager and save some extras for patterns.
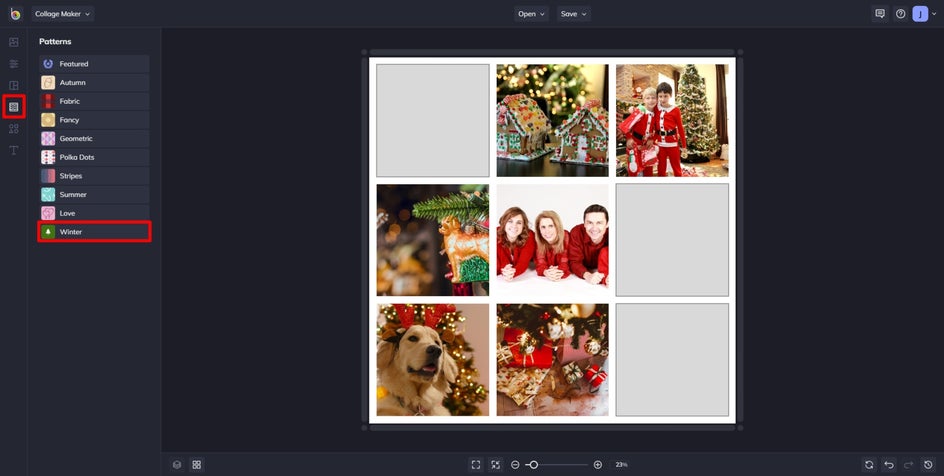
Step 3: Add Patterns or Graphics
did you know that you can add graphics and patterns to your collage holiday card as well? For this tutorial, we're going to select the Pattern tab and choose a pattern theme that's relevant. Since we're creating a holiday card, we will use the Winter patterns.
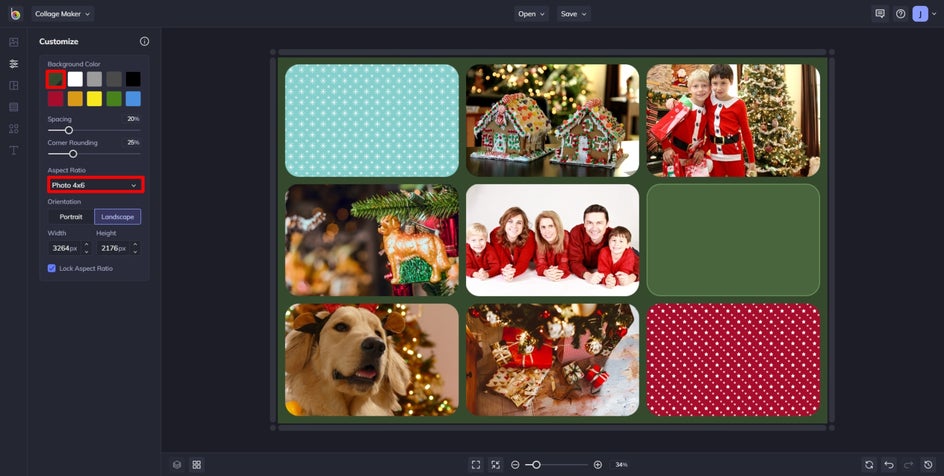
By dragging patterns between existing cells, we can add new cells filled with the seasonal pattern. By adding four patterned cells, we have created space to add our text greeting without obscuring our pictures. The patterned cells can trade places with image cells by dragging one onto another as necessary.
Step 4: Customize It More
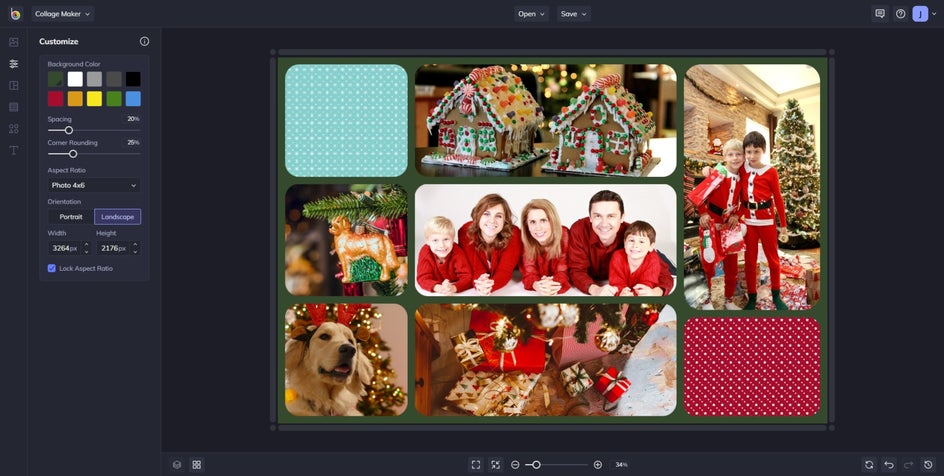
In the Customize tab, we can change the Background Color to a more thematic dark green. Corner Rounding can be adjusted to a softer 25%. By adjusting the Aspect Ratio to “Photo 4x6” the card can be a better size to fit in an envelope for delivery.
Not every image will be formatted in an ideal way. By hovering at the image's edge and dragging the dashed lines that appear between rows and columns, we can give them more room to shine.
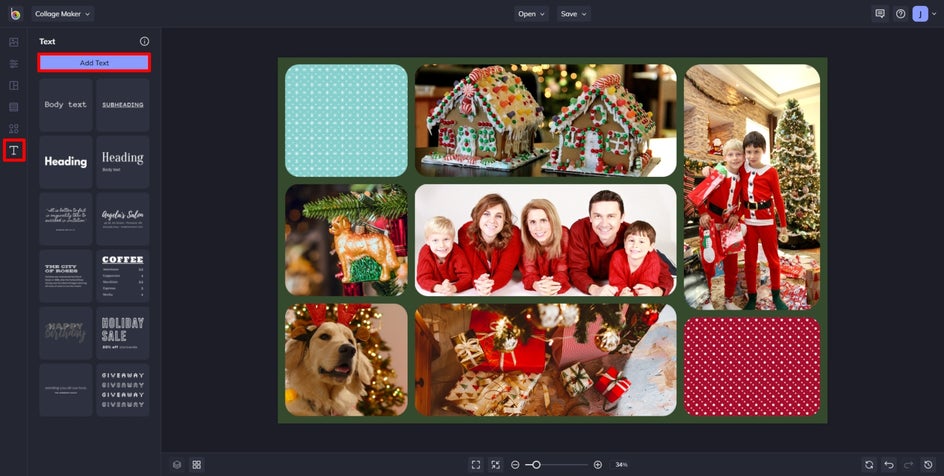
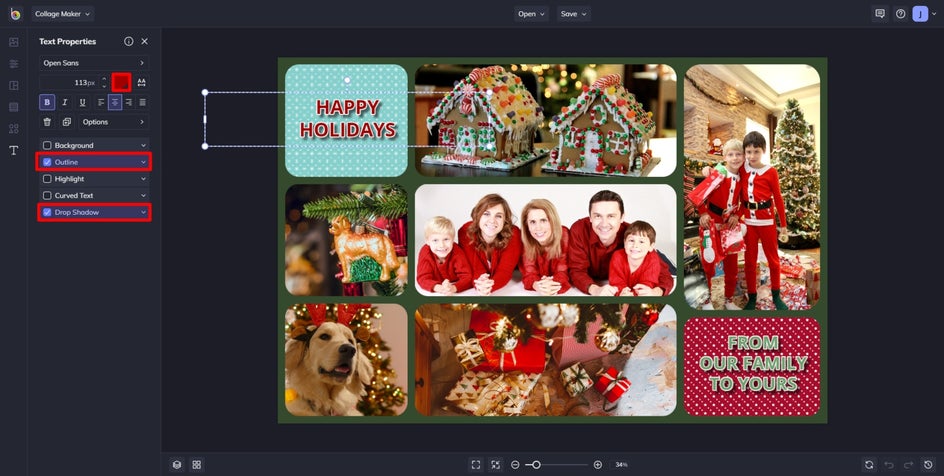
Step 5: Add Your Season’s Greetings
Navigate to the Text tab. Use the Add Text button to add text to the collage. Move the Text over the newly included pattern cells and use the text properties to stylize the added text.
Since we're using a pattern as the background of our text, we changed the text color to something that pops. Then, we added a white outline and drop shadow for improved visibility.
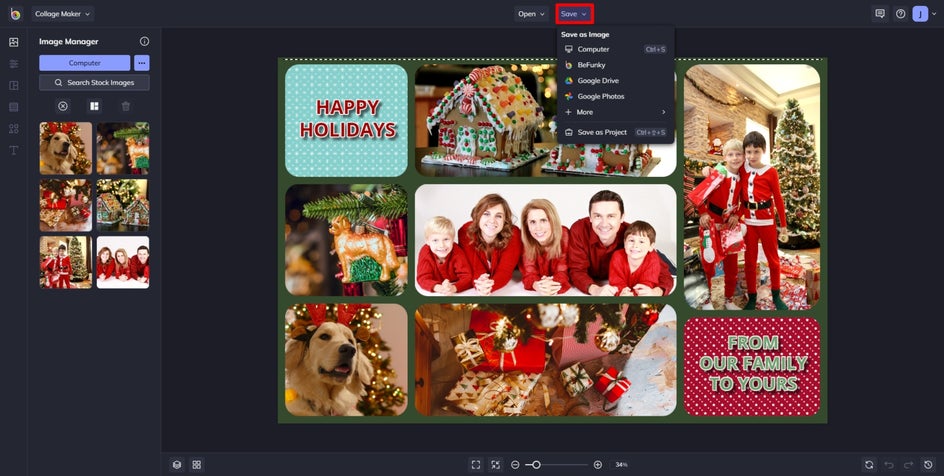
Step 6: Save It!
The only thing left to do is to save your work locally to your device so you can print it and send it out. If you choose to save it as a project, it can become a quick template for next year’s cards!
Collage Your Way Through the Holidays
From just a blank collage canvas, a beautiful card can be crafted, featuring all of your favorite holiday memories. Are you ready to spread the holiday cheer with all your friends and family? Get started by heading to the Collage Maker!