Mastering The Art Of Polyscapes

A couple days ago, I stumbled upon a collection of beautiful, eclectic designs called polyscapes. I’d seen these kinds of designs before, but never stopped long enough to know what they were. From my elementary school days, I do know that “poly” means “many”, and “scape” means “view or scenery." So in essence, a polyscape is a graphic that contains many different views or scenes.
Thanks to the BeFunky Photo Editor and new Cutout Tool, it’s incredible simple to create your very own eye-catching polyscapes. Here are a few examples of designs I whipped up in a matter of minutes. You can use them as the design for your next rock album cover, or just stare at them and ponder life’s great mysteries.


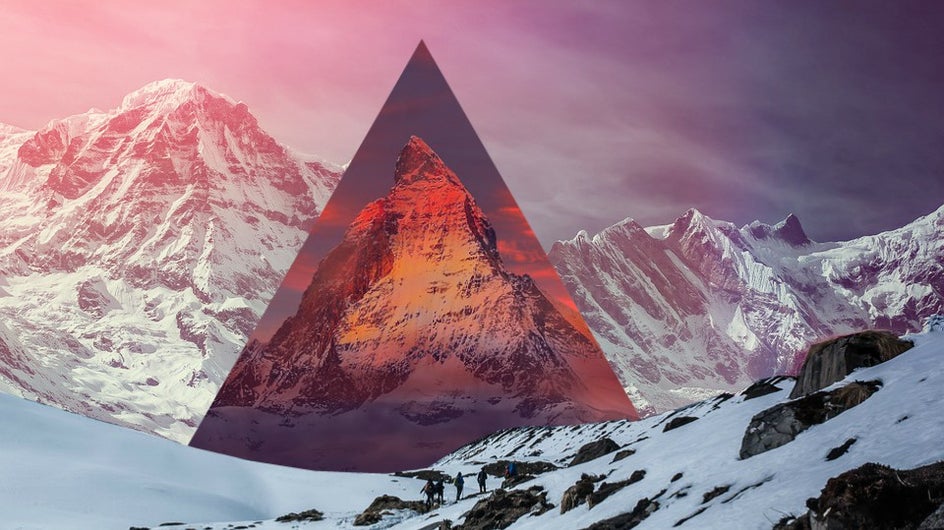
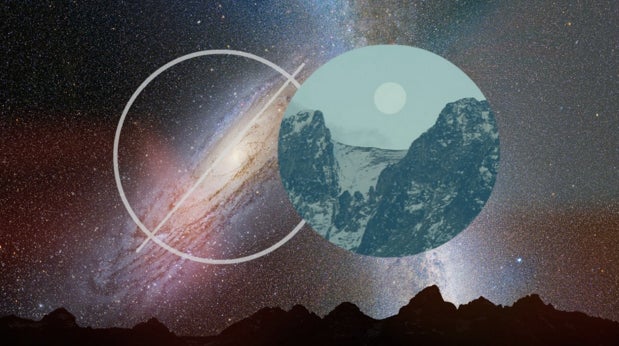

Now that you’ve seen some stunning examples of polyscapes, you’re going to flip out when I show you how easy they are to make with BeFunky’s Photo Editor! All you need to do is collect a few photos of landscapes, cloudscapes or any other epic nature photo you can find. I found all of the photos above on Pixabay, totally free of charge. Now let me show you how it’s done:
Step 1: Cut Out Some Shapes
Upload a photo and cut out some geometric shapes to use on top of your main photo. There are a few ways to do this with BeFunky. You can add an overlay to use as a template and then use the Cutout tool in the Edit tab to cut your shape out.
Or, you can freeform it with the Cutout Tool and skip the overlay. For a precise triangle like the one above, I chose to go the overlay route.
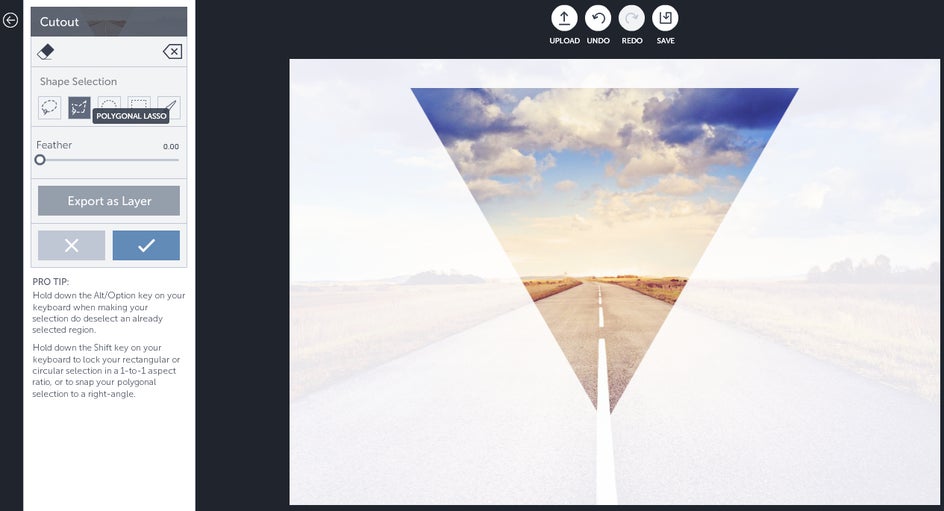
Pro Tip: Use the Poly feature of the Cutout tool to isolate angled objects for your polyscape image.
Step 2: Add Your Cutouts As Layers
It’s very important to click the Export As Layer button once you’re happy with what you’ve cut out.
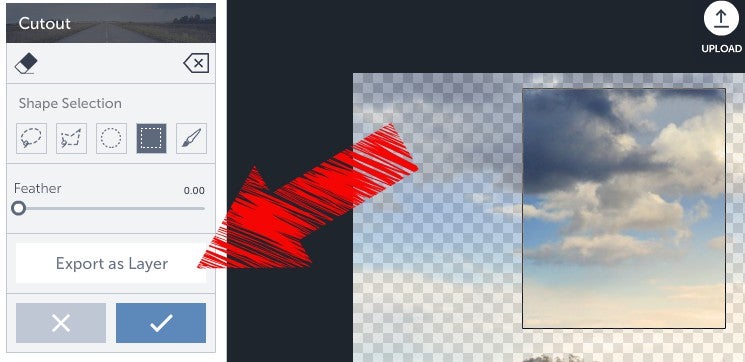
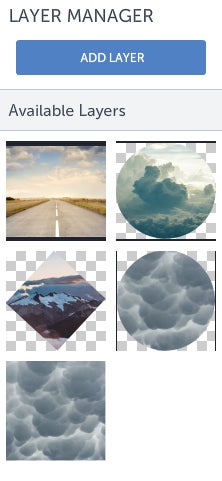
This will save the layer to a library of your cutouts for you to use in this project, which you can access in the Layer Manager tab.
Pro Tip: Polyscapes work best with a minimalist approach, so don't stack too many layers.
Step 3: Arrange Your Layers
Once you’ve got all the layers you want to use in your polyscape, upload your main photo and make any necessary edits. Then, add your layers from the Layer Manager tab and arrange them.
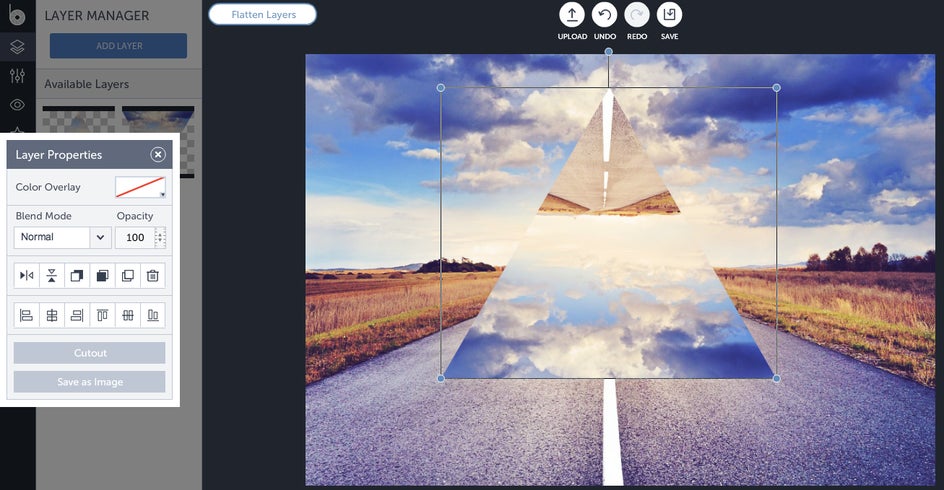
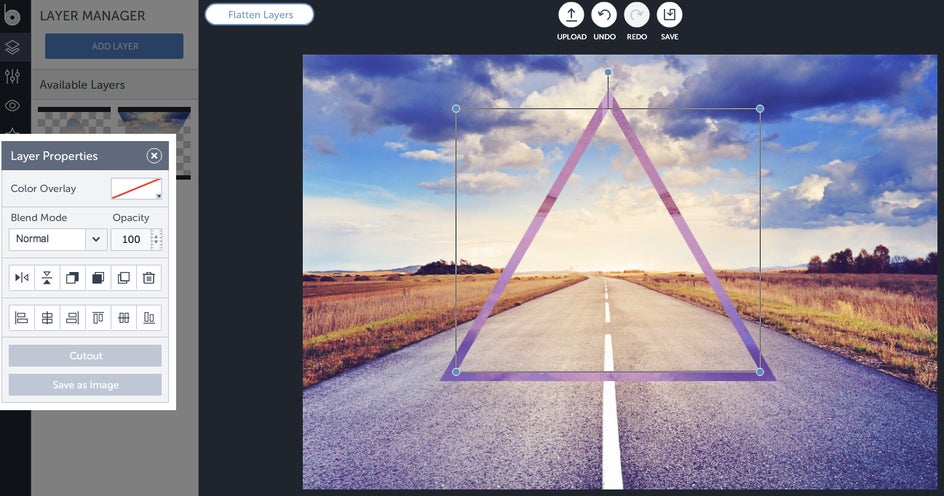
When you add a layer to your photo, a Layer Properties toolbar will appear. From the toolbar, you can rotate, move layers backwards and forwards, add an overlay color and so much more. For this polyscape, I added a purple overlay to the first triangle cutout.

Then, I arranged a second triangle layer on the top of the first to create a border effect.
And finally, added an inverted triangle on top of the first two.
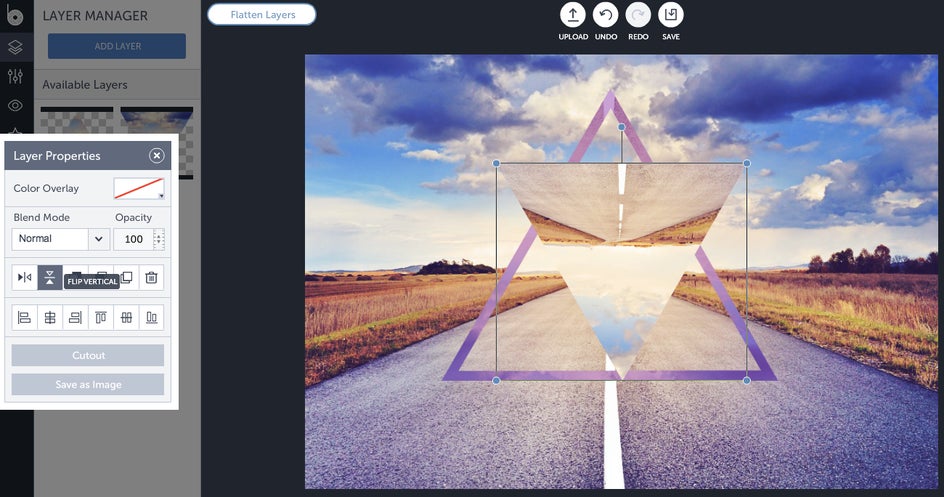
Then I manually resized it. You’ll find you have a lot of flexibility to resize and drag things around on top of each layer.

Pro Tip: Try using Blend Modes to instantly darken, lighten or add contrast to your image.
Where does this road lead? To polyscape city, of course!
Want to design your own polyscapes like a champion? Follow the link below and get to layering! And remember, there's no rules or limits to how you design it. Just use your imagination and let your creativity flow.