4 Tips for Mastering Reflection Photography

As you peer onto a lake at sunset, you might notice that the colors of the sky are reflected onto the water in an enticing way that you wish to capture forever. So why not do just that? Preserve the scene long after your memory has lapsed with our top 4 tips for reflection photography below.
What Is Reflection Photography?
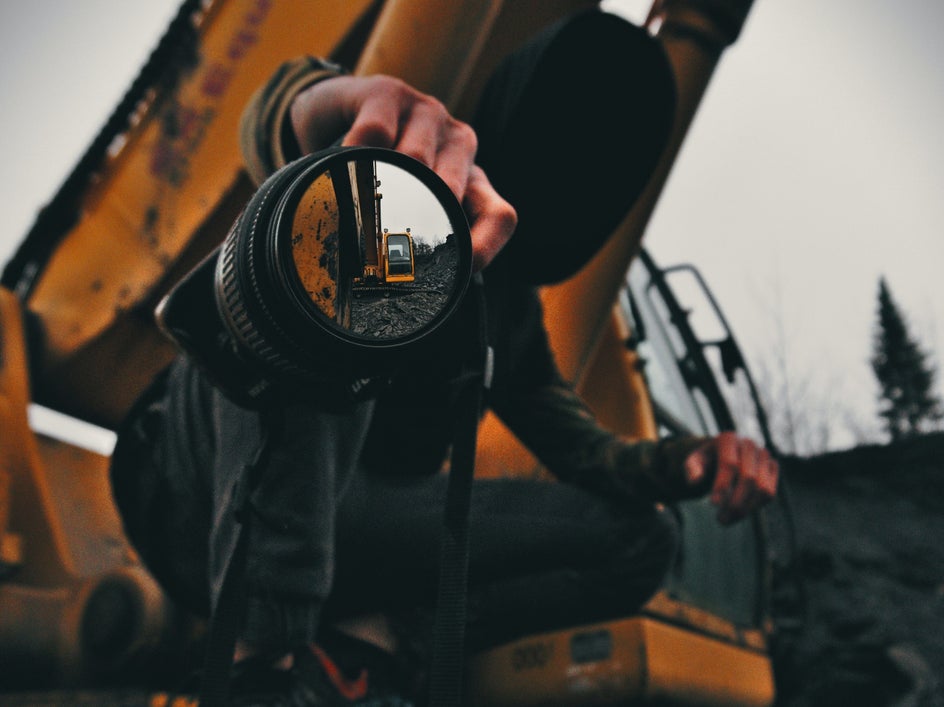
Reflection photography is also known as mirror photography. Its basic premise is capturing an image that also has a reflective surface that is echoing the surrounding scenery. It can be in a setting as huge as the ocean, or as small as a raindrop. As long as there is a reflective surface, magic can be made. Although we have mentioned bodies of water as examples, anything that is reflective can work. This means that mirrors, tiles, or even windows are a great medium to get started with reflection photography.
4 Tips for Achieving Beautiful Reflection Photos
With the help of BeFunky’s Photo Editor and Mobile app, we have 4 simple tips that will help you find artistic beauty in reflection photography.
1. Scout the Right Location
A spot with a body of water is often the go-to location for a stunning reflection image. However, if this idea feels limiting, you just have to plan ahead! Grab a mirror and set out to your desired location, or take a look around your location and search for shiny surfaces like buildings windows, or marble tiles. Even a puddle can create a mind-bending reflection image!

Be sure to arrive at the location early enough to check out cloud coverage and keep an eye on the sun’s position in the sky and how it interacts with your shiny surface. Reflection photography is primarily about the light reflecting off objects, so these are important aspects to consider before starting to shoot. Start snapping some images of your reflective surface, and if you don’t like how the light is hitting, start again in a few hours. Photographing the same location at different times of the day will yield vastly different results, and it may help you determine your favorite time to shoot!
2. Use the Best Equipment
A DSLR (digital single-lens reflex) camera and a wide-angle lens are going to be your best friends when it comes to shooting reflection photos. Here is a list of our top suggestions for using a DSLR camera for reflection photography:
- DSLR Camera
- Wide-Angle Lens
- Tripod
- Shutter Release Cable
- Preferred Props
A tripod will offer you stability, and the shutter release cable will allow you to maintain the focus of your image without having to click a button on the camera. Technically, any type of lens can work for reflection photography but a wide-angle lens will offer you the ability to capture the most amount of area without sacrificing the quality. Props are a great way to enhance the artistry in an image as we mentioned earlier with the mirror.
If you don’t have a DSLR camera, there is no need to worry. All of this can also be done on your phone and edited with the BeFunky Mobile app! Camera phones have made so many advancements in camera quality in a short amount of time, that you can get super high-quality images at the touch of your fingertips. Most phones now have the option to take images with a wide-angle setting as well, so you can get just as creative as you would with a DSLR with what you already have in your pocket.

3. Master Your Camera’s Settings
Water-based reflection can often distort images because of wind ripples on the water. Playing around with your camera settings beforehand is going to give you a leg up on the time it takes to learn them in the moment of shooting. When working with these water-based reflections, you want the landscape to be in focus, even though the reflection should be the focal point. Switch your camera into aperture priority mode with a small aperture of f/14 or even smaller if your camera allows it. Use the lowest ISO settings that will still allow for a shutter speed of 1/50 or faster, and perform fine-tuning adjustments until the desired result is achieved.
When snapping on a phone, you are able to adjust the settings by touching different focal points on the screen, and sliding your finger down to adjust the exposure settings. Take a look at your phone’s camera settings and get to know what each one does ahead of time, this will allow you to know exactly what will happen if you do different things ahead of time instead of having to learn how it works while you are shooting.
4. Compose and Edit Your Images
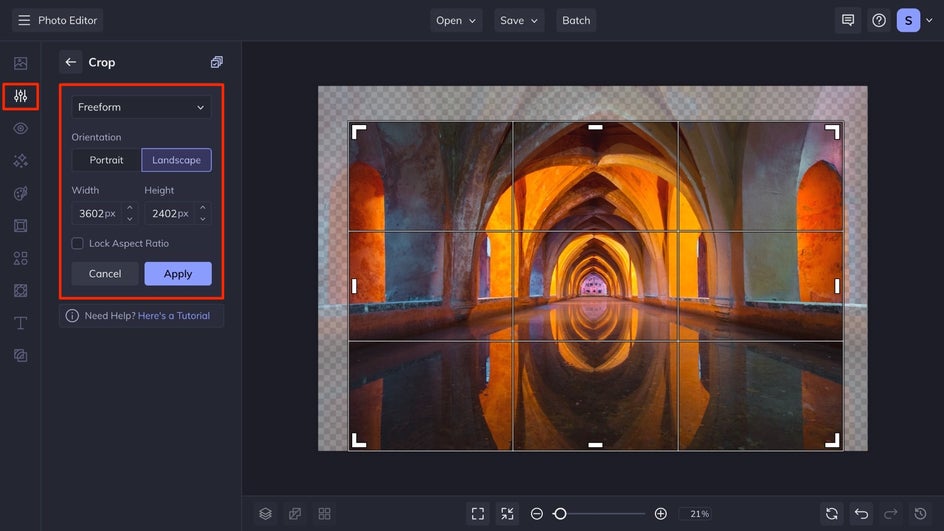
The most important thing about the composition of reflection photography is that when it is done with a body of water, you want to make sure that the horizon is at the center of the image. This will allow you to achieve the echo effect flawlessly and in accordance with the Principles of Design. You can accomplish this using the Crop tool in BeFunky’s Photo Editor, click on the Edit tab on the left side of your canvas and then select Crop. You can select the crop size from the drop-down menu, or use the Freeform option and adjust it with the guides. When you do have the desired size and composition, click the Apply button.
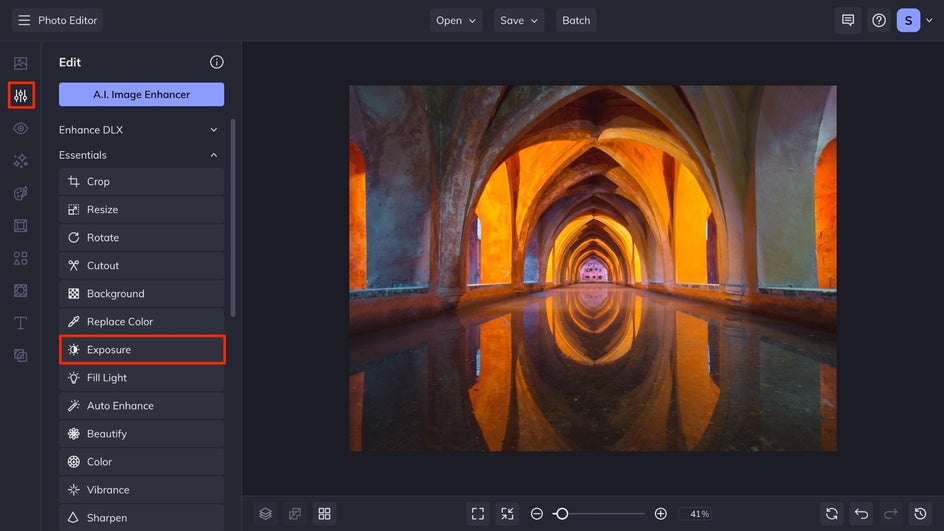
For images that don’t have the luster you remember them having when you captured them, you can adjust them with the help of adjusting the exposure. It is something that is easily adjusted and makes a huge impact on the final product of your image. Under the Edit tab, select Exposure.
This will take you to a menu of options for adjusting the settings of your Exposure. When you are adjusting the settings, remember that small adjustments will make your final image one that is similar to how you recalled it at the moment. Once you have achieved the perfect balance of exposure, click Apply.
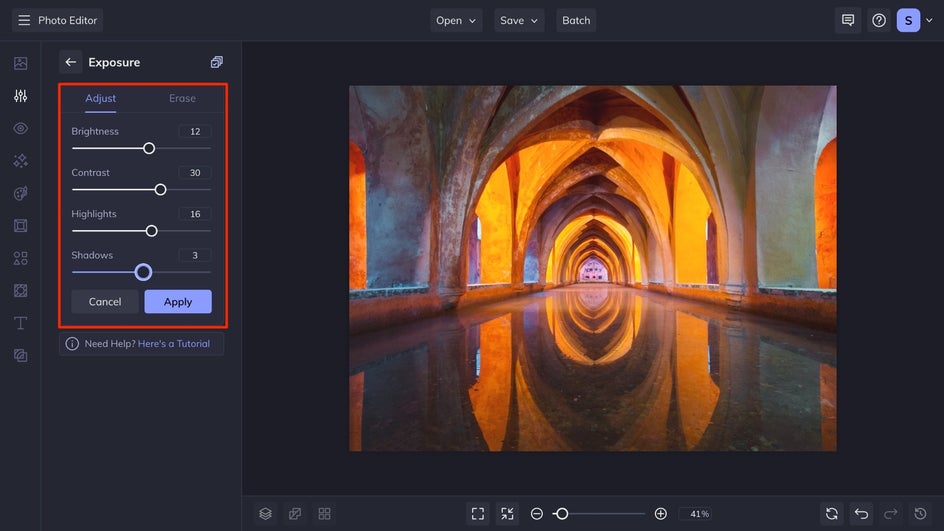
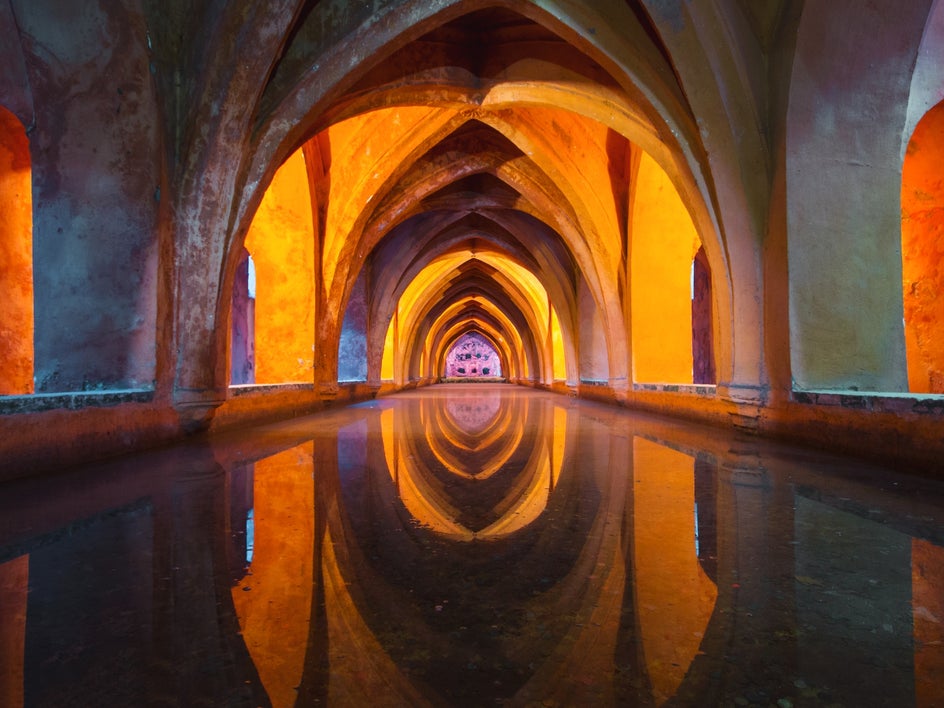
Take a look at how we transformed this image with the Exposure tool! In just a few clicks, this scene and its reflection in the water are bold and striking. Explore the settings on your own images to find what works best.

Capture and Edit Reflection Images With Ease
With these 4 tips, you’ll be able to capture one-of-a-kind images that stand out from a mile away. Reflection photography can be as small-scale, or large-scale as you desire. With the help of BeFunky’s Photo Editor and Mobile app, you can capture those reflections, edit and share them in just a few minutes.