Glow Up With the Perfect Skin Tool

After a long day at a music festival, you snap a selfie that is perfect for social media! You look at the photo, and realize you are covered in a day's worth of sweat, there is a pesky white head popping up, or maybe you are sporting a nasty sunburn! BeFunky’s Perfect Skin tool allows you to attain share-worthy skin in no time.
How to Use The Perfect Skin Tool
It’s never been easier to send pimples packing, lighten dark circles, erase scars, and get rid of shiny skin. With the help of BeFunky's Perfect Skin tool, found in the Touch Up tab, you are able to transform your skin while maintaining your natural look.
Step 1: Upload an Image From the Touch Up Tab
Click Here to head directly to the Touch Up tab and open your own photo using the Open tab at the top of the canvas.
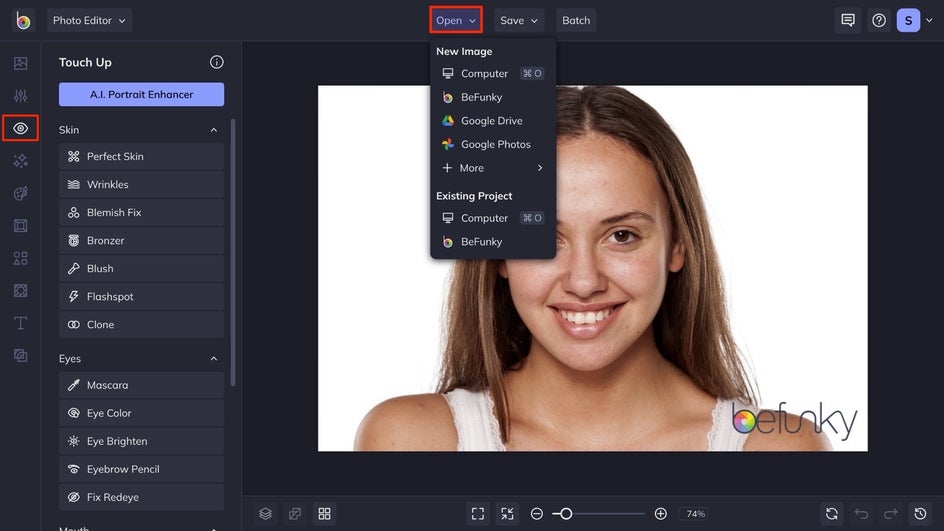
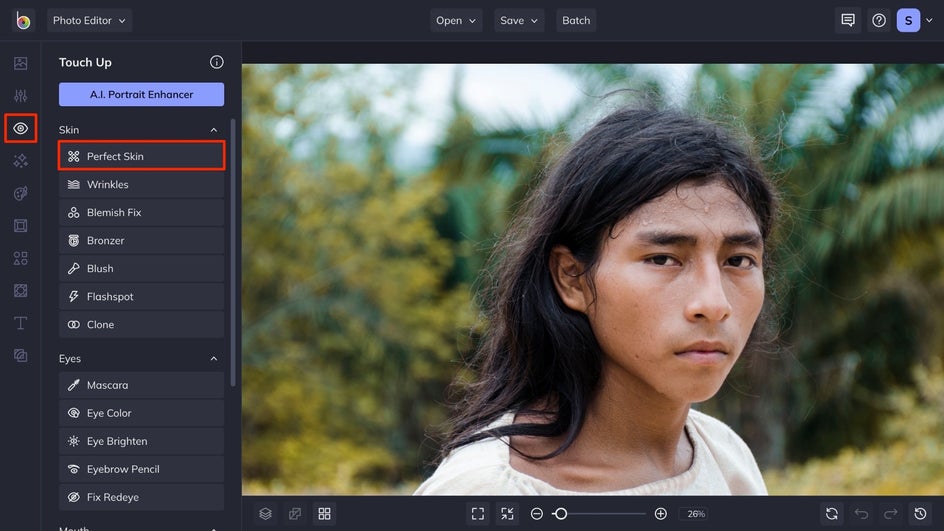
Select the Perfect Skin tool to get started on hiding blemishes, scars, sweat, shine, and more.
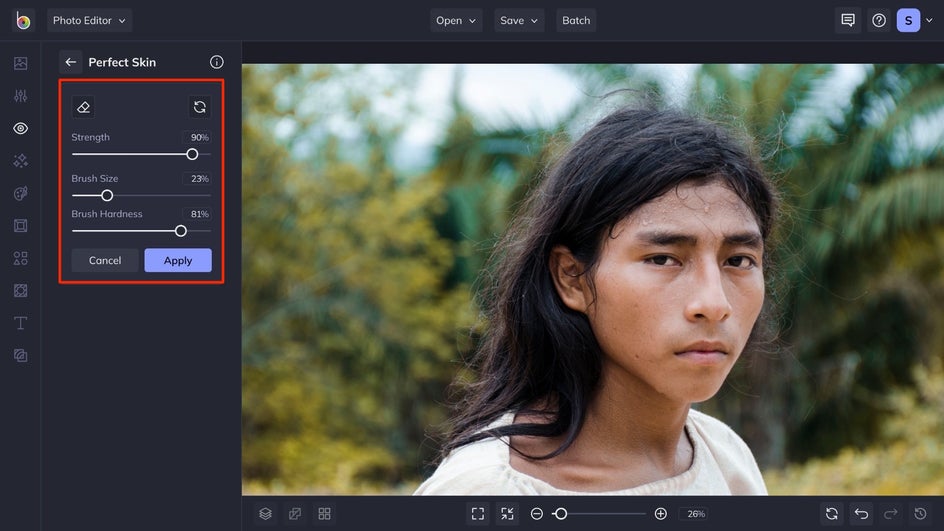
Step 2: Customize the Perfect Skin Settings for Your Complexion
After you select the Perfect Skin tool, a box will pop up with sliders that adjust the strength, brush size, and brush hardness. Did you have a breakout when your photo was taken? Set Brush Strength higher. Is there a larger area of skin showing? Increase the Brush Size to cover a greater surface area. Want to appear to have softer skin? Lower the Brush Hardness for a smooth look that never appears airbrushed.
Step 3: Use the Brush on Your Image and Apply the Effect
Use the brush to paint the effect over any exposed skin in your photo that needs retouching. Watch as it instantly transforms less-than-perfect complexion into renewed, radiant skin. If one pass over the area is not your desired result, adjust the brush settings, and go over the section again. Zoom in on the image by using the plus and minus at the bottom of the interface to get a more detailed use of the tool.
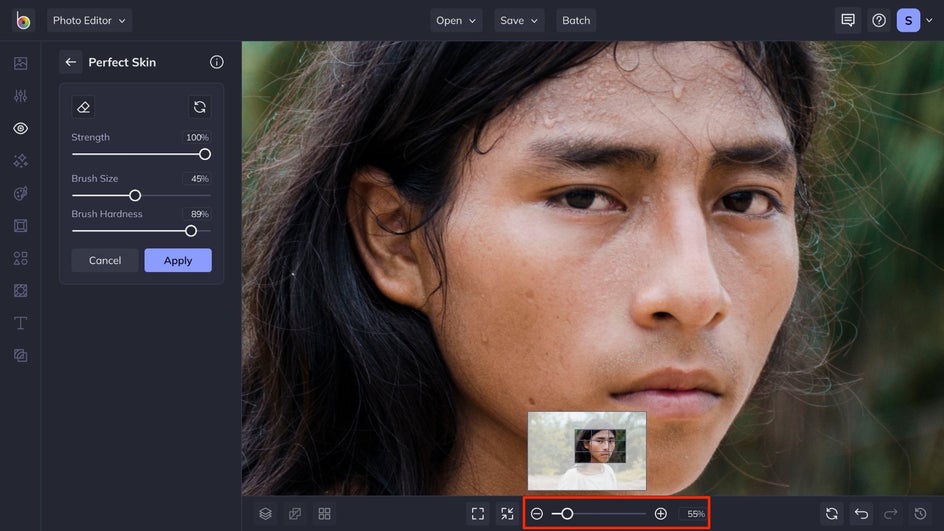
To move the image while you are zoomed in, press the space button. Be sure to adjust the size of the brush for finer details, and to make the final result more realistic.
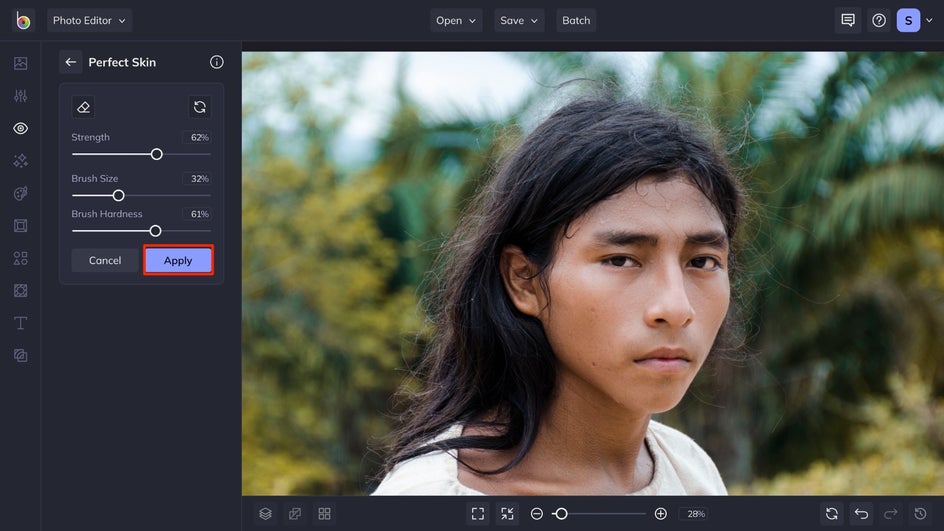
Once you have achieved the desired look for your image, click the Apply button to apply the results to the image.
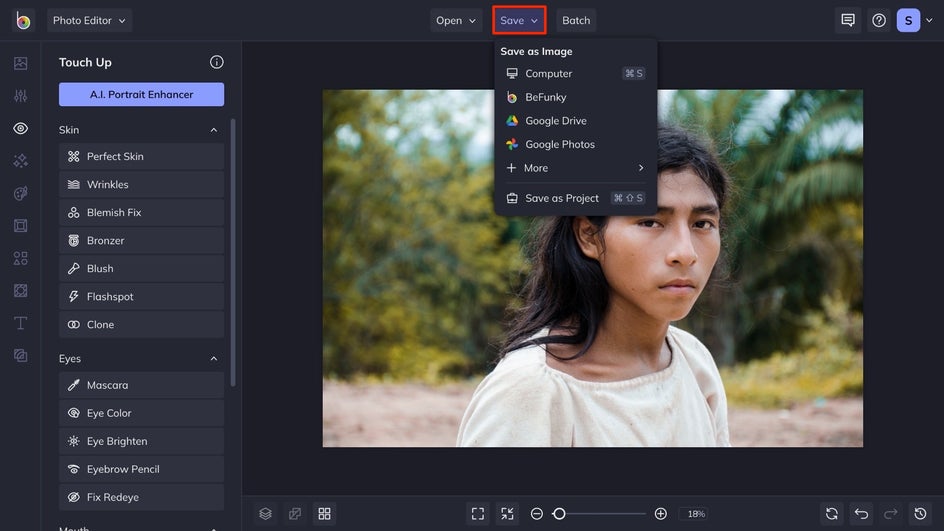
Step 4: Save Your Image
Once you've achieved the perfect skin in your photo, click the Save button and choose your desired location. Share it directly to social media, as a PDF for printing, or as a project to come back to later!
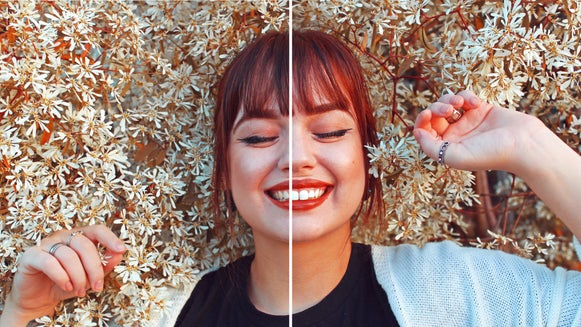
Final Results
In just four simple steps, you can reduce shine, remove blemishes, and even out skin tone! Ditch the complicated makeup tutorials, face contouring techniques, or concealer applications – achieving perfect skin is just a few clicks away. Take a look below at how we transformed this image.


Get Perfect Skin in Just a Few Clicks
Ditch your worries about shiny skin, and enjoy the moment. BeFunky’s Touch Up tools are here to enhance your selfies, portraits, and more – so you can just have fun in the moment. Get started to achieve the skin you want with the Perfect Skin tool.