Photography Challenge: Self Portrait
If you're just starting out in the photography world, don't expect a surplus of models willing to work for free while you learn the ropes. Most likely, you'll need to use the best model at your disposal: yourself.
When I first started out, I couldn't even get my friends to pose for me. Especially when ideas came to me suddenly and I wanted to them to drop everything to help me out. They weren't too fond of those ideas, either. Instead, I invested in a tripod, some time watching YouTube makeup tutorials, and a few cheap props. The results were just as rewarding as the learning experience.
Here are a few examples of what I came up with while alone in my apartment:
Portrait 1 - "Glow Stick Massacre"

To accomplish this, you'll need a distant light source in front of you. For example, a low-lit lamp a few feet in front of you (but behind the camera). I then cut open a glow stick and poured it on me (do NOT get near your eyes).
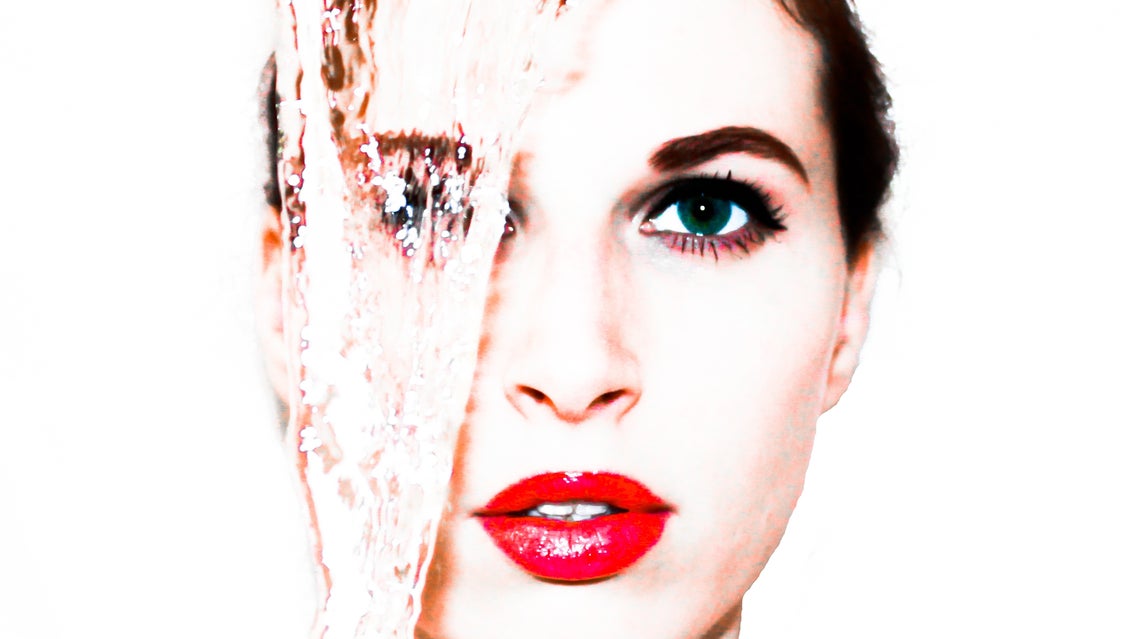
Portrait 2 - "The Pour"
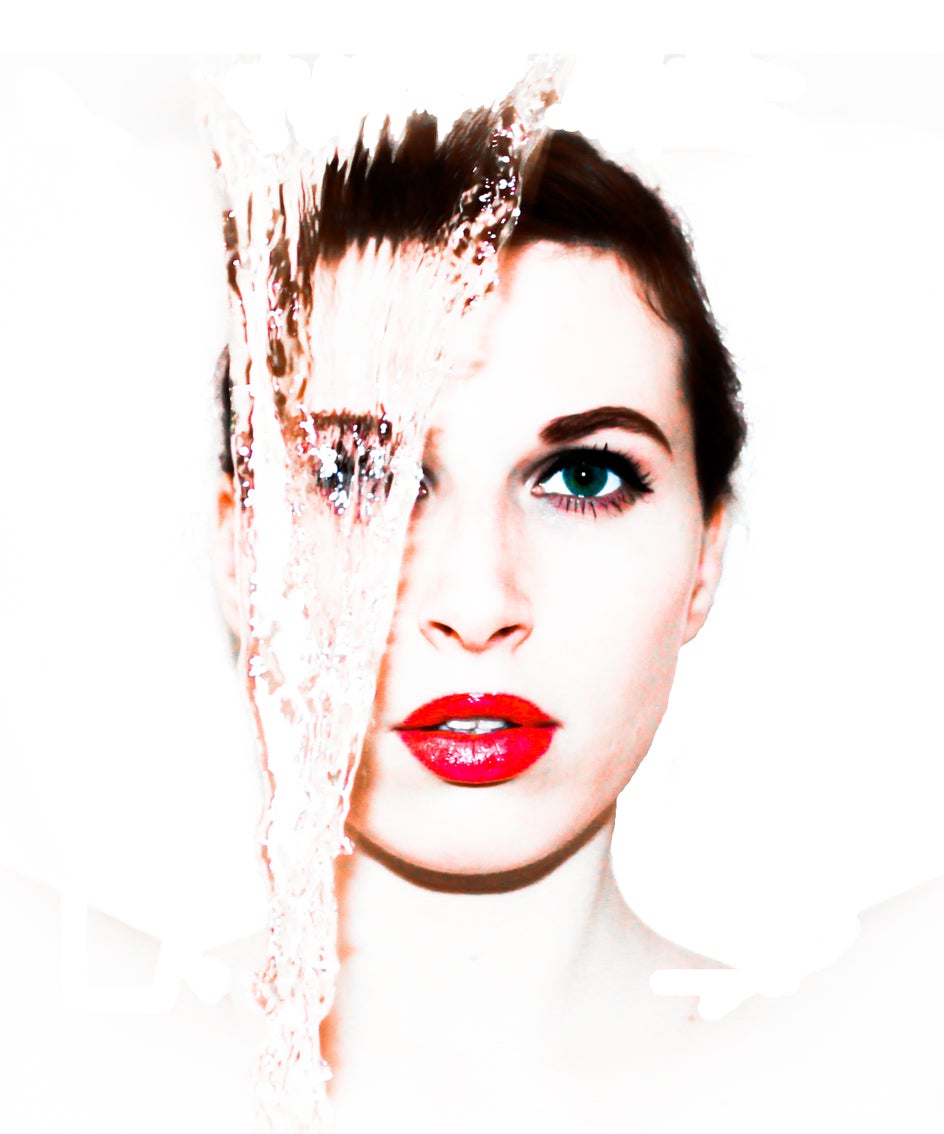
The first thing I invested in was two scraps of fabric.: one black, one white. You can get these in the scrap bin at your local fabric store. In this photo I taped a scrap of white fabric behind me in the shower. I then used a pan filled with water above my head (pan and arms out of the shot) to pour in front of my face. Make sure to use a fast shutter!
Portrait 3 - "Flour Girl"
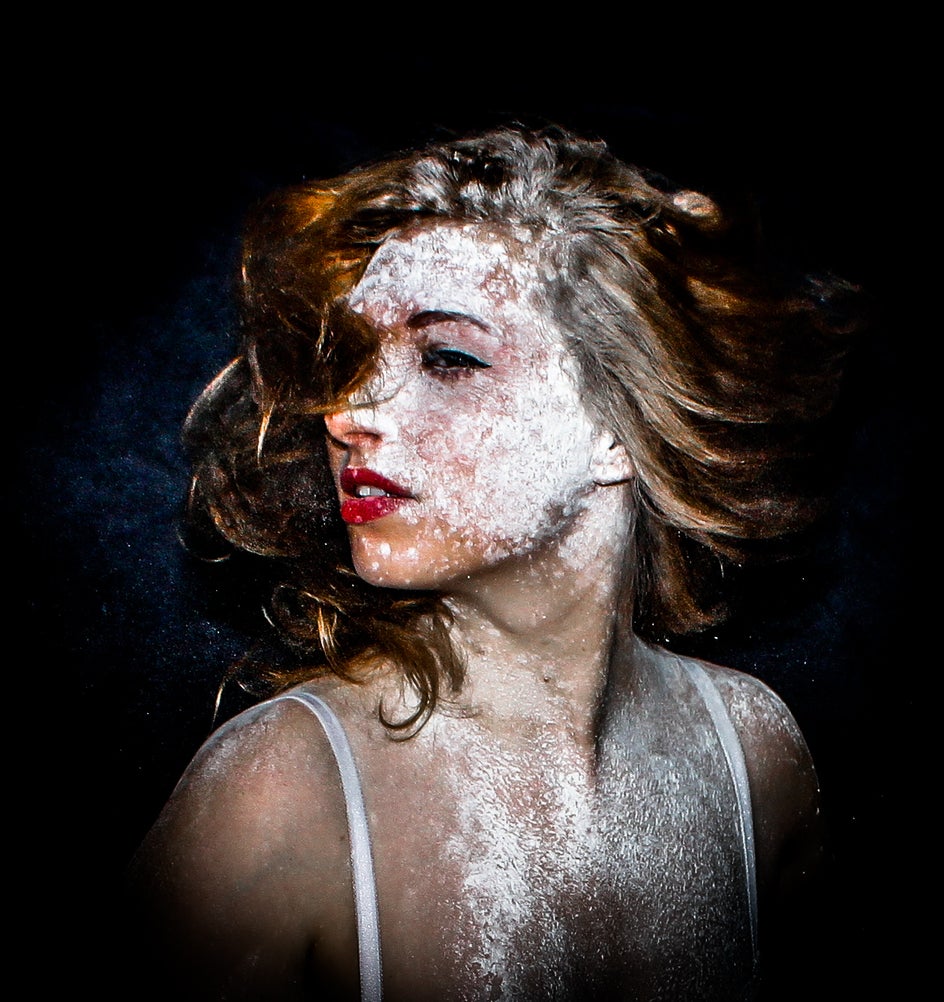
To achieve this mess, I taped black fabric to the wall while sitting on a sheet (to catch the flour). I set my camera to a fast shutter and doused myself with flour while shaking my head back and forth. It took a week to get all the dough out of my ears, but it was worth it.
Portrait 4 - "iPad Portrait"
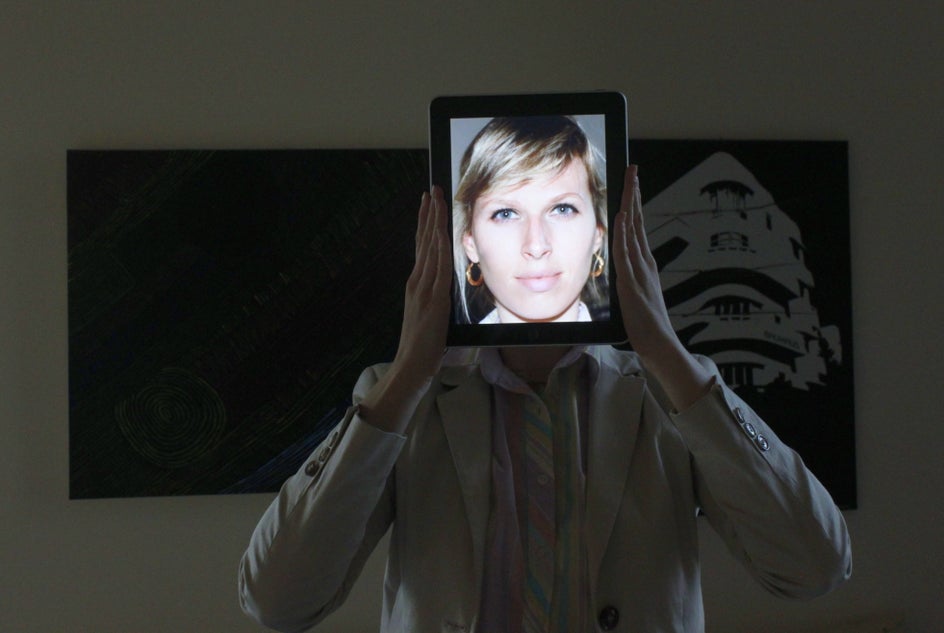
The degree of difficulty on this one was actually quite high. First you must take a closeup of your face, then upload it to the iPad. Make sure the lighting is just right, otherwise you will be exposed properly, but the iPad will be overexposed and too bright. Best time to take this photo is during sunset when the natural light in your home is just right.
Portrait 5 - "Striking a Match"
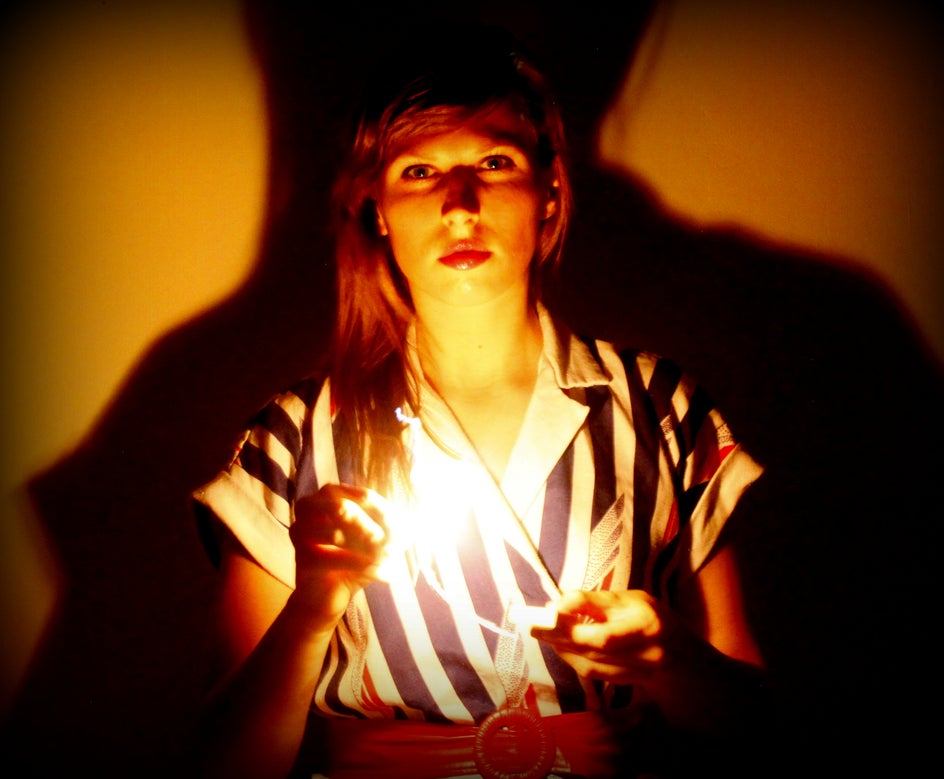
You'll need a quick shutter speed for this one as well. You'll want to make sure that the light from the matches is the only light in the room. I accomplished this by setting up a candle where I was going to sit in order to check the exposure. Once you've got that right, strike up a match. Make sure to set the camera to take multiple shots, that way you can at least get 10 attempts in at once and hope one comes out.
Portrait 5 - "The Virgin"
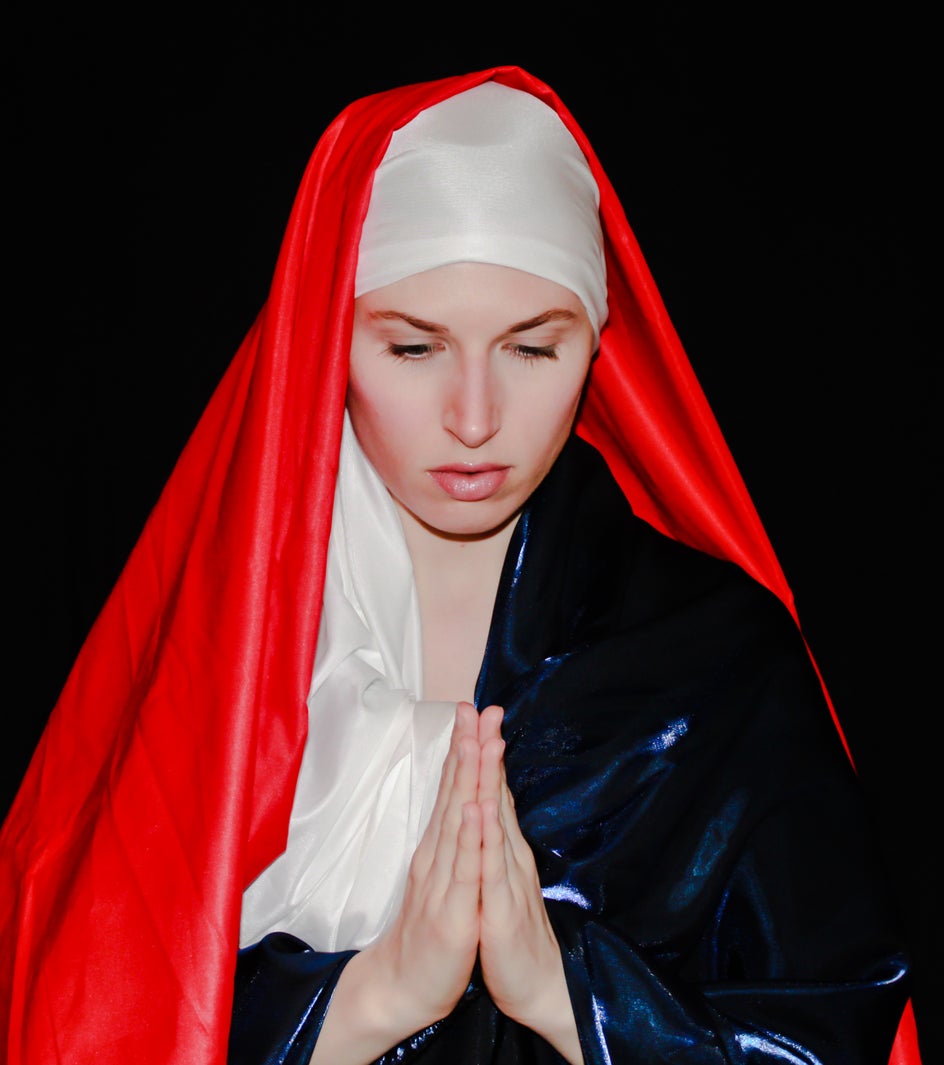
This one was simple! Scrap fabrics and the camera's built-in popup flash. Don't forget to hang up that trusty black fabric in the background.
Portrait 6 - "Flapper"
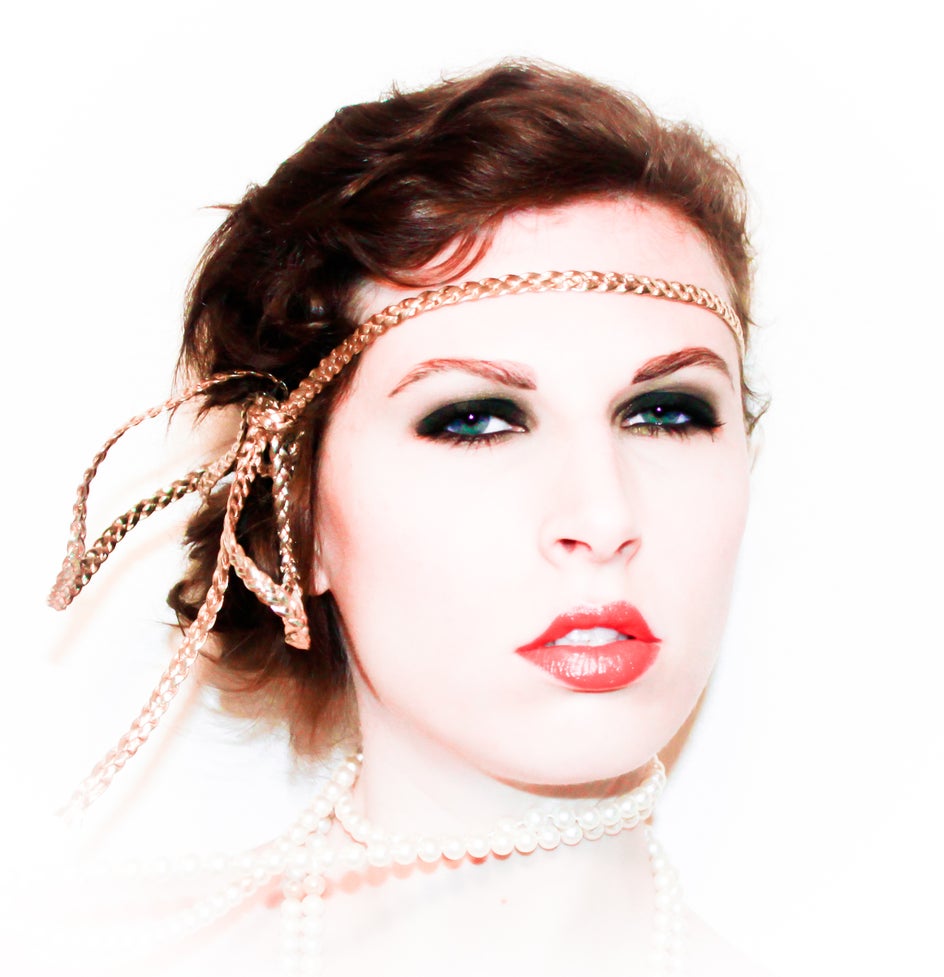
Try YouTube for 1920's makeup tutorials, a white wall, a lot of light in the room, and you've got this one in the bag.
Portrait 7 - "Gold Glitter"

GLITTER IS MESSY. If you're doing this shot inside, make sure you lay down an old sheet or tarp. Setup the tripod directly in front of you and use the camera's pop-up flash. Put some glitter into your hand and blow it at the camera. The mess will be worth it.
Portrait 9 - "A Tribute to Liz"
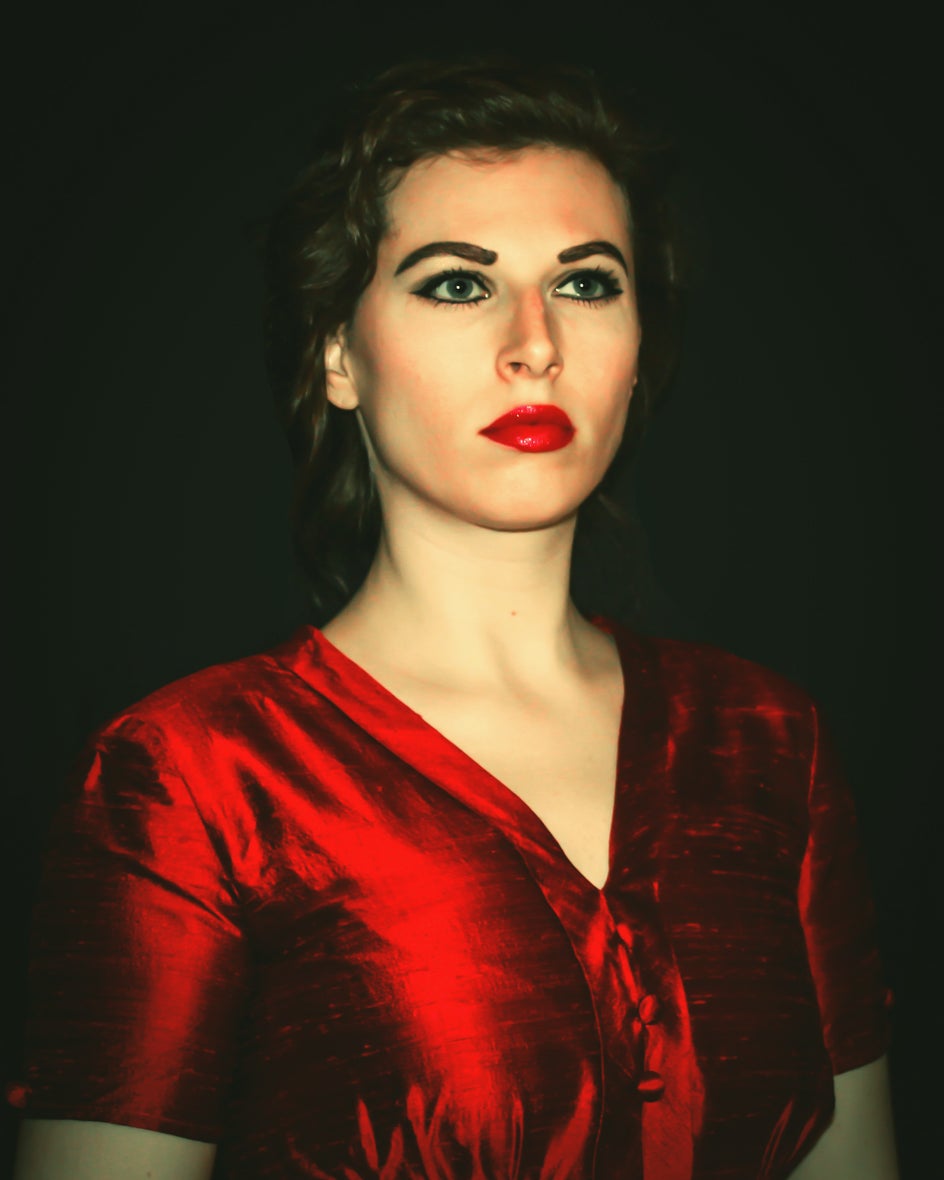
Who doesn't want to be Liz Taylor? Watch a few 1950's makeup tutorials on YouTube and get yourself a great dress from the local vintage shop. You'll want to use a single light source, dim, pointed directly on you. Don't forget to use that black fabric again!
Portrait 10 - "Golden Girl"
![Untitled--2 [1600x1200]](https://www.befunky.com/images/wp/wp-2015-05-Untitled-2-1600x1200.jpg?auto=avif,webp&format=jpg&width=944)
Gold foil is very inexpensive and can be purchased from your local art supply store. With a little bit of Vaseline it will stick to your face. To get this shot, I laid on the floor on a white sheet, underneath a clothing rack. I SECURELY tied my camera to the rack so that it would be pointed down on me.
What I learned from this challenge:
My Camera:
The most important thing I learned from these shots was how to use my camera. I was frequently surprised with the capabilities of my camera and what it can do at different settings. Every shot I found a new setting that opened my eyes.
My Confidence:
I also gained a lot of confidence with the positive feedback I received from the photos. It was always encouraging and inspired me to keep shooting.
Once you get a few great shots posted of yourself, your friends will be throwing themselves at you to model for you. As soon as that happens, you will be able to accomplish all those shots where you wanted to be behind the camera instead of in front of it. HAVE FUN!