How to Sharpen and Clarify Your Photos

Our Sharpen tool makes your photography crystal clear. By enhancing contrast along the edges of your image, it helps undo the appearance of blurry lines and bring your pictures back into perfect focus. So whether they were the unfortunate victim of a case of shaky hands, a subject who just wouldn’t stand still, or a shutter speed that was a little on the slow side, BeFunky's Photo Editor is here to make photo editing easier by removing whatever it is that has clouded your creative vision!
How to Sharpen a Blurry Picture
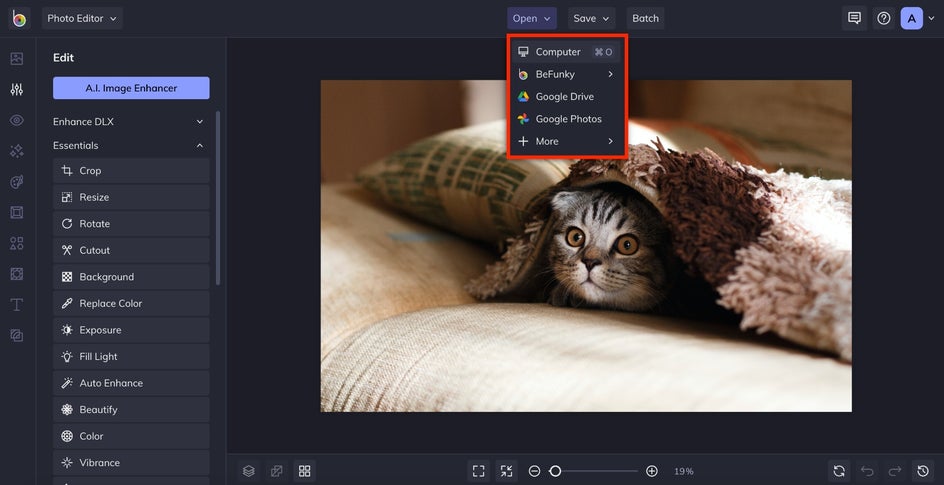
We make restoring the sharpness of your photos quick and easy. To begin, just upload a photo to the BeFunky Photo Editor by selecting it from the Open tab, or for even faster uploading, simply drag-and-drop your image into the interface.
Step 1: Upload Your Photo
Choose the Sharpen tool from the Edit menu on the left side of the screen.

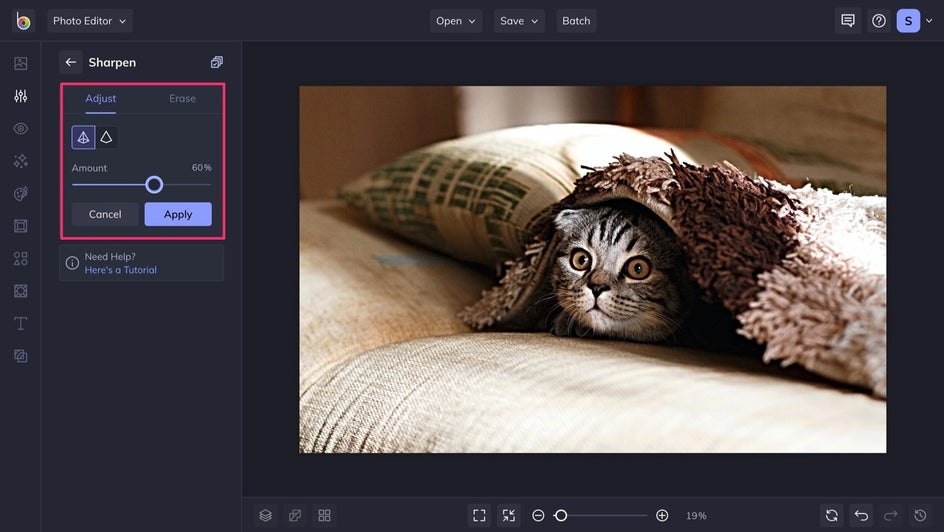
Step 2: Adjust the Sharpness Amount
Next, adjust the Amount using the sliding scale. The more you increase the intensity of the Sharpen tool, the more the contrast between brights and darks along the edges of your photo increase. This will create crisp lines – but be careful not to overdo it. When sharpening is used in abundance, it can create a grainy appearance. Everything in moderation! When you’re satisfied with the results, click Apply.
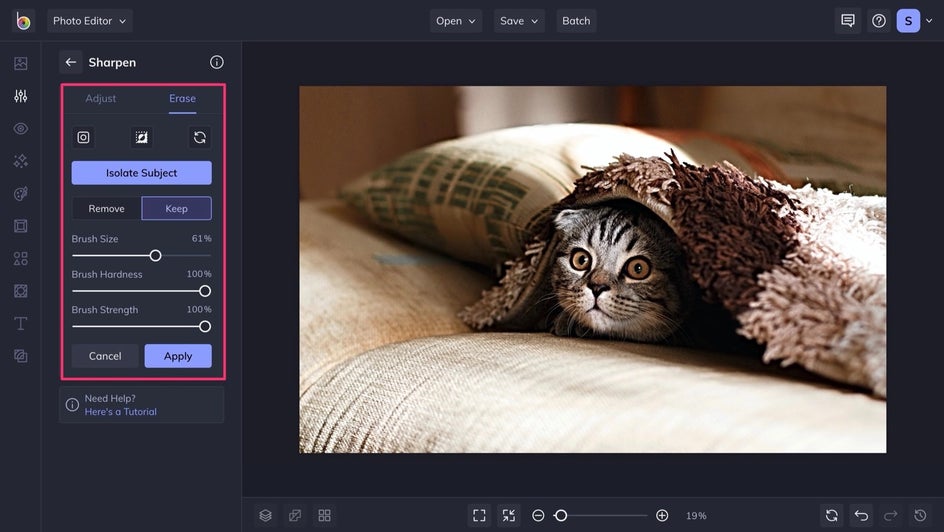
Step 3: Perfect It By Keeping or Erasing the Sharpness
Slow shutter speeds, shallow depth of field, and other camera-related factors can cause blurriness in certain areas, while others remain perfectly clear. If this happens, try using the Erase tool. You can use it to apply Sharpen to only the areas that need it most. Next, click the Invert button and adjust the Brush Size to change the surface area you want to cover, Brush Hardness to change the definition of your tool, and Brush Strength to control intensity. Brush over the areas that you want to sharpen and then click Apply.
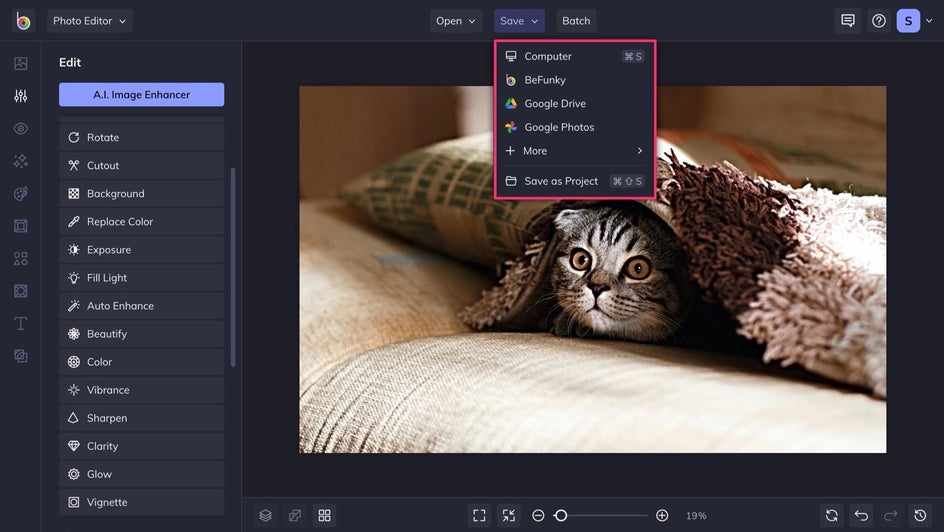
Step 4: Save Your Photo
Lastly, when you're happy with the sharpness of your photo, save it to your location of choice!
So Sharp!
Notice the subtle changes to the subject its immediate surroundings? Without changing much in the background, you can easily sharpen the foreground to give the photo of depth.


If your photos are out of focus, the solution is clear. Use Sharpen to bring greater definition and clarity to your photography!
How to Add Clarity to Your Photos
If you liked the effect of our Sharpen Tool, you’ll probably like the Clarity tool. BeFunky’s Clarity Tool impacts the photo in a slightly different fashion. Sharpening an image focuses on the lines at a very small scale, whereas using a Clarity tool works on the image as a whole. You should try using both to see which elevates your photo best!
Step 1: Upload Your Photo
Upload your photo to the Photo Editor using the Open dropdown menu. Either upload your own photo or choose from BeFunky’s vast stock image library. You can use the Clarity tool alongside the Sharpen tool, or utilize it on its own.
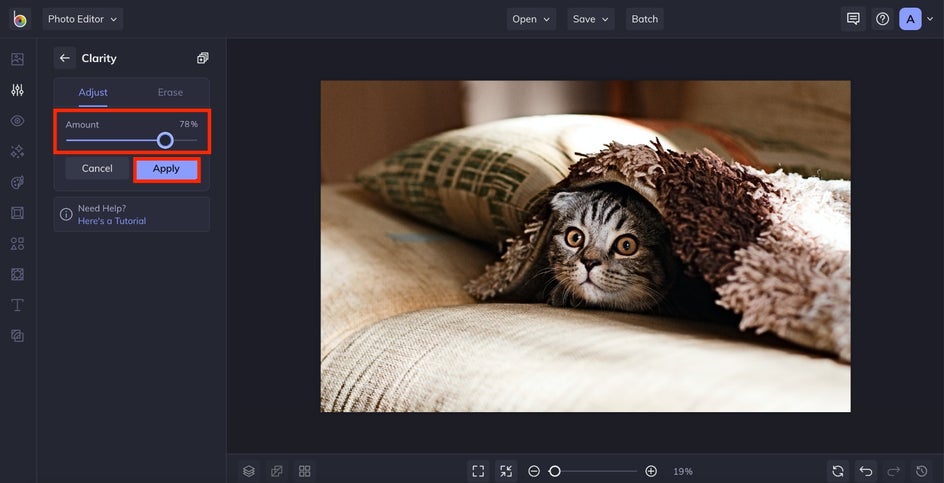
Step 2: Find the Clarity Tool
After uploading your photo, navigate to the left side menu to the Edit menu. Scroll down until you find Clarity, with a diamond icon beside it. Now, within the Clarity tool, you have options for how you want to adjust your image. Use the Amount sliding scale to adjust the amount of clarity you want to add to your image.
Step 3: Adjust the Clarity of Your Photo
As you move the sliding scale, you’ll notice that the lines of the photo sharpened across the image as a whole, instead of pinpointing specific places in the image as the Sharpening tool would.
Step 4: Save Your Photo
Once you’re happy with your photo, click the blue Apply button. Then, navigate up to the Save dropdown menu and save your photo just as you would with the Sharpen tool.

So Clear!
Shaky photographer hands or a moving image are easily remedied using these tools. Similar to the Sharpen tool, you want to be careful about overdoing it. A photo with too much clarity can look over-edited and unrealistic.


Super Sharp and Crystal Clear Photos
BeFunky’s Sharpen and Clarity tools allow you to fix your photos with blurry lines to make them crisp and visually stunning – no prior editing skills required. If your photos are out of focus, use Sharpen and Clarity to bring greater definition to your photography!