The Beginner’s Guide to Making Business Cards

Marketing your personal brand or company is no easy task. Business cards are a classic in-person marketing method that captures your brand’s story and helps make it memorable. BeFunky’s Graphic Designer provides professional templates that make it easy for you to design your own business card.
Check out these beautiful business card templates and make your business stand out from the crowd. We’ve outlined a beginner’s step-by-step for how to design your own business card for free using the tools available in the Graphic Designer Toolset. It’s easy, simple, and impressive. Potential clients will remember your brand. Follow the tutorial below to create stunning business cards.
An Easy Way to Make Your Own Business Cards
Choose from one of these stunning templates and use various tools to make your business card look unique. Photos, graphics, text, and more are all within your grasp. Check them out.
Step 1: Choose a Template
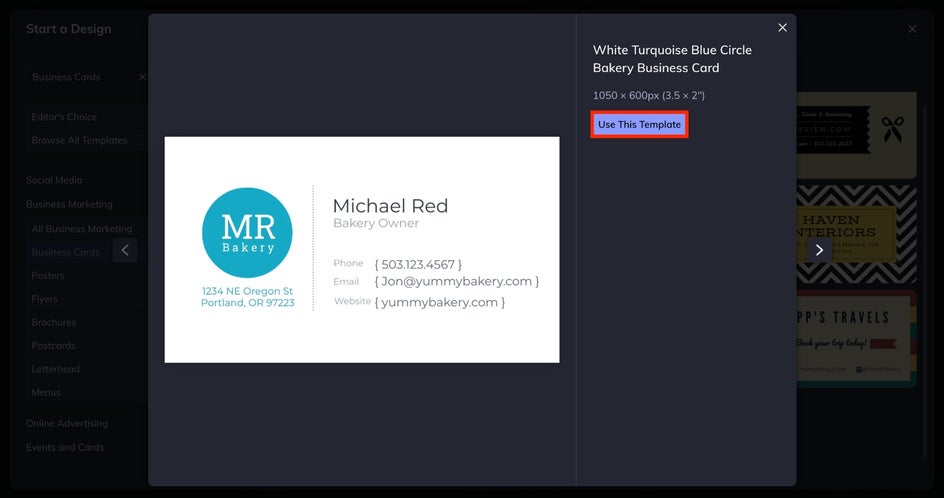
If you follow this link to the Graphic Designer, you’ll land on the Business Cards Templates page. Here, you can select one that best represents your brand – keeping in mind that you will have full editing power soon.
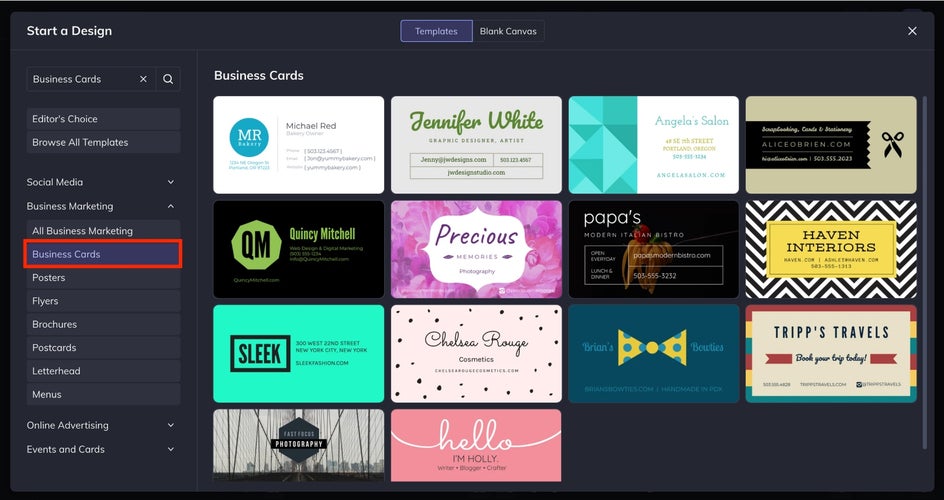
Once you click on the Use This Template button, your selected template will appear on the Graphic Designer canvas.
Step 2: Update the Background
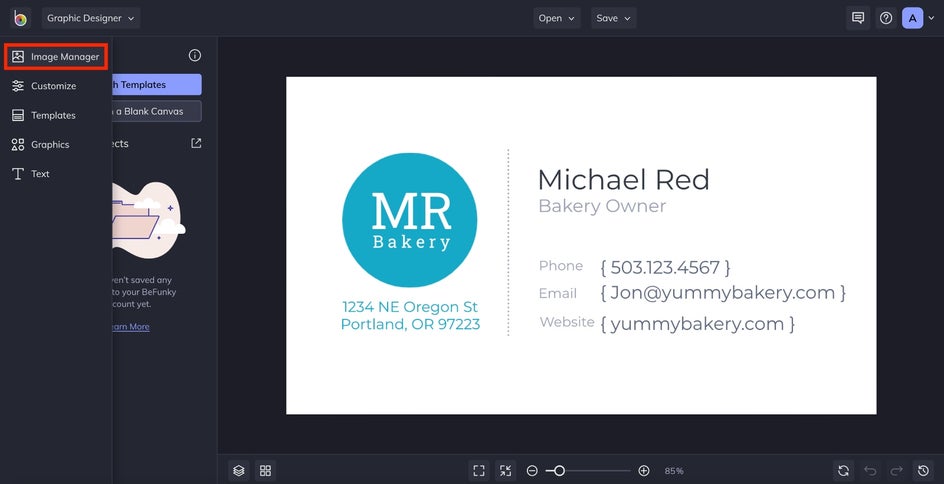
For this example, we’re going to create a business card for a local art gallery owner. Navigate over to the Image Manager by clicking the topmost icon on the left menu bar.
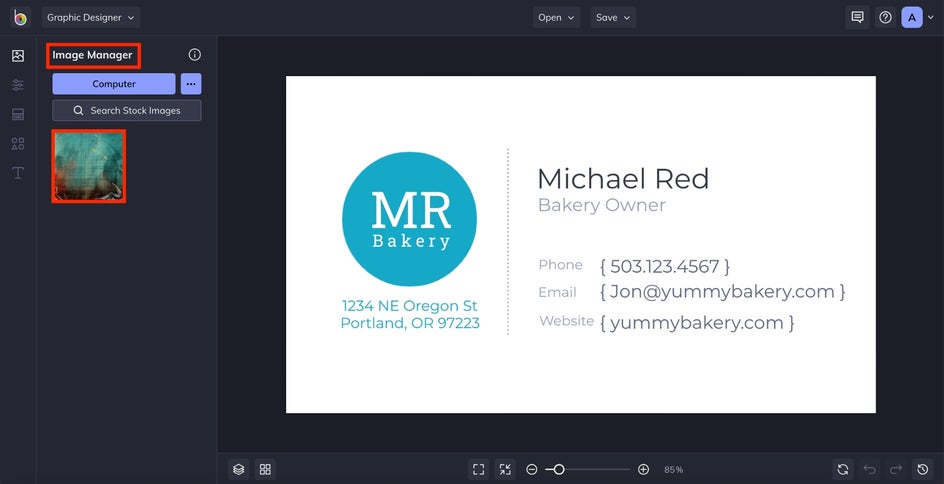
If you have your own image that you’d like to appear as the background of your business card, select the blue Computer button to upload it. The other option is to peruse BeFunky’s graphics library by clicking the Search Stock Images button. Here, we entered the Fine Art category.
Click the image you want. A blue box will appear around the outside edge of the image with a blue checkmark in the bottom right corner. Close the stock image library and your selected image should appear in the Image Manager on the left side of the screen.
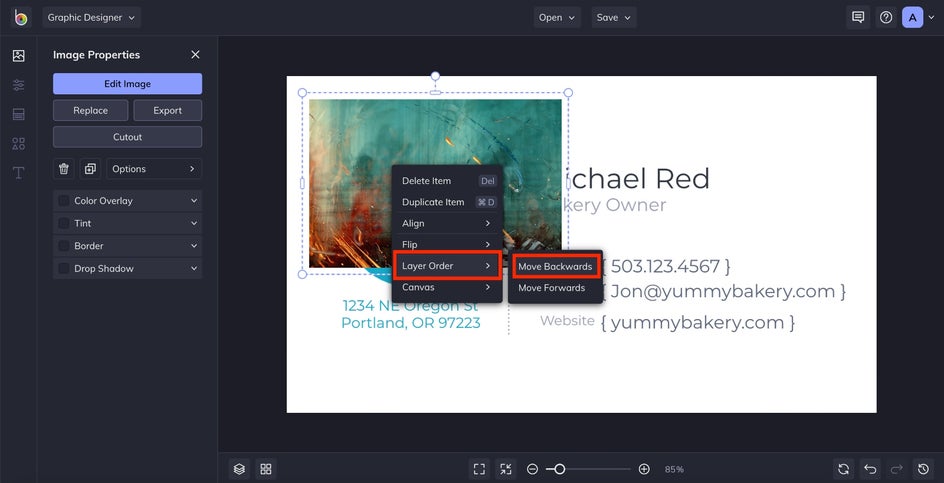
Double click or drag the image to place it on your business card. Right-click on the image and move your cursor down to hover over Layer Order. Click Move Backwards. This will place the image behind the template’s preexisting text. Repeat this step as many times as necessary until the image is behind all the text.
Use the circles on the outside of the image to adjust its size until it's to your liking.
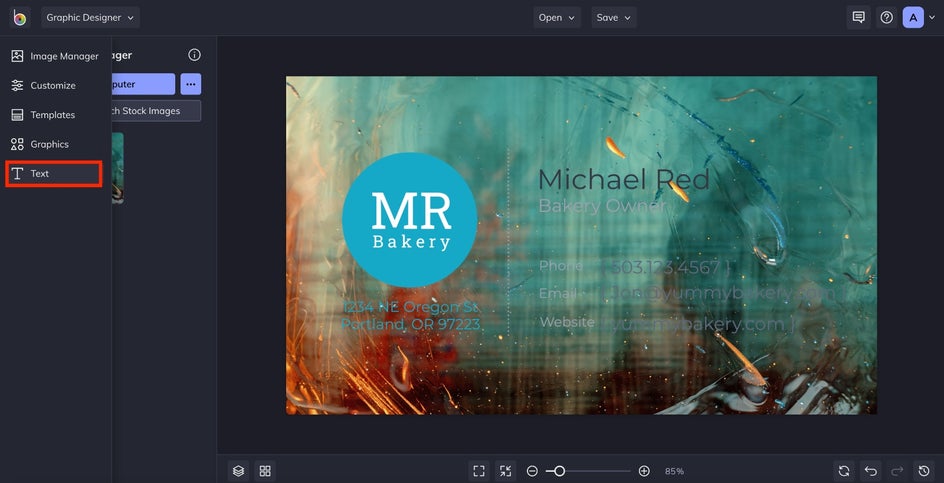
Step 3: Customize the Text
Now that you’ve updated your business card’s background, it’s time to change the copy. Navigate to the left icon menu and find the Text feature. Click the icon.
By clicking on the text on the business card, you can update the font, size, and other features in the Text Properties box on the left side of the graphic designer.
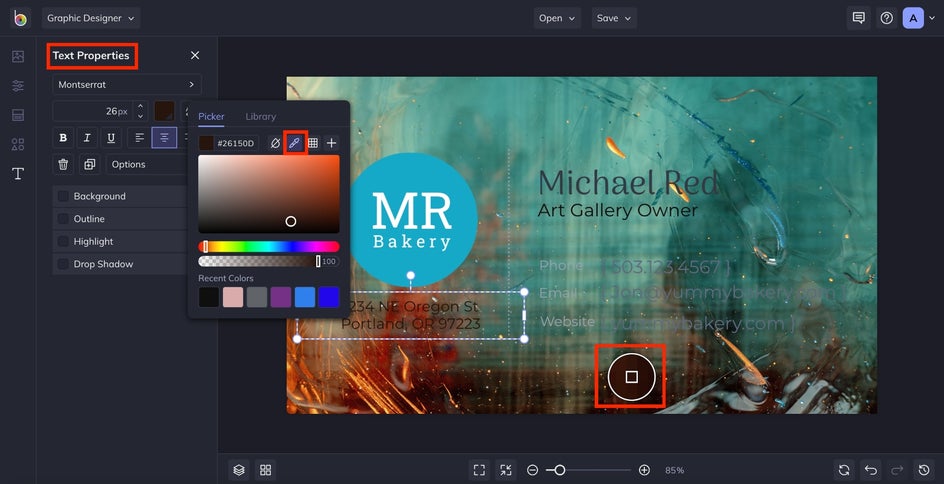
Play around with different fonts and colors to find what best represents your brand. Try using the eyedropper tool to match the color of the text to the color in the background image. Make updates across all the text on your business card, making sure that your address, phone number, hours of operation, and name are all accurate and easy to read.
Step 4: Add Graphics
After you’ve updated your business card’s text, it’s time to experiment with adding visuals. Move your cursor to the leftmost icon menu to find the graphics menu. Click Graphics to enter this part of the graphic designer.

Similar to when you change the background, you can either upload your own visual or choose from BeFunky’s graphics library by clicking the blue Computer button or the Search Graphics button directly below it.
For this example, we’re going to stick with simple geometric shapes. Inside the Graphics Library, we clicked on Geometric Shapes in the leftmost menu under Popular Tags. This brings up a huge library of options. Select the graphic of your choice the same way you chose a background image earlier. The graphic will appear to the left of the graphic designer under Your Graphics.

Drag or double-click the graphic for it to appear on your business card. When the graphic is selected, you can change its color and other features under Graphic Properties to the left. Feel free to get creative with using the drop shadow and tint features available in the editor.
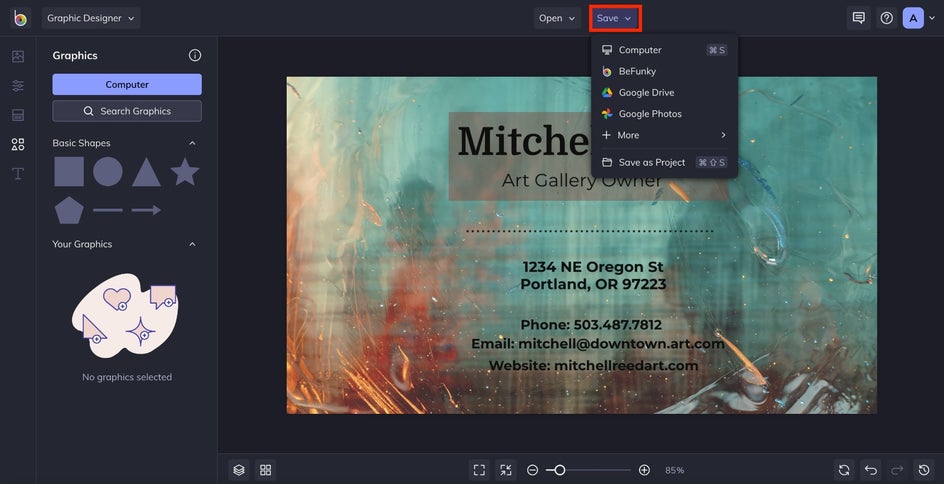
Step 5: Save Your New Card
The final step is to save your new business card. Click the Save dropdown menu and save the business card to your computer, Google Drive, or elsewhere. Nice work! You’ve just made your own stunning business card that current and potential clients are certain to love.
Design Your Own Business Cards
Creating your own business card saves you time and money. It represents your brand and helps make your business memorable. Using BeFunky’s Graphic Designer to create cards for your business is easy and efficient. Take this beginner’s guide with you as you get creative and design impressive new business cards.