Using BeFunky To Make A Twitter Header
Ah, Twitter. As a writer, it’s one of my favourite procrastination tools. But why just tweet to procrastinate when you can go a step further and eat up some valuable work hours fiddling about with your Twitter profile’s design? If you’ve got an urgent deadline, show how well you work under pressure by spending some time using BeFunky to make a Twitter header.
Twitter headers: showing backgrounds what’s what since 2014
Thanks to the Great Twitter Update of 2014, headers are the new backgrounds. All the cool kids have one.
Here’s how to get yours happening.
To change your header, click on the header thumbnail displayed on the top left of your Twitter homepage screen. Then click “Edit Profile”.

You’ll be given a bunch of options for things you can update or edit. For now (because we do have deadlines, right?), let’s focus on the header.
Click “Change your header photo”. If you already have a header photo in use, click “Remove”. If not, you can simply upload a new header.
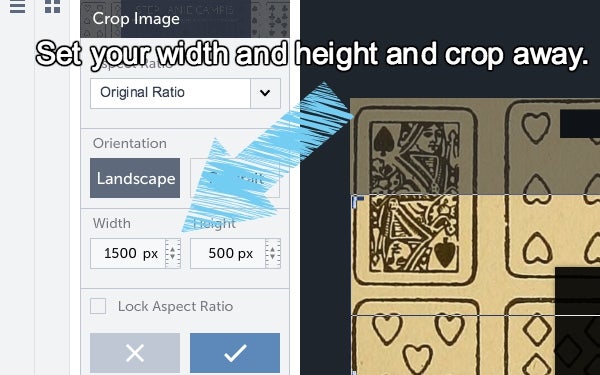
For best results, you’ll want an image of 1500px wide by 500px tall.
You can scale your image in BeFunky by going to “Edit”, then “Crop” or “Resize”.

Note that your Twitter icon will jut up into the bottom left of your header, so choose a graphic that can deal with this interruption. Twitter will also dial down the image quality of your header, so avoid low-res shots unless grunge is your aesthetic. Depending on what you use Twitter for, you may also want to add extra information about yourself, thumbnails of your work, or an annotated Doge collage.
Once you’ve uploaded your image, you’ll be prompted by Twitter to adjust your image for best fit. When you’re happy with how it looks, click “Apply”.
Matching your Twitter header and color scheme with BeFunky
Now that you have a fancy-pants background, let’s make sure the rest of your Twitter color scheme complements it.
On the same Twitter page, click “Edit Profile”, then scroll down a bit to the box that says “Theme Color”.
Clicking on this will give you a few basic color options, as well as a box where you can free-type a Hex color of choice.
Since not everyone’s header is going to work with a bold yellow or purple, here’s where the BeFunky Color Picker comes in.
Load up your Twitter header image in BeFunky.
Go to “Edit”, then “Color Filter”. A snazzy pink color is set as the default filter, but let’s ignore that by toggling the “Amount” bar down to zero.
Click the tiny arrow in the bottom of the “First Color” box. A new box, complete with an eyedropper tool, will pop up.
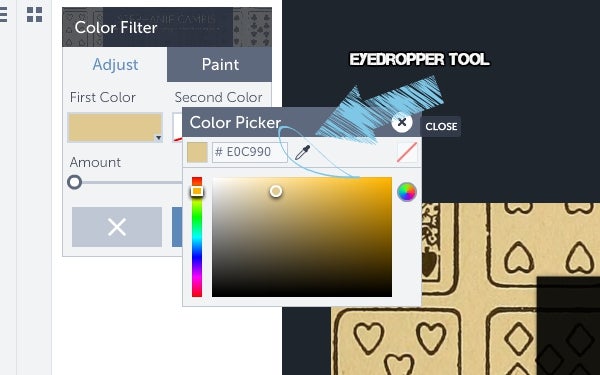
Click the eyedropper, and then click anywhere on your image to capture the Hex code of the particular color you’re after.
Ctrl+C it and paste it in to the patiently waiting Twitter Hex code box. Hit save.
Look at all that matchiness.
Changing your Twitter background
Twitter backgrounds are kind of obsolete these days, but here’s how to customize your Twitter background, even if it is for your eyes (and the eyes of whoever else uses your computer) only.
From your Twitter homepage, Go to Profile > Design.
Click “Change Background”. If you have an existing background set, click “Remove background”. If not, just select the image file you want from your computer.
Note that Twitter’s maximum background file size is 2mb, so if you’re dealing in huge, ultra hi-res images, you’ll need to scale the size of your image.
You can do this in the BeFunky editor by going to Edit and then “Resize”. 1250 - 1500 pixels across is a good bet.
You can also crop your image down to size by going to Edit and then “Crop”.
Click upload, and then save. Ta-da! No one else will know it’s there, but you’ll sleep better at night.