The Art of Decorative Lettering
Remember the heady days of Microsoft Word Art? When spinning letters dazzled and marching ants were the epitome of border design?
We’ve come a long ways since then, but deep down, we all know that typographical feats of awe and wonder are something we should all be striving for.
If you’re a blogger, a scrapbooker, a freelancer mocking up business cards, a DIY button maker, or someone writing a ransom note (if you are, let me know, and I’ll contact the authorities), read on.
Here’s how you can use the BeFunky Photo Editor to help you jazz up your typography—as easy as A, B, C.
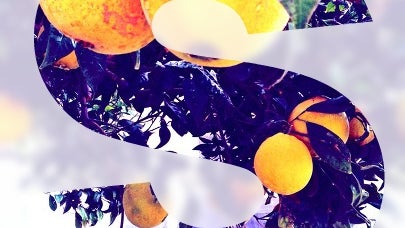
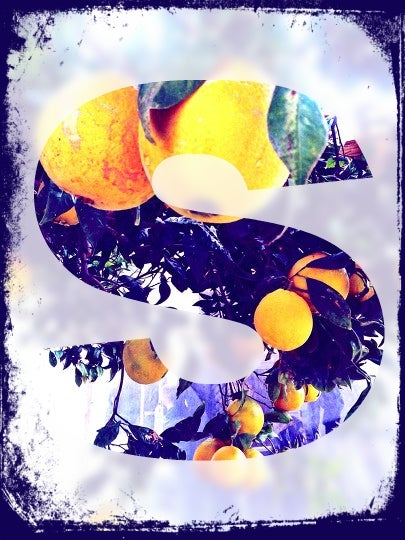
Illuminated Letters
Technically, illuminated letters are painted using gold, but those kinds of pigments are hard to come by on the interwebs, so for our purposes, we’ll take illuminated letters to mean “really cool fancy letters at the beginning of a word”.
And as a plus, you don’t even need to spend hours hunched over in a draughty monastery to make them.
Upload your image to the photo editor. I’ve gone with lemons, because I’m feeling summery. Head to “Overlay”, then “Text”. Select your letter overlay of choice, then click on the slider button for adjustment options galore.
Let’s dial back the opacity a bit and increase the background blur. This gives us that tracing paper overlay look.
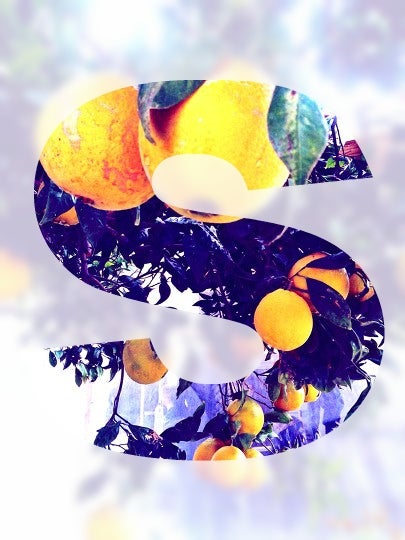
We can also head over to the “Frames” section of the editor for some further tweaking: I’ve gone with the “Grunge” effect here:
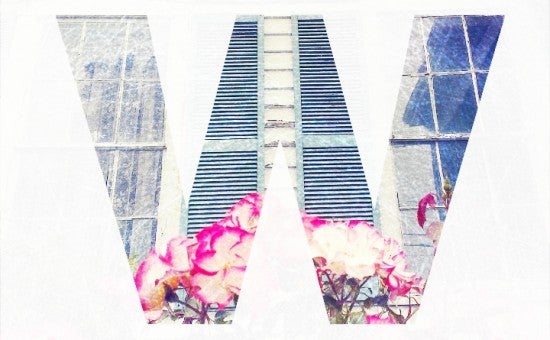
I Can’t Believe It’s Not Fabric
Our first effort achieved a tracing paper effect—but let’s try something a little more textured this time.
Upload your image, head to “Overlay”, then “Text”, and fiddle about with the slider options until you’re happy with your opacity and background mixes. Now it’s time to head to “Textures” in the Editor menu.
There are plenty of gems here (not literally, although there are several different bricks and metals available), including the “Fabric” option, which gives a tactile effect that looks great on-screen and when printed.

For a shabby chic look, try the “Scratches” options, or go for that overexposed ghostly orb look with the “Bokeh” and light trails effects.
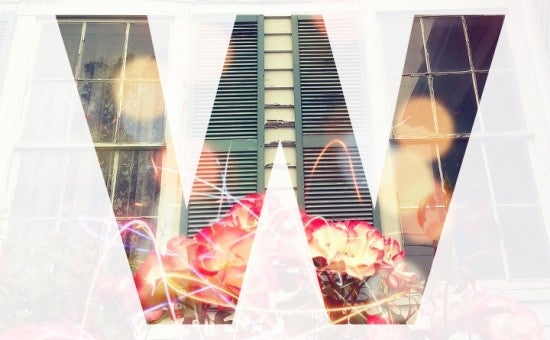
Yep, that’s a letter that knows how to party.
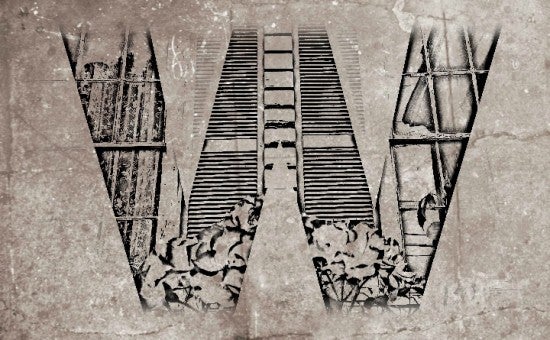
For a gritty urban look, try the “Stenciller” effect under “Effects”. It’s like Banksy made you a logo:
B Is For Butterfly
Righto. Let’s get an alphabet book happening. An alphabet starting with B, because we’re rebels like that.
Upload your image–I’ve gone with a lepidopterist’s dream of butterflies galore—and head to “Overlay”, then “Text”.
We went with subtle last time. This time, let’s go all out with Pantones blazing.
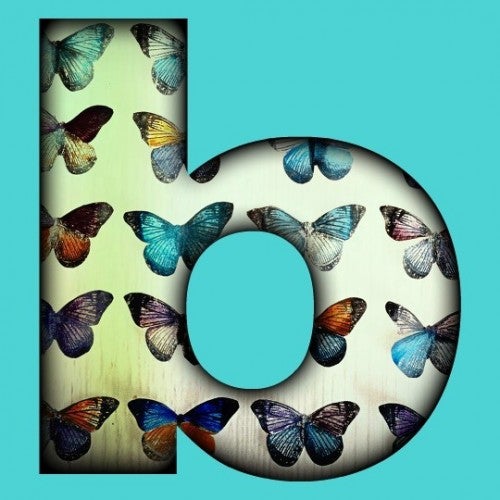
To get this David Bowie 80's eye shadow effect, I’ve upped the background opacity to 100%, selected a matchy-matchy color backdrop using the eyedropper tool, and added a bit of pop using the “shadow” tool.
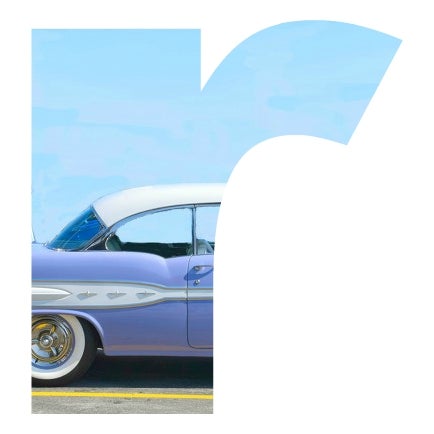
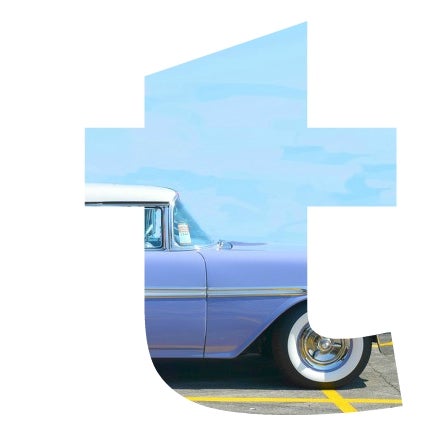
Going On A Road Trip
It’s summertime, and perhaps you’re about to hit the road in your cruisemobile. Or perhaps you did years back, and you want to relive your glory days. Either way, this is the 21st century, which means you have to tell everyone about it.
Let’s make up a spiffy banner to upload to your social media channel of choice—or, if you want extra vintage cred, to print out and stick in a scrapbook or photo album.
You know the drill by now: upload photo > “Overlay” > “Text”. I’ve gone with 100% opacity again, but I’ve left everything else au naturel.
This time I’m going to make two letters: an R and an S, and then cut them down to size.
Next up, it’s off to the BeFunky Collage Maker. Head to “Template”, and then “Grid”. I’ve selected the 2x1 option. Click in the grid boxes to add your images.
Since our wheels of choice are pretty old-school, I’ve dressed up my collage using some retro-looking text (I’ve used the “Duplicate” option to give a 3D effect), and a polka-dot background, found under “patterns”. You can get the rounded corners effect by dropping into “Settings” and playing with the corners slider.
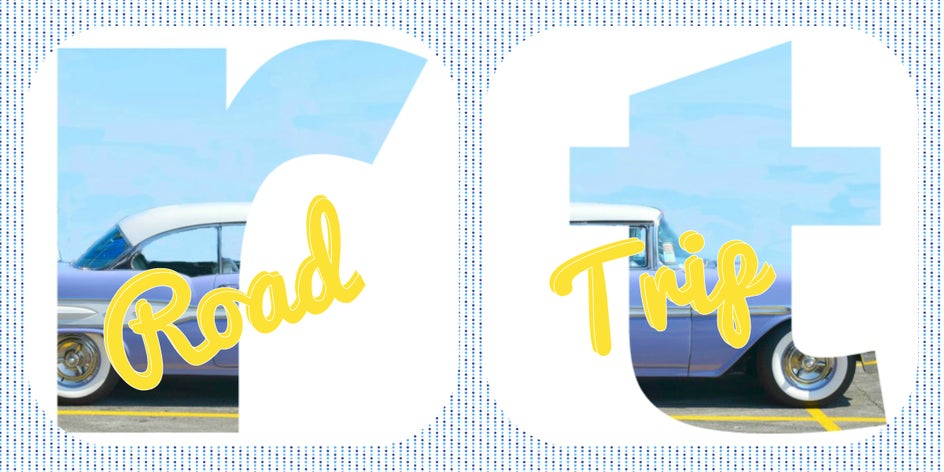
All we need now is a dashboard Elvis and we’re well on our way to nostalgia-land. But let's face it—you've been there since I mentioned "marching ants".
Head to the BeFunky photo editor and start stylin' your letters today: