Create a Heart-Melting Valentine’s Day Card With the Collage Maker

Nothing says, “I love you” quite like a Valentine’s Day card.
It's the official—unofficial—Valentine's Day must-have. I mean sure, you can't forget the chocolates. But how enjoyable is that decadent, delightful, rich dark chocolate truffle without a beautiful card and a sweet message to give you the warm-and-fuzzies all over?
That's why this Valentine's Day, we're going to help you uplevel your card game by doing it DIY style with our Collage Maker. A collage card allows you to create a personalized card that tells your unique story with photos of special moments you've shared with your loved one. And that could be anyone: your partner, your parents, your bestie, or even your galentines!
Do you want to know the best part? You're going to score major points for being all DIY and artsy; while also showing you cared enough to use your time, energy, and creativity instead of your money. Convinced? Great! Keep reading to learn how you can create a Valentine’s Day card that's guaranteed to melt the heart.
How to Create Valentine’s Day Cards With the Collage Maker
To kick things off, click here to open the Collage Maker. Once it’s open, follow the tutorial below to learn how to create a Valentine’s Day card in six simple steps.
Step 1: Choose a Layout for Your Card
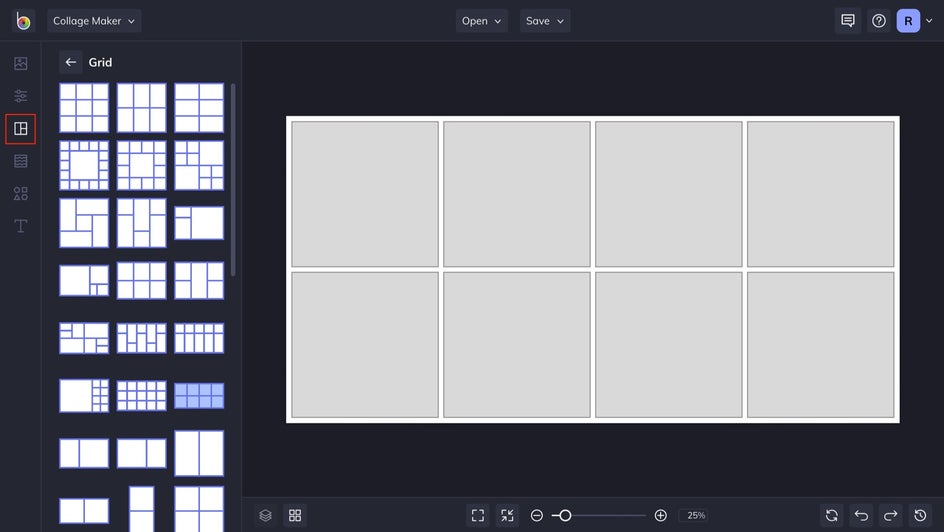
Before we get to the fun part, choose a base layout for your card by clicking the Layouts tab in the icon menu, then click Layout Presets and select a Grid. For our design, we decided to go with the eight-cell grid option.
Step 2: Upload Your Photos
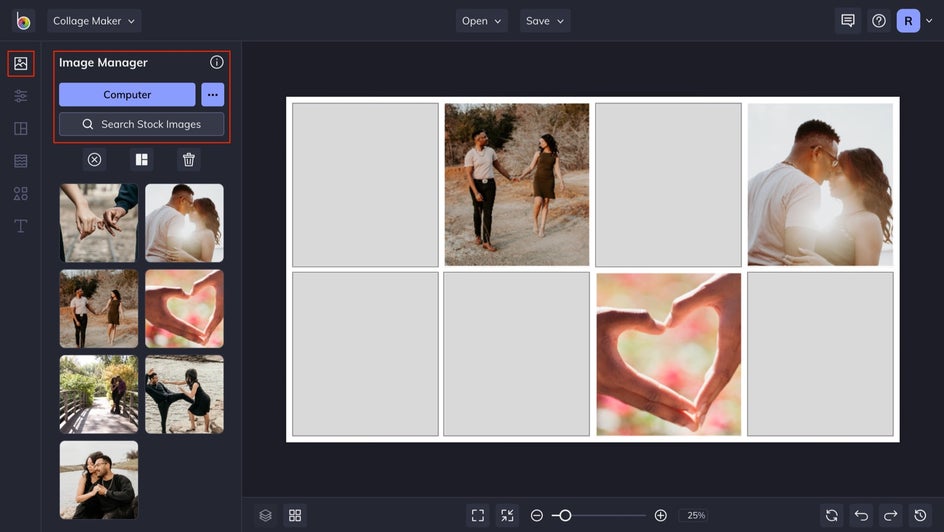
Next, you’ll want to add photos to your layout. You can do this simply via drag/drop from your desktop, clicking the Image Manager tab and selecting Computer to upload photos, or clicking the blue “. . . “ button for more options. From here, you’re free to insert your photos anywhere you please, but keep the vision for your card’s design in mind. You’ll also want to select photos that portray a cohesive narrative to tell your card’s story.
Step 3: Get Creative With Collage Cells
Now for the fun part—customization! There are many cool things you can do with collage cells to create a unique design: adjusting height and width, altering corner roundness, deleting some cells while leaving others, playing with spacing, and much more. If you like to learn more about collage cell and layout customization, check out BeFunky’s tutorial on how to personalize your collage layout.
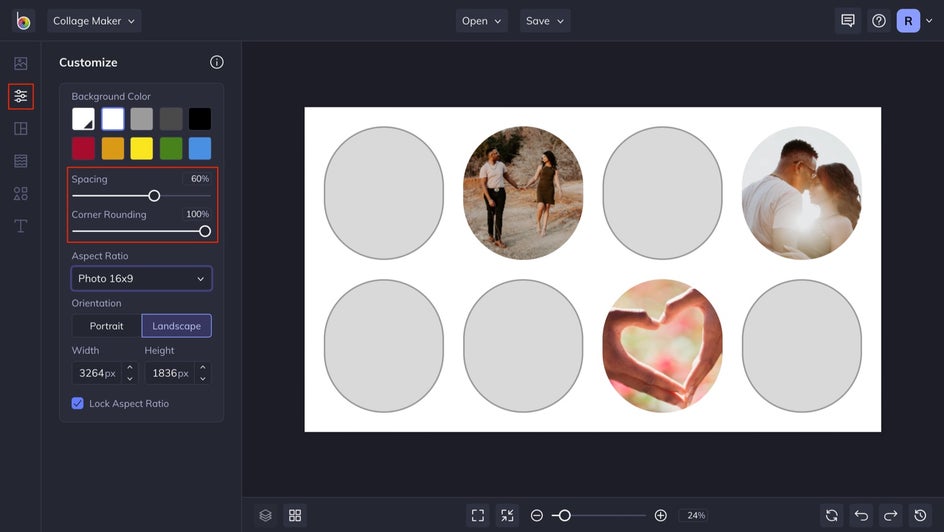
For our card design, we opened the Customize tab and made several edits to the layout. First, we increased the spacing to provide a larger buffer between the photos and borders. Then, we used Corner Rounding to give a circular aesthetic for our photos by dialing it up 100%. And lastly, we selected a preset Aspect Ratio of 16x9 to ensure our images don’t get distorted if we change the width.
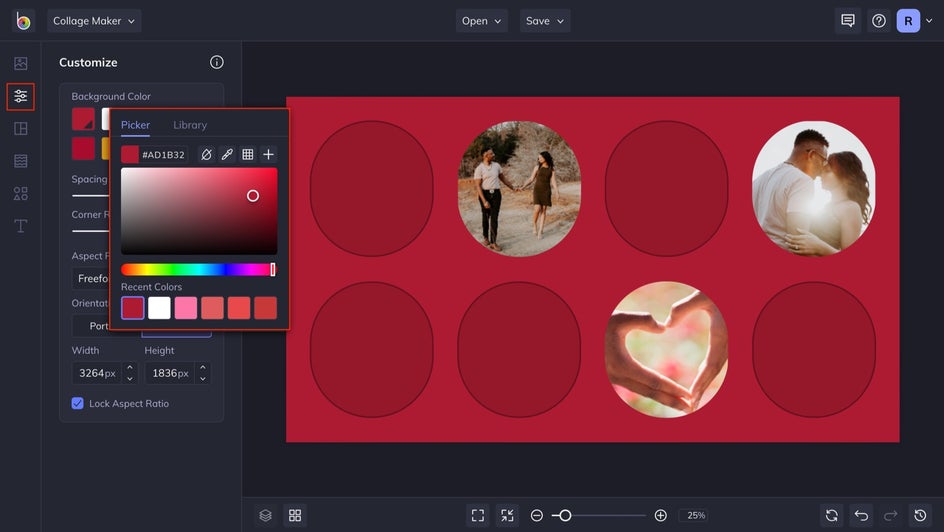
Step 4: Choose a Background Color
To choose a background color, simply click the Customization tab and select your desired color using the Color Picker. You can also use the Eye Dropper Tool to copy colors from your photos or select from the preset colors.
Step 5: Customize Your Design
This is where you get to add personality to your design. By now you should already have an idea of what you want to create. If you still need a little inspiration check out our Card Maker templates for more ideas. It’s important to remember that nothing is off the table at this stage. There are no bad ideas! You can play around with colors, text, graphics, effects, and layering to bring your design to life.
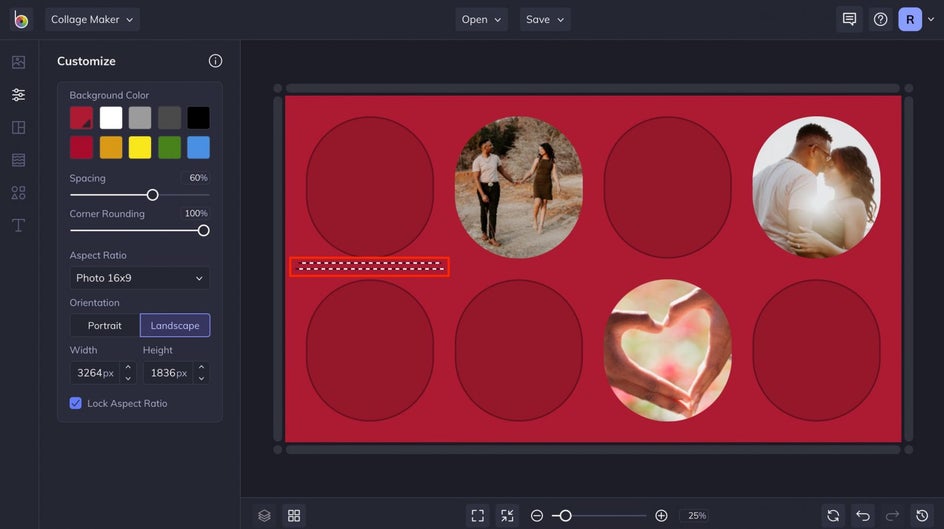
For our design, we removed the unwanted cells cluttering up our card. To do this without affecting the surrounding cells, you must detach unwanted cells from the grid. Start by hovering over the area between the cells until you see a dashed line. Then hold the Command or Ctrl key until you see two parallel lines. From here, drag the edge of the cell away from your images while continuing to hold the Command or Ctrl key.
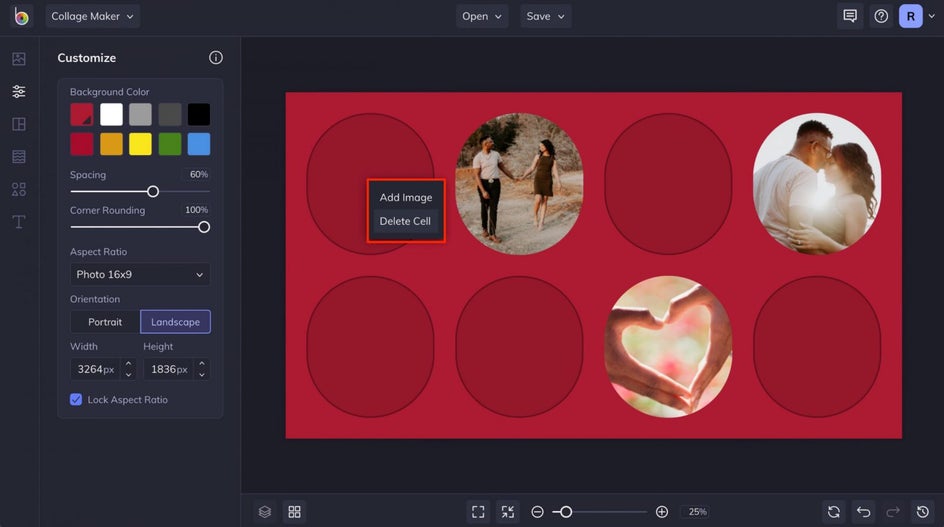
Once your cells are detached, you’re free to delete them without affecting your layout. Simply click on the cell you want to remove and select Delete Cell from the dropdown menu.
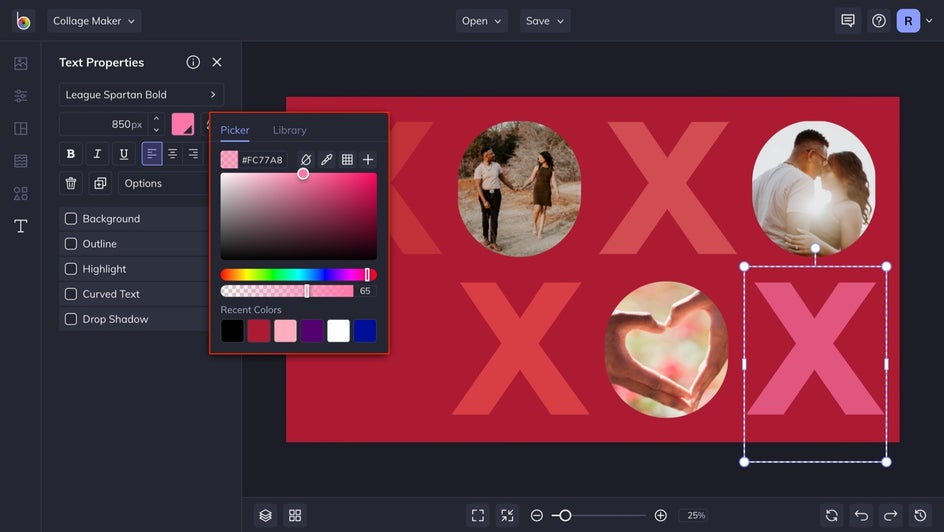
As you can see in the screenshot below, our idea was to build a theme around Xs and Os, with our rounded photos representing the "O"s. To do this, we're going to head to the T icon in the menu to open the Text Properties tab, followed by the Add Text button. You can resize your text by dragging the circles in the corners.
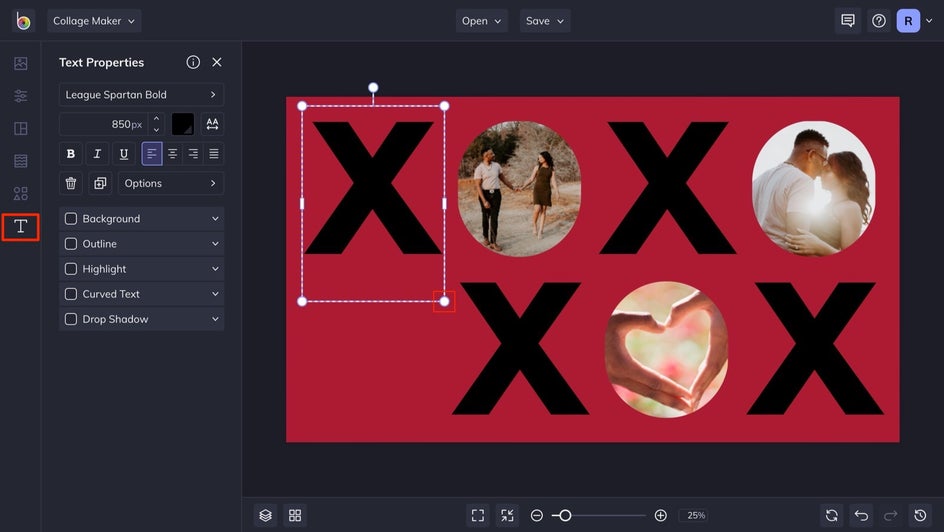
We decided to give our Xs some style by clicking the text box and adding color with the Color Picker, then adjusting the Transparency Slider.
It's time to put the cherry on top by crafting a heartfelt Valentine’s Day message. This part is particularly important so you’ll want to spend some time here. We recommend drafting three unique messages and combining the best parts of each.
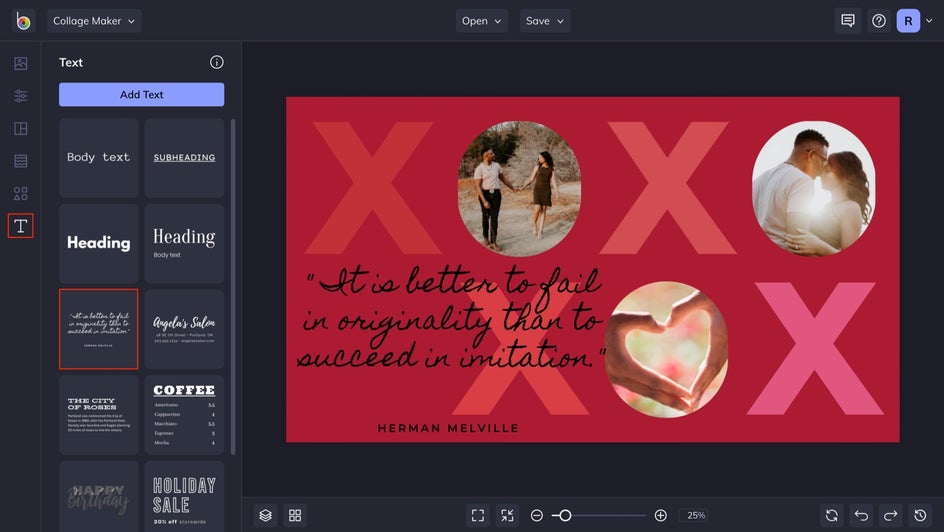
Step 5: Add Your Message
After you’ve crafted the perfect message, it's time to add text to your layout. To do this, click the T icon in the menu bar to open the Text tab. From here, you can select one of our Text Patch templates or add a text box to your layout by clicking the Add Text button. To find the perfect font, you can explore the vast array of fonts in our library. We decided to go with a Text Patch that resembled handwriting to match our card’s theme.
Now let’s put the finishing touches on your text by making customizations in the Text Properties menu. Simply click on your text to open the menu and choose from the many available options. You can edit color, size, spacing, and even add eye-popping text customizations.

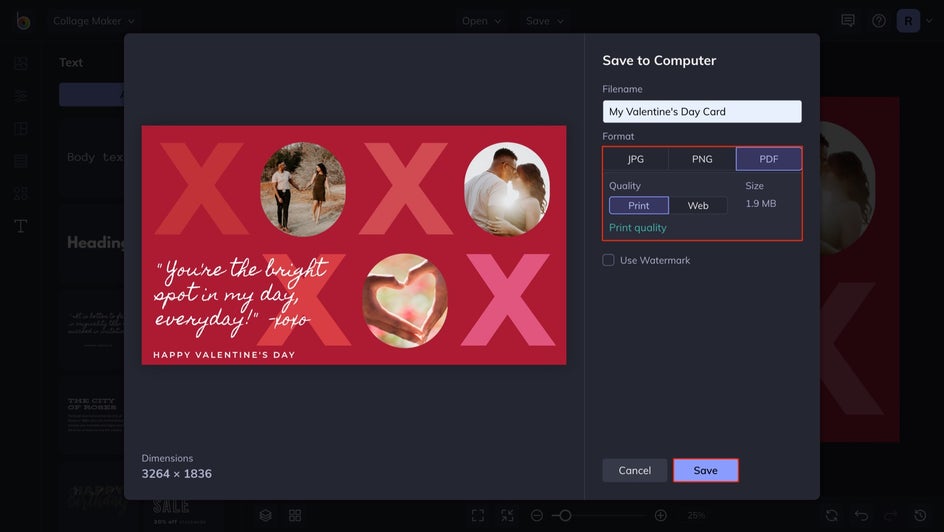
Step 6: Save Your Design
After you’ve made your final edits, you’ll want to save your design by clicking the Save button at the top of your screen. If you’re planning to print, select the Computer option and click the Print button to save your card as a print-quality PDF. If you prefer to send a digital card select the Web option instead.
Show Your Love With a Valentine’s Day Card to Remember
Whether it’s your partner, parents, best friend, or galentines, a DIY Valentine’s Day collage card is the perfect way to highlight the special moments shared with your loved one. This Valentine’s Day, skip the cookie-cutter department store cards and design the perfect card for your special someone with BeFunky’s Collage Maker.