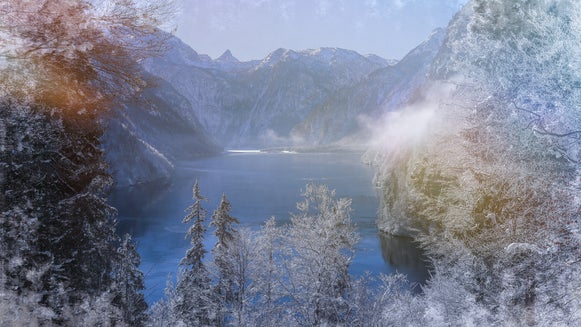
Add Falling Snow to Your Photos for a Wintery Effect

Snow can be tough to capture in a photo, especially if you are taking photos with your phone camera and not with a pricey camera lens. It’s hard to capture snowflakes for many reasons, not only because they are so small and you need good lighting, but even with an expensive camera setup, it is hard to take clear photos of your subject while also capturing the snow in the foreground.
Often, even while it is snowing, the camera can only capture a few snowflakes at a time – not very wintery.
How Do You Add Snow to a Photo?
To do this well, you’d generally need a lot of falling snow in the foreground of your image to capture enough snowflakes to see them, but this condition also makes it difficult to shoot in an environment like that without getting your camera soaked. So how do you make it look like it is snowing in your photo in this kind of a catch twenty-two situation?
With BeFunky’s Photo Editor, it is easy to add snow to your images during the photo editing process. Adding snow during the post-production process allows you to create the most snowy scene without disrupting your main subject. Maybe you took some photos on your phone in the snow but it didn’t look snowy enough or the colors don't quite reflect the mood you were going for. This is a great way to enhance the scene! You can even add snow to photos from your phone or tablet with the mobile app.
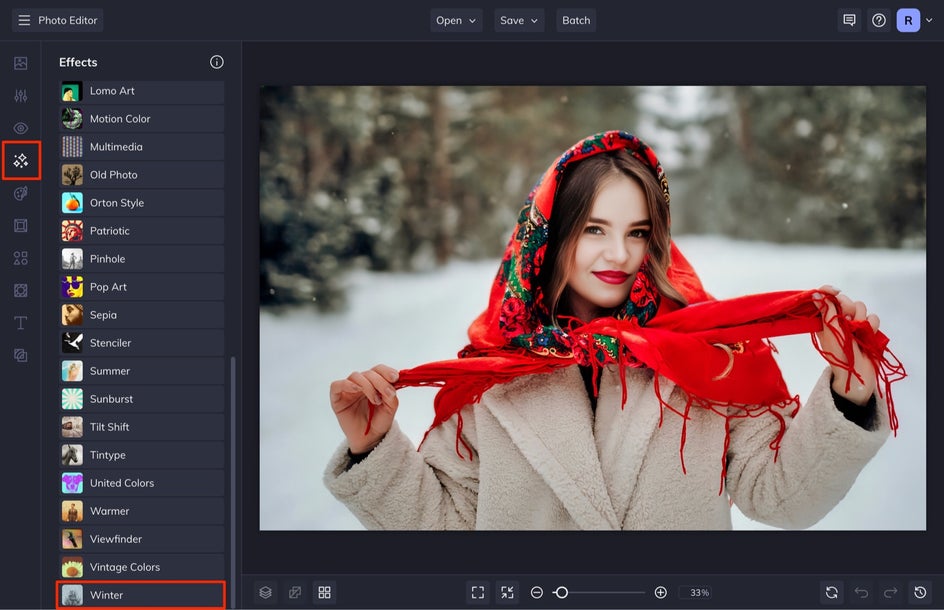
There are many effects that you can apply to give a wintery effect to your images. Let’s take a look at a few good options for adding wintery effects to your images and then we are going to show you the best effect for adding snow to a photo.
Applying a Snow Effect for Free
Applying a snowy effect to your photos for free is possible using BeFunky’s photo effects. You can apply any one of these alone, or combine them to create a unique photo effect filter.
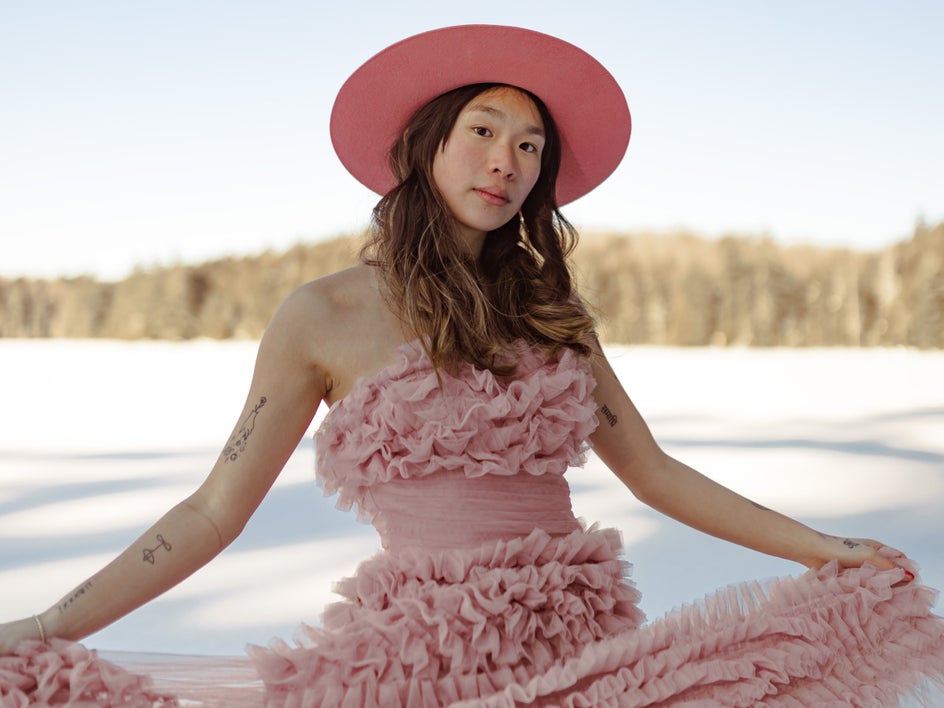
The top three free features you can use are the Tint tool, the Bokeh texture, and the Winter 1 effect. We are going to apply these tools and effects to the photo below. This photo is a great example of how you can turn a warm-looking photo into one that appears like it was taken in the middle of winter!
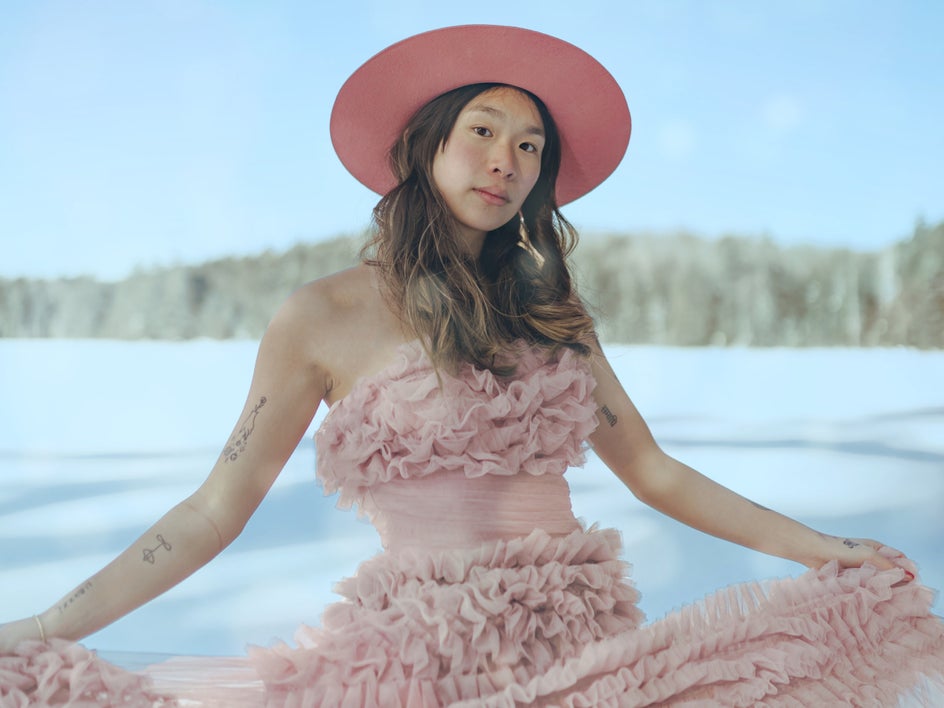
Tint Tool
First, you can achieve a wintery look using the Tint tool. Apply a cool-toned colored tint to your image. You can find this tool in the Edit tab.
Bokeh Texture
You can then apply a Bokeh effect and diffuse this so that it looks like snow is in the foreground of your image. Bokeh can be found in the Textures tab. I would recommend Bokeh 1 and Bokeh 2 for a wintery effect.
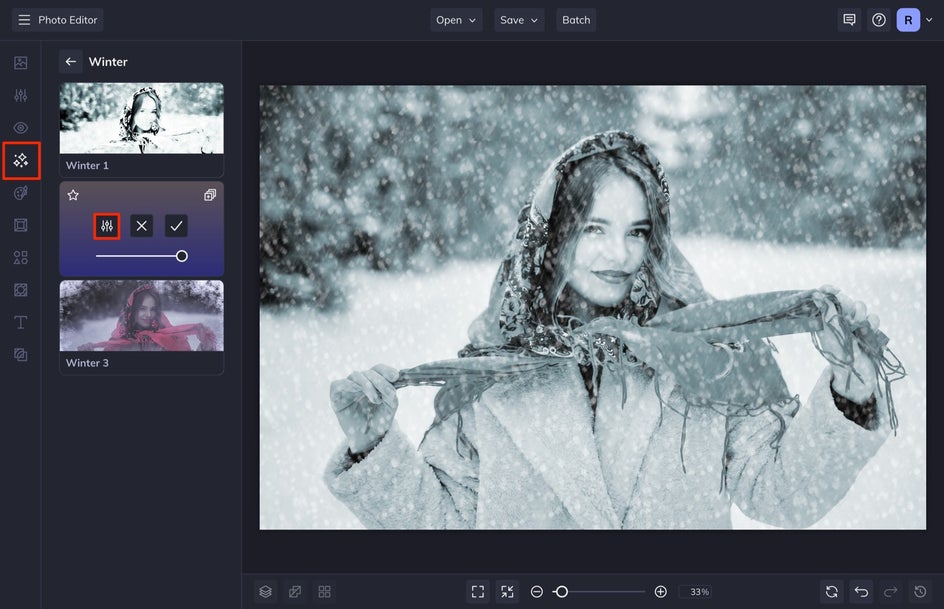
Winter 1 Effect
You can apply the Winter 1 effect to your image to give it a cohesive wintery look. This can be found in the Effects tab.
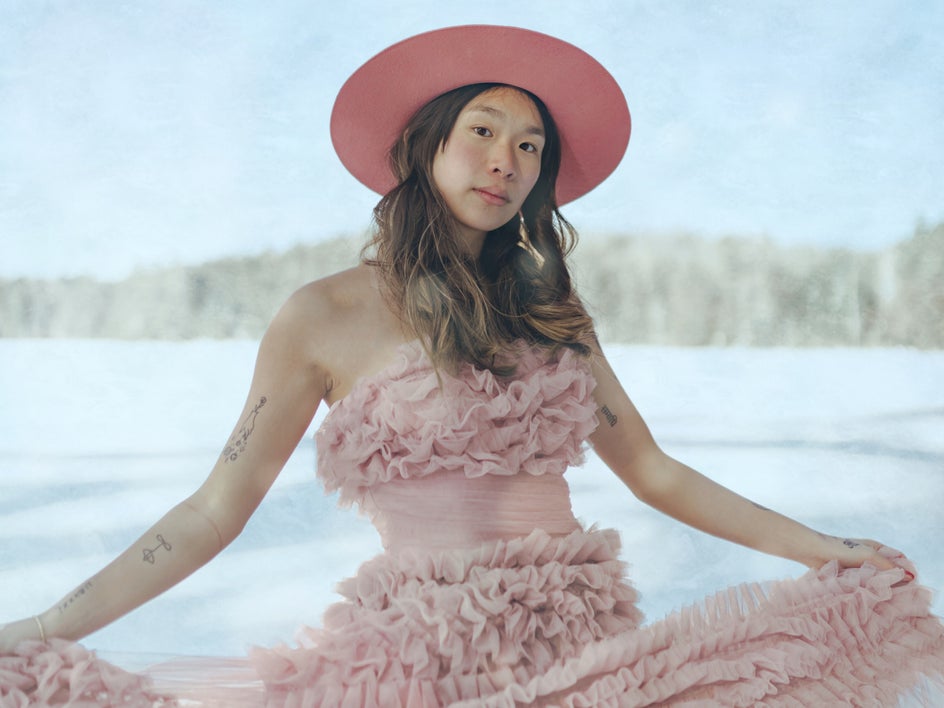
Lastly, I adjusted the Color options like Temperature and Saturation, and then also increased the Contrast in the Exposure tab. This helped to make the photo look a bit more cohesive.
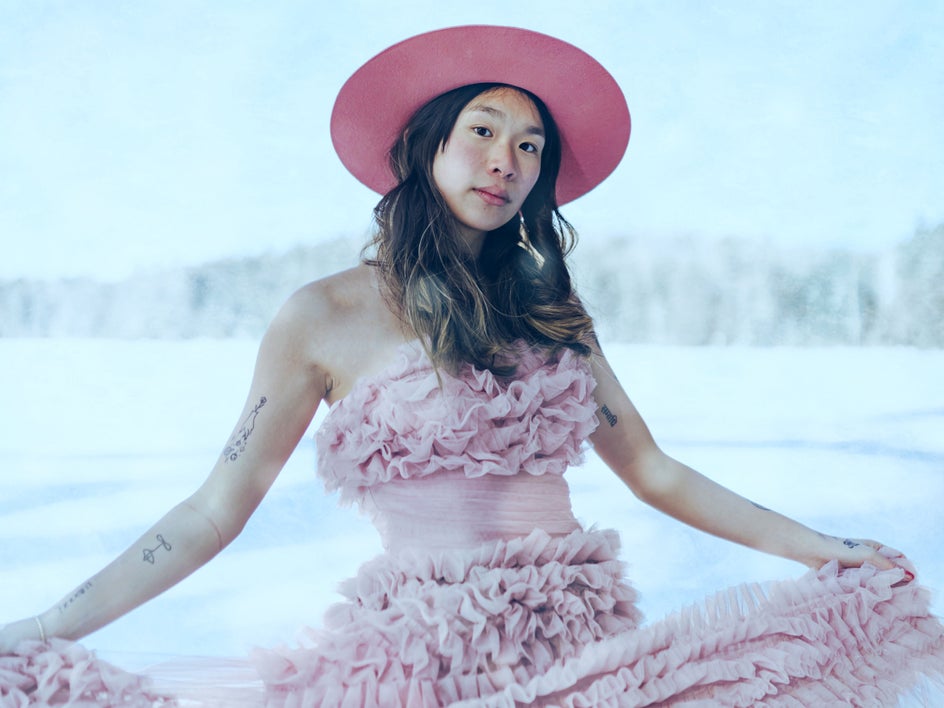
Next, we will show you how you can easily add snow to your image by using the Winter 2 effect. This is an exclusive BeFunky Plus effect. Follow along below!
How to Add Falling Snow to a Photo
Let’s head into BeFunky’s Photo Editor to add a falling snow effect to our image.
Step 1: Head to the Effects Tab
First, upload your photo by selecting Open and then Computer at the top of the screen. Or, drag and drop a photo file directly onto the canvas, which is my preferred method. You can also head directly to the Effects tab by clicking here if you don't need to make any prior edits.
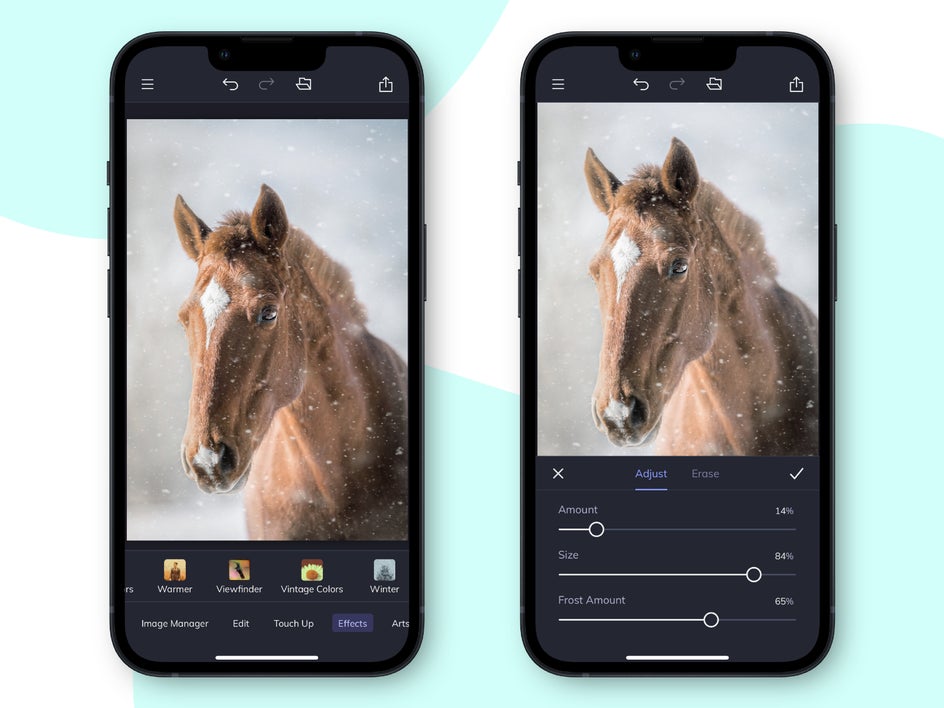
Step 2: Adjust and Apply the Winter 2 Effect
From the Effects tab, select Winter. There are a few options from here, but we are going to use Winter 2. Click on the tool to see the effect in action.
You will notice that the effect at peak amount looks a bit dodgy, but we are going to adjust the settings so that it looks like a natural snow effect. To do this, select Settings.
First, we are going to go into the Select tab and click Background in the drop-down menu. This will apply the effect to the background, keeping our subject isolated.
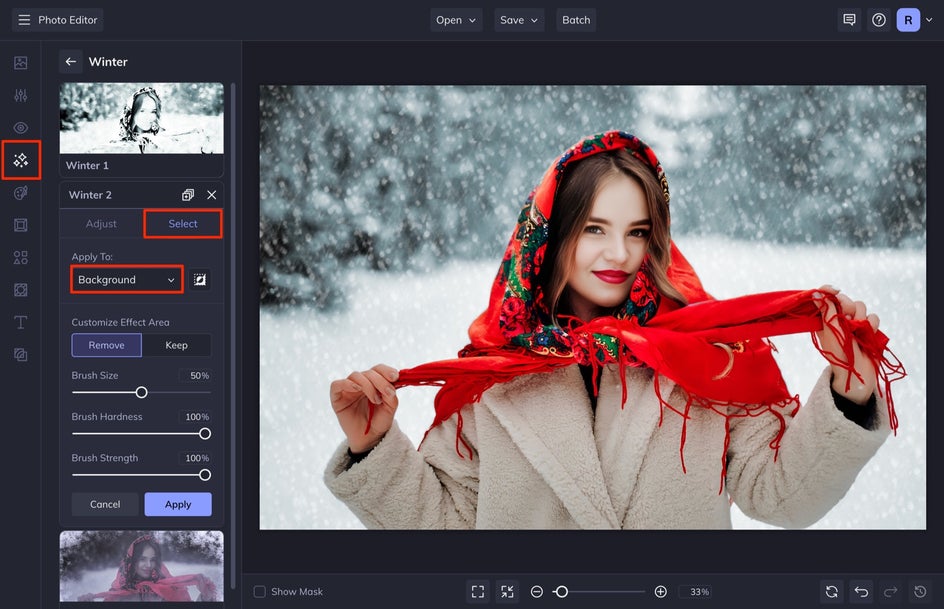
From here, head back into the Adjust tab to modify the effect. We are going to adjust the Amount and Size to our liking and keep the Opacity at 100 for maximum snow effect. When you are happy with the results, select Apply.
Step 3: Save Your Snowy Photo
Before saving, don’t forget that you can also add the free tools from above if you want your photo to be even more winterized! We decided to add a light Bokeh effect to this one after applying Winter 2.

When you've finished editing, click the Save button at the top of the screen. Save your image as a high-quality JPG if you’re keeping it digital. You can also save it to your Image Manager if you want to make it into a holiday greeting card.
Take a look at the before and after.


Add Falling Snow to Your Photos
Adding falling snow to your images is easy with BeFunky’s Photo Editor. Not only can you add snow, but you can also winterize them with many of our free editing tools. This is a great effect if you want to spice up your winter photo or if you simply live somewhere warm and want to add snow to your images.