How To Add Light Leaks To Photos
Photography is quite literally all about lighting. Whether you’re shooting on a DSLR, practicing the technique of film, or experimenting with DIY pinhole cameras, the reflection of light that is exposed to your medium is key to creating a lasting image. Aside from playing such a huge role in capturing images, lighting also serves as one of the most creative effects of photography. In some unique instances, it can just so happen that an unplanned detail can set the whole tone and vision for the entire shoot, like a light leak.
Light leaks have become an increasingly popular effect by bridging the gap between a more dated, retro style of photography and today’s picturesque style. Whether your vision is leading you towards a soft and subtle glow or a bold, eye-catching flare, BeFunky’s Photo Editor has everything you need to add Light Leak textures to photos and create something totally unique! We’ll teach you all about the science behind light leaks, then show you how to add them to your images without having to alter your camera lens.
What are Light Leaks in Photography?
In traditional photography, light leaks were initially seen as an error. The overly exposed, sometimes color variant spots on a print was an indication that there was a fault in the camera body that was allowing additional light to leak in. Older camera models made primarily of cheap plastic and foam sealants resulted in light leaks much more often than the durable plastic and metal alloy models we use today. They were nearly impossible to detect during capturing process, and came as a surprise to photographers when viewing their final shots.

Light leaks are also a common error in the developing process of analog photography. If the film was exposed to even the tiniest sliver of light, it could burn the film and create spots, or lines, or worst of all, it could overexpose the whole photograph leaving the subject unrecognizable.

Though once seen as an error and a true marker of retro photography, light leaks have become increasingly popular over the past couple of decades. With modern innovations, light leaks do not naturally occur as often as they once had, and now are most commonly added in the photo editing process. If you love the look, BeFunky’s Texture tab offers many different styles of Light Leaks that you can add to your image with the click of a button! Each of our Light Leaks feature advanced options to further edit the positioning, opacity, blending overlay, and more. We’ll show you how next!
How to Add Light Leaks in BeFunky’s Photo Editor
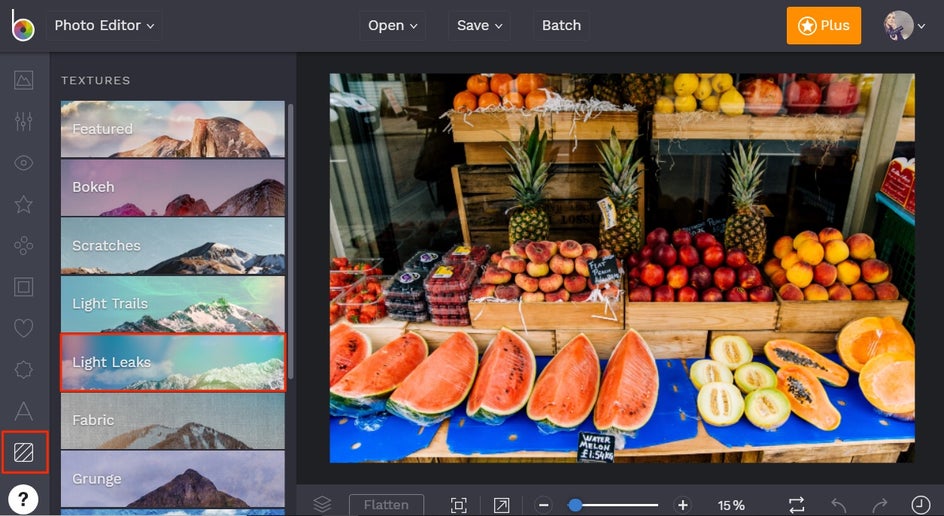
To begin adding light leaks to your own images, head to BeFunky’s Photo Editor and upload a photo using the Open tab at the top of the screen. Once your photo is uploaded, choose the Textures tab from the main menu on the left. A sidebar of multiple texture options will appear. Clicking the fifth choice titled Light Leaks will open to a number of unique light leak effects for you to choose from.
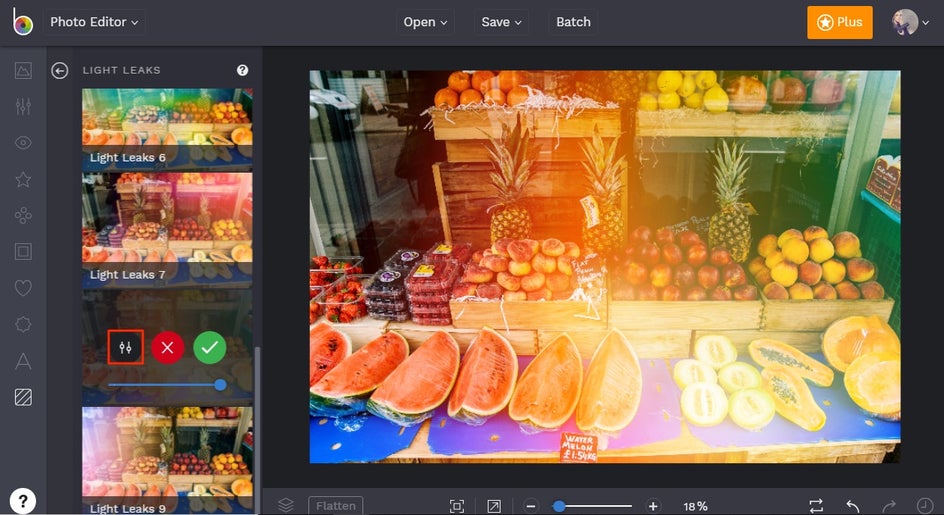
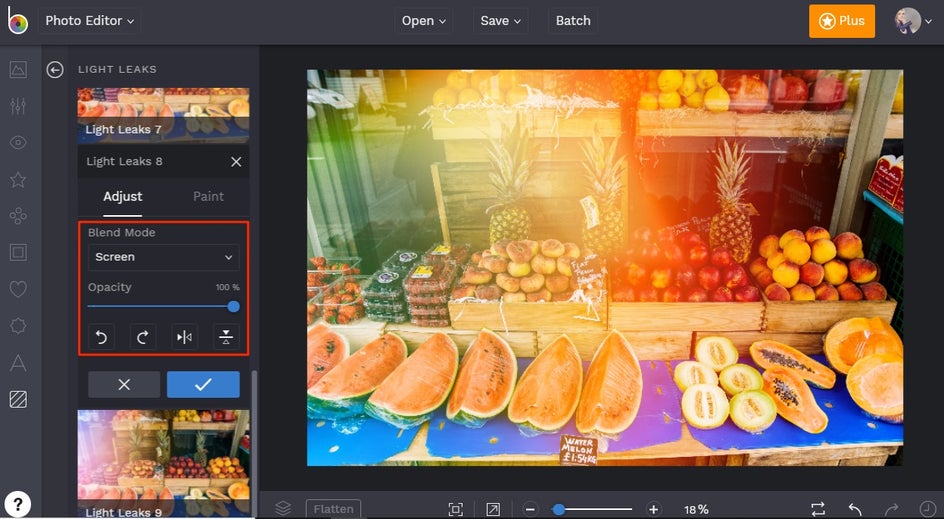
Clicking on each Light Leak gives you a preview of the effect on your photo. When you find one you love, you can either click the green checkmark on it’s thumbnail to apply it right away, or click the Settings menu (the mixing board icon) to find even more options for customizing your Light Leak.
In the Settings menu, you can use the Opacity slider to increase or decrease the amount of the Light Leak and use the arrow buttons to rotate and flip its position. You can also experiment with different Blend Modes by clicking the dropdown menu, allowing you to adjust the way your Light Leak texture blends with your image.
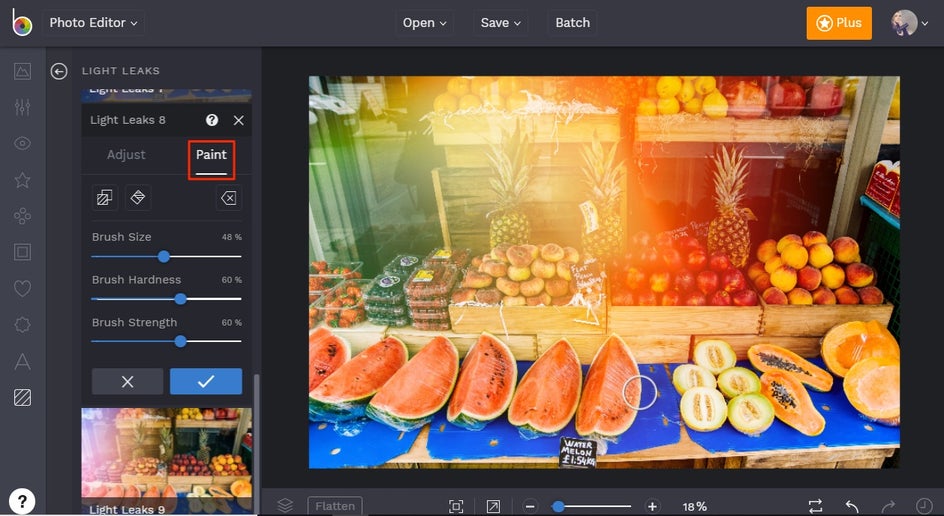
You can also use Paint Mode to selectively apply your Light Leak by clicking the Paint tab (located next to Adjust in the Settings menu). After adjusting the Brush Size and Brush Hardness, simply click and drag with your mouse to remove the Light Leak from certain areas of your image. If you’d rather paint the Light Leak on to the photo instead of remove it, just click the Inverse icon to revert the image back to original and paint the Light Leak on with your mouse. You can always use the Erase button to fine tune your selective edits.
When your Light Leak looks perfect and your vision has been brought to life, click the checkmark to apply it. From here, you can keep adding additional Light Leaks and edit your photo to perfection, or click the Save button at the top of the Photo Editor to save your work. You can save directly to your Computer or instantly publish your work to your social media platforms!
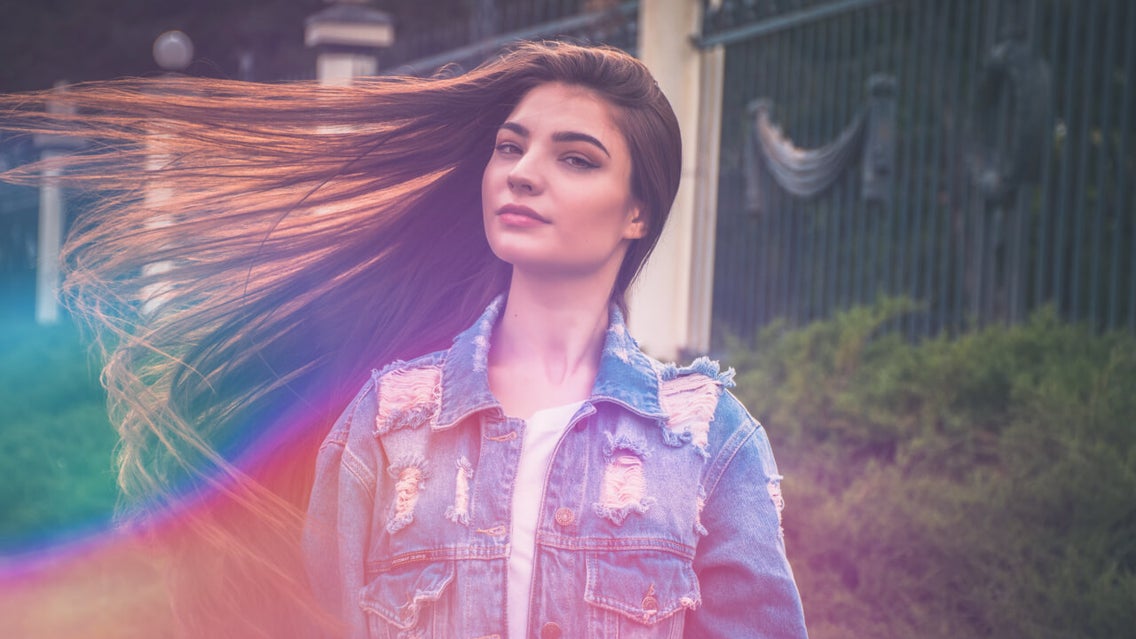
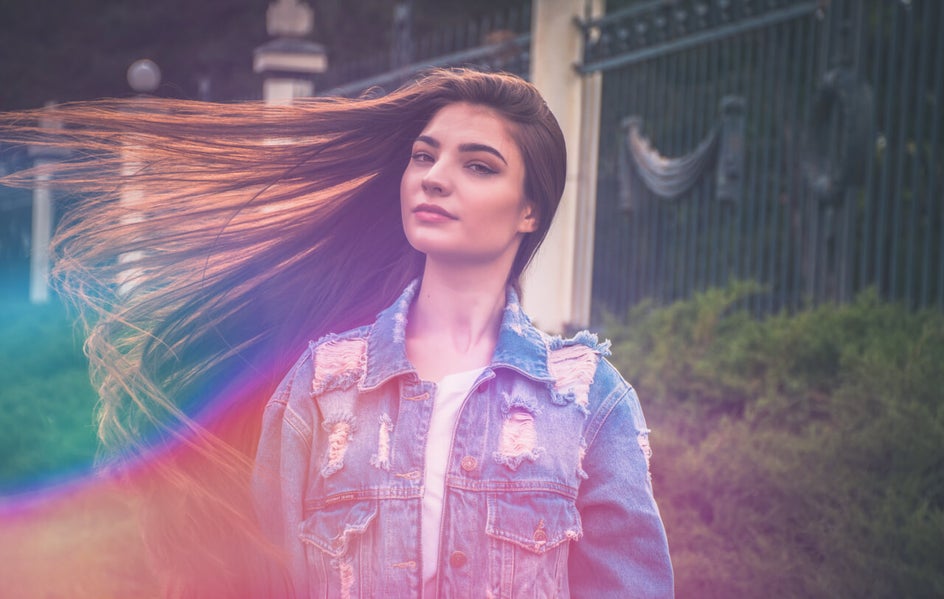
Before and After
Just look at how much character has been added in minutes using BeFunky’s Light Leak textures! They truly bring a retro style to photography, making it look like you captured the shot on a vintage camera.


Whether you enjoy more of a one-click-and-done approach or creating different variations with the adjustment options, BeFunky’s Photo Editor makes the process of adding realistic light leaks to your photographs quick and seamless. Try them out by clicking the link below!