The 3 Best Tools to Remove Photo Backgrounds
Removing the background of an image is usually a pain in the – well, there’s no need to even complete that sentence because BeFunky’s powerful photo editing tools make this job as simple as ever. Whether you need to create a transparent background for uploading images to the web, turn a logo into a PNG with a transparent background, or erase the background of an image and replace it entirely, BeFunky’s Photo Editor is packed with three powerful tools to help you make it happen.
From our AI-powered Background Remover, to our Cutout tool and Background Fill, no background is too difficult to remove. While you can achieve the same effect with multiple tools, each tool within the Remove/Replace menu comes with its own unique strengths. We are going to detail each of these tools below and let you know the perfect time to use each one.
You can find these tools in the Edit tab in the left-hand menu of the Photo Editor under the Remove/Replace drop-down. Simply upload your photo for each one by selecting Open at the top of your screen and selecting the location you’d like to upload it from. You can also drag and drop an image directly onto the canvas to start.
Remove and Replace Backgrounds With the Background Remover
Let's start with the Background Remover tool. This tool is one of the most powerful tools for removing backgrounds from any image. The cool part is that not only can you remove the background, but you can replace it with another image or color while using the tool. These are amazing features that are very unique to BeFunky’s platform when you compare it to other editing tools on the market. For an extensive article on this tool, check out this article.
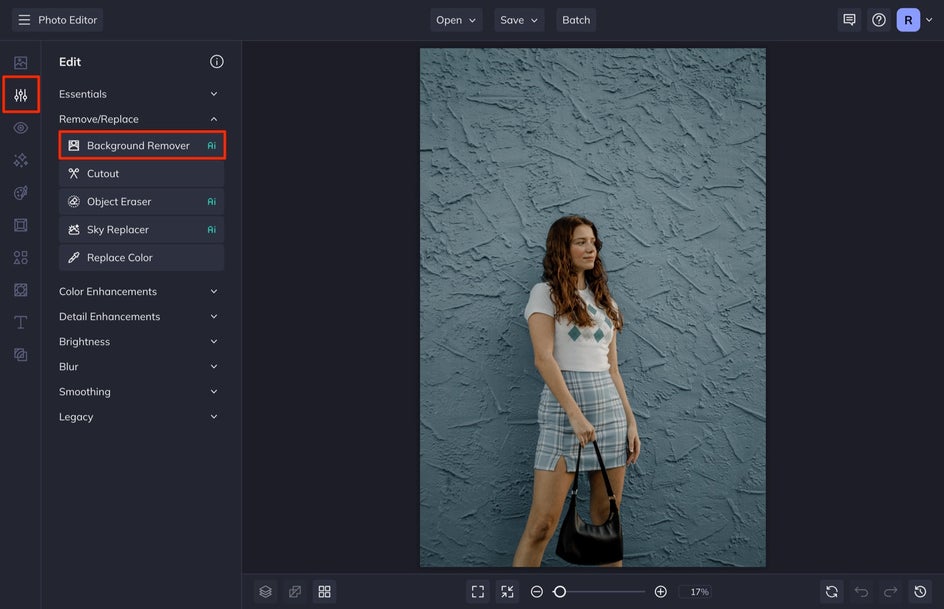
Step 1: Select the Background Remover
After you upload your image, select the Background Remover tool from the Edit menu. The AI will automatically go to work to remove the background in your image.
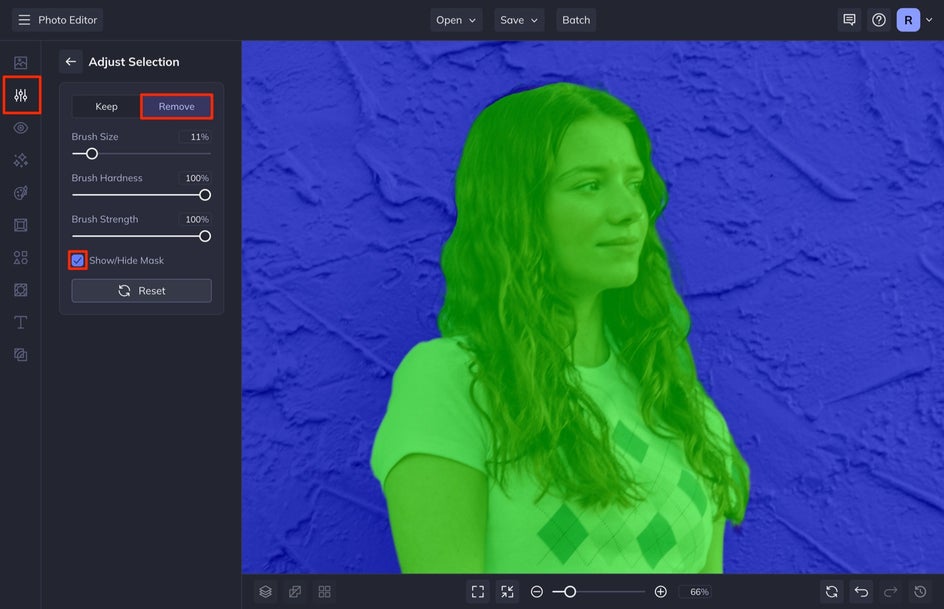
Step 2: Make Adjustments
You can then correct any discrepancies by choosing Adjust Selection and using the brush to clean up any issues around the edges of your main subject. The green represents your main subject and the blue represents the background that has been removed.
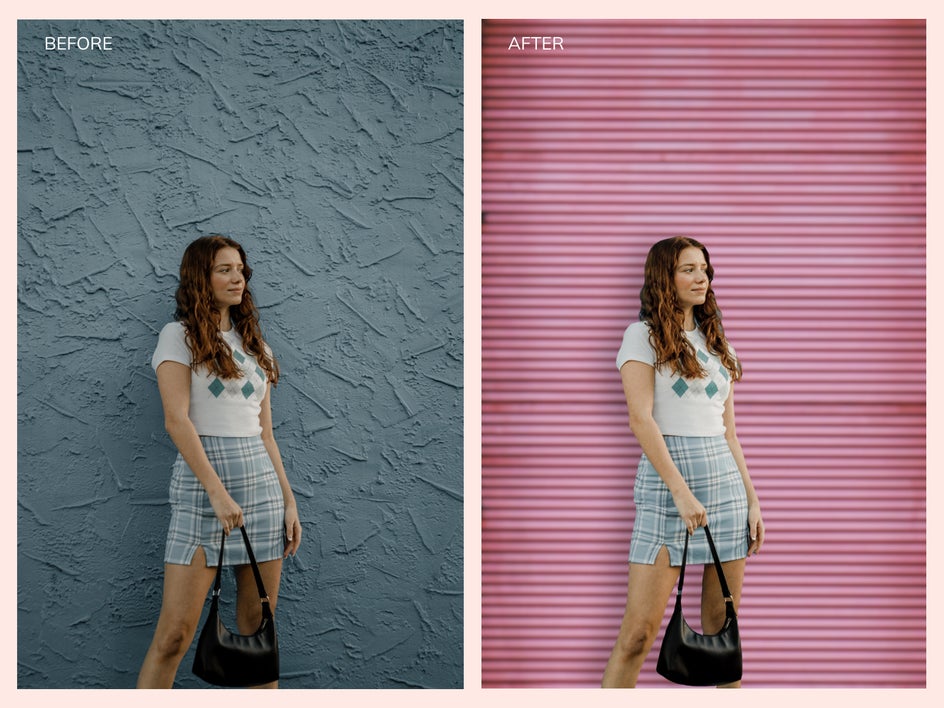
After you have your subject cleaned up, you can then choose to replace the background with a different color or photo altogether. To replace the background, simply select Change Background and then Color to replace it with a solid color, or select Image to replace it with a new image.
You can select your own image by choosing Computer, or choose from our thousands of free stock images by selecting Stock Images.

You can also edit the background further by selecting Edit Background and making adjustments like blurring the background, scaling the image in the Adjust tab, and editing the colors in the Color tab.
With this tool, you can also add a drop shadow to your subject, which adds dimension to the subject, making sure it doesn’t disappear into the background. To do this, select the Drop Shadow selection from the BG Remover menu.
Not only can you remove the background of your photo with the Background Remover, you can also replace it and edit the results to your liking.
Isolate a Subject With the Cutout Tool
The Cutout tool is perfect for cutting objects out of your photos and removing the background entirely. This tool comes with an array of incredible brush options that make this tool stand out from the others. Sometimes you just need a little more control over how you separate your subject from the background – if that’s you, this is your tool. For an extensive article on this tool, check this out.
This tool is perfect for when you want to cut out a subject from your photo that you’d like to use elsewhere in other design work or promotional material. Because this tool gives you the option to Export as Layer at the end, you can literally turn your subject into its own layer that you can then use in other graphic design work.
Step 1: Select Cutout Tool
From the Edit menu, select Cutout from the Remove/Replace drop-down. Select Isolate Subject to let BeFunky do all the heavy lifting.
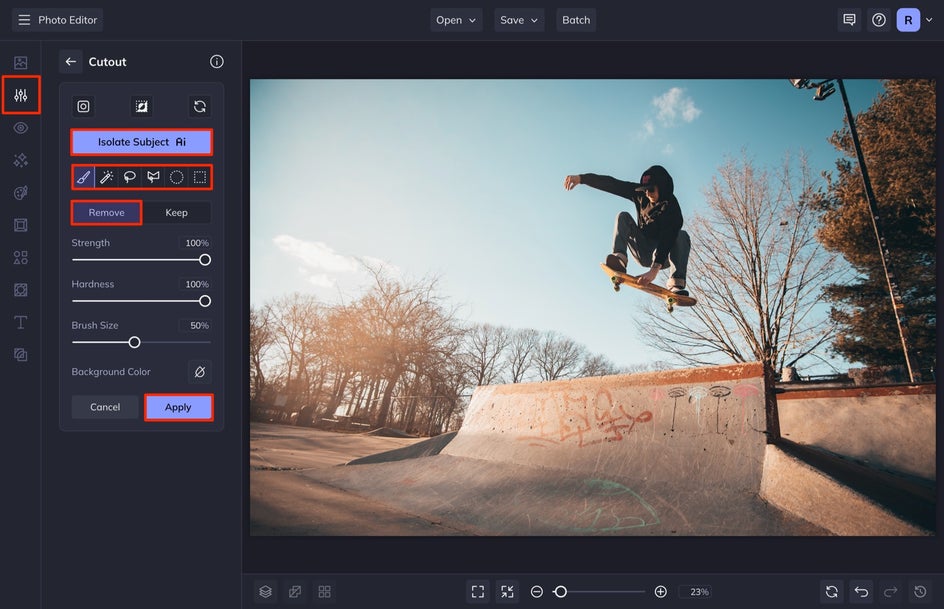
Step 2: Take Advantage of Cutout Precision
This is where the Cutout tool excels. There are so many options included within the Cutout tool that make it so simple to refine the subject you want to isolate. Some of my favorite brushes are the Magic Brush, the Lasso, and the Polygon tool.
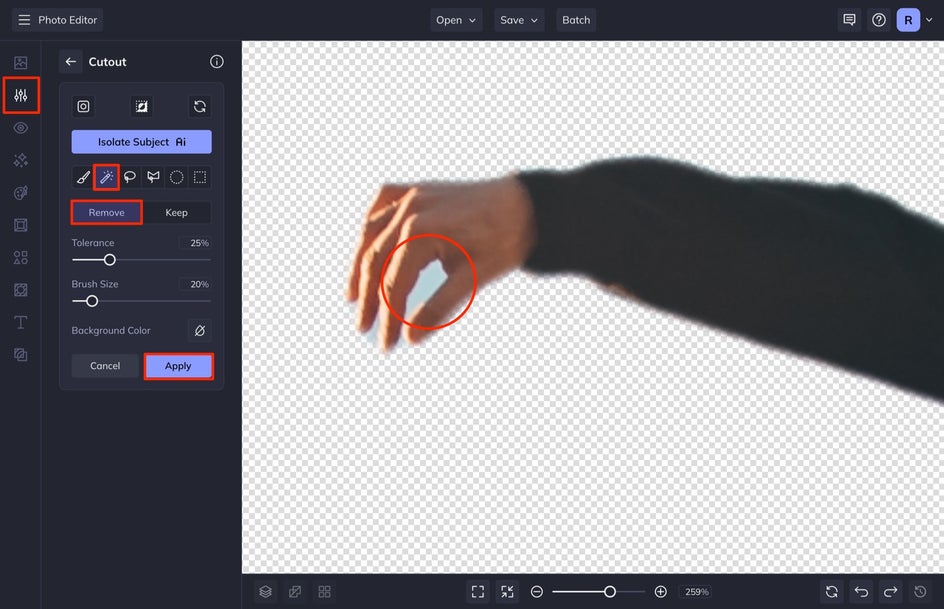
The Magic brush makes it so simple to clean up any areas where the Isolate Subject tool didn’t quite get it right the first time. If there are any areas of the background that still need to be removed, simply select the Magic Brush tool and click on the part of the background you want to remove. Any color that is the same color as your selection point will be removed while preserving the color differences around it. Seriously magic!
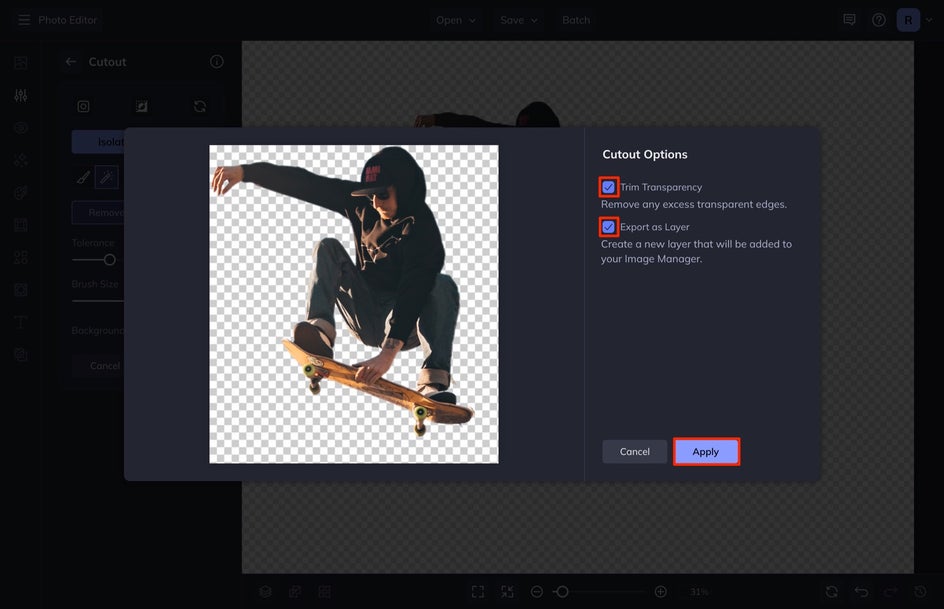
Step 3: Export Your Cutout
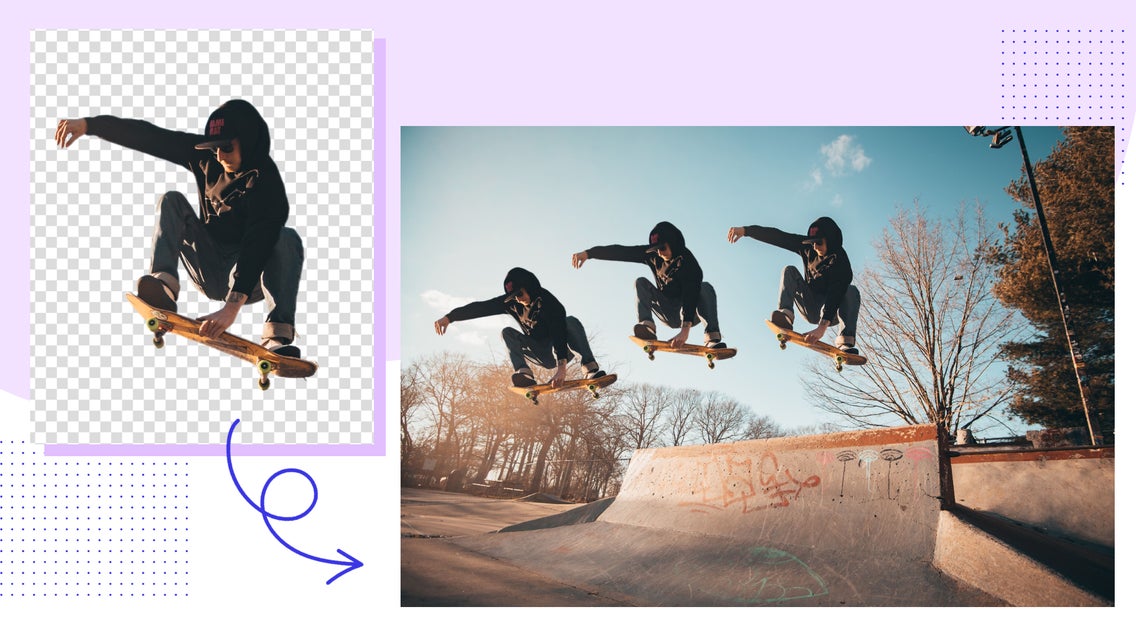
When you are finished, select Apply. When you do, you will see a menu pop up where you can select Trim Transparency and Export as Layer. I select both of these so that I can use what I cut out as its own layer in other areas of my design work. The photo will be automatically saved to your image manager for further use. If you want to save this image to your computer somewhere, select Save and then make sure to choose the PNG option to maintain the transparent background. The other options will not keep the background transparent.
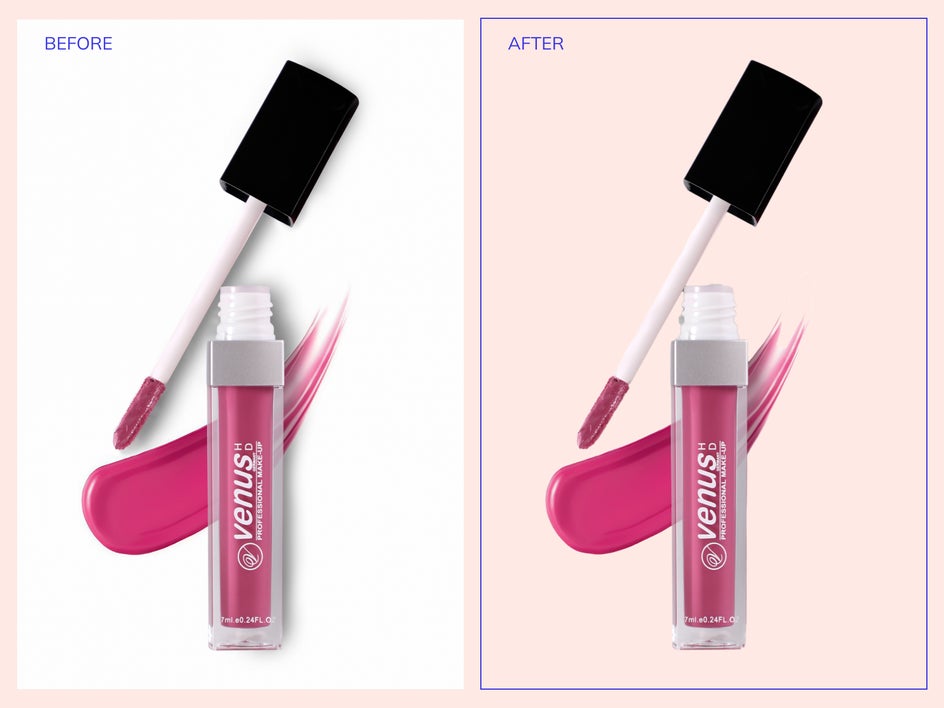
Here is an example of what you can do with your new image layer!

No-Fuss Transparent Backgrounds With Background (Fill)
This is the ultimate “no-fuss” tool for removing backgrounds. This is a great tool for simple product shot photography where you need a quick tool to do the job without any complicated features.
Step 1: Isolage Subject and Apply Background (Fill)
Simply create a transparent background by selecting Background (Fill) from the Legacy dropdown in the Edit tab.

From here, select the Erase tab and then Isolate Subject. After this, select Apply and then save your image by following Step 3 above.
3 Ways to Remove Backgrounds With BeFunky
Each of these tools can remove the background from your image, creating a transparent background in seconds. Because each tool has its own unique features, pick the tool that is best for your next project and follow along with BeFunky’s Photo Editor to get the results.