20 Photo Editing Tips and Tricks You Might Not Know About
If you’re looking to up your creative workflow with BeFunky, there are so many tips and tricks we’re eager to share with you. Not only will these tips help you edit photos, create graphic designs, and make photo collages like a total pro, your creativity will take on a whole new level of efficiency! Here are 20 standout tips and tricks you should know:
1. Quickly Start a New Project
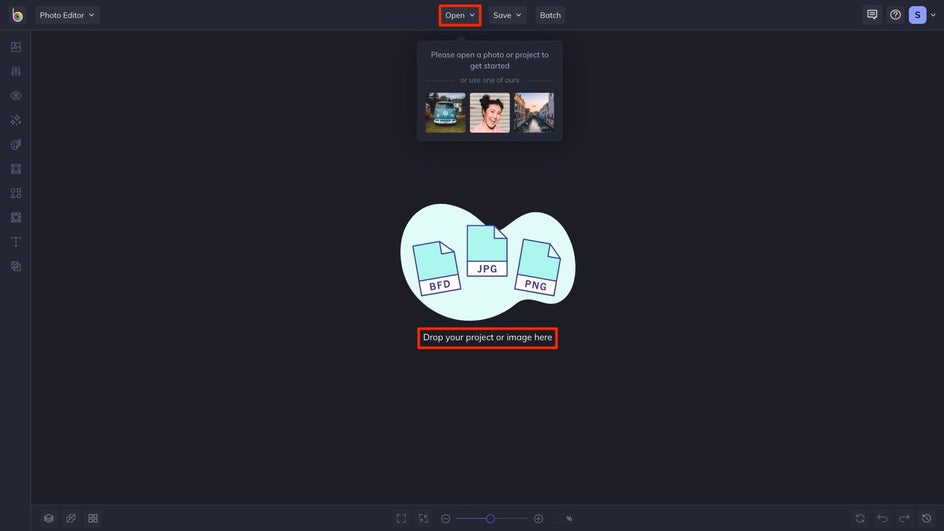
In the Photo Editor, whether you’ve got a photo uploaded to your canvas or not, you can start a new photo editing project at any point by simply dragging and dropping an image file from your desktop right into the interface. You can also click on the Open button, followed by the location of your file.
2. Search for Your Favorites
Search for your favorite features from anywhere in the app – including your Dashboard. Whether you're looking for something specific like the HDR DLX feature or the entire collection of Artsy effects. Simply press [Ctrl/⌘ + P] to open the search bar!
3. Save as a Project to Make Edits Later
Whether you’re in a time crunch or you simply want to back up your work, use the Save as Project option, found in the Save menu. It will save your work in editable format, so you can come back and continue your editing session at a later date, or fix something you didn't see the first time.
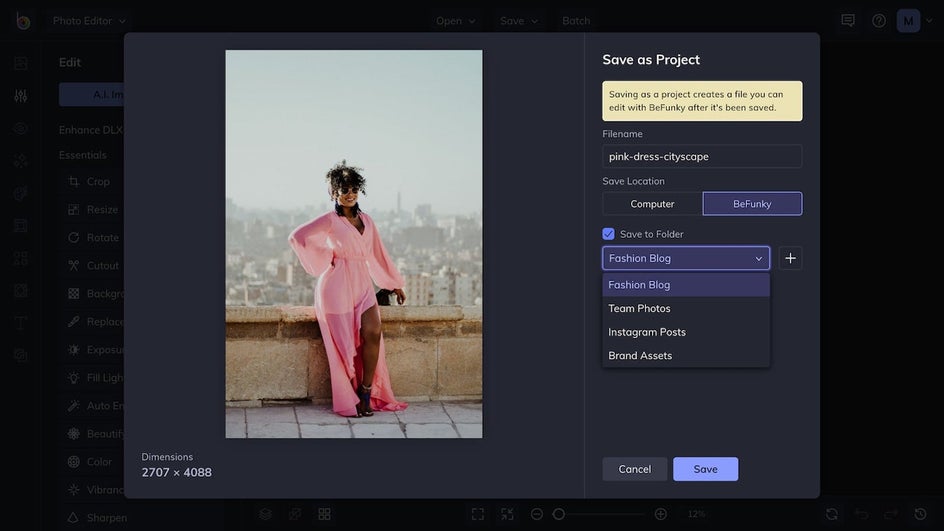
This comes in handy when you want to create a custom template to use over and over again – like Pinterest Pins, social media posts, and customized collage layouts. You can also sort them in custom folders to quickly find exactly what you're looking for.
4. Pan While You’re Zoomed In
Sometimes you’ve got to zoom in on your project to use a tool more precisely. If you're using a trackpad, simply pinch to zoom and then pan by dragging two fingers. Alternatively, you can use the slider found at the bottom of your canvas to zoom, and then hold down the Spacebar while you click and drag the image to pan.
5. Show Original Photo
It can be helpful to see what your original photo looked like before edits were made. A really quick way to do this is to press the "O" key (“O” as in Original) to see your original image and compare it at any point. This is another keyboard shortcut that is super handy.
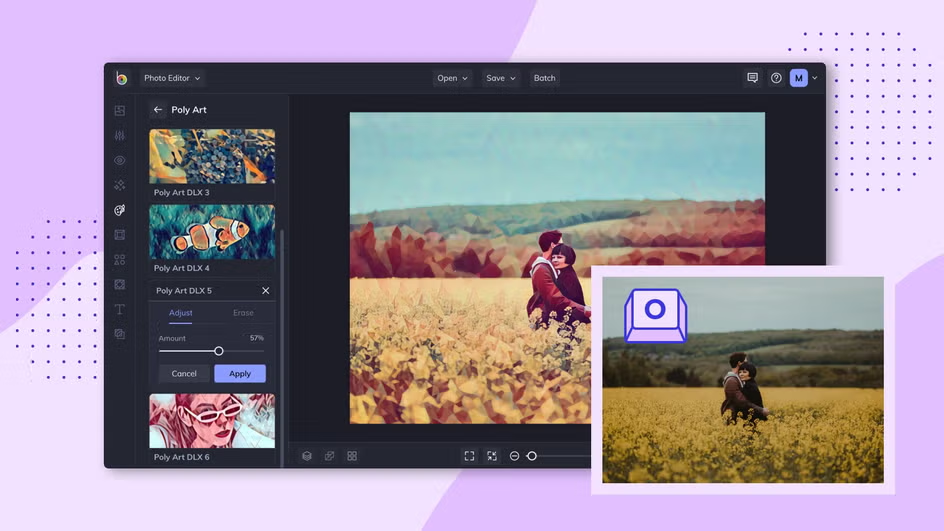
6. Press the “D” Button to Quickly Duplicate Anything
When you’re working with layers (text, graphic, or image), they can easily be duplicated by selecting the layer and pressing the “D” key (“D” as in Duplicate).
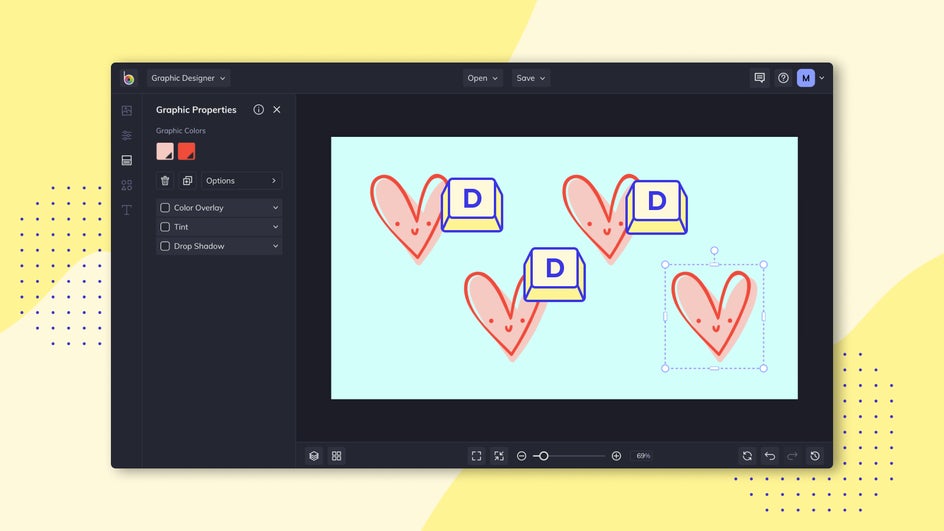
That means you can create multiple text layers with the same font and formatting and as many copies of a graphic or image layer as you want. It’s the fastest keyboard shortcut for duplicating ever!
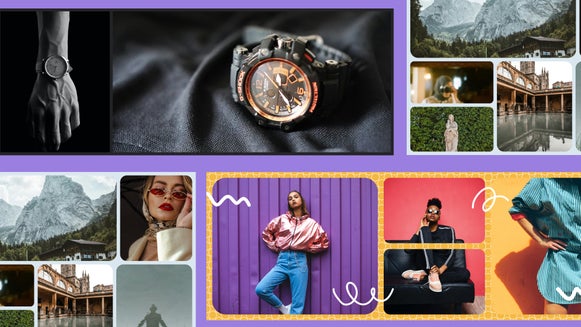
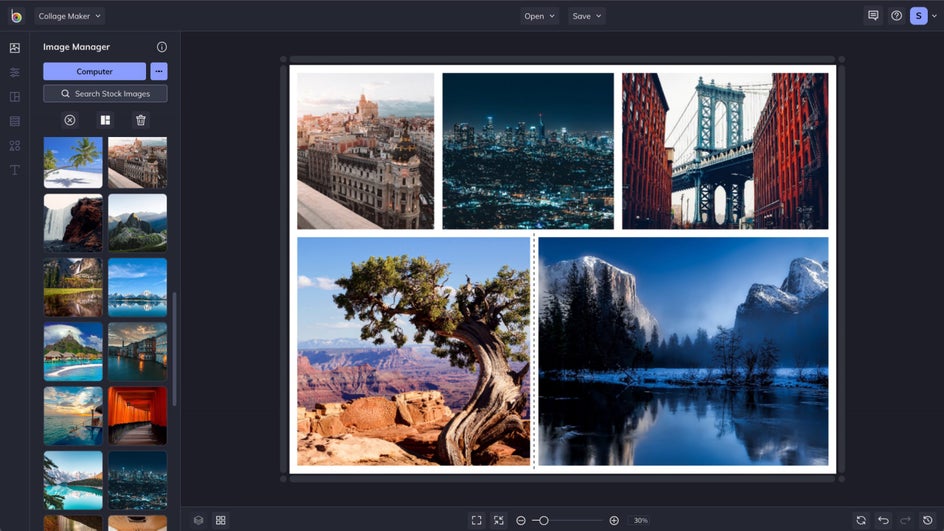
7. Create New Collage Cells in Seconds
Anytime you’ve got a Collage Layout loaded onto the canvas, you can easily add new cells to customize the layout. Simply hover an image file in between cells until you see two dashed lines appear, then drop it in to create a new cell.
You’ve also probably noticed that you can resize entire rows of collage cells by clicking and dragging them on the layout. But did you know that if you hold the Shift key while dragging you can resize one cell at a time? Perfect for customizing your layouts the way you want!
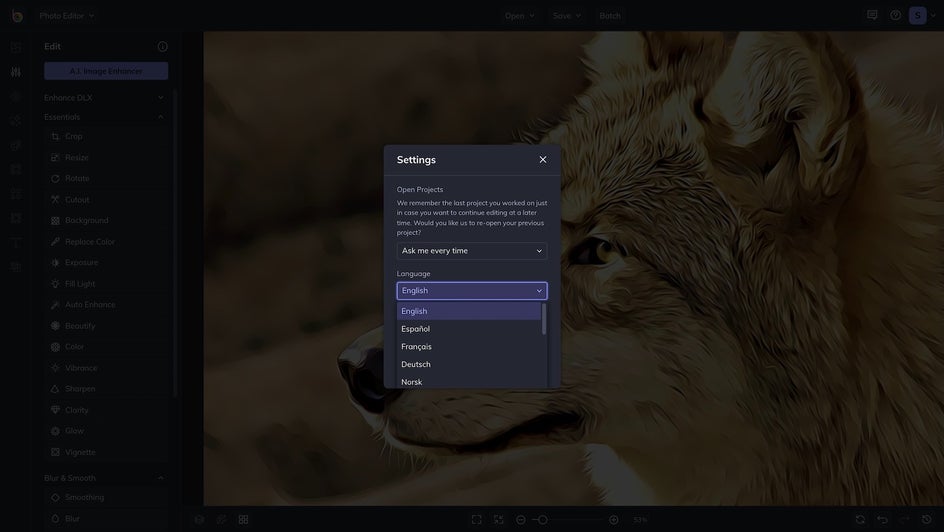
8. Change Your Default Language
Whatever your language preference, you can easily change your default language in BeFunky. Just click your icon (or the dropdown menu) in the upper-right corner of BeFunky’s Photo Editor, Collage Maker, or Graphic Designer. Select Settings and then choose the language of your choice!
9. Add Your Own Fonts
BeFunky’s Text tool comes with a huge library of free fonts, but if you want to add your own fonts to the list, it's easy! Simply head to the Text tab, and add some text. From there, click on the font box, followed by the + button. Finally, choose Add From Computer, and drag and drop any font file that's stored on your computer.
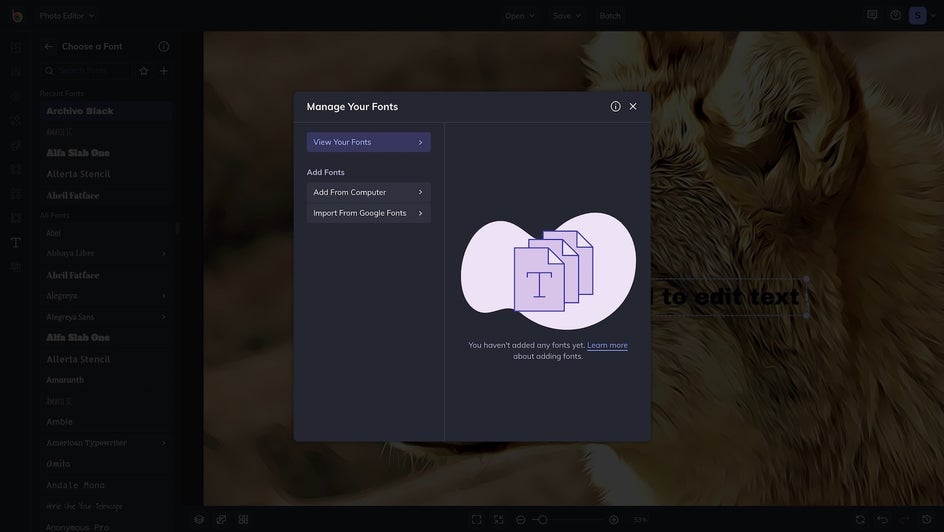
And to make things even better, BeFunky is also integrated with Google Fonts, so you can choose from hundreds more options to add to your font library! In the Manage Your Fonts menu, choose Import From Google Fonts to browse the list and add any you love in a single click.
Any fonts you add from your Computer or Google Fonts will instantly be stored in your font list, allowing you to use them right away.
10. Use Alignment Tools for Precise Placement
Whether you're working on a design, photo edit, or collage, BeFunky offers some helpful alignment tools to make placing layers easy. Just click on the Alignment button in the bottom menu to enable Snap Lines, Display Distances, and Guides. This way, you're able to see the precise distance in pixels between the edges of your layer and the edge of the canvas, relation to other layers, and so on.
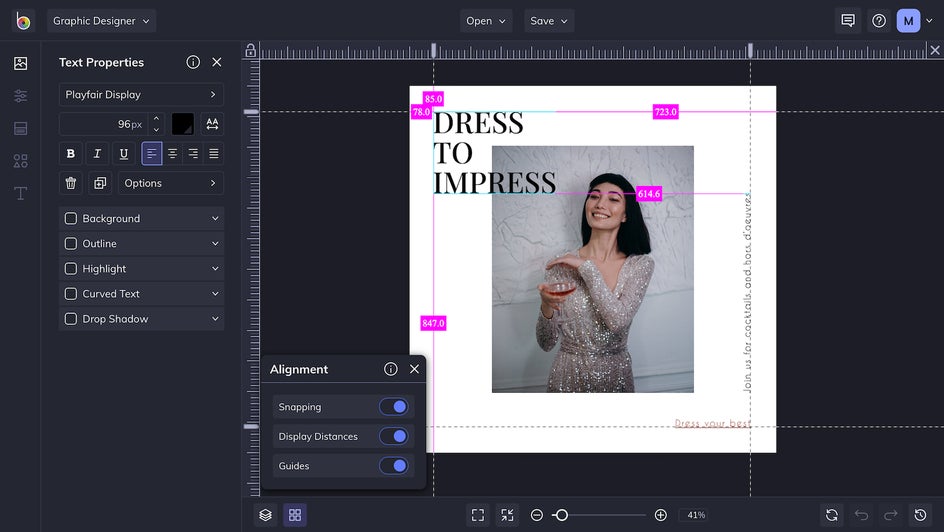
To get super meticulous alignment, you can even use the arrow keys when your layer is selected to nudge it in slight increments. This takes all of the guesswork out of design placement!
If you find that any of the Alignment tools are distracting for your creative workflow, you can easily disable them (and re-enable them) at any time.
Just click the Alignment button in the bottom menu, followed by Disable on Snapping, Display Distances, or Guides.
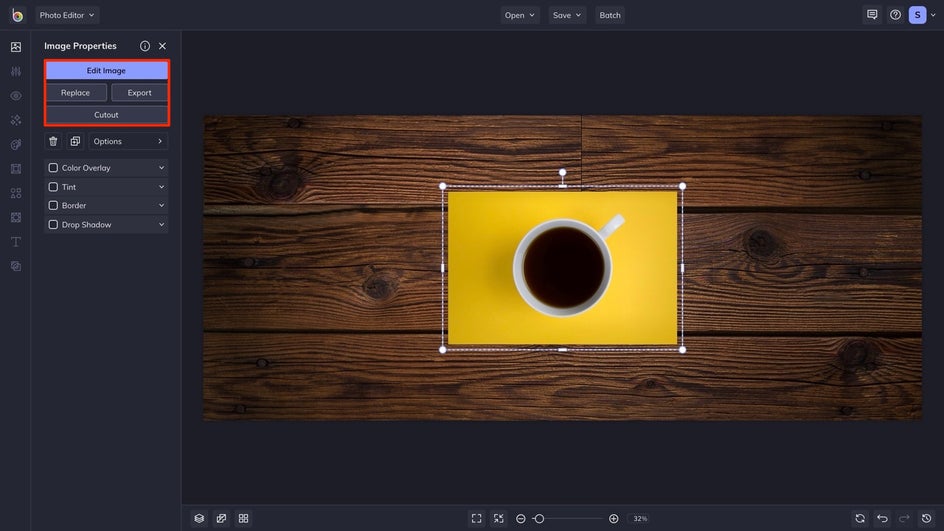
11. Crop, Edit, and Cut Out Image Layers
Whenever you add an image layer on top of another photo, design, or collage, you can use the white rectangles around it to crop it to perfection.
You can also select Edit Image in the Image Properties menu and edit your image layer with powerful tools from BeFunky's Photo Editor, or select Cutout to erase the parts of the image layer you want. That means you can erase backgrounds from image layers or edit them however you want, right on top of the background image!
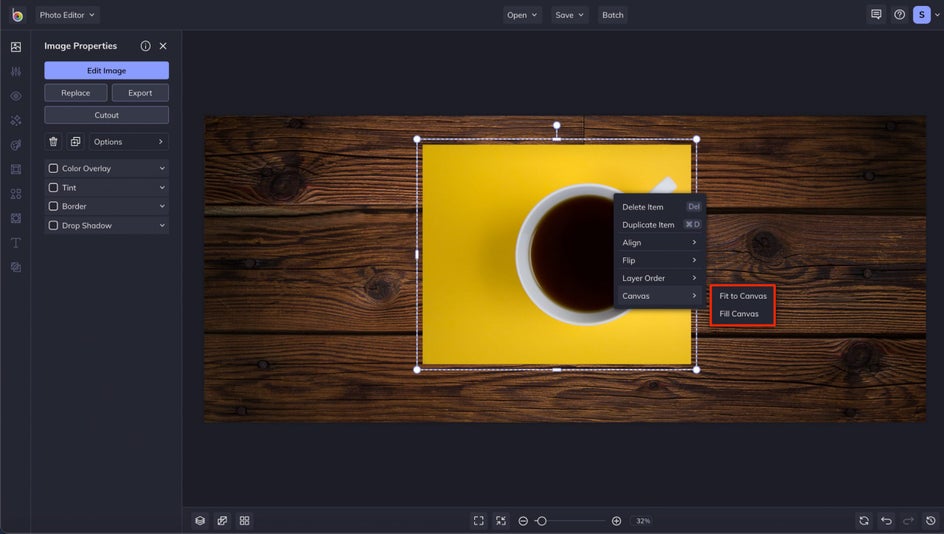
12. Quickly Resize Image Layers
There are a few quick resize options that really come in handy when working with image layers. When you right-click an image layer, click Canvas from the dropdown menu and select Fit to Canvas to fit the layer perfectly to the edges of the canvas, or Fill Canvas to fill the entire canvas with the image layer.
13. Resize and Adjust Layers as a Group
Speaking of layers, did you know that you can hold down the Command key (or the Control key on a PC) while you select them to highlight a whole group of layers? Alternatively, you can click and drag with your mouse over multiple layers for quick selection.
With all of them selected at once, you can use the blue circles around your group of layers to resize and rotate them. That takes the guesswork out of adjusting layers one by one. And if you right-click a group of layers, you’ll have additional options for editing such as moving them forward and backward, flipping them, and aligning them.
14. Match Colors With the Eye Dropper Tool
For all the times you want to make your text or graphic match a certain color on your design canvas, the Eye Dropper Tool will save you tons of time. When your Color Picker is open, click the Eye Dropper icon and select any pixel on your template.
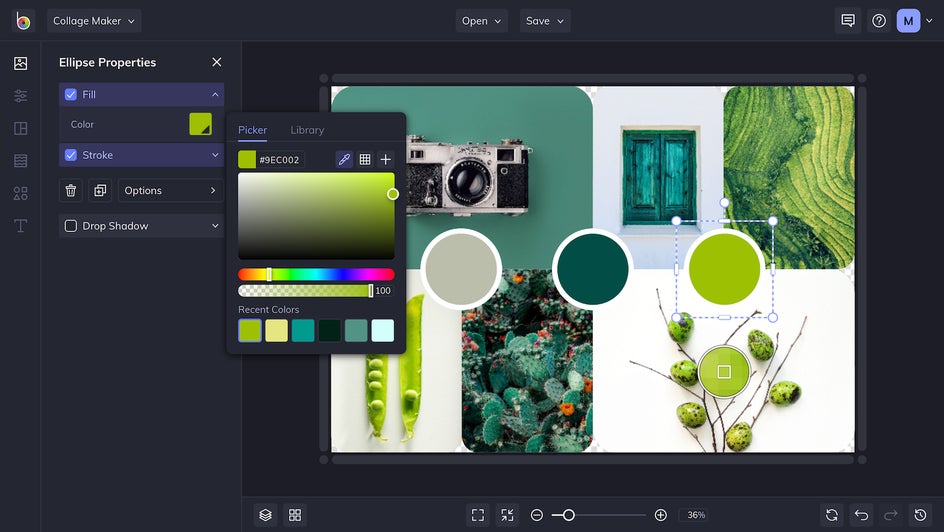
And if HEX color codes are more your style, there’s even a field in your Color Picker to type in the code for ultra-precise color matching. You can also save your most used and beloved colors to your Library by clicking the + icon, found to the right of the Eye Dropper Tool.
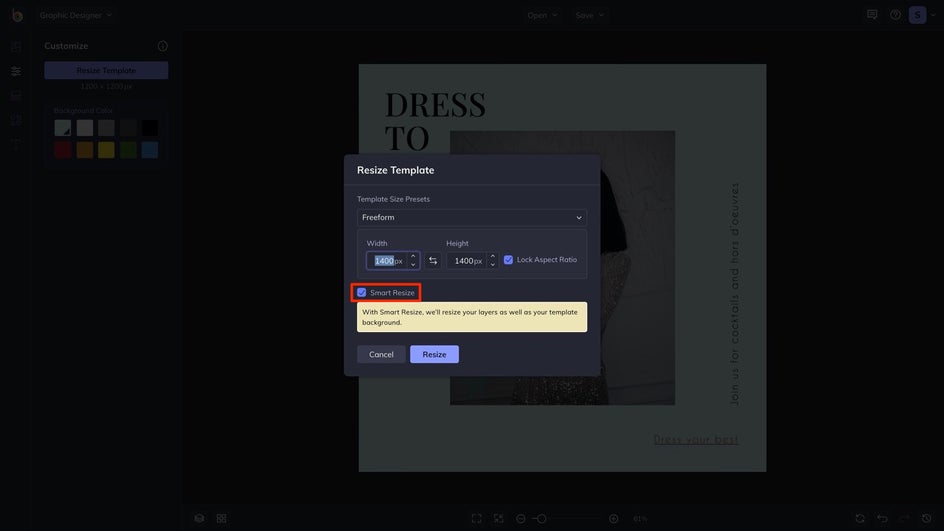
15. Resize the Smart Way
Check the Smart Resize box when you're resizing your project in the Designer to resize your layers to correspond with the template.
16. Fill Graphics and Text With Image Masking
Image masking allows you to fill graphics or text with an image of your choice. You can do this by simply dragging images into graphics or text. It's super easy! And once you've added an image to your layer, you can crop it to best fit the frame. Just think of your graphics or text as cookie cutters for your photos.
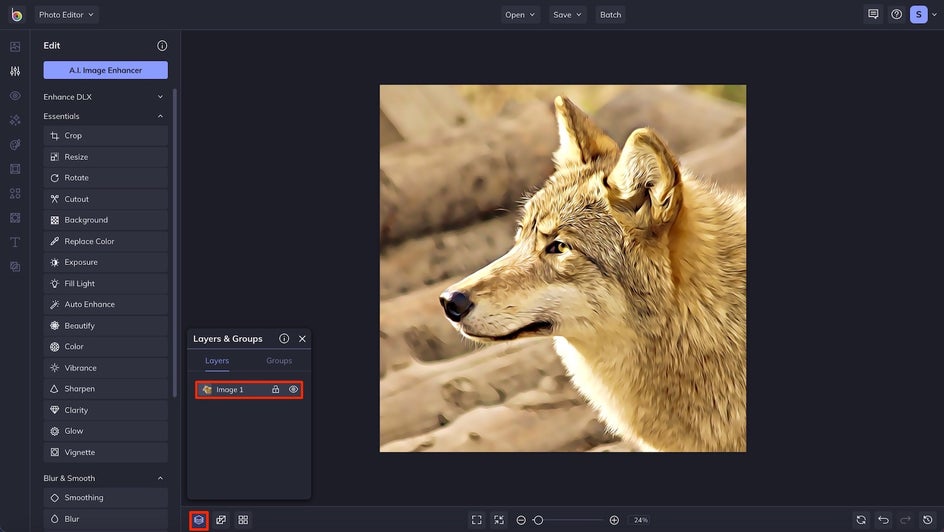
17. Hide and Lock Your Layers
Don't let your layers get in the way – use the Layers & Groups tab to lock and hide layers that you aren't currently editing. This helps keep things organized and prevents you from accidentally editing the wrong thing.
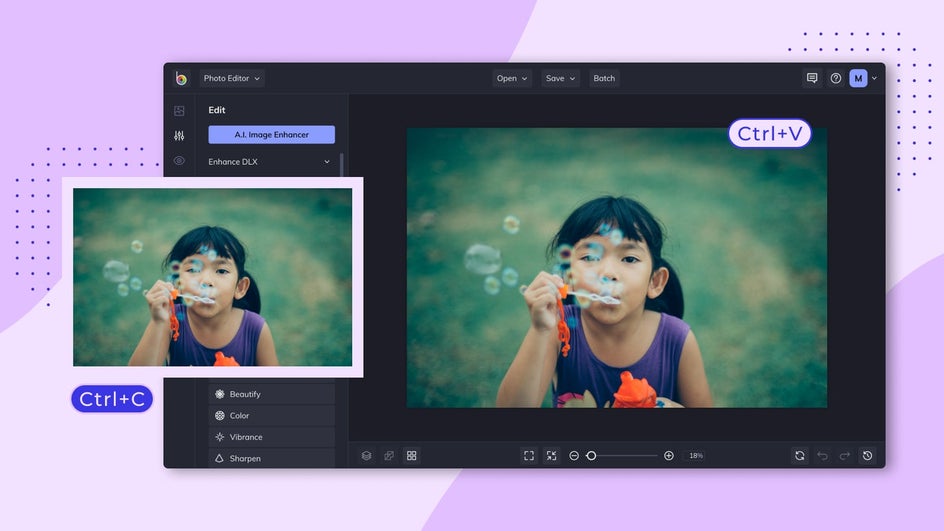
18. Copy/Paste Text and Images
Did you know that you can copy/paste text and images from your computer straight into BeFunky? For the smoothest experience, you'll need to use your keyboard shortcuts when copying (Ctrl/⌘+C) and pasting (Ctrl/⌘+V) your text or images.
19. Switch Between the Dark and Light Theme
By heading to the Settings menu, found in the upper-left corner of your window (next to your initial), you can toggle the Theme Color and the Canvas Color to Light or Dark. There are several pros to each, so having the option gives you the freedom to choose what works best for you. Check out this article to learn more!
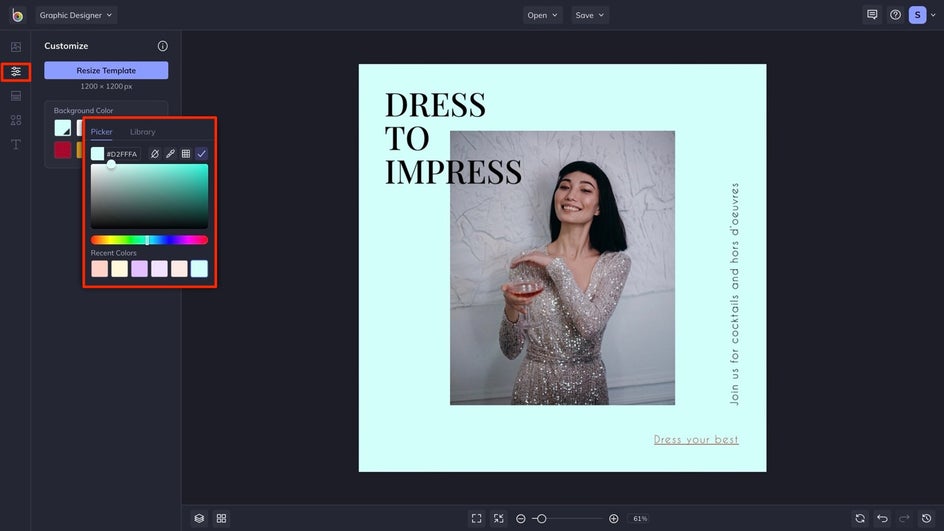
20. Change the Background
By heading to the Customize tab in the Graphic Designer, you can easily change the background color of your canvas. Simply click on one of the preset swatches, or click on the top-left swatch to open the Color Picker.
Become a BeFunky Pro
We're dedicated to providing you with all the best tips and tricks when it comes to working in BeFunky. These handy little things will seriously up your game when it comes to photo editing, collage making, and graphic design. We're excited about how they'll improve your workflow. Keep on learning with the never-ending tips and tutorials with our blog!