The Ultimate Guide to Using Blend Modes In Photo Editing
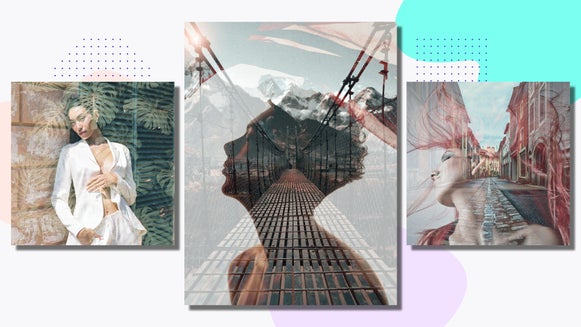
You may not think you know anything about Blend Modes, but the truth is you’ve seen them used in photography for years. They’re one of the most commonly used tools in photo editing and graphic design, and can easily elevate the simplest of images. Using Blend Modes can add artistry and complexity to your project with just a few clicks. All that’s required of you is a thoughtful design and multiple visual layers. By blending layers – whether images, text, graphics, or textures – you’re able to achieve countless different looks across your creative work.
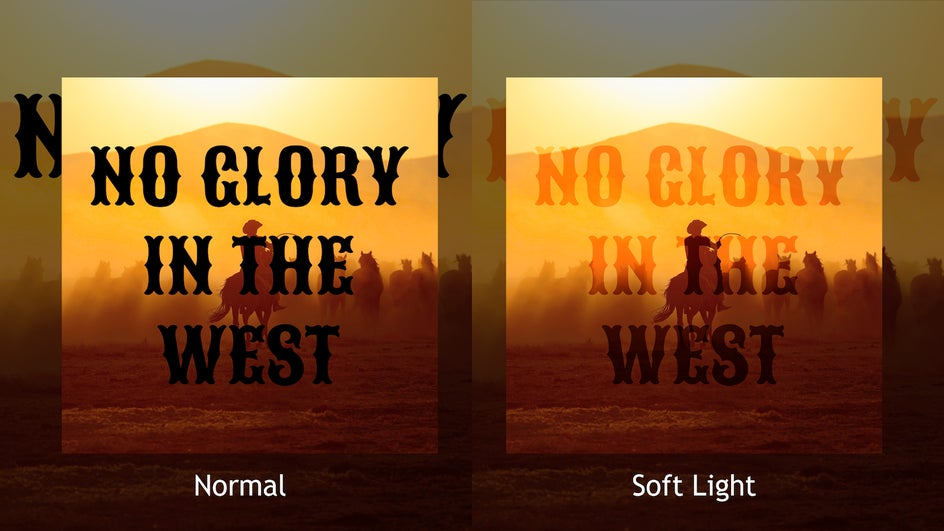
Take the following example: In the first image, we’ve simply dropped text onto an image. In the second, we’ve used the Soft Light Blend Mode to let the background shine through while keeping the lettering intact.
There are dozens of different Blend Modes out there, so you may be a little daunted at the idea of adding them to your arsenal. But don’t worry! We’re going to break down just what Blend Modes are, why they make your projects look more professional, and how to use them yourself. After you read through this article, you’ll have a whole new world of photo editing and graphic design at your fingertips! Whether you’re in the Photo Editor, Graphic Designer, or Collage Maker, these Blend Modes are just waiting to take your creative projects to the next level.
What Are Blend Modes?
In photo editing and graphic design, Blend Modes allow you to do just what the name suggests: blend things together. They allow two layers to interact with one another in order to make a single, complete image. Layers can include images, text, textures, or design elements. Whenever you add a layer onto an image or design, the default Blend Mode is “Normal,” meaning the opaque top layer completely hides the opaque bottom layer. Changing the Blend Mode will change the way those layers interact.
How Blend Modes Work
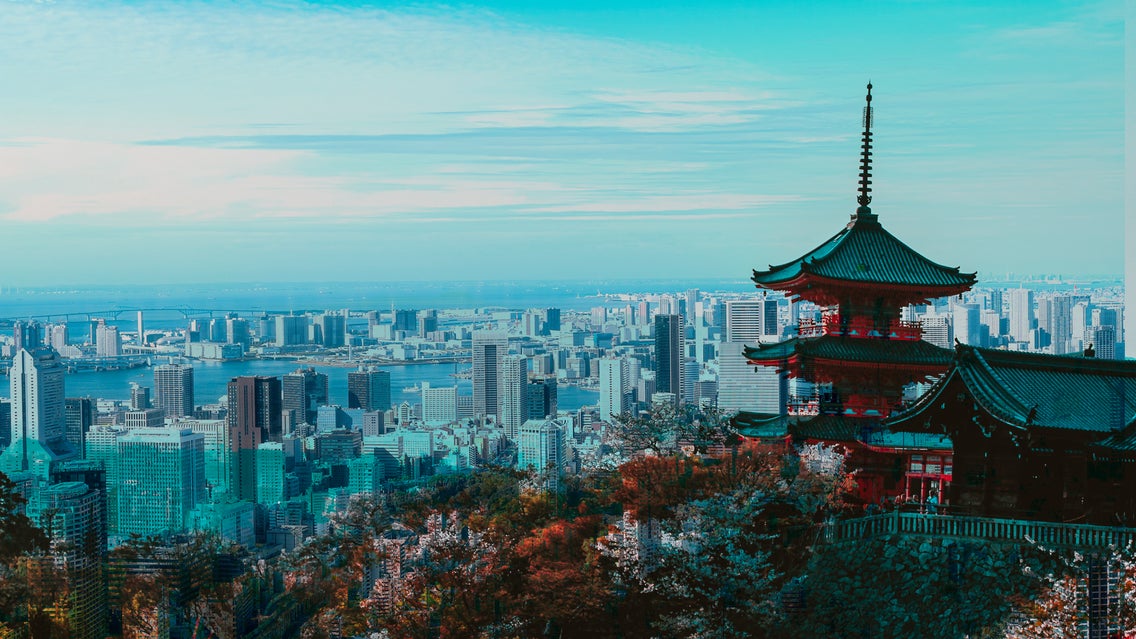
Blend Modes are actually mathematical algorithms that dictate how two layers interact with each other. Luckily, you don’t need to do any math yourself: You can change the Blend Mode in a couple of clicks. By selecting a new Blend Mode for the top layer, also known as the “active layer,” you can essentially tell it how to blend with the bottom layer. In the following image, we used the Darken Blend Mode:
Without Darken, the top layer – in this case, the city – would simply obscure the image beneath. With the Blend Mode, the image looks purposeful and cohesive. This results in a cleaner and more polished end result.
How Blend Modes Elevate Your Photo Editing
Blend Modes are complicated processes made simple. For example, many Blend Modes mimic double exposure film photography without the hassle of rewinding or processing film. This allows you to instantly boost the visual complexity of your work.
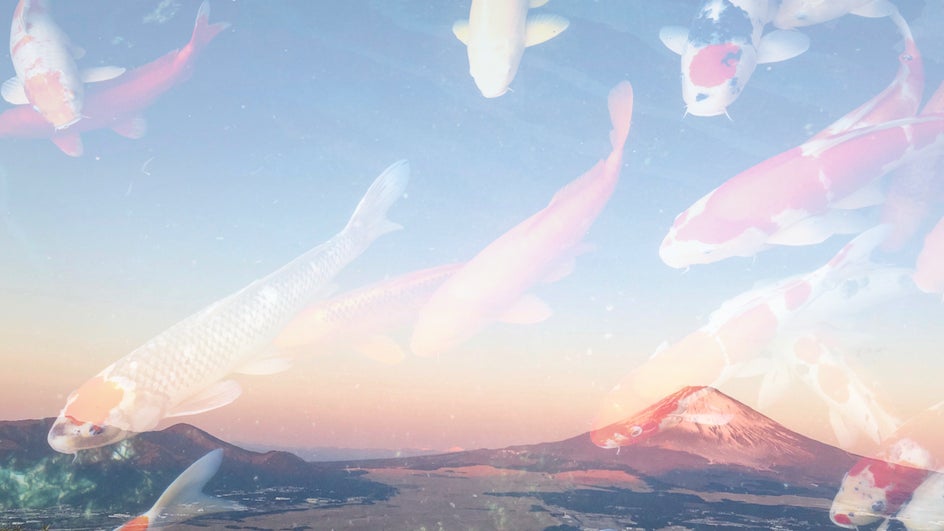
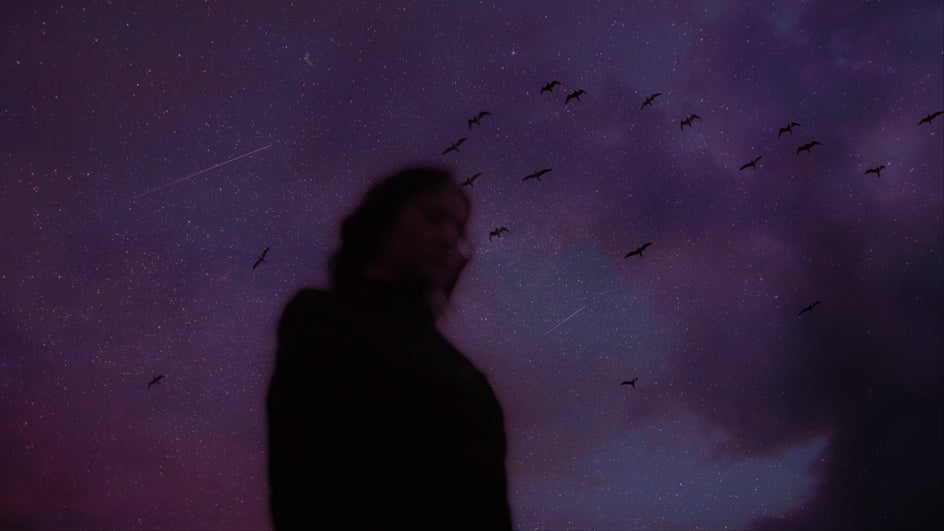
What makes the digital method even better than the analog is that you can play around with the particular mode and opacity in order to capture the mood you want. The above image uses the Screen Blend Mode to achieve a playful, dreamlike quality.
Blend Modes can also be used when working with other layers, like BeFunky's Textures and Effects, or when adding text to photos. By selecting the proper Blend Mode for your elements, you can balance them perfectly with your image, resulting in a harmonious design. This can make your projects look cleaner and more professional than they would look without a Blend Mode.
BeFunky provides a wide range of Blend Modes with a large variety of effects. Even when using the same two elements, changing the Blend Mode can result in dramatically different looks. Read on to learn about a few of these Blend Modes and how to apply them in BeFunky!
How to Layer Images Using Different Blend Modes
Whenever you utilize layers in BeFunky, there are 20 Blend Modes available to you alongside the default “Normal.” Each Blend Mode can be adjusted for opacity. Depending on what element you’re using, you’ll find the different Blend Modes options in the Image Properties, Graphic Properties, or Text Properties menu.
Since there are so many Blend Modes to choose from, we’re going to highlight six of our favorite options: Multiply, Screen, Overlay, Soft Light, Lighten, and Darken. We'll be combining these two images to show you what each Blend Mode can do:
Even though we’re using the same two images, the Blend Mode we choose will make a big impact on the final look.
Overlay
Overlay is one of the most commonly used Blend Modes because of its versatility. With it, light areas become lighter and dark areas become darker, creating beautiful high contrast images. Overlay often allows both images to take center stage, making it one of the best Blend Modes to use to create a double exposure effect.
Soft Light
Soft Light is a gentler take on Overlay, allowing you to combine images with more nuance. It can add a soft fade, but generally keeps the contrast intact. The active layer will usually be less visible than the base layer.
Multiply
Multiply darkens shadows and blends mid-range shades, making it a simple but effective Blend Mode. When you want to add contrast to your image and fill the lighter areas of your base layer, try Multiply! This mode is especially great for replacing bright skies and backgrounds with darker images.
Screen
When you want to add a pale, faded look to an image or graphic, the Screen Blend Mode works wonders. Screen is also a great way to add texture to graphics and photos, including dust, scratches, and light leaks. With Screen, any dark elements on the active layer are going to be less visible, while bright elements will be more visible. It’s often most effective to use an active layer with plenty of texture and brightness.

Lighten
With Lighten, the brightest areas of the active layer completely obscure the base layer beneath. The darkest areas of the active layer allow the base layer to show through. Values in the middle range will be moderately affected. Try adjusting the brightness and contrast of your active layer to see how the Blend Mode changes!

Darken
As you might expect, Darken is the exact opposite of Lighten. Darker elements in your active layer will cover the base layer, while brighter elements allow the base layer to remain visible. Middle ranges will continue to be moderately affected.
How to Use Blend Modes to Layer Images in BeFunky
You can use Blend Modes across all of BeFunky’s Creative Platforms –and if you’ve mastered them in one platform, you’ve mastered them in all three! In this tutorial, we’ll show you how to layer two images in the Photo Editor. The process is the same in the Graphic Designer and Collage Maker, and can also be applied to text, textures, and more.
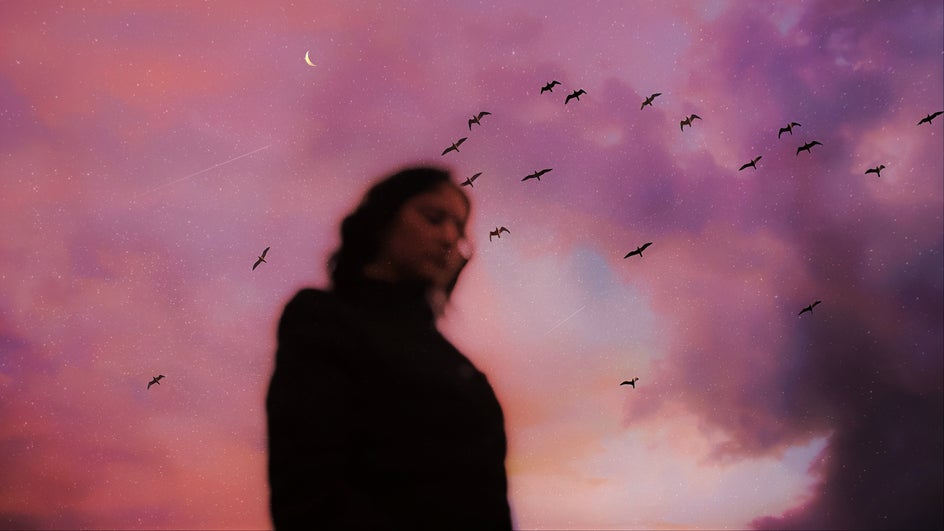
Step 1: Upload Your Base Layer
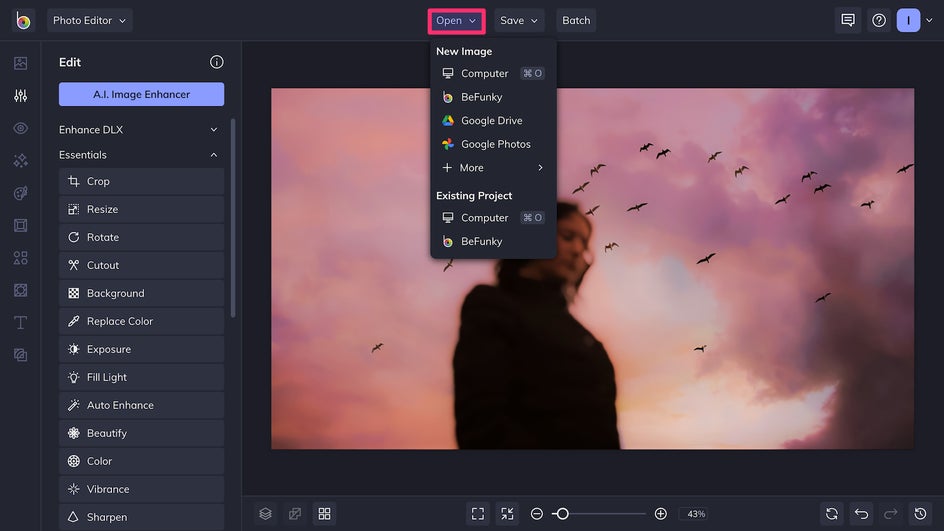
To begin, just head to BeFunky’s Photo Editor and upload an image, either by using the Open tab or dragging and dropping a file from your computer. This will be your base layer.
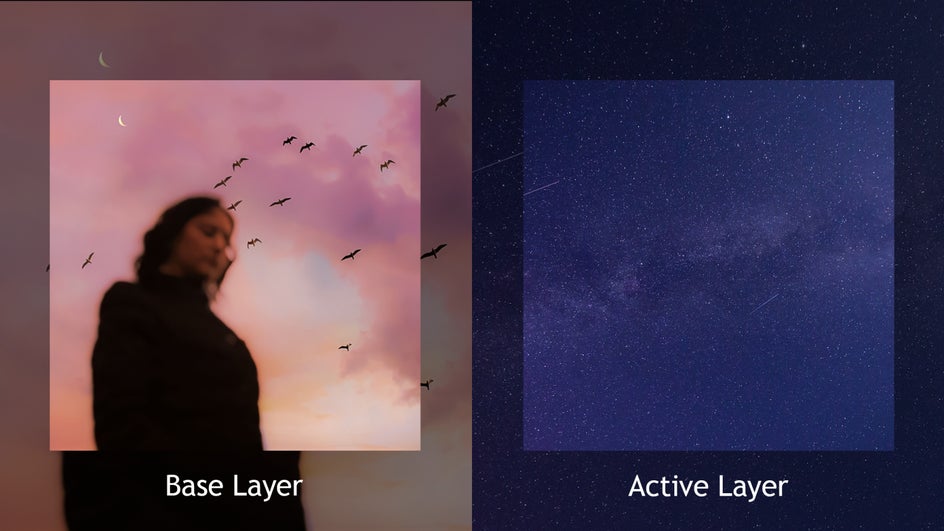
Step 2: Upload Your Active Layer
In the Image Manager tab, upload a file from your computer, your image library, or choose from BeFunky’s large selection of free stock photos. Once your image uploads, it will appear in the Image Manager tab as a thumbnail. To add it to the base image, simply double click the thumbnail or drag and drop it onto your base layer. From there, resize the active image layer by clicking and dragging the blue circles at the edge of the image.

Pro Tip: If you’re ever using more than one layer above your base image, you can manage them by clicking the Layers & Groups icon in the bottom left corner.
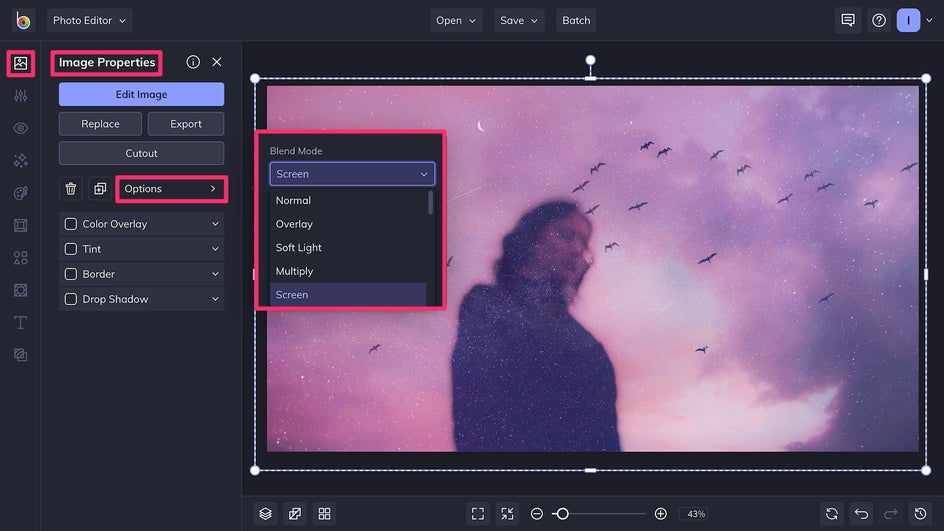
Step 3: Pick Your Blend Mode
You’ll notice that any time your active layer is selected, the Image Properties menu opens in the sidebar. This is where you’ll find your Blend Modes. Click on Options in the Image Properties menu and you’ll see the Blend Modes dropdown menu. Clicking through the different blend modes will allow you to see how they’ll look as they blend your layers together.
Step 4: Customize Your Blend Mode
Once you’ve picked a Blend Mode, there are a few ways to adjust and customize it so that you can achieve the exact look you want. The Opacity tool is helpful for toning down high contrast Blend Modes. It can help you achieve a more natural effect. Using Tint to change the coloring of your active layer can also result in different looks!

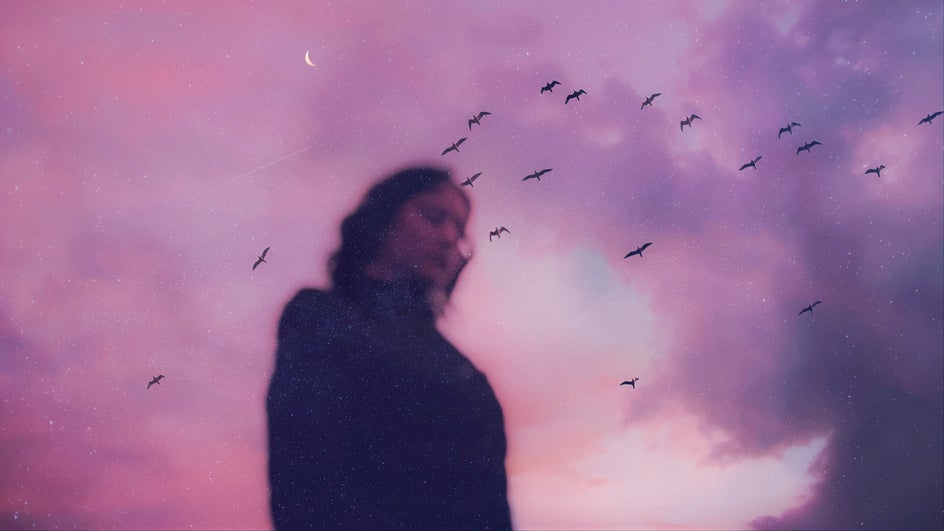
Final Results
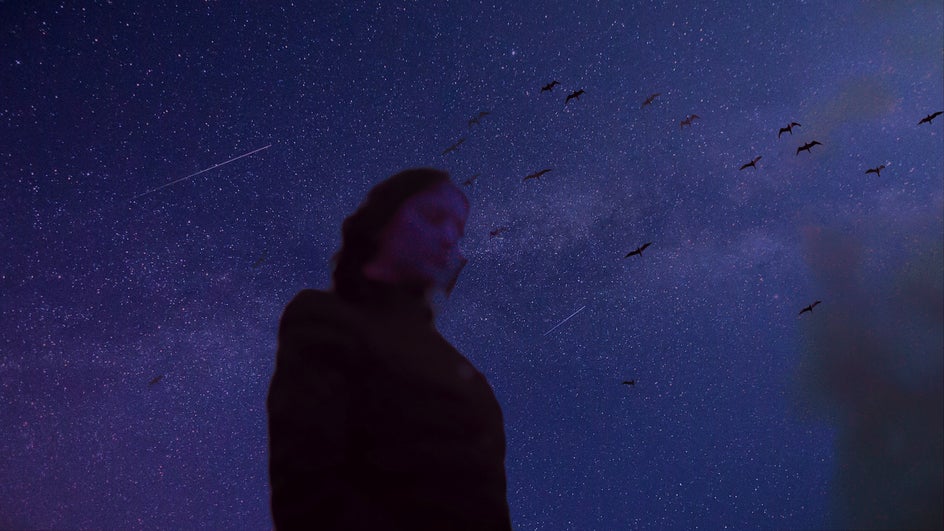
We started off with two very beautiful but very distinct images. Using the Screen Blend Mode at 75% opacity, we were able to layer these images so that they enhance each other instead of competing for the spotlight. The stars add dreaminess and texture to the original image. The lone subject offers a proper focal point for the night sky. Combining the two images results in a completely different mood than each photo can manage alone.
Achieve That Blended Aesthetic
With the wide range of Blend Modes available to you in BeFunky, you’ll be able to create any feeling or aesthetic you can possibly dream of. Remember, you can use Blend Modes when working with any layer, whether that’s text, graphics, effects, textures, or other images. No matter what kind of project you use them for, Blend Modes will help take your work to the next level. They’re perfect for adding unique textures, replacing the background in your photo, creating text overlays, and more. Try out some Blend Modes in the Photo Editor, Graphic Designer, or Collage Maker today!