Blur Images and Create Depth of Field With the Blur Tool
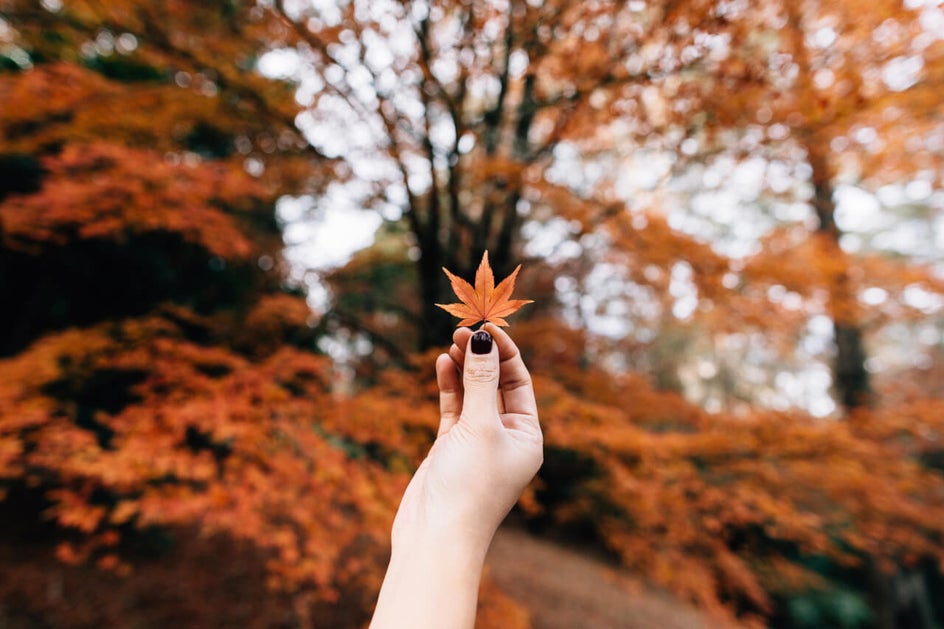
While capturing blurry photos isn’t always ideal, great photos often require just the right amount of blur to bring out details in the right places and add overall intrigue. Most importantly, blur plays a vital role in creating depth of field. This allows you to have a point of focus, while details behind this point blur seamlessly into the background, thus creating a sense of distance.

Whatever look you’re going for, the Blur tool in BeFunky’s Photo Editor can help you blur images a little or a lot - all in a few clicks! Whether you wish to blur photos to create mesmerizing depth of field, add an ethereal haze, or create a sense of movement, this tool lets you do it all.
For those of you wondering “how do I change the depth of field in a photo?” and “how do I blur the background of a picture?”, we’ve got you covered. We’ll reveal our favorite looks you can create with the Blur tool, as well as show you how to blur the background in a photo online using BeFunky.
Your Handy Guide to Photo Blurring
Don’t know where to start when it comes to blurring images? That’s ok! Here are a few instances where the Blur tool really comes in handy:
Add a Blur Effect to the Background
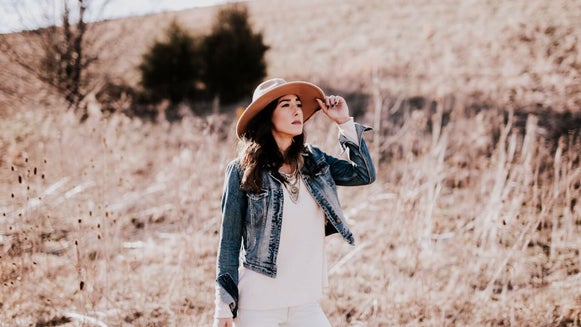
Depth of Field is usually created during the photography process, whether using a DSLR or the camera of a mobile. However, unless you know what camera setting blurs the background, it can be tricky to recreate this look prior to editing.
If you’ve ever struggled with depth of field, you can fake it till you make it with the Blur tool. By using it in Erase Mode, you’re able to paint your desired amount of blur only on the parts of the images you want. In this case, it’s totally effective to create that blurry background you’re wanting.
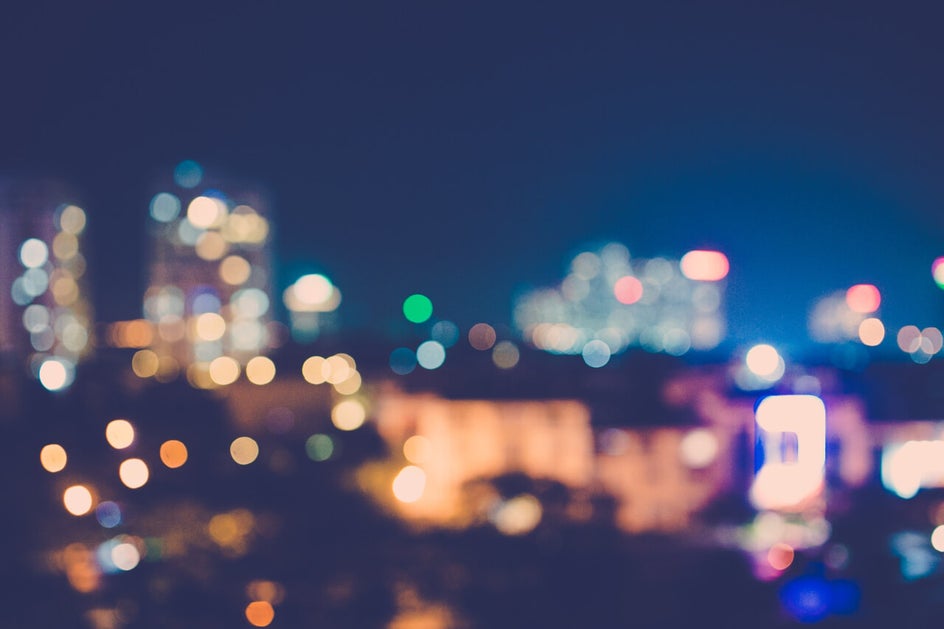
Blur the Entire Image
If a surreal effect is more what you’re after, you can use the Blur tool to blur images entirely. This effect only takes a click, but it adds a really dreamy vibe to your imagery.
Get Rid of Distracting Details
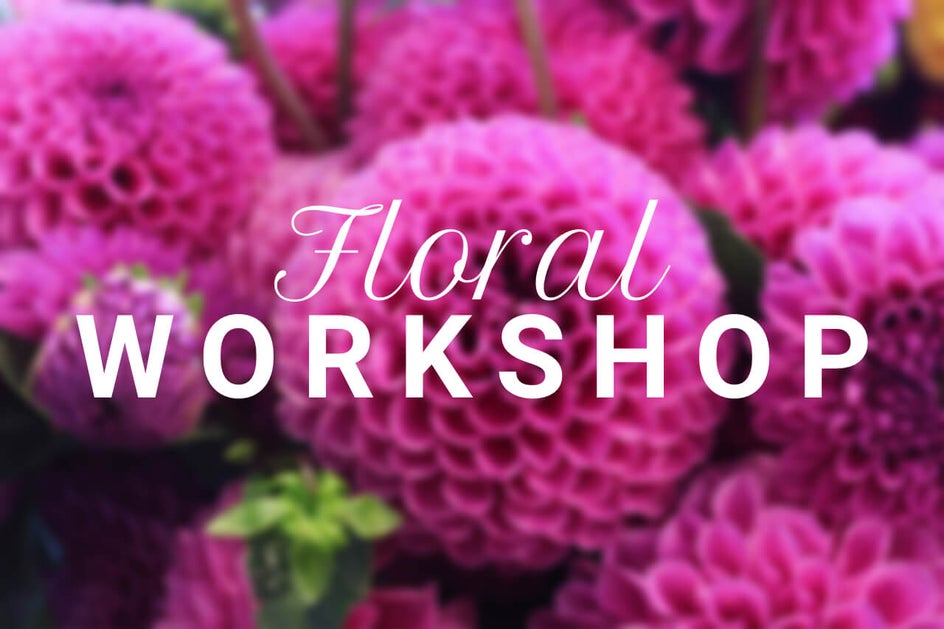
Have you ever wanted to add text to photos or place graphics on top of an image, only to find that all of the details in the photo distract from the focal point? The Blur tool will change all of that. By blurring your image before placing text and graphics, you’re able to keep the focus where it needs to be, all the while keeping the color and added appeal of your imagery.
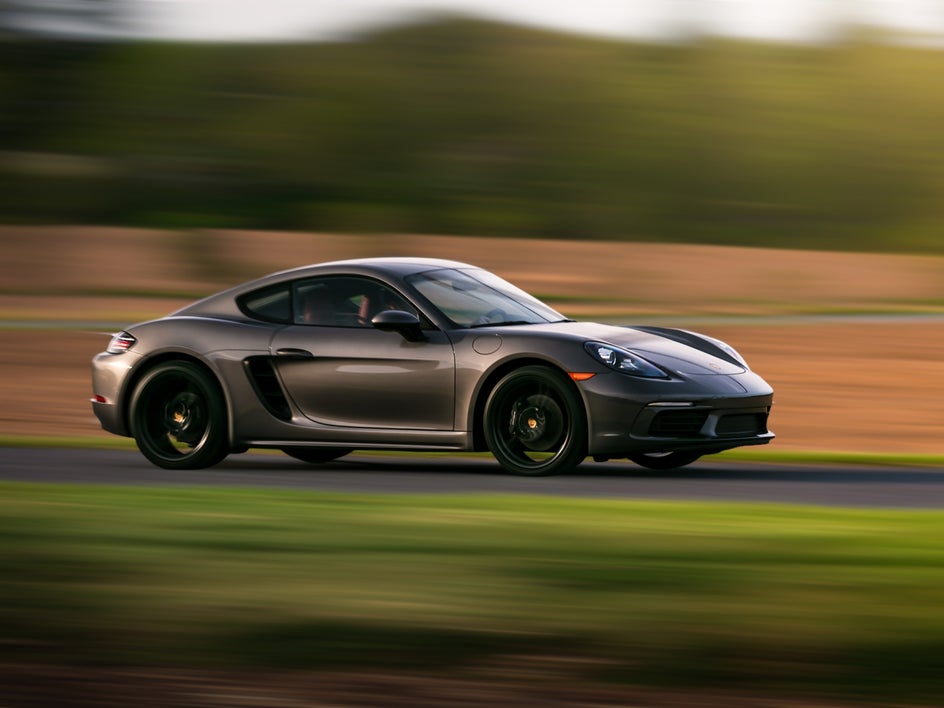
Create a Sense of Speed With Motion Blur
The Blur tool also has a Motion setting, which adds a linear directional blur to your image to imply motion or speed. You can even adjust the direction you want your blur to go, helping to make the blurry effect even more in-tune with your subject.
For example, if you were adding the Motion Blur to a photo of a car, you might set the direction to horizontal to imply that it is driving fast in a forward motion.
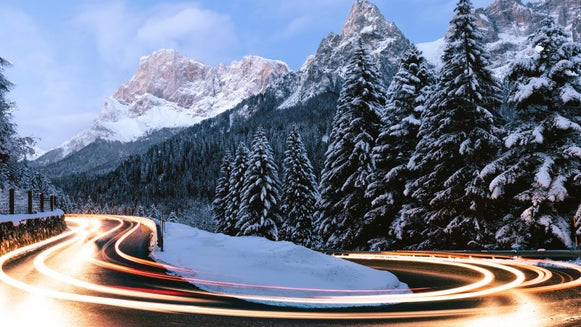
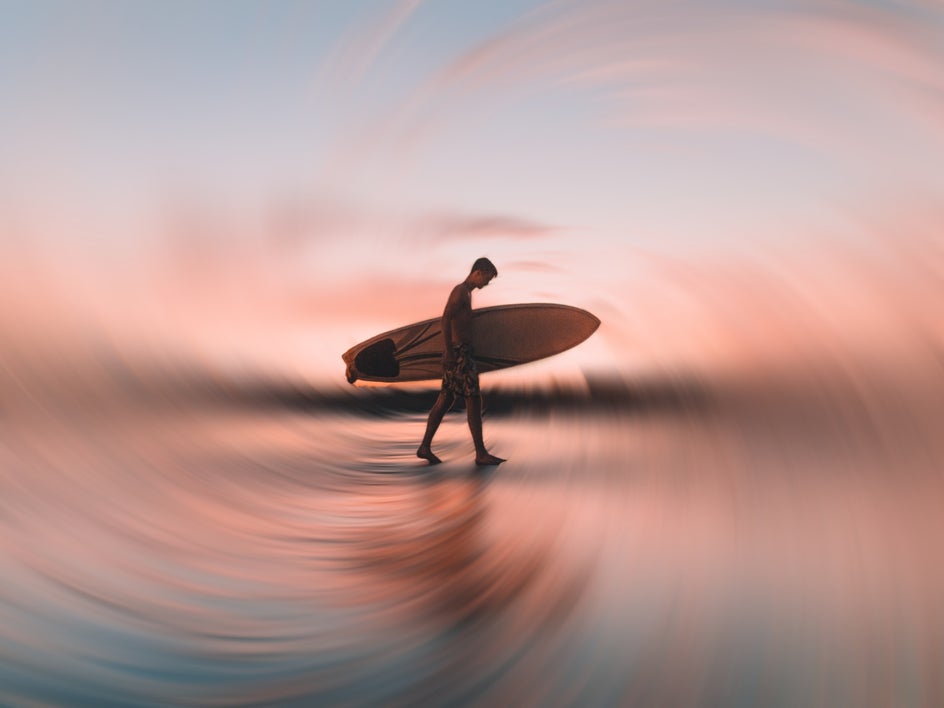
Add a Radial Blur for a Fun Vibe
The Blur tool also has another fun customization for your blurred effect. The Radial Blur effect creates a swirled circular blur, which is perfect for creating the look of swirling water or something more abstract, like a time warp. It’s a fun and unique way to blur your image, whether you apply it to your entire photo, or only blur the background.
How to Blur the Background in a Photo Online and Create Depth of Field
Ready to use the Blur tool to create depth of field within your own image? To get started, head to the Photo Editor and open an image of your choice.
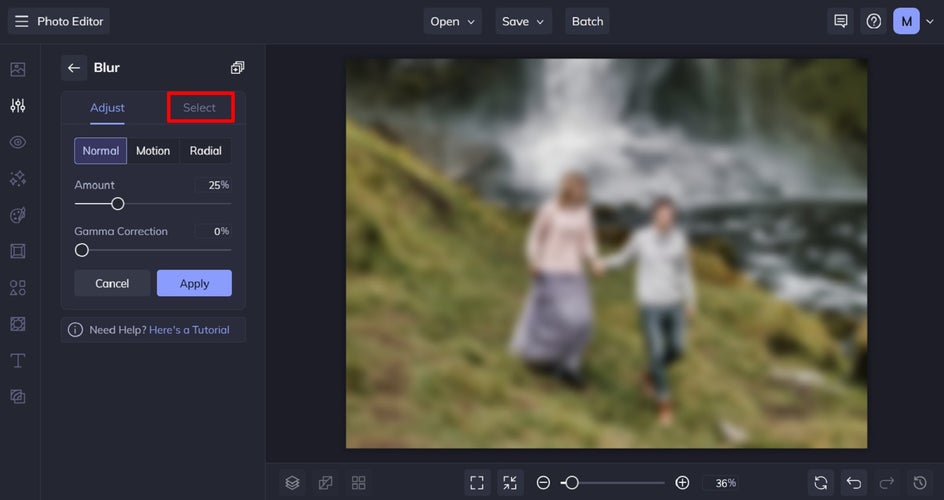
Step 1: Locate the Blur Tool
Navigate to Edit from the main menu on the left, then scroll to the Blur category. This tool can also be found under the same section of the mobile app.

Step 2: Click on the Erase Tab
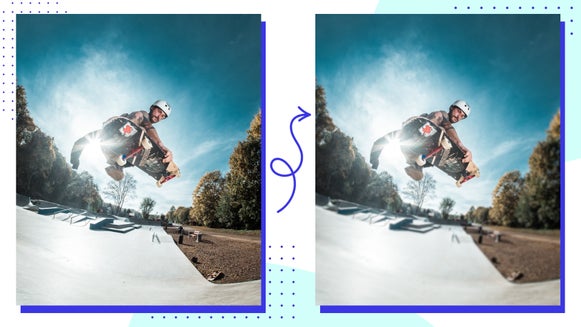
Once you’ve clicked on the Blur tool, you’ll find that the entire image becomes blurred. Don’t worry for now, as we’ll be showing you in the next step how to selectively apply the Blur tool so it creates depth of field and leaves your subject crisp and clear.
While there are a few different blur effects that you can choose from (Normal, Motion, and Radial), we recommend sticking with Normal for this tutorial.
Then, simply click on the Select tab, located next to Adjust, to proceed.
Step 3: Isolate Your Blur Effect
In the Select tab, you can now choose where to apply the blur with the Apply To dropdown, invert your selection, or customize the effect area with a brush. These tools will help you achieve a realistic depth of field look.
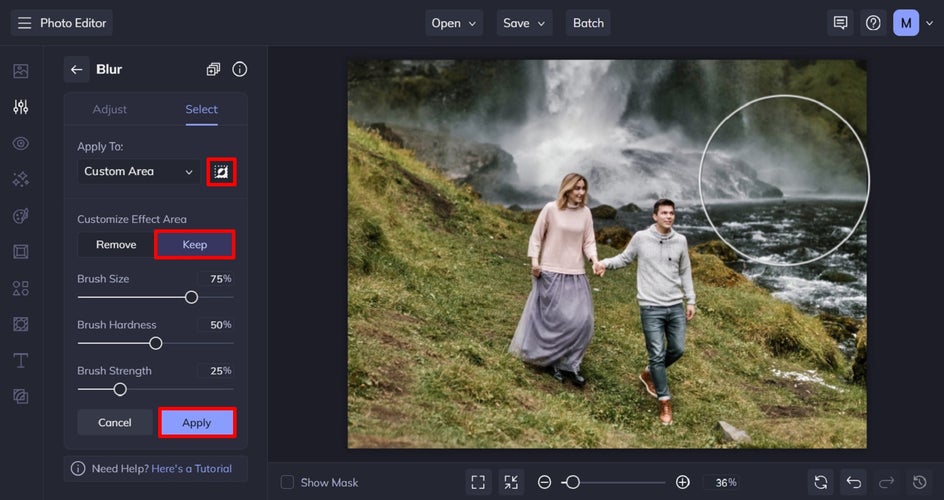
Use the corresponding sliders to adjust the brush size, hardness, and strength. Then, use your cursor to paint your blur effect where required.
To create depth of field, you’ll want to apply the Blur tool on the background or ‘furthest point’ in your image. This will draw even greater attention to your foreground. Or, you can apply the Blur image tool to the foreground and set your image’s subject into the middle ground.
You can also use the sliders to adjust the hardness and strength of your blur as you go. For example, you might want the furthest point in your photo to be super blurry, while other areas of the image become less blurry the closer they are to the foreground.
When you’ve finished creating your depth of field effect, simply click Apply to apply your changes.
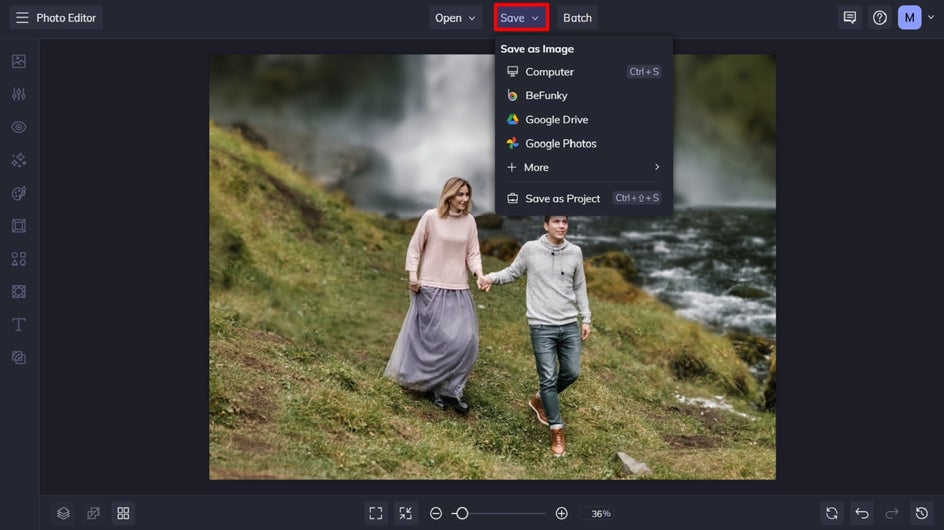
Step 4: Save Your Blurred Image
You can then keep on editing your photo with BeFunky’s vast library of other photo editing tools and effects, or click the Save button at the top of the Photo Editor to save your work.
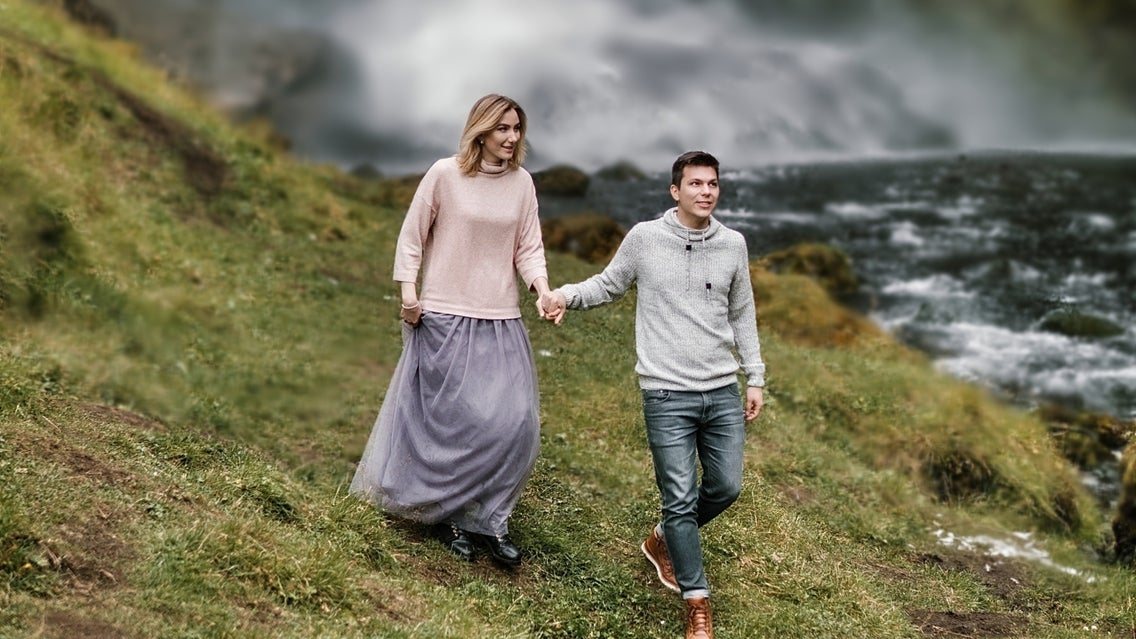
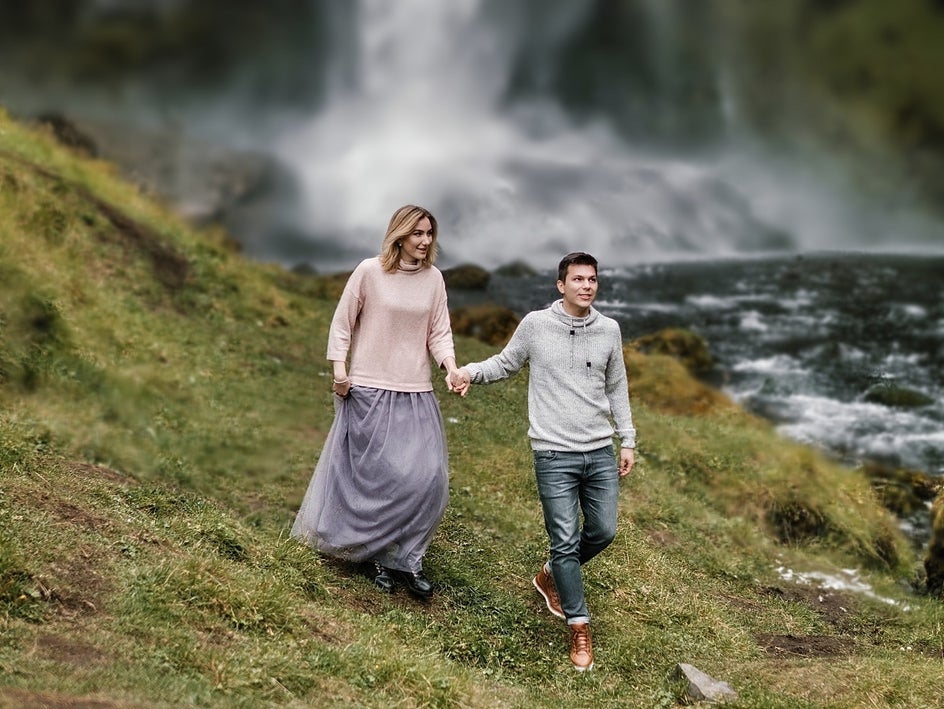
Final Results
The Blur tool creates a depth of field effect that’s so realistic that it’s hard to believe it was created with just a few clicks and not a DSLR!

Use the Blur Tool to Create Depth of Field in Seconds!
Thanks to BeFunky’s Blur tool, creating depth of field in a photo has never been so easy! All it takes is a few minutes of your time, along with the use of just one handy tool.
What incredible depth of field looks will you create? Try out the Blur tool for yourself in the Photo Editor today!