6 Ways to Add a Blur to Your Photo
The ability to blur parts of our focus plays an important role in our everyday lives. Whether we are looking for someone in a crowd, driving, or taking in the view after a hike, we are constantly blurring parts of our viewpoint to focus on the most important thing in front of us. If you apply this same concept to your photography, you’ll be able to choose the main focal point of your image and blur less important details – this way, you can manipulate what your audience notices first about your photo. There are many different tools you can use to intentionally blur photos to achieve certain blur techniques, but before getting into that, let’s talk about why you would blur a photo.
Why Blur Your Images
There are many reasons why you might want to add a blur to your image. First, you add blurs to images because it helps you focus on a specific part of the frame. Blur manually controls your focus. Blur can also give you the ability to add depth of field to your photos or apply a motion blur to give the effect of movement.

Usually, these techniques involve using specialty cameras or lenses, which can get pretty expensive. With BeFunky, you can apply many of these blur tools in the editing process to get a very similar effect that a high-end lens would give you.
The Top 6 Tools for Blurring Photos
With BeFunky’s Photo Editor, you have five amazing tools to help you easily blur photos and get the look you’re going for in the editing process. We are going to go over Tilt Shift, Vignette, Blur Tool, Blur Edges, and Pixelate. These can be found in both the Edit and Effects tabs. We’ll show you how each of these tools can help you achieve a different type of blur.
The Tilt Shift Effect
The Tilt Shift effect comes straight from tilt-shift camera lenses. These lenses blur the top and bottom of a frame so that your focus falls on a straight line through the center of an image. This was a super popular lens many years ago and I think that it should be a classic camera lens in anyone's kit because it gives a unique effect you just can’t get any other way – until now.
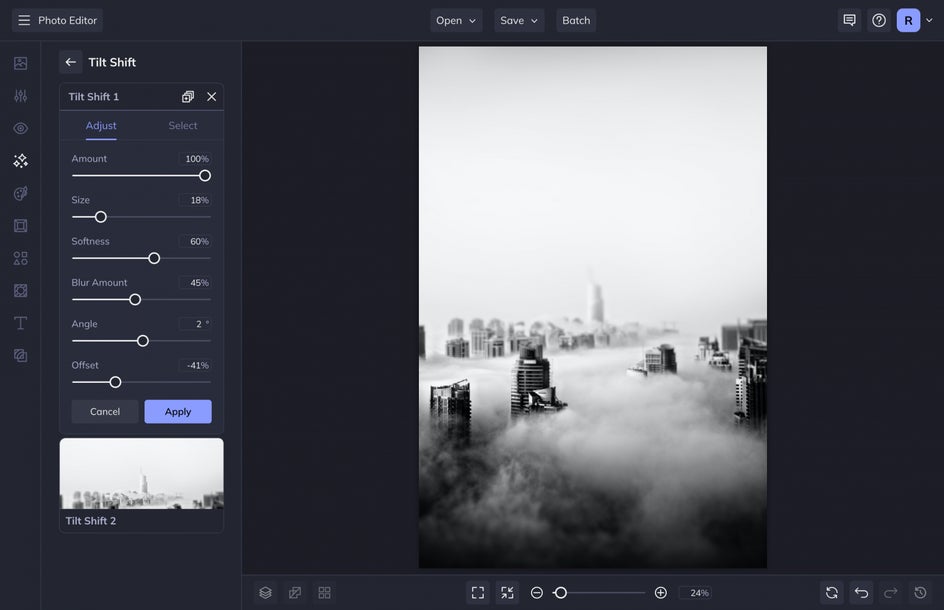
You can find Tilt Shift in the Effects tab and it applies the same effect a tilt-shift lens would to your image. Simply click on the option and then choose the version of tilt-shift that you want to apply. After you apply it, you can click on the settings and adjust the effect further with options like the Offset, Angle, and Blur Amount.
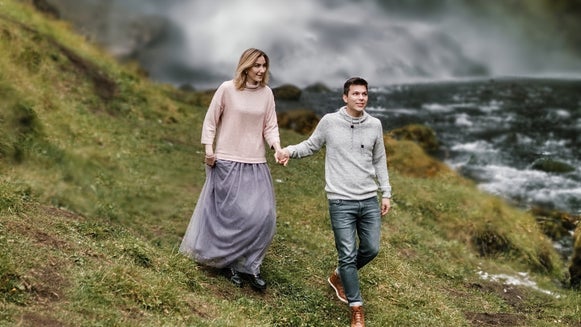
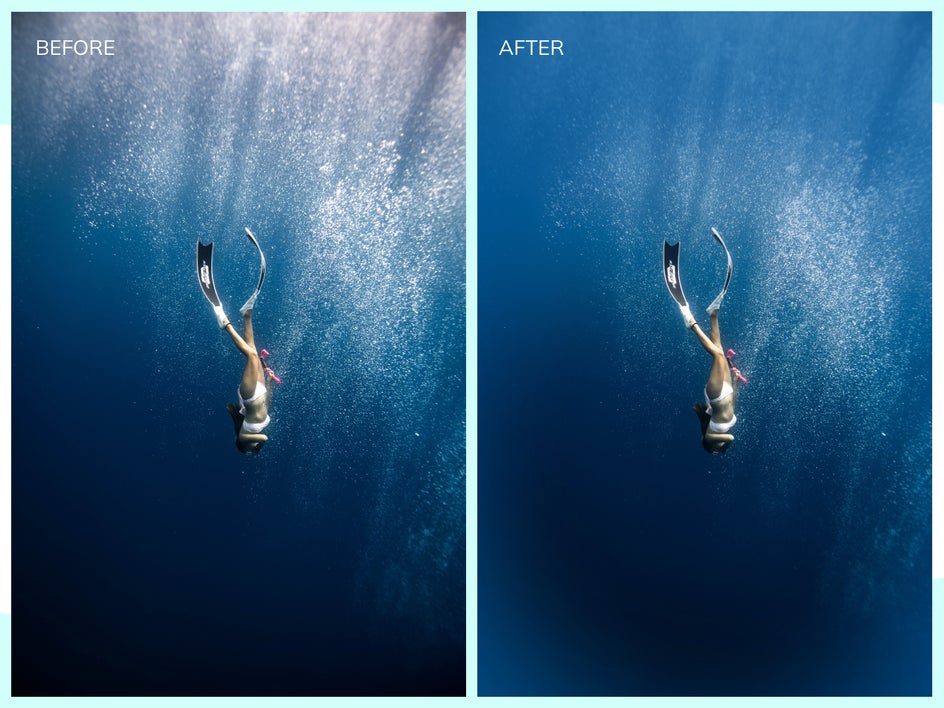
The Vignette Tool
You can find the Vignette tool in the Brightness category of the Edit tab. Create a blurred look with the Vignette tool by adjusting the Outer Color to a color similar to the background that currently exists. Remember, the point is to have your eye focus on the main subject, so by applying a dark ring around the outside of your image, you draw the eye into the center of the image.
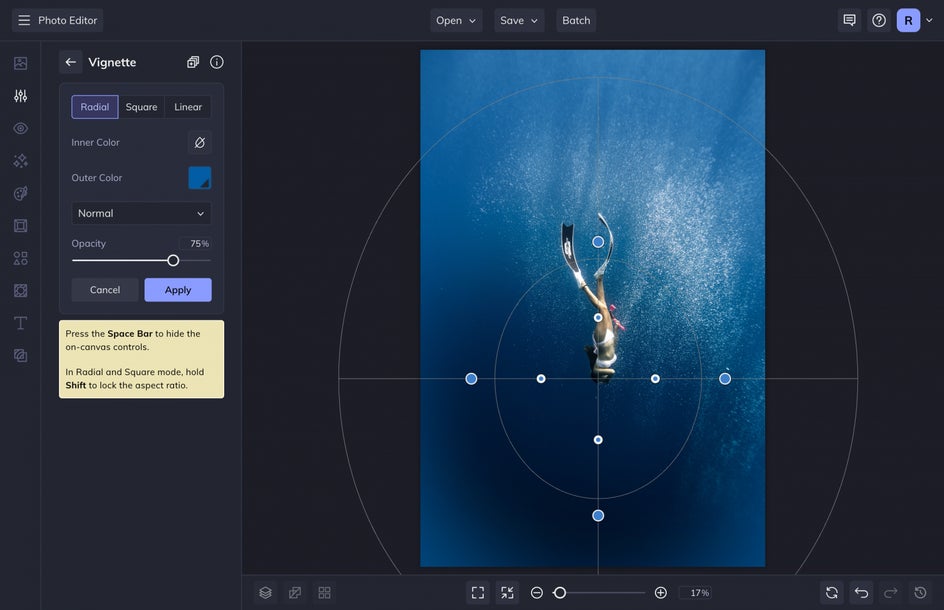
Take a look at the before and after once we apply this tool:
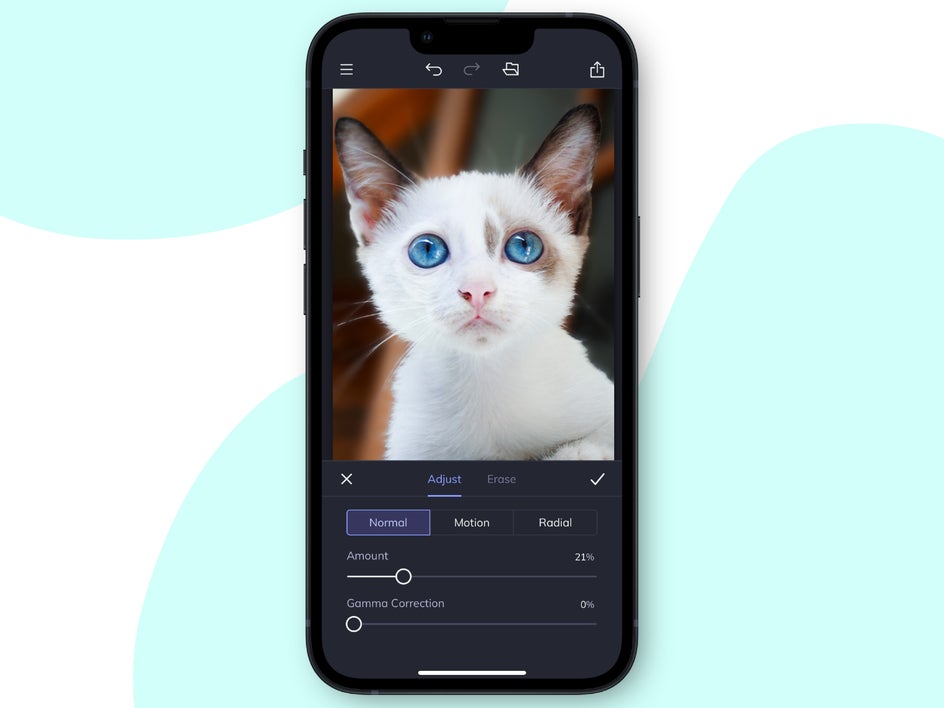
The Blur Tool
The Blur tool is free and gives you the ability to blur an entire photo or selectively blur photos by painting the effect exactly where you want it. This is also the perfect tool to use when you want to create depth of field in your frame, as it mimics the kind of depth of field you would get from an expensive lens, at a fraction of the cost.
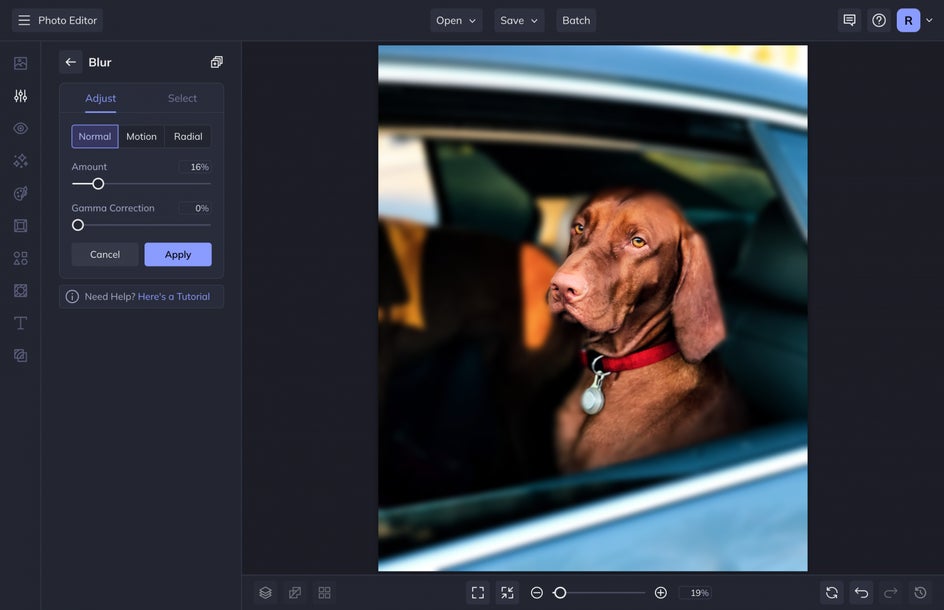
After clicking on the Blur tool, you’ll find that the entire image becomes blurred. This is a great option if you need to blur a photo before adding text to photos if you need a background for a poster or other design. You can adjust the amount of Blur using the Amount slider.
To create depth of field in a portrait or image click on the Select tab. Select Background from the drop-down menu to let AI apply a blur to only the background of your image. After you do this, you can apply blur to the edges of your foreground or subject to blend the effect. Select the Keep tab and then adjust your Brush Size and Brush Strength and paint the part of the photo that you want to blur. From here, you can click back over to the Adjust tab to increase or decrease the amount of Blur you’ve painted onto the image.

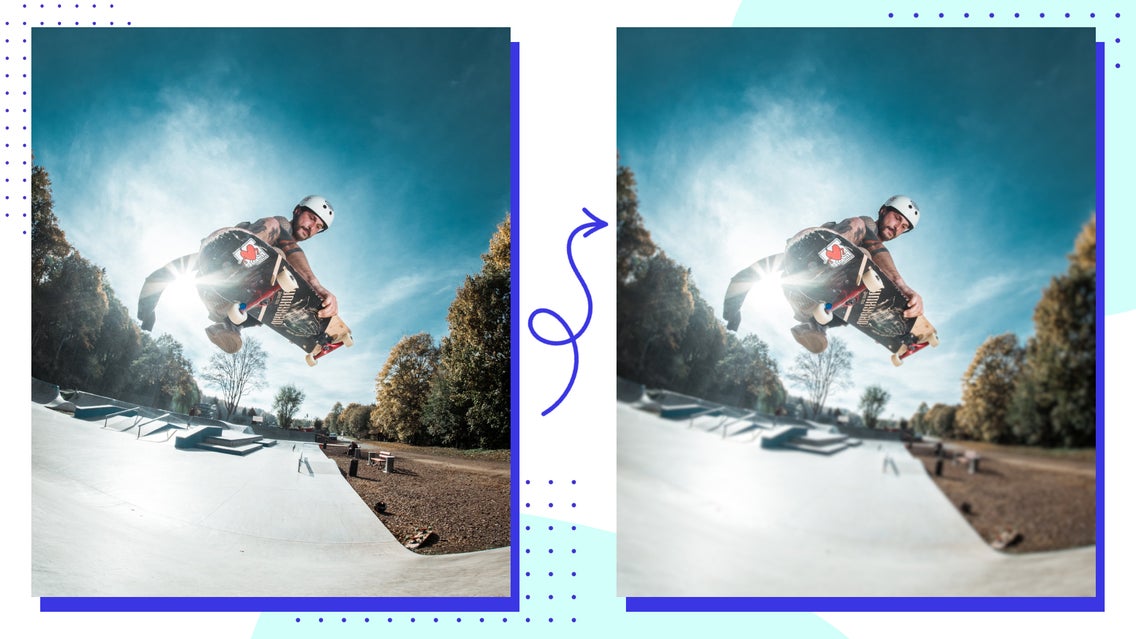
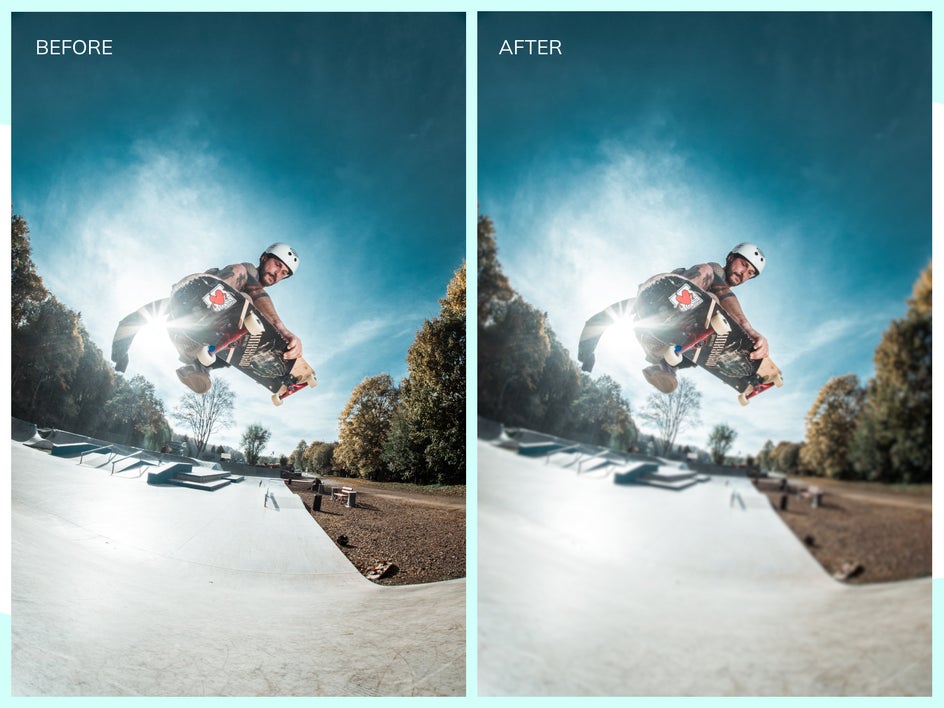
The Blur Edges Tool
If you simply want to blur the edges of your photo, the Blur Edges tool is the best option – and it’s free to use! This can be found in the Edit tab under the Blur menu. Simply select the Blur Edges tool and adjust the sliders for Size, Blur Amount, Shift Vertical, and Horizontal. This will help you find the perfect balance of blur and will give you the most control when applying blur to the edges of your image.
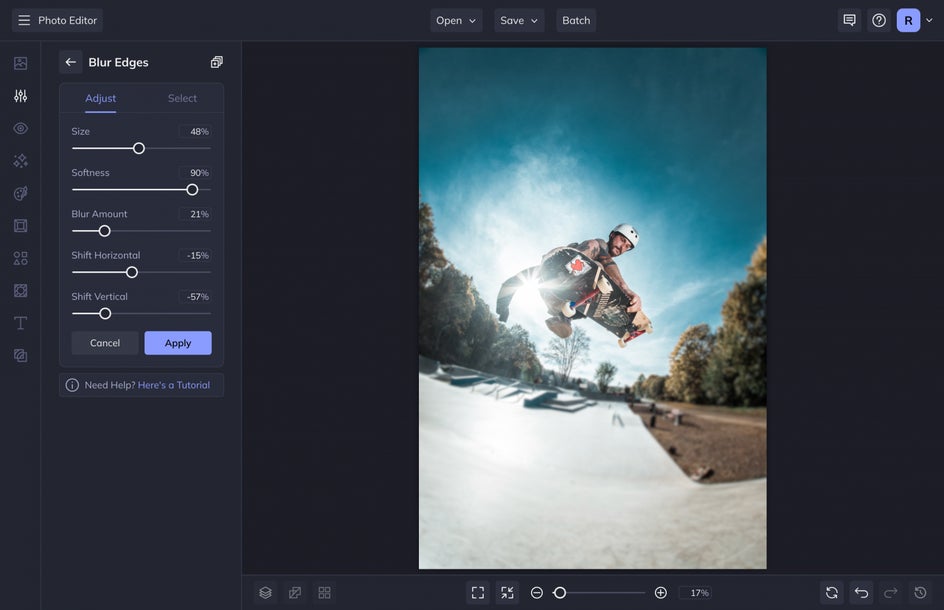
Play around with these sliders to get your desired look. The blur on this allows you to adjust the circumference of the blur around your entire photo. If you just want to blur the outer area of your image, decrease the size; if you want a very concentrated focus, increase the size.
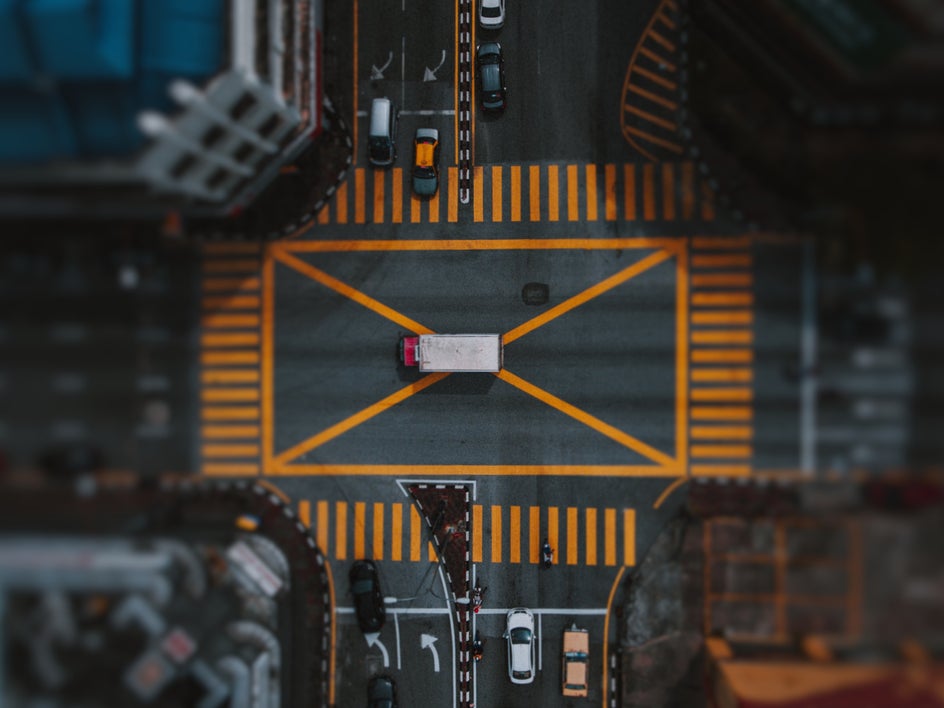
The Pixelate Tool
Usually, when something is pixelated we try to fix or smooth it, but adding a pixelated effect can be cool if you are creating imagery for a background of a design. It gives enough texture to your design to be creative, without taking away from the image’s overall shape and look.
The Pixelate tool is free to use on BeFunky and can be found in the Edit tab under the Blur tab. Simply apply the Pixelate tool and then adjust the Amount slider. Here’s the before and after:
Take a look at how you can use a pixelated image like this in one of the templates in our Poster Maker:
The Lens Blur Tool
The Lens Blur tool is a great way to add bokeh to images. Whether you want to turn the entire image into a bokeh or you want to select just the background to have a bokeh effect, this tool can do it.
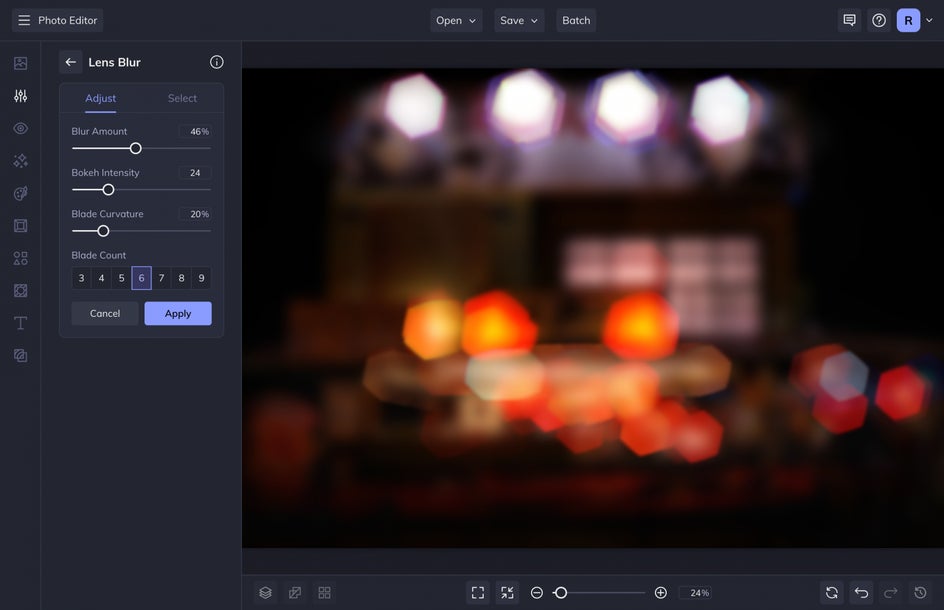
Simply select Lens Blur from the Blur menu in the Edit tab. You can adjust the Blur Amount, Bokeh Intensity, Blade Curvature, and Blade Count. With these options, you can achieve many different bokeh effects.

If you want to learn how to apply bokeh to just the background of an image, check out this article.
Blur a Picture on Your Phone
These techniques are all simple to achieve straight from your phone or mobile device, you don’t need a computer for it! Simply download the BeFunky app on Google Play or the App Store. Locate these tools near the bottom of your screen in the Edit and Effects category.
Create Photo Blurs in Seconds
By using any of the blur tools above, you can focus on certain areas in your photos that you want the viewer to pay attention to. Upload your photo into BeFunky’s Photo Editor to get started.