The NEW Clarity Tool: The Sharpest Images Ever.

We have all been there: arriving at home after having an amazing day shooting one of your favorite sessions, only to find that the photos you took don’t look as sharp as you thought they were. When your photos look hazy and out of focus, it can be completely aggravating and make you feel like you’ve ruined a good session. After all, no matter what type of photography you’re shooting, it’s essential to produce photos that have superb clarity and detail.

Even with the best cameras out there, the clarity in your photos can still be lacking under imperfect lighting conditions - so how do you rescue them? Oftentimes using too much image sharpening in post processing can make an image look grainy, cause halo effects, or simply make your photo look over-edited.
Thankfully, when we reimagined the new BeFunky, we decided to create the most powerful, easy-to-use tool for bringing out your image details and depth without the look of an oversharpened photo! Get ready to meet the NEW Clarity tool for enhancing your images in just a few clicks. It’s a professional-grade tool you’ll want in your toolbox for making your images look oh-so-sharp, even when they looked like they couldn’t be rescued. We’ll show you how!
What Does The Clarity Tool Actually Do?
Even though typical image sharpeners and the Clarity tool have the same goal in common (to sharpen the details in your photo), there is a huge difference between sharpening a photo and adding Clarity to it.
When you use a Sharpen tool, it works by adding contrast to the edges of objects within your frame, leaving most of the details in between alone. There are definitely some instances where adding contrast to the edges is appropriate, but it’s a tool that should be used sparingly. Too much image sharpening produces too much contrast, quickly leading to halo effects around objects and a grainy, pixelated texture to the entire photo. Not the best look.
On the contrary, rather than only affecting the edges of objects in your photo, the Clarity tool allows you to enhance a wider area in your image by adding contrast to the midtones. That means you’ll get super sharp details and depth within your image without creating the look of an oversharpened photo! By increasing the midtone contrast, your image will appear more naturally sharp and smoothly detailed, like you captured the photo with the fanciest camera on Earth. In other words, the results will be more similar to what your eyes would have seen when you looked at your subject.
How To Use The Clarity Tool To Sharpen Image Details
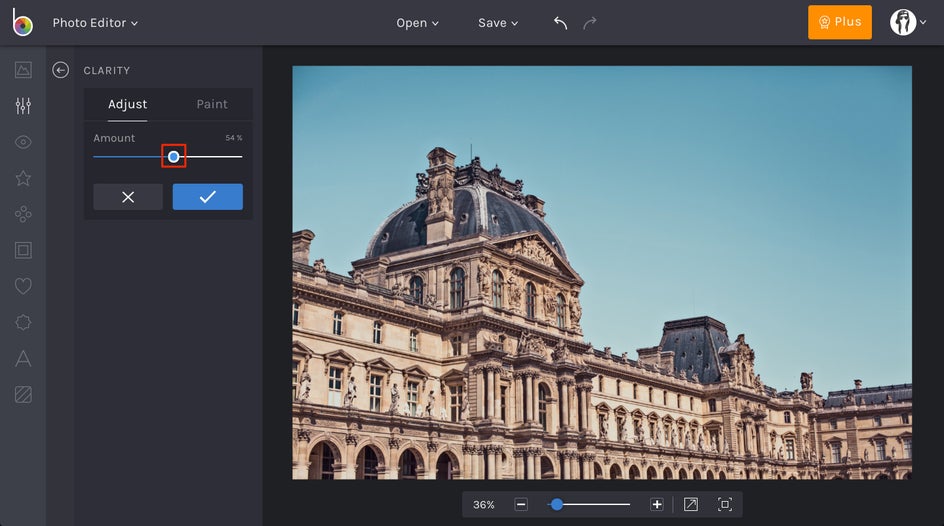
When you’re ready to try the Clarity tool for yourself, head to BeFunky’s Photo Editor and upload a photo by selecting a file from the Open tab. For even faster uploading, simply drag-and-drop your image into the interface and it will automatically appear.

In the Edit menu on the left, select the Clarity tool and adjust the slider to enhance your photo. If you are wanting to apply Clarity in small increments, use the arrow keys on your keyboard to slide the cursor to the left or right and make micro adjustments.
If there is only a certain part of your photo that you are wanting to add Clarity to, you can use the effect in Paint Mode for selective editing! Simply select the Paint Mode* tab (next to Adjust) in the Clarity tool’s menu. Click the Inverse icon (the two overlapping squares), adjust the Brush Size and Brush Hardness, and use your cursor to paint the Clarity effect onto certain areas of your image. You can then adjust the Brush Strength to increase or decrease the amount of Clarity within these areas.
*Paint Mode is now Erase Mode. To get the same effect described above, go to Erase Mode, click the Invert Selection button, and select Keep.
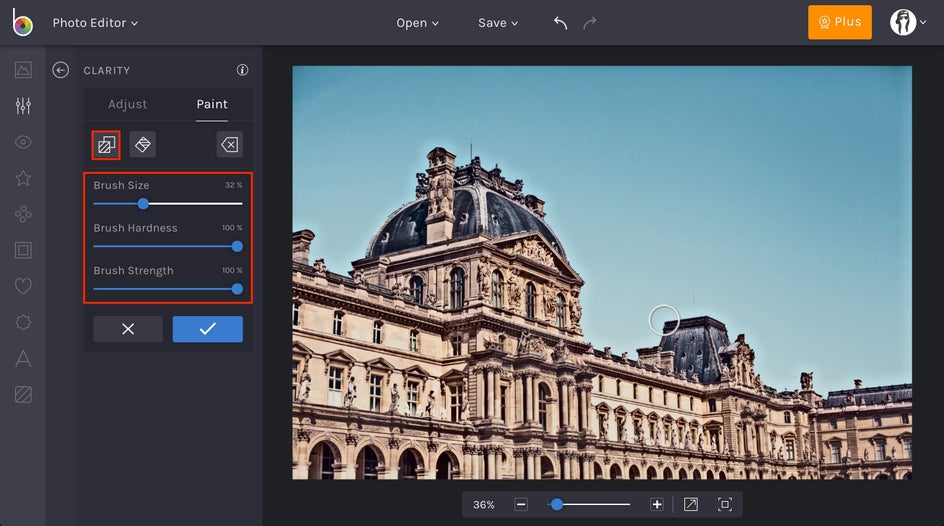
If you apply the Clarity tool to an area you didn’t want to, just click the Erase** icon and erase the effect from that portion of your image. If you want to start over completely, select the Reset button.
**This is now called Remove
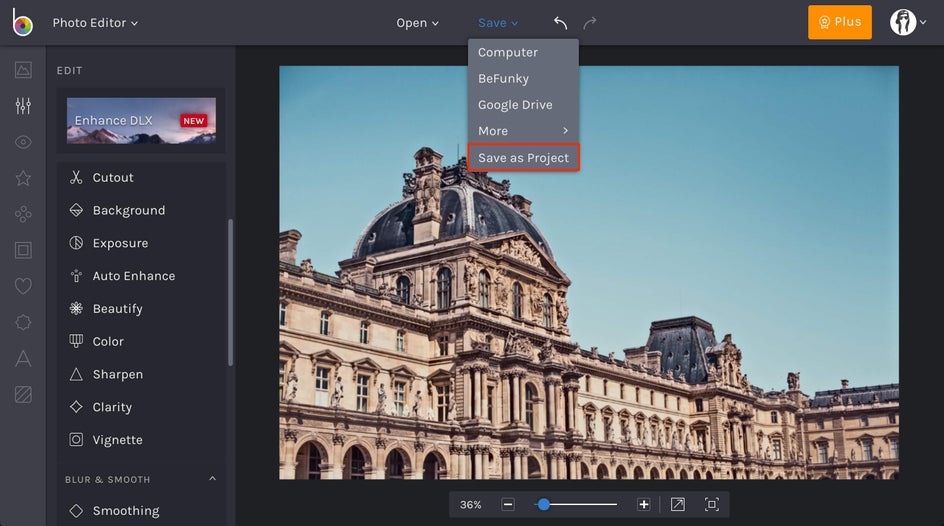
Once you are finished with your adjustments and you’re ready to save your image, select the Save button at the top of the Photo Editor to save your work to a chosen destination on your Computer, Dropbox, Google Drive, or post it right to your social media accounts. If you’d rather continue editing this image but are short on time, there’s a new Save As Project feature for you to save your image in editable format! That means you can pick up right where you left off, whenever you’re ready.
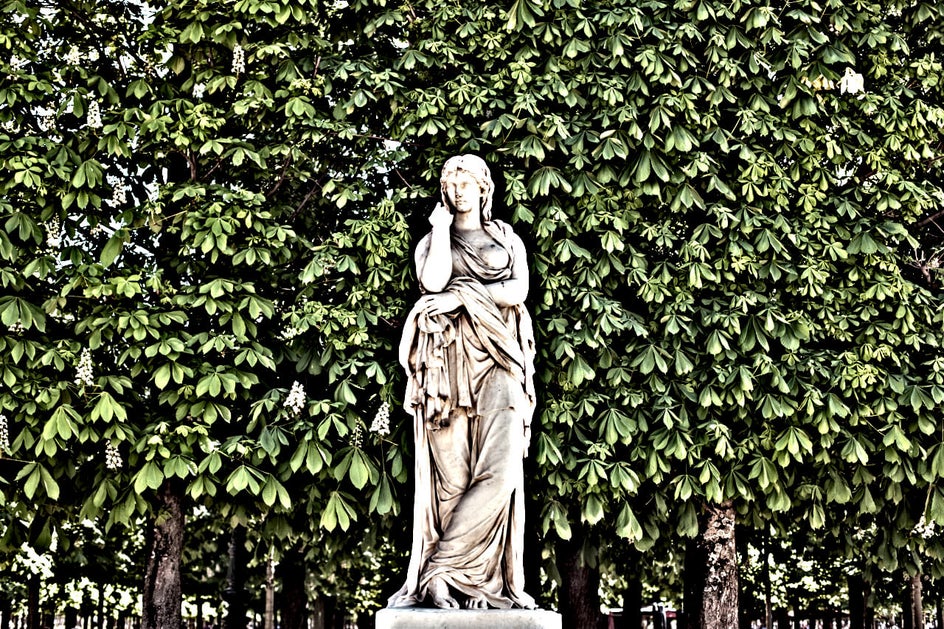
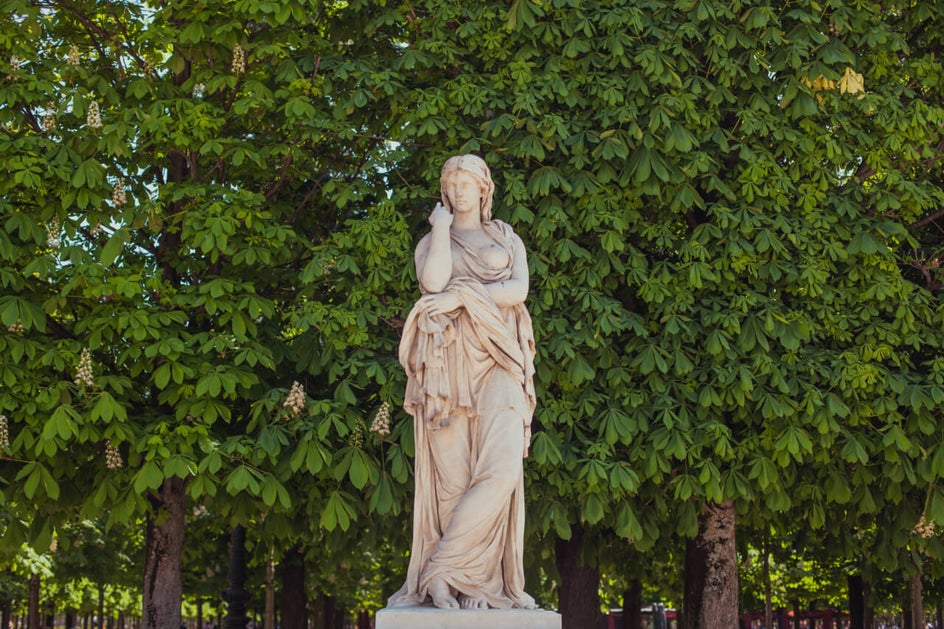
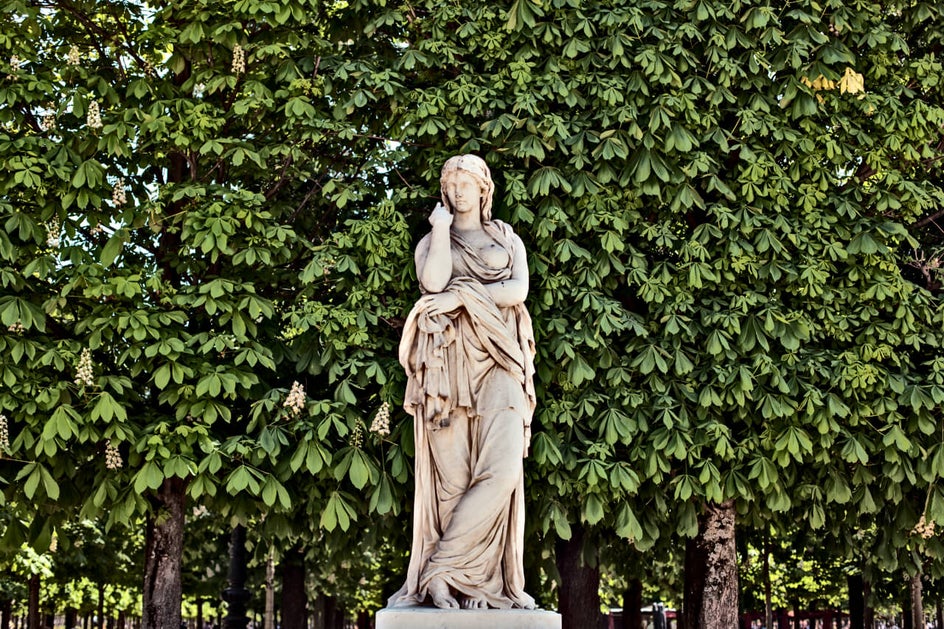
Before and After
Check out how much more detailed this image looks after it’s been enhanced with the Clarity tool! All in a few clicks.


Ready to start adding Clarity to your photos? Click the link below and get started! We can’t wait to see how clear it makes your photos.