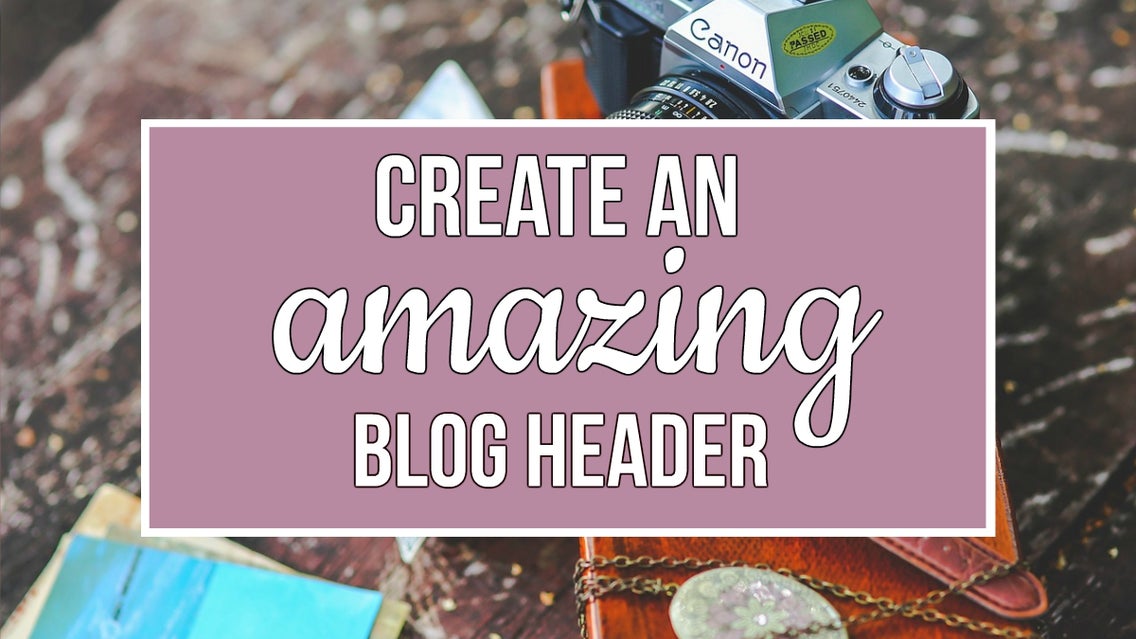
Create An Amazing Blog Header With The Designer Toolset
So you love writing about your passion on your blog, but you feel like the design isn’t show-off worthy quite yet. Or maybe you've been kicking it old-school with your journal for ages, and would love to bring your writings online.
You want to send people over to a beautiful blog you’re proud of, but you’re not a designer—and not about to shell out the funds to hire one!
Hey, I hear you! And the last thing you want to spend your free time doing is learning some complicated design program. So I’m going to show you how you can easily create an amazing and unique blog header (without any knowledge of graphic design or web tech-y stuff!)—that’s totally bold and totally YOU!
Here’s how to do it:
From the BeFunky homepage, click the “Designer” button at the top! (That’s right… you’re a designer now.)
Choose your Template
The size of your blog header will vary, depending on your platform and theme, but a good reference is 800-1000 pixels wide, and 300-500 pixels tall.
For our template, we’re going to go into Social Media Headers and choose the Facebook option. These headers are 815 x 315 pixels, and should work just fine for our blog header!

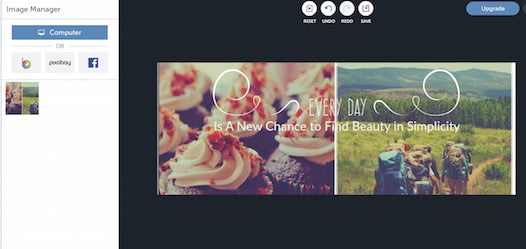
Upload Your Image
Now it’s time to make this header our own! Go into Image Manager (the third little button down on the left-side menu) You’ll see that you can upload pics from your computer, BeFunky, Facebook or from Pixabay (a super resource with tons of great photos you can use for free!)
I’m going to upload a Collage that I already edited with the photo editor to use as this header, so I’m going to select that and head back to the main screen. Now, I can drag that image straight into my header template!
Super helpful side note: You can easily switch back and forth between the Designer and Photo Editor—just click "Open Image in Editor" to make any edits, then click on the little thumbnail in the lower left corner to return to the Designer.
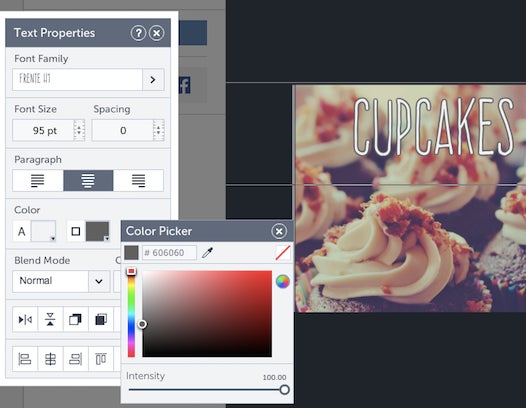
Personalize!
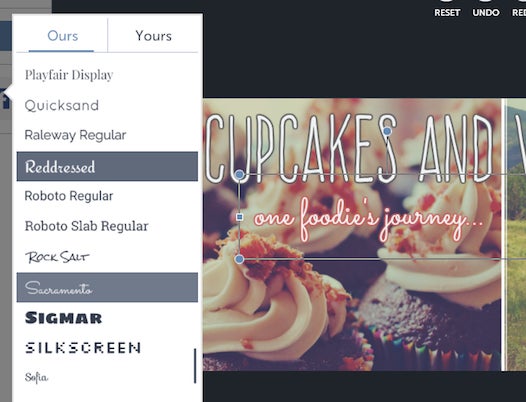
Now it’s time to customize this blog header with our text. Let’s click on the text to put in our blog title, and change up the size and font.
I’m loving the font that’s been chosen with this template, so let’s keep that but make it WAY bigger. I’m also going to outline the text to make it really pop!
Now, we need a tagline for the blog! I’m going to select a fun, scripty font, then outline that as well so it stands out.
Cool! So we’ve got a background image, a title and a tagline. Now we’re going to head over to Design Elements to add some awesome finishing touches to this header.
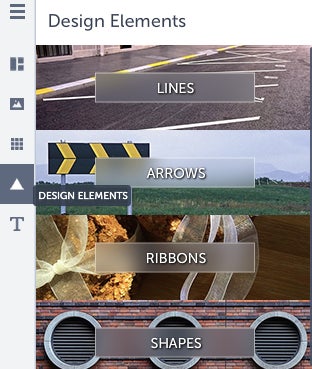
I am such a sucker for dotted lines! So I’ve added in this cute dotted line element underneath the title, and brought down the intensity to give it a nice subtle effect.
Now let’s just add in one more element… back to our Design Elements, and now Travel!

Let’s put this cute little accent in around our tagline, and duplicate the image to put it on the other side. Flip that little arrow around using the “flip horizontal” tool, and put him in place!

There we have it! A brand new blog header ready to go, just save to your computer and your blog is about to have a major facelift!

So what are you waiting for?! Go off and get started on creating your own unique and fun blog header, so you can share your amazing voice with the world in style!