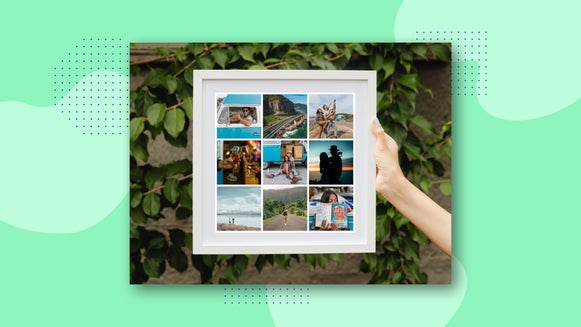
Create One-of-a-Kind Photo Gifts
With the upcoming winter holidays many people find themselves scrambling to find gifts that are unique, creative and truly appreciated. If you're one of those people, have you ever considered creating a one-of-a-kind gift using your very own photos? (probably not, I dare say...until now!)
Creating a customized photo gift has never been so easy thanks to the BeFunky Photo Editor and Graphic Designer. While there may be virtually countless ideas roaming around there on the internet, here's three of my favorite DIY gifts to help get you started.
Calendar
Using MixBook you can create your very own fully customized photo calendar using a blank canvas or starting with one of their many different designs. You can add your events and holidays, including birthdays, as well.
Before you get started though, it's important to edit the pictures you want to add to your calendar to make sure they're the best quality they can possibly be. Although MixBook has a few editing tools itself, they're very limited, so we're going to head over to the BeFunky Photo Editor instead.
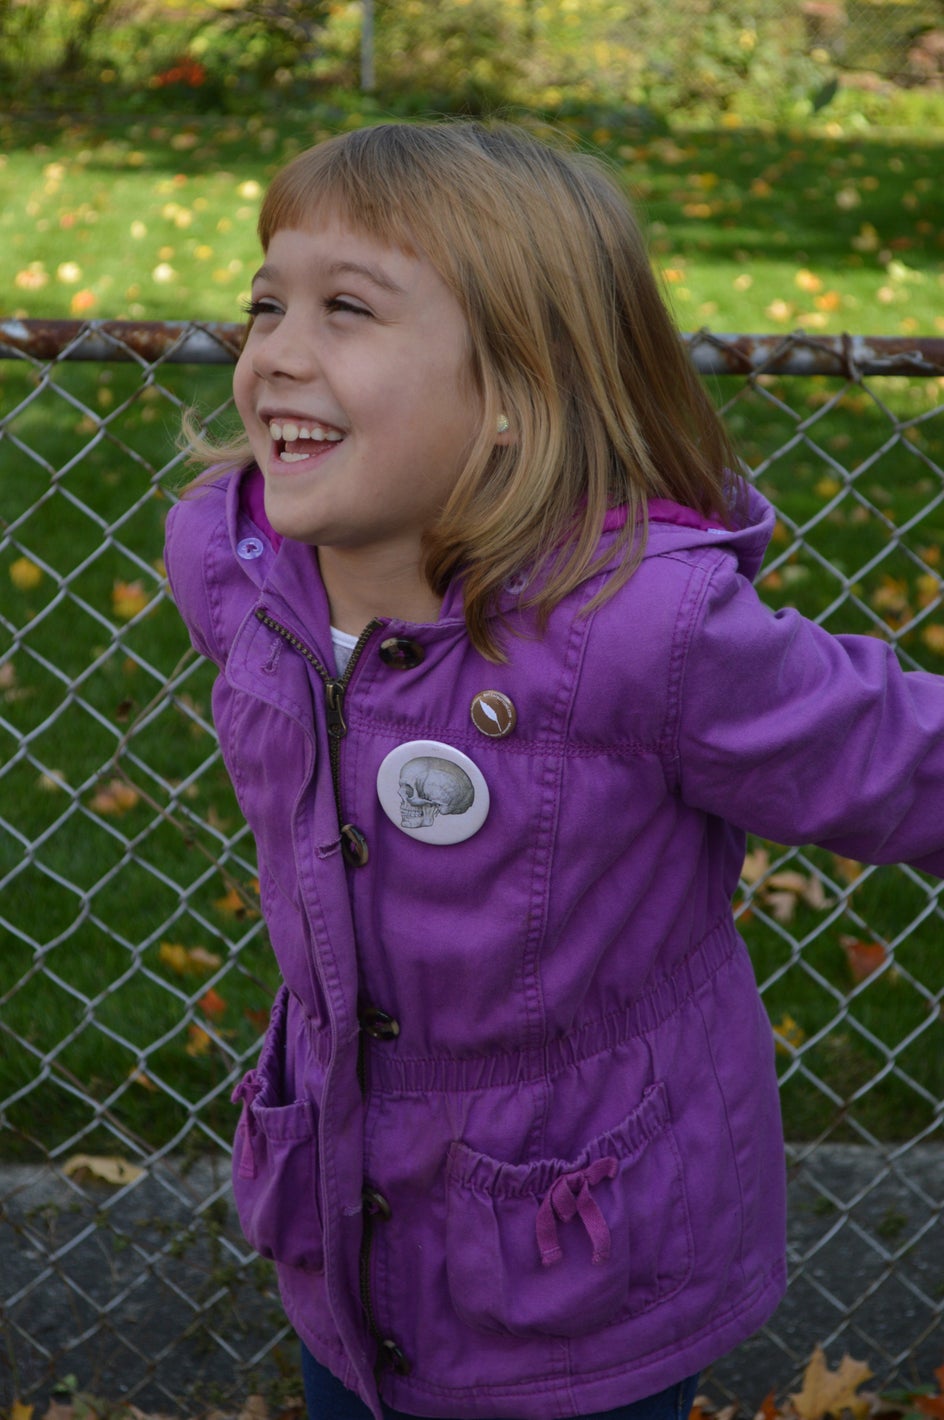
To get started, upload your photo in the BeFunky Photo Editor. Though this can be a photo of just about anything, I decided to use a photo I like of my daughter laughing.
The original photo is really dark and there are a few imperfections...but not for long.
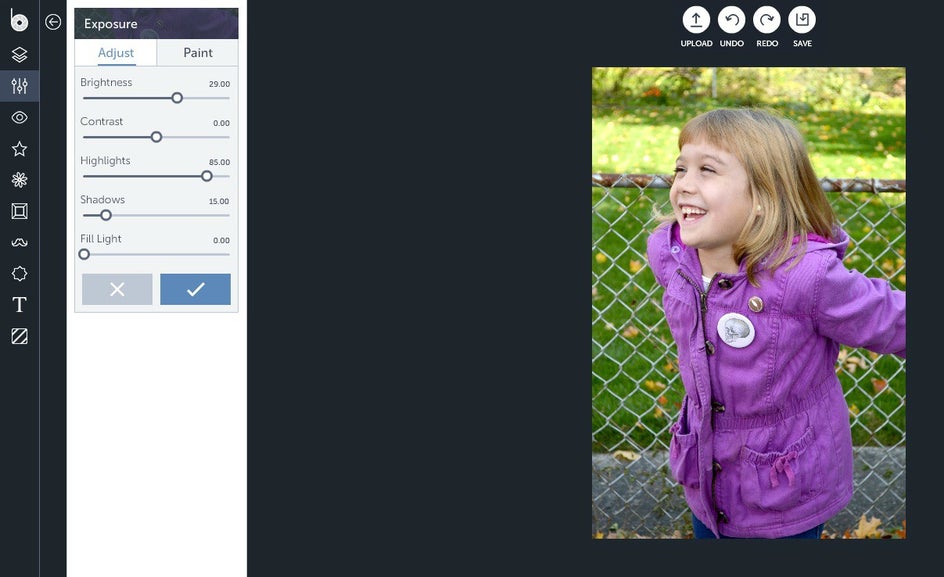
The first thing I did was adjust the Exposure under the Edit panel. I brought the brightness way up, then brought my highlights up to 85 and the shadows up to 15.
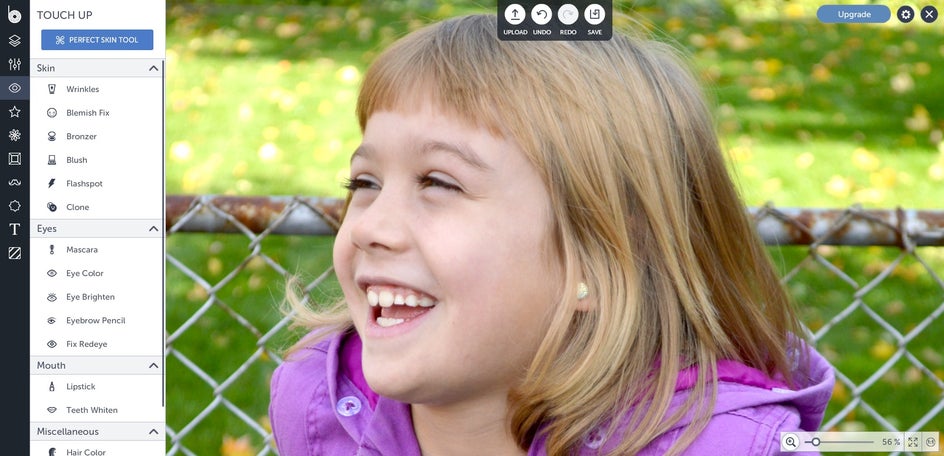
After that, I zoomed in on her face and whitened her teeth for a brighter smile using the Teeth Whiten tool, and then edited out a couple of blemishes using the Blemish tool.
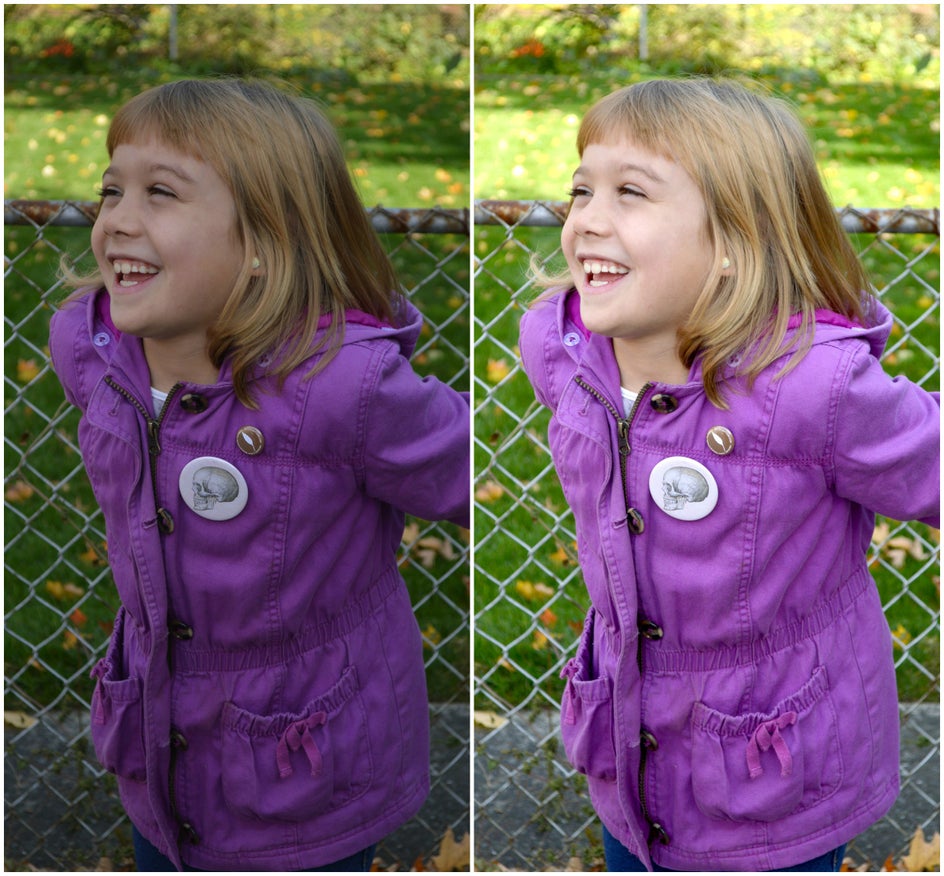
A few small edits make a big difference! So make sure you go through each photo one by one to make sure they're to your liking.
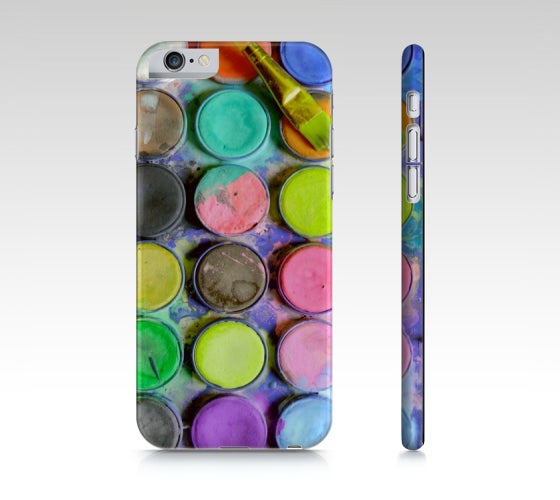
Phone Case
You can use ArtofWhere to create your very own awesome phone cases for either Samsung or iPhone. It's as simple as uploading a photo and placing it on their template.
However, before you upload you need to select and edit your picture first. Make sure you select a vertical picture—these look much better than a horizontal photo on the back of your phone.
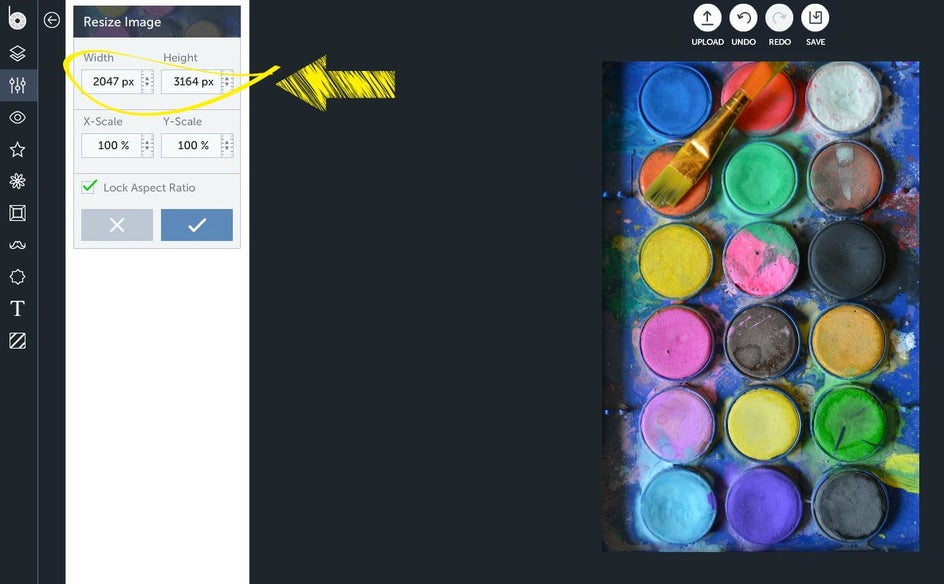
ArtofWhere requires that your photo be at least 1063px x 1801px. To check this go to Edit, then Resize Image. At the top it'll show you the width and height of the photo. Anything more than the minimum size is okay, so resize it to your heart's content. (Keep in mind that no matter what company you use, you should probably check their file requirements to make sure you're getting the best quality product possible).
Once you've finished editing your photo you can go to ArtofWhere and make your phone case!
Tote Bag
Vistaprint offers a lot of different photo gifts from t-shirts to hates, posters to coasters, and more! But I think tote bags make especially great gifts because: 1) they're functional 2) you don't have to guess the right size, and 3) you know it'll definitely get used.
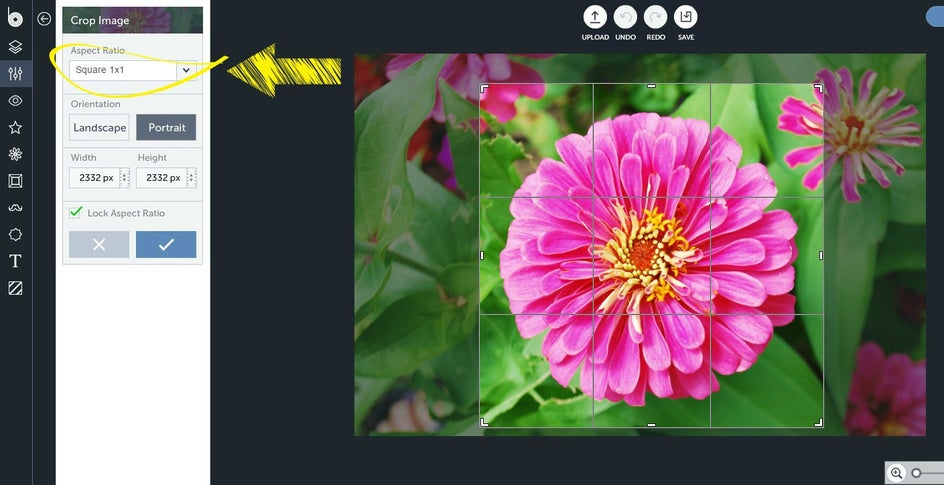
When selecting a picture to use, try to think of something the receiver will enjoy the most. Using my younger sister as an example, I would select this pink flower because her favourite colours are pink and green.
Following Vistaprints product specs, I know the printable area size is 8 x 8 inches, and the photo itself needs to be 1400 x 1400 pixels, so I adjust it accordingly. Once you've uploaded your picture to the editor, crop it into a square using the aspect ratio.
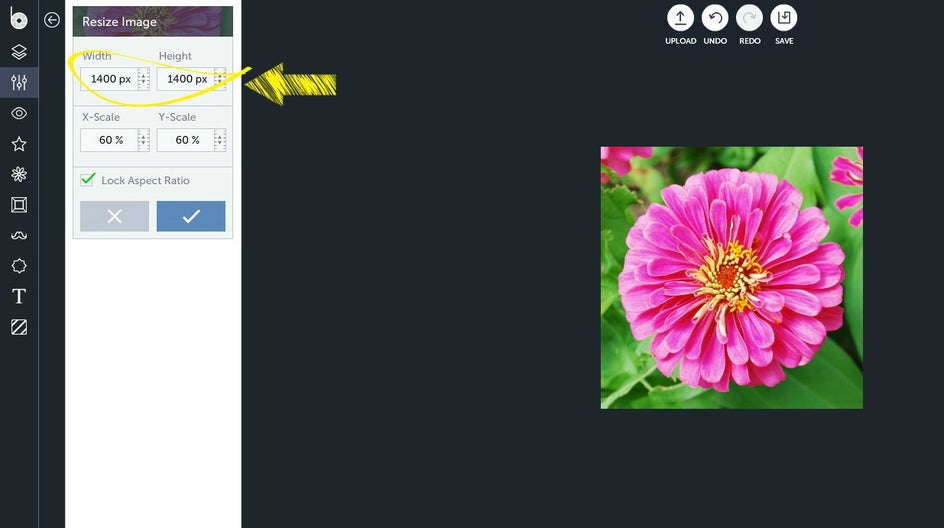
Next, go to the resize tool and adjust the width and height to 1400 px.
You can now edit your photo however you like, playing around with the exposure, artsy effects, textures and more. I used the Bokeh 4 tool and then flipped it vertically.
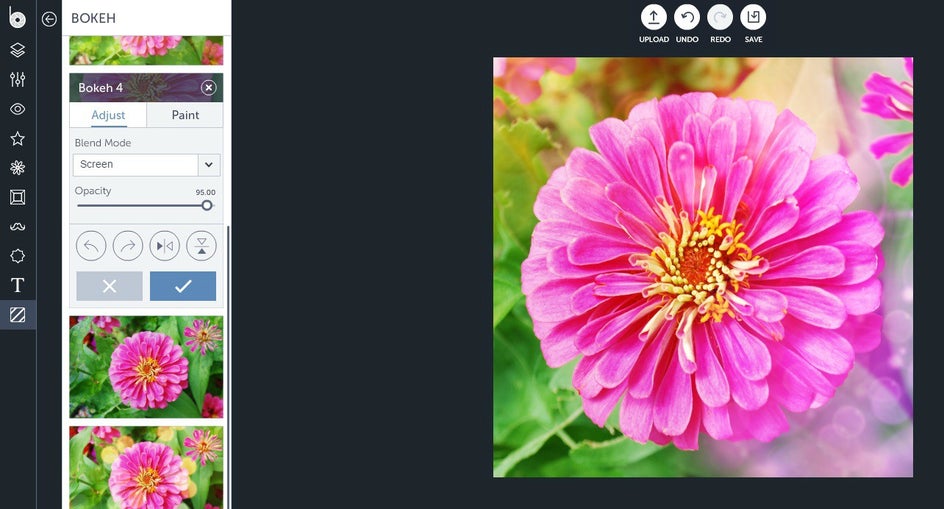
Once you're done editing, save it as a jpeg or png file and upload to Vistaprint.
Ready to make your own one-of-a-kind photo gifts?