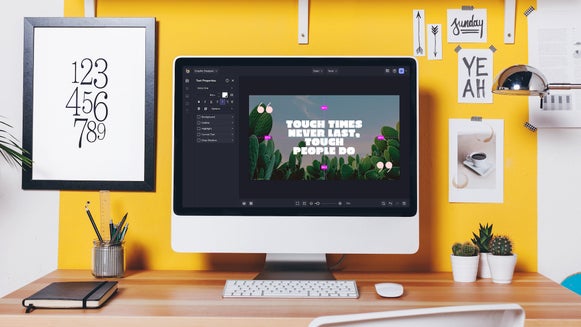
Creating Personalized Birthday Collages

Store-bought cards might be convenient, yet they’re not quite as heart-warming as a custom birthday collage. This is because a birthday collage lets you feature a series of special images of your recipient, which they’re sure to cherish for many years to come.
So, how do you make a birthday collage? Thanks to BeFunky’s birthday collage app, it’s easy! Keep reading to learn more about our Collage Maker, as well as how you can quickly create your best birthday collage yet.
Finding the Perfect Photos for Your Birthday Collage
Before you create your own birthday collage, you’ll want to put together a selection of photos that are perfect for the surprise you had in mind. Don’t know where to begin? We’ve revealed the top two methods of finding photos below.
Social Media
The beauty of social media is that it also acts as a treasure trove for photos of your family or friends. This is particularly helpful when you’re creating a birthday collage, but want to collect photos of the recipient without their knowledge.
Facebook is a great place to start, as the images are easy to save to your own files. You can also view photos others have tagged of your recipient, rather than just photos they have uploaded themselves. Instagram can also prove beneficial, but you will need to screenshot your favorite images in order to use them in your collage. Just keep in mind that this can affect their quality.

Photo Albums
For friends or family members who aren’t on Facebook, dusting off the photo albums may be the best place to find suitable photos for your collage. Photo albums are also great when seeking out nostalgic photos, like those adorable images of you and your siblings when you were children.
Simply scan these images for optimal size and quality, or take a photo of them on your phone to create a digital copy.

How to Make a Birthday Collage Using BeFunky
Ready to make your own birthday photo design for someone special? To get started, head to the Collage Maker.
Step 1: Choose a Birthday Collage Layout
Wondering “where can I make collages for free?” When you start a new collage within the Collage Maker, the default layout will be a 3 x 3 square. This is the free collage layout, which can be resized or customized in any way you see fit.
To select a different layout, navigate to Layouts in the main menu on the left, then select the type of collage layout you’re after: Grid, Big Photo Wrap, Shape, and more. You can also click the Create Your Own button if you have a more specific layout in mind.
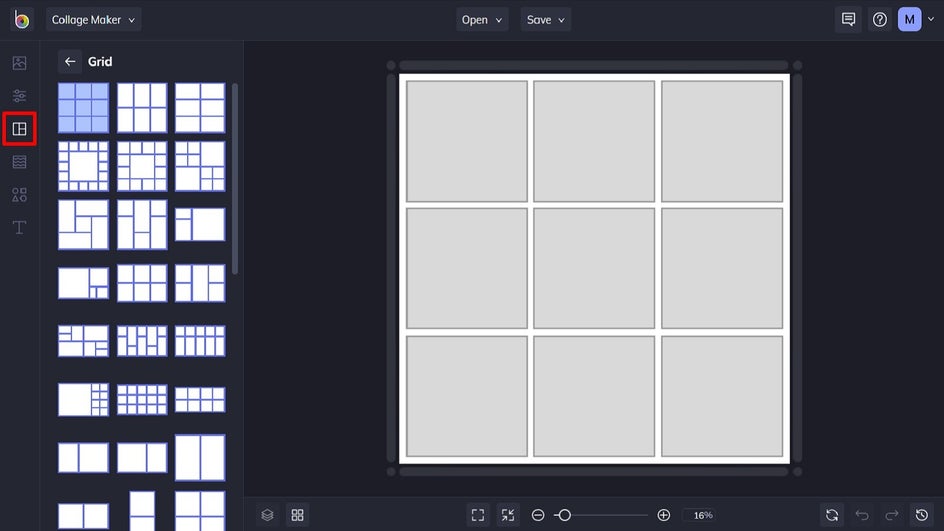
You also have the option to use BeFunky’s Collage Wizard, which automatically generates several preset layouts based on the images you’ve selected. The beauty of the Collage Wizard is that it uses the images you’ve selected to make a perfect collage, all without having to crop any images. If you wish to use this feature, simply skip to Step 3 to upload your desired images, then navigate back to Layouts to click Collage Wizard.
Step 2: Resize Your Birthday Collage
If you wish to resize your collage, you can do so by hovering over any of the outside edges or corners of your collage. Then, simply drag them in to make your collage smaller, or out to make your collage larger.
You can also change the aspect ratio of your birthday collage by navigating to Customize in the main menu on the left. Click the dropdown menu that says Freeform, then select your new aspect ratio from the list.

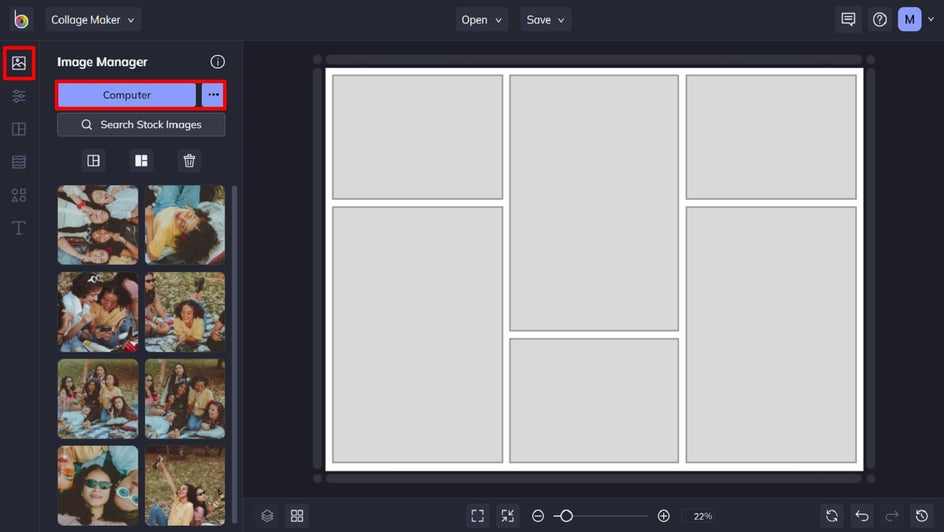
Step 3: Add Your Photos
Now comes the fun part: uploading your images and placing them into your birthday collage! Navigate to Image Manager in the main menu, then click Computer to select the images from your own files. Alternatively, you can click the three dots (…) to upload imagery from your BeFunky account, Facebook, or Google Photos.
Once uploaded, simply drag and drop each image into the desired cell.
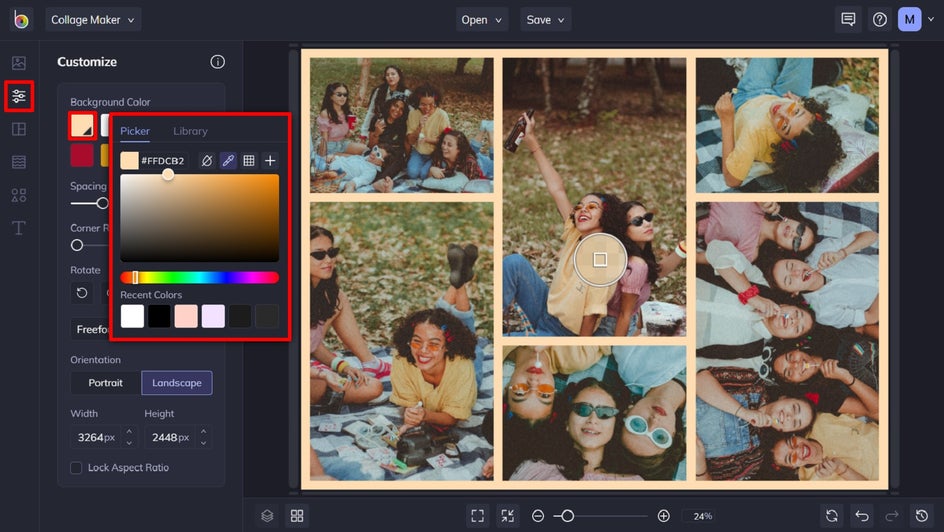
Step 4: Change the Background Color
To brighten up your collage even more, you can change its background color. Navigate to Customize and select a background color from the existing color swatches, or click on the first swatch to choose your own color from the Color Picker. Here, we’ve used the Eye Dropper Tool to select a hue already present in our collage images.
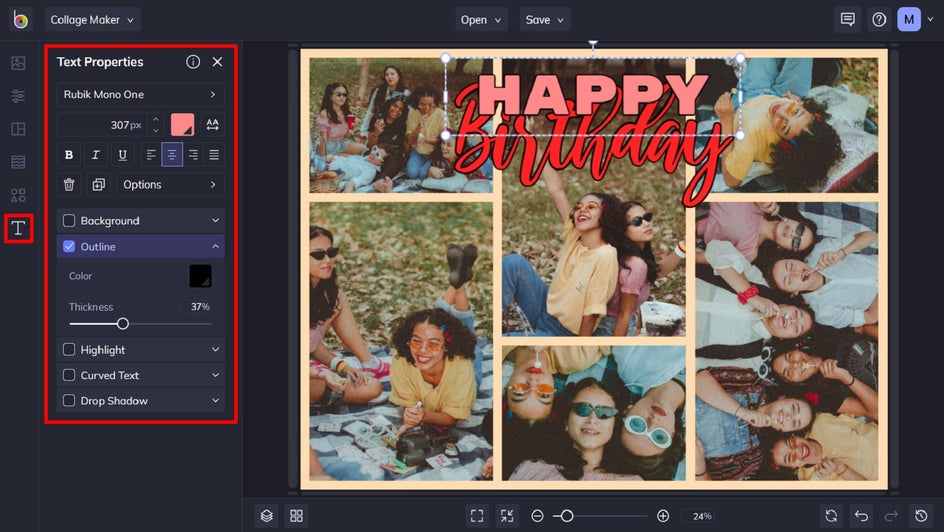
Step 5: Add Text
Add a new text box by navigating to the Text tab in the main menu on the left and then clicking Add Text. Alternatively, you can choose from one of the preset texts below. Click and drag your text box into place, then double-click it to type in your birthday message.
When you select the text box, a Text Properties toolbar appears where you can also adjust things such as the font, size, color, spacing, and more.
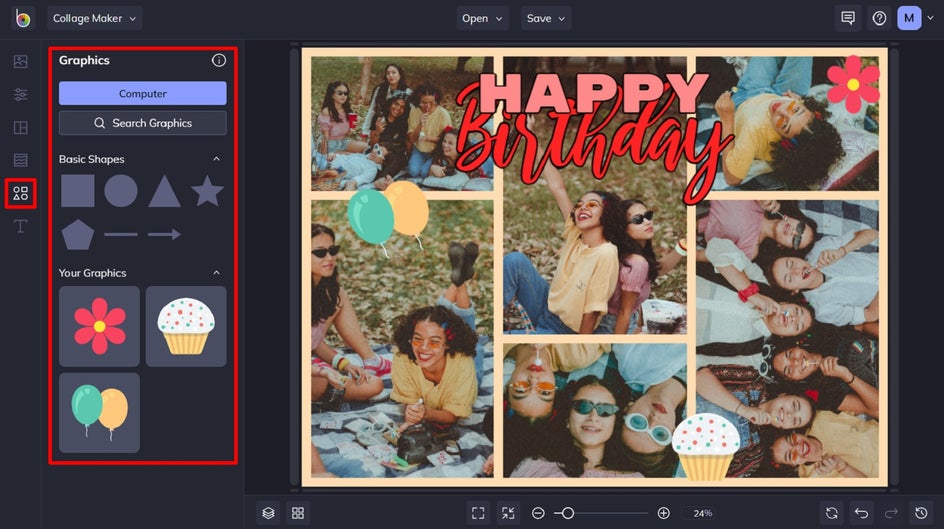
Step 6: Add Graphics
If you want to add some fun and colorful elements to your birthday collage, click on Graphics in the main menu. You can choose from basic shapes or click Search Graphics to access BeFunky’s huge library of clip art, symbols, lines, and more. You can even type “birthday” into the search bar in the top-left to search birthday-related graphics.
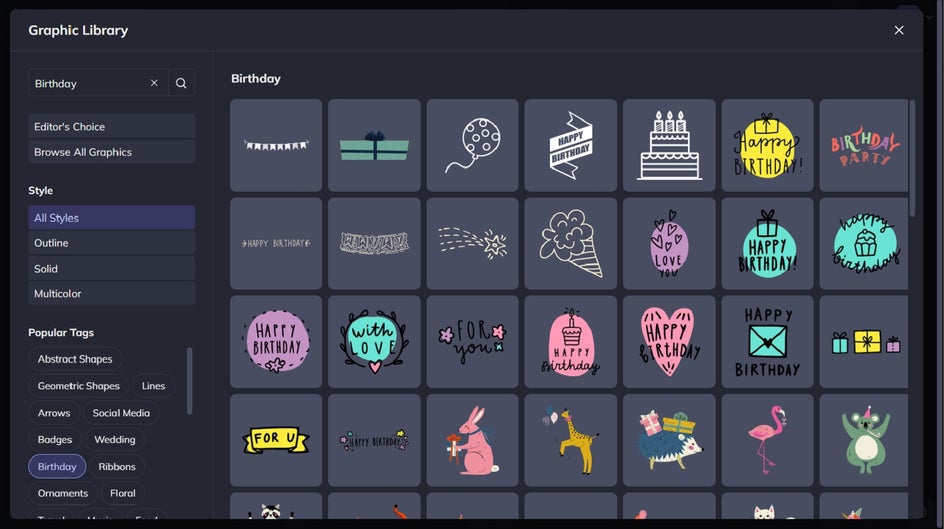
Simply click on the graphics you wish to use, and they will be added to the Your Graphics section. You can then use your mouse to click and drag the graphic onto your birthday collage.
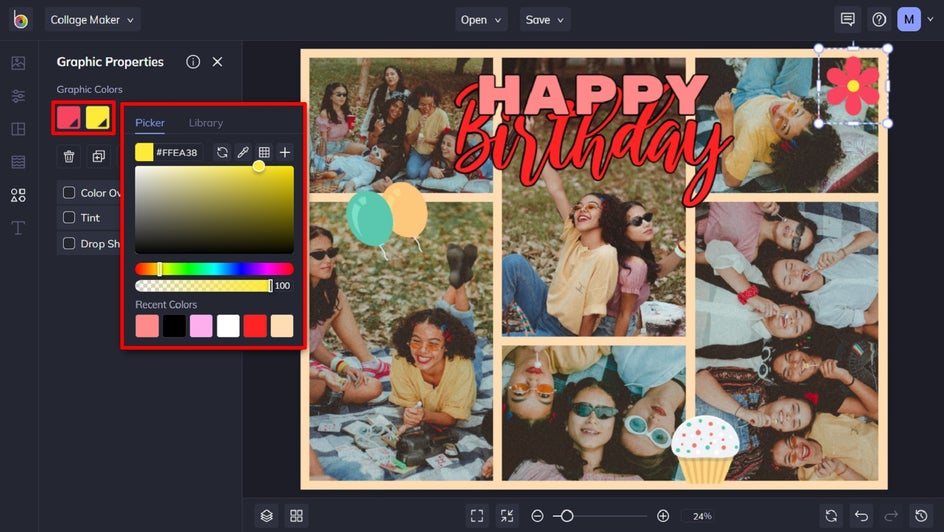
Step 7: Edit the Colors of Your Graphics
If you want to change the color of these graphics, this is easy to do. Click on the graphic you wish to alter, and a Graphic Properties panel appears. Simply click the swatches underneath Graphic Colors (or Color Overlay, depending on your image), then select a color from the Color Picker. You can also type in your desired Color HEX Code (if you know it) or use the Eye Dropper Tool to select a hue already present in your design.
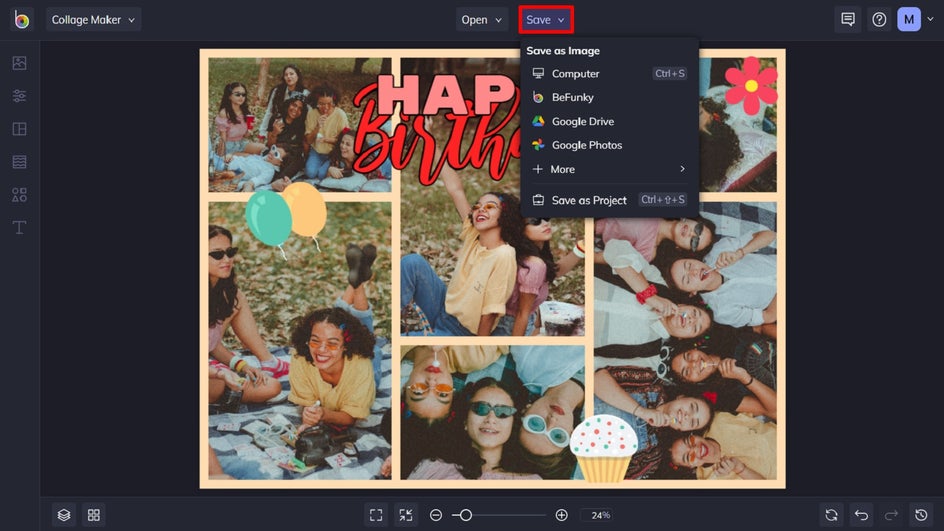
Step 8: Save Your Birthday Collage
Once you’re happy with how your birthday collage looks, it’s time to save it. Click Save at the top of the screen, then select your desired save location.
If you wish to print your birthday collage to give to your friend, then we recommend saving it as a PDF in Print quality. This will ensure it looks as crisp and clear as possible!
Celebrate in Style With a Birthday Collage
Birthday collages are the perfect way to celebrate a loved one’s birthday, yet creating one from scratch doesn’t have to be tedious or time-consuming. With BeFunky’s Collage Maker, you can simply select your layout, upload your photos, add some text, and decorate it with a few fun graphics. Or, simply leave it to the Collage Wizard to do half of the work for you in a single click!
Try our birthday collage maker for yourself to see just how great it is.