4 DIY Photo Gifts for Everyone On Your List
Finding heartfelt gifts for your loved ones can be fun but challenging—especially if you’ve ever found yourself wondering, “what do you get a person that already has everything?” Thankfully, you don’t need to search shop after shop to find the perfect present. For something that’s truly meaningful and one-of-a-kind, consider a DIY photo gift instead!
If you’re thinking, “what gift can I make with pictures?”, don’t fret. Whether you’re looking for DIY photo gift ideas for best friends, parents, grandparents, your partner, or more—the following creative photo gift ideas have got you sorted! All it takes is BeFunky’s creative suite and a few clicks of your mouse.
1. Framed Art With Artsy Effects
Ever wanted to turn one of your favorite photos into a work of art? The Photo to Art effects in BeFunky's Photo Editor are the perfect way to turn a photo into a fun masterpiece—all within a single click.
To turn your own photo into art, start by heading to the Photo Editor and opening a photo of your choice.
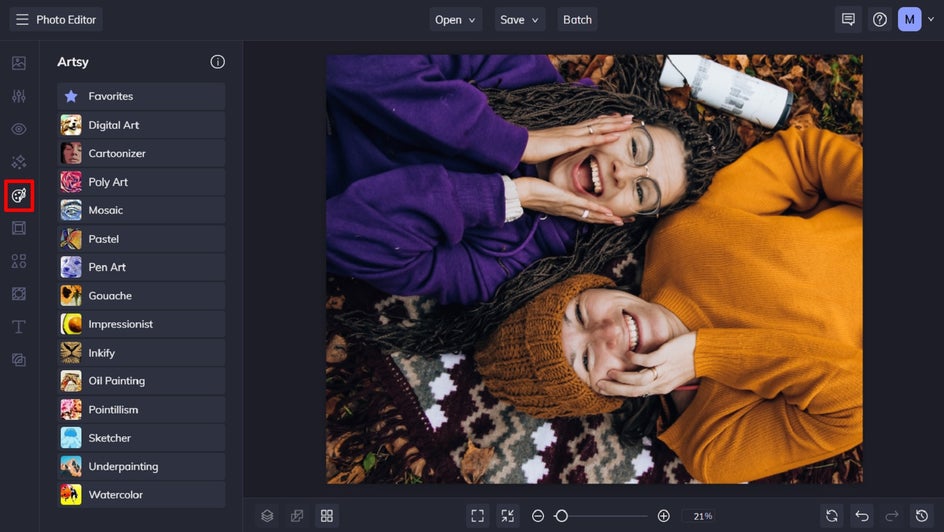
Step 1: Navigate to the Artsy Tab
Click on Artsy in the main menu on the left to see the range of artistic effects available. Then, select a category that takes your fancy to explore the effects on offer.
For this tutorial, we’re choosing a Digital Art effect.
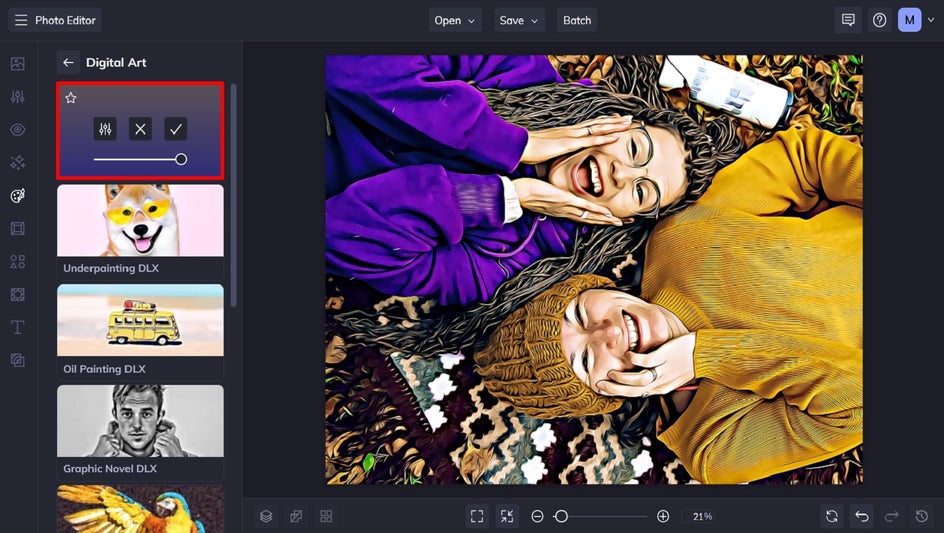
Step 2: Select Your Desired Artsy Effect
You can sample each of the Artsy effects on your photo by clicking on them. You can also adjust the effect’s strength using the slider. Once you’re happy with how the Artsy effect looks, click the checkmark button to apply it.
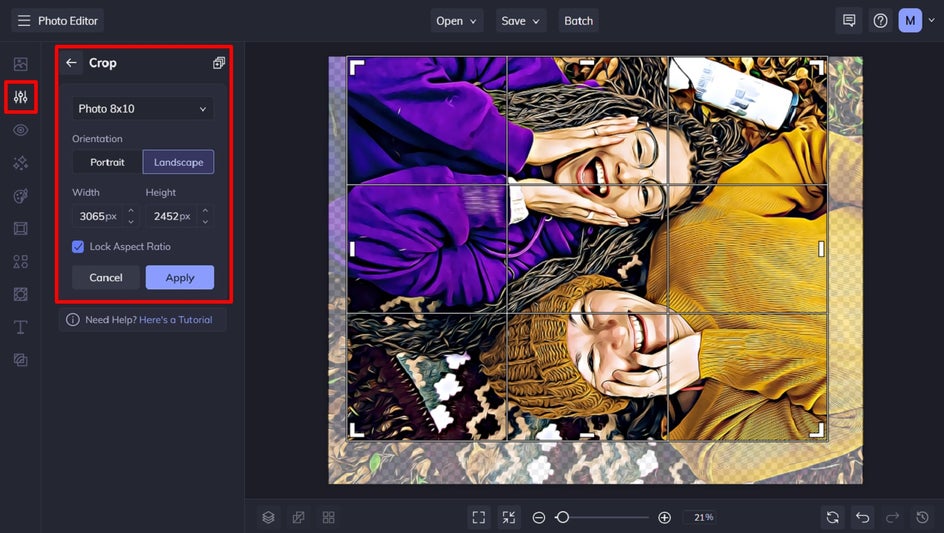
Step 3: Crop the Photo to Fit Your Frame
If necessary, you can also crop your image so it’s the required aspect ratio for printing and placing within your desired frame size. To do this, navigate to Edit in the main menu on the left, then click Crop.
Select your aspect ratio from the dropdown menu. You can also select your desired orientation, width, or height. Just don’t forget to keep the Lock Aspect Ratio checked, as this will allow you to change the size of your selection while keeping the aspect ratio the same.
Step 4: Save Your New Art for Printing
Now it’s time to save your new artwork so it’s ready to print. Click Save at the top of the screen, then select your desired save location.
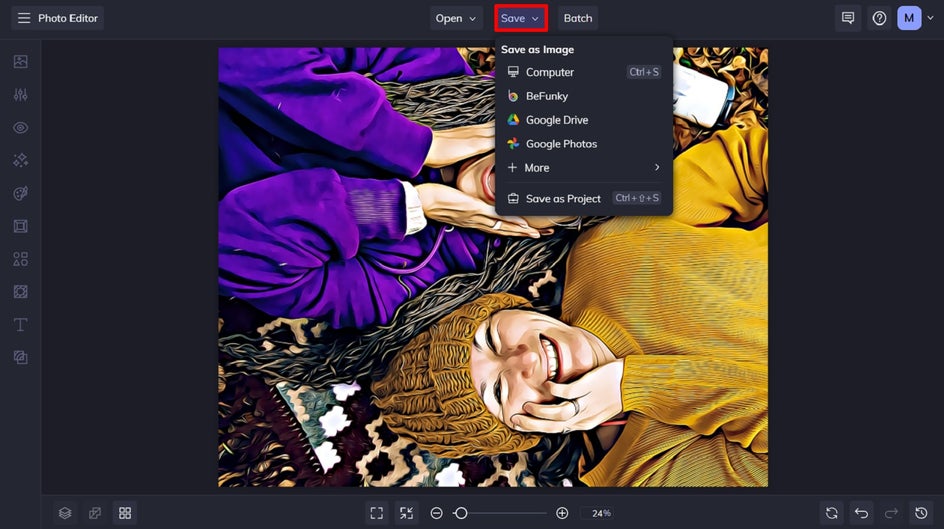
We recommend saving your image in PDF format > Print Quality so it’s the best quality possible for printing.

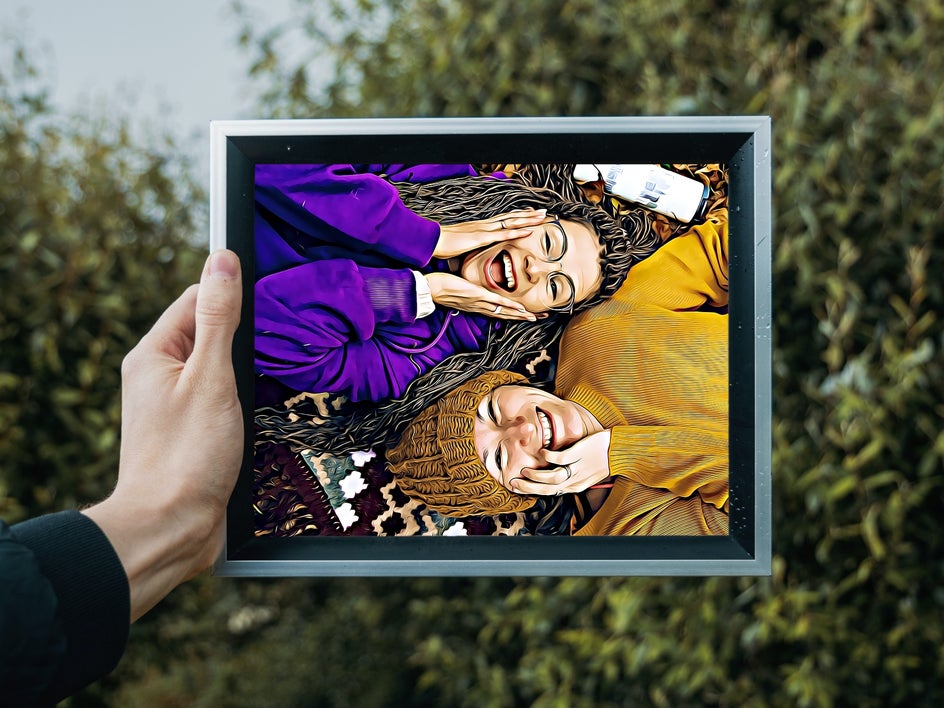
Framed Artsy Photo: Final Result
Now all that's left is to print it out on the paper of your choice and put it in a frame!
2. Inspirational Picture Quotes
If you’re looking for another great DIY photo gift idea for someone special in your life, then an inspirational picture quote may be right up their alley. With BeFunky’s Graphic Designer, it’s super easy to add text to photos and create inspirational picture quotes within just minutes.
To make your own, start by heading to the Graphic Designer.
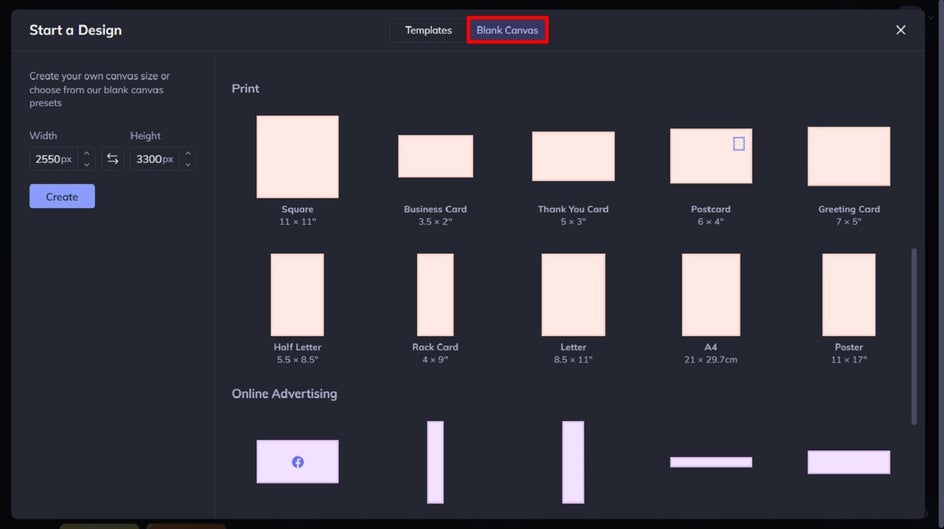
Step 1: Select a Blank Canvas
Start a new design, then navigate to Blank Canvas at the top of the screen. Select a Blank Canvas that will be perfectly sized for the frame your inspirational picture quote will end up living in.
For this tutorial, we’ve chosen the Letter sized canvas, measuring 8.5” x 11”.
Step 2: Add Your Image
To create a background for your picture quote, navigate to Image Manager in the main menu on the left. Then, upload a photo of your choice by clicking on the Computer button. Alternatively, you can search BeFunky’s giant free stock photo library by clicking Search Stock Images.
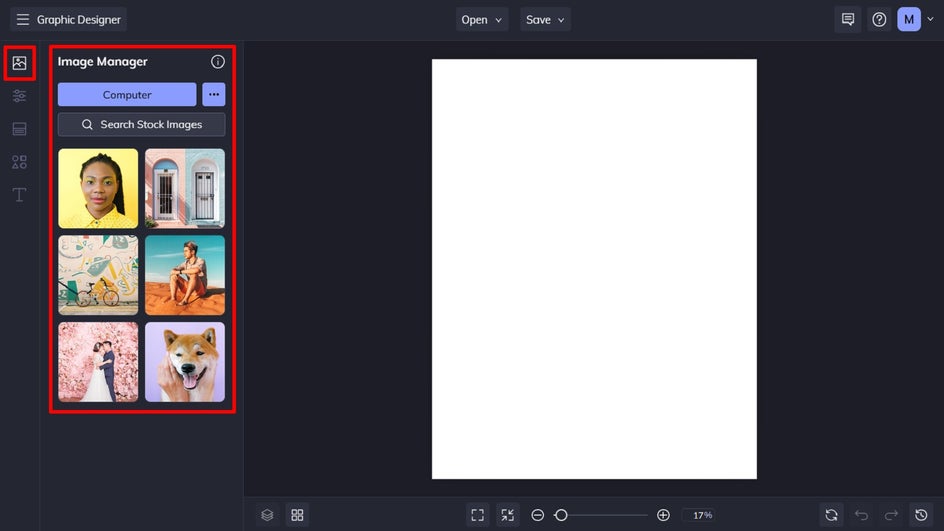
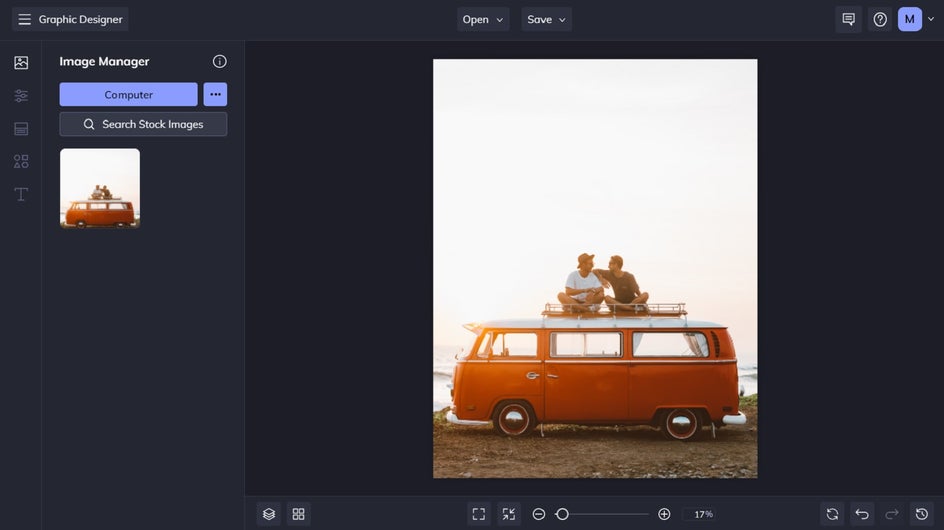
Once you’ve uploaded your desired image, drag it over to your canvas and resize it by dragging the corner circles outwards until the image covers the template.
Step 3: Add Your Quote
Add a new text box by navigating to the Text tab in the main menu on the left and then clicking Add Text. Alternatively, you can choose from one of the preset texts below.
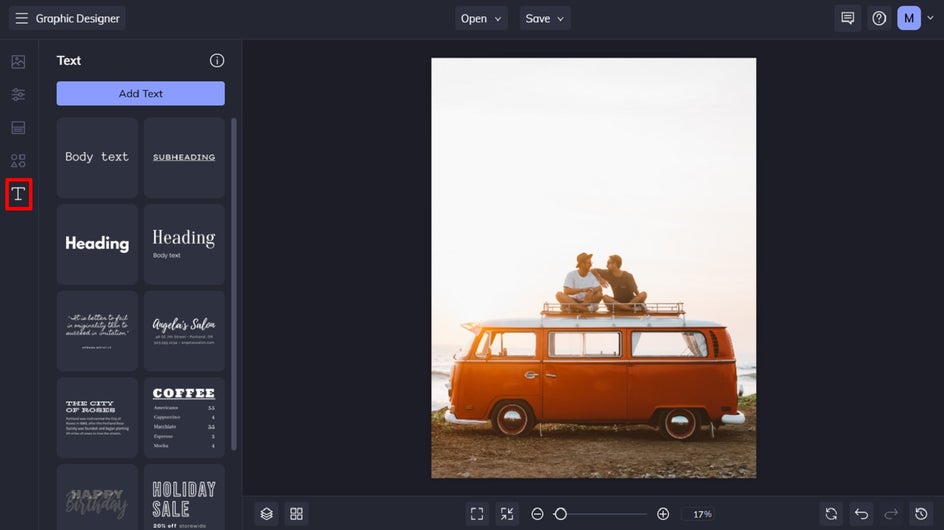
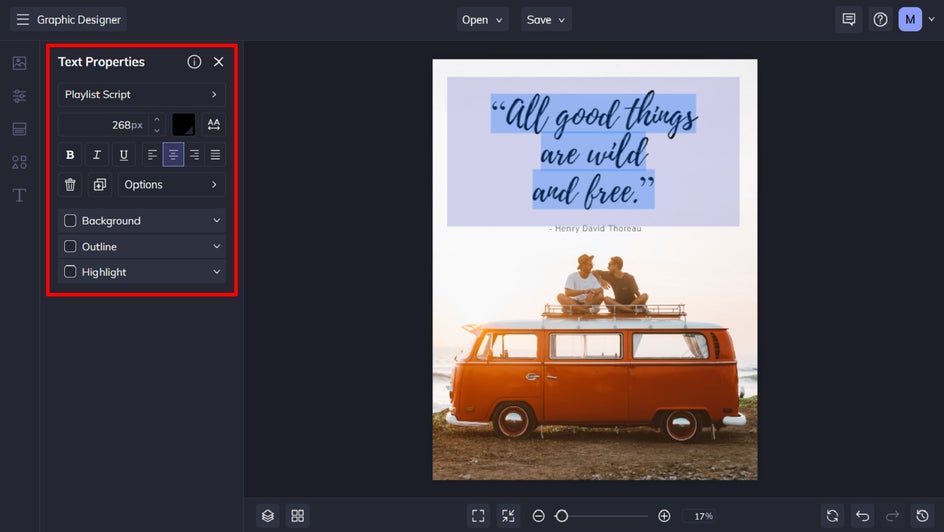
Click and drag your text box into place, then double-click it to type in your inspiring quote. When you select the text box, a Text Properties panel appears where you can also adjust things such as the font, size, color, spacing, and more.
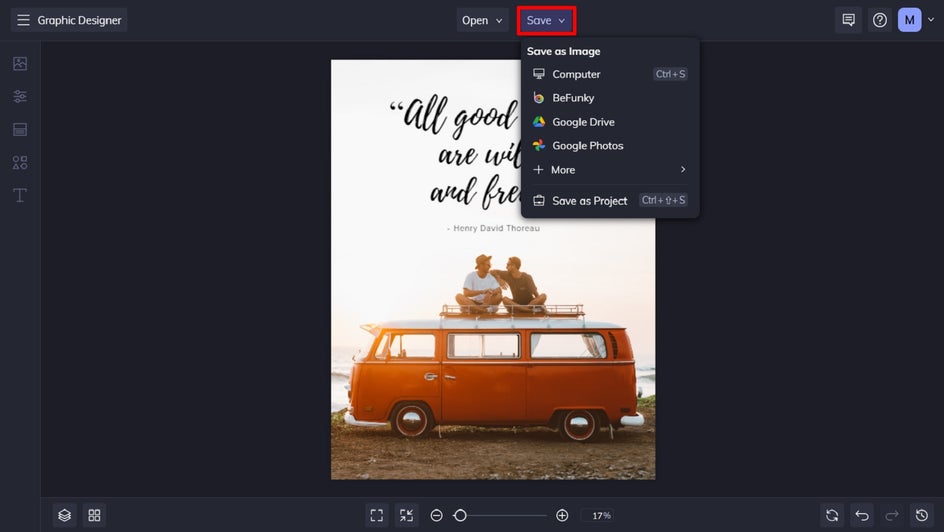
Step 4: Save Your Picture Quote
Once your inspiring picture quote is finished, it’s time to save your design. Click Save at the top of the screen, then select your desired save location.
Just like we mentioned in the previous tutorial, you can save your image in PDF format in Print Quality to ensure it’s in the highest quality possible.
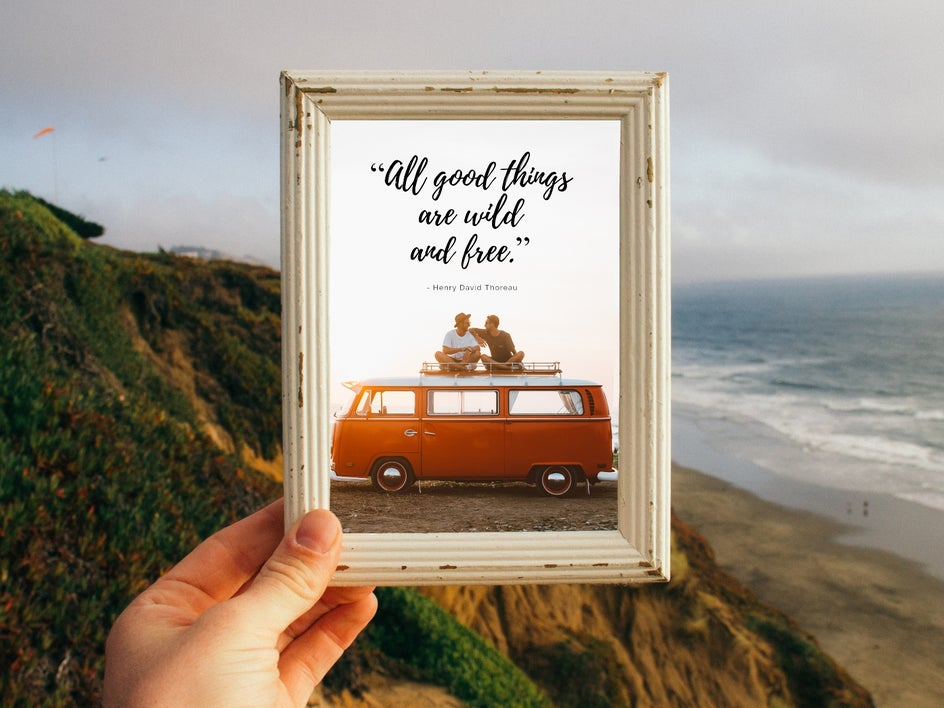
Picture Quote: Final Result
Print it out, put it in your frame, and you’ve got yourself a perfectly meaningful gift you can make in minutes!
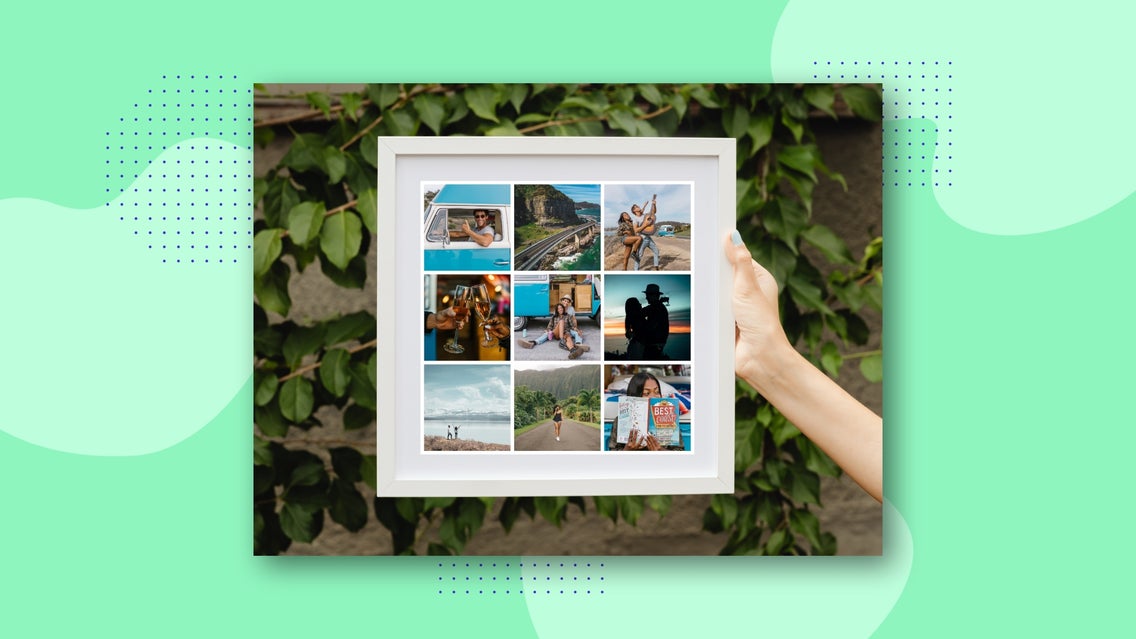
3. Personalized Photo Collages
Whether you put together a collage of the road trip you took with your friend, special moments you’ve had with family, or a montage of you and your partner, a collage makes for a cherished photo gift.
Once you’ve got your theme in mind, head to the Collage Maker to get started.
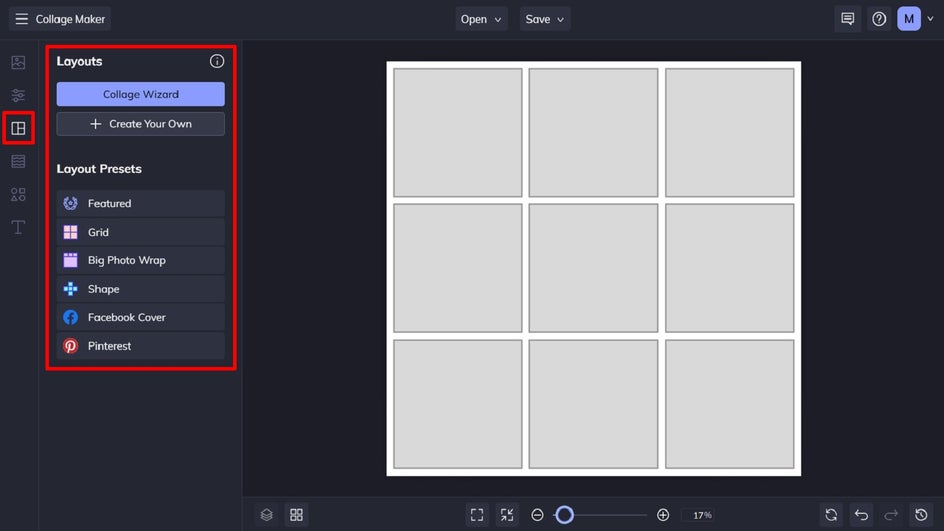
Step 1: Choose Your Collage Layout
Your collage’s layout will determine how many photos you use, as well as its overall appearance. To choose a layout, navigate to Layouts in the main menu on the left. You can choose a Layout Preset, create your own, or even use the Collage Wizard feature to have it automatically generate the optimal collage layouts for you based on the images you want to use.
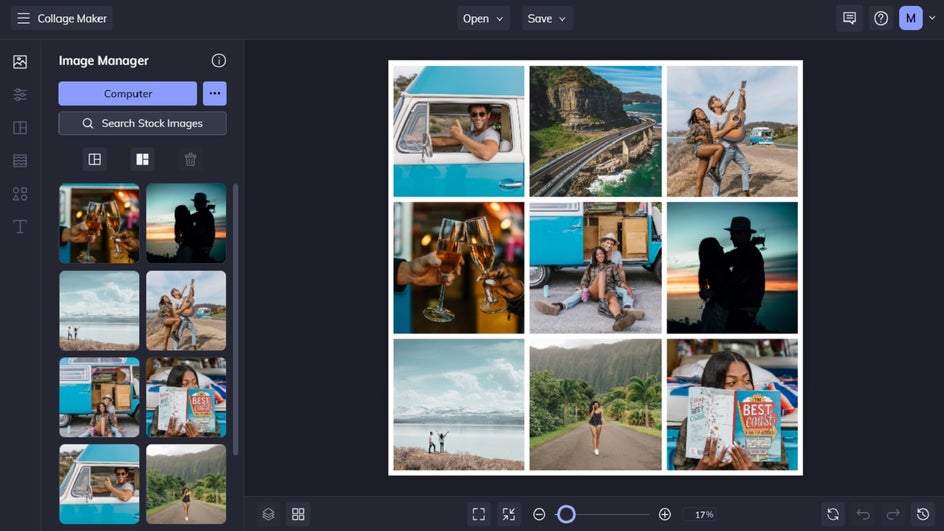
Step 2: Upload Your Collage Images
Navigate to Image Manager from the main menu to upload your chosen photos from your computer. Alternatively, you can click the three dots (“…”) to upload images from your BeFunky account, Facebook, or Google Photos.
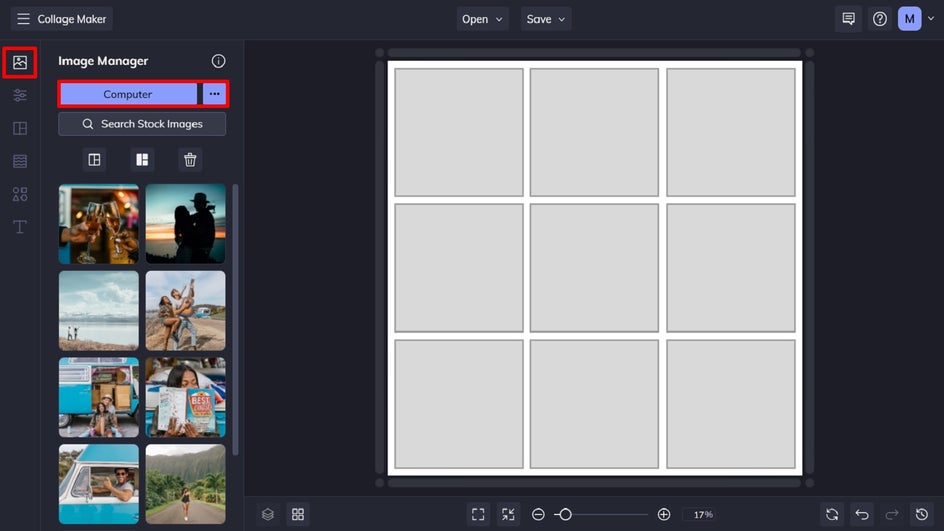
Once the images have been uploaded, you can simply drag and drop them onto your collage layout.
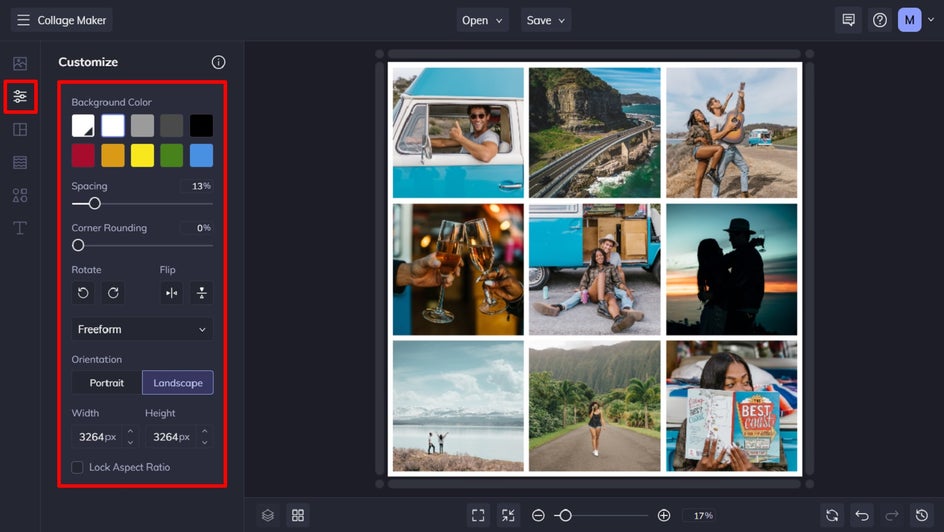
Step 3: Customize Your Collage
You can also change your collage’s background color, spacing, width, height, and more, if you need to. To do this, navigate to Customize in the main menu.
Step 4: Save Your Photo Collage
Once you’re happy with how your photo collage looks, click Save at the top of the screen and select your desired save location.

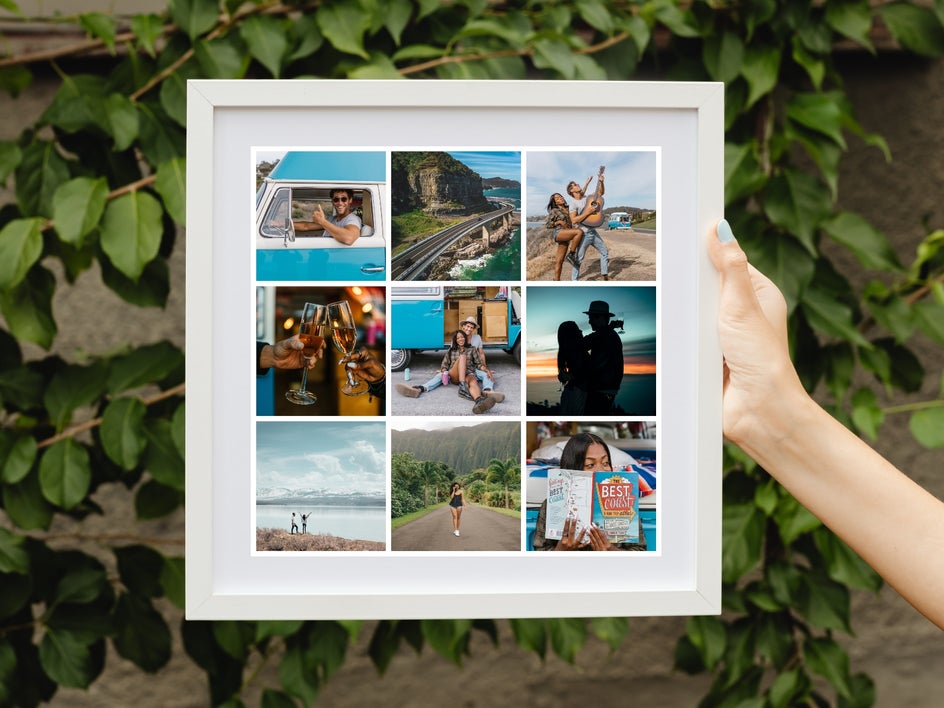
Photo Collage: Final Result
Photo collages aren’t just easy to create, but they’re also a great way to celebrate your relationship with someone special.
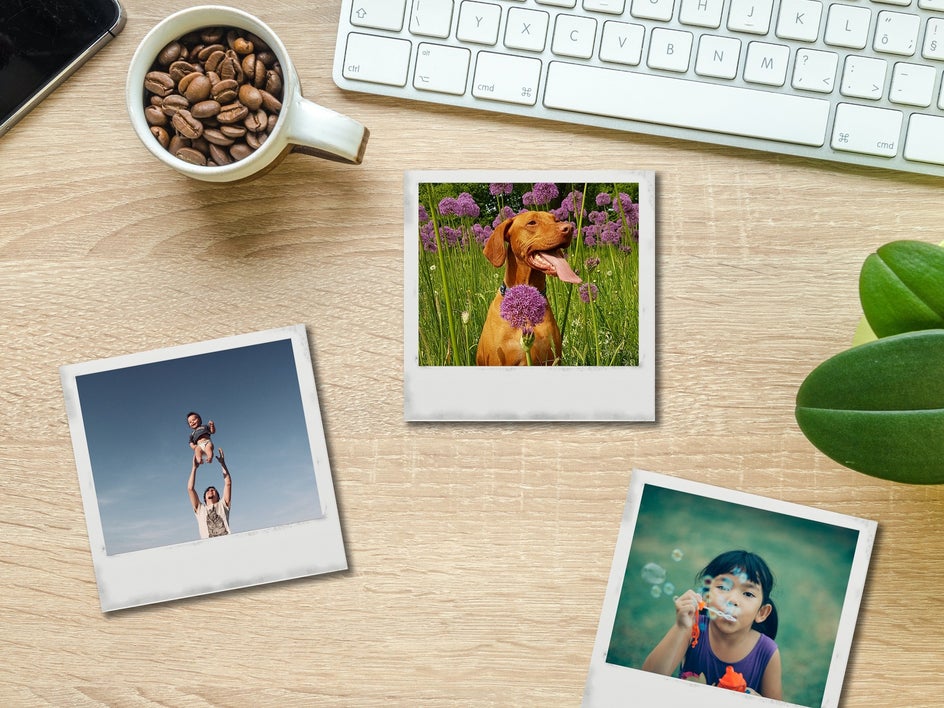
4. Polaroid Photo Coasters
How about creating a DIY photo gift that’s practical and heartfelt? The original inspiration for these DIY Polaroid photo coasters came from this tutorial. You can start creating your own Polaroid photo designs by heading to the Photo Editor and opening a photo of your choice.
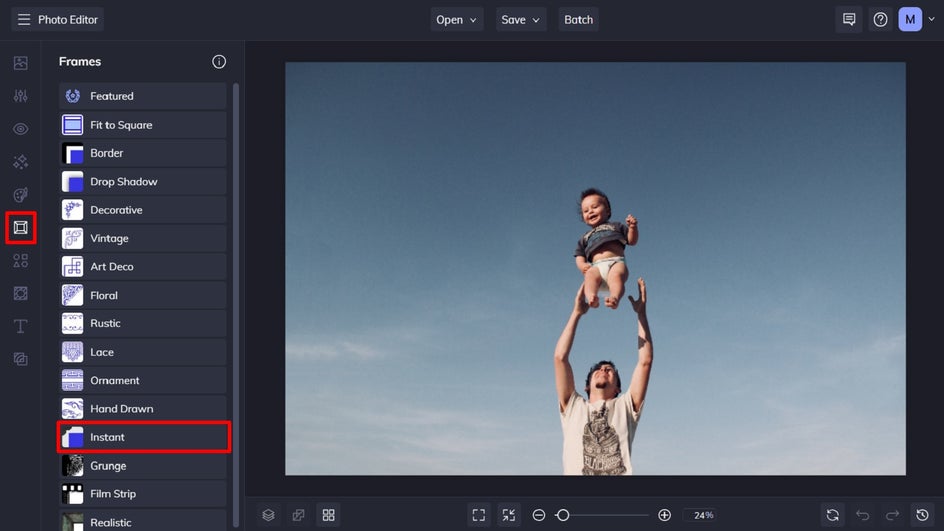
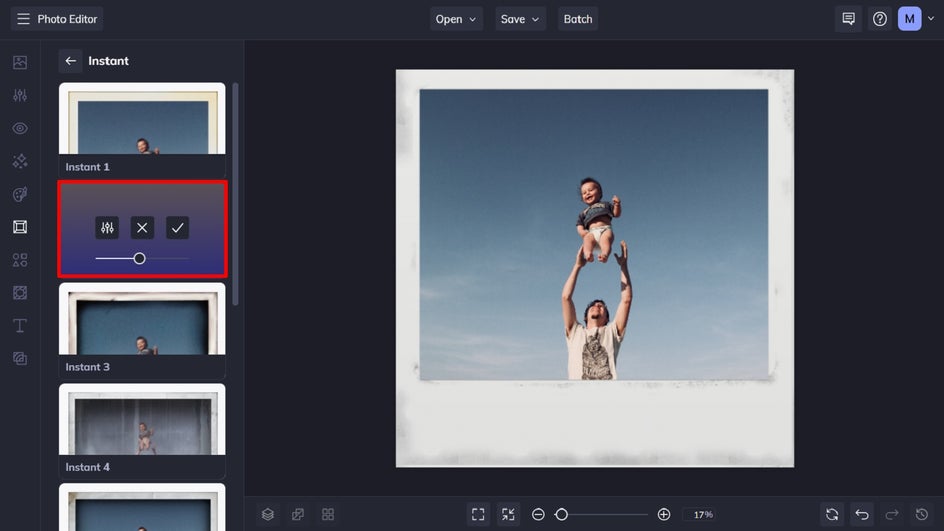
Step 1: Navigate to Frames
Once you’ve uploaded the first photo you wish to turn into a Polaroid, navigate to Frames in the main menu on the left, then click Instant.
Step 2: Select and Apply Your Instant Frame
Sample each of the Instant frames available, then apply the one which you like the most.
Step 3: Resize Your Polaroid Photo
The size you wish to print out your Polaroid photos will depend on the size of the coaster you’ll be gluing them to—whether that’s a tile, thick piece of cardboard, wood, or more.
You can determine the exact pixel measurements by using our handy conversion chart. Then, navigate to Edit, followed by Resize to input your desired dimensions.

Step 4: Save Your Polaroid Photos
Once you’re finished, all that’s left to do is save your Polaroid photos so they’re ready to print out and turn into coasters! Click Save at the top of the screen, then select your desired save location.

Polaroid Coasters: Final Result
There you have it—your very own DIY Polaroid photo coasters. Once they’ve been glued onto your chosen coaster backing, don’t forget to spray some clear acrylic finishing spray or apply mod podge over the tops of the images to ensure they stay in pristine condition.
Start Your DIY Photo Gifts Today!
Creating your very own gifts for loved ones has never been so easy or fun. Thanks to the wide range of tools available in BeFunky’s Creative Suite, you’ve got everything you need to create framed art, inspirational picture quotes, photo collages, or even DIY Polaroid coasters.
What gift will you create first? Head to BeFunky to get started!