Wrap It Up! Simple Ways To DIY Your Holiday Giftwrap
One of my favorite things to do at Christmas time is find the perfect gifts for the ones I love. I keep a running list all year long, taking notes on things they like. But almost as much as I love seeing the look on their face when they open a thoughtful gift, I get a real thrill out of getting creative with the wrapping paper! Sure, the wonderful people at retail outlets have a lovely arsenal of gift wrap, but there’s something amazing about taking the time to decorate and personalize the paper myself. Did I mention I am an overachiever?
Anyways, my house doesn’t have the best lighting for taking pictures of the process, but thanks to BeFunky’s Photo Editor I was able to edit to my heart’s desire so I can show you all how this gift wrap stuff is done. Just a few simple edits, like cropping, sharpening, and adding a filter, bring out the magic of the creativity. I'll show you some before and afters to show you how simple it is. But first, here are a few of my favorite ways to decorate gifts for Christmas:
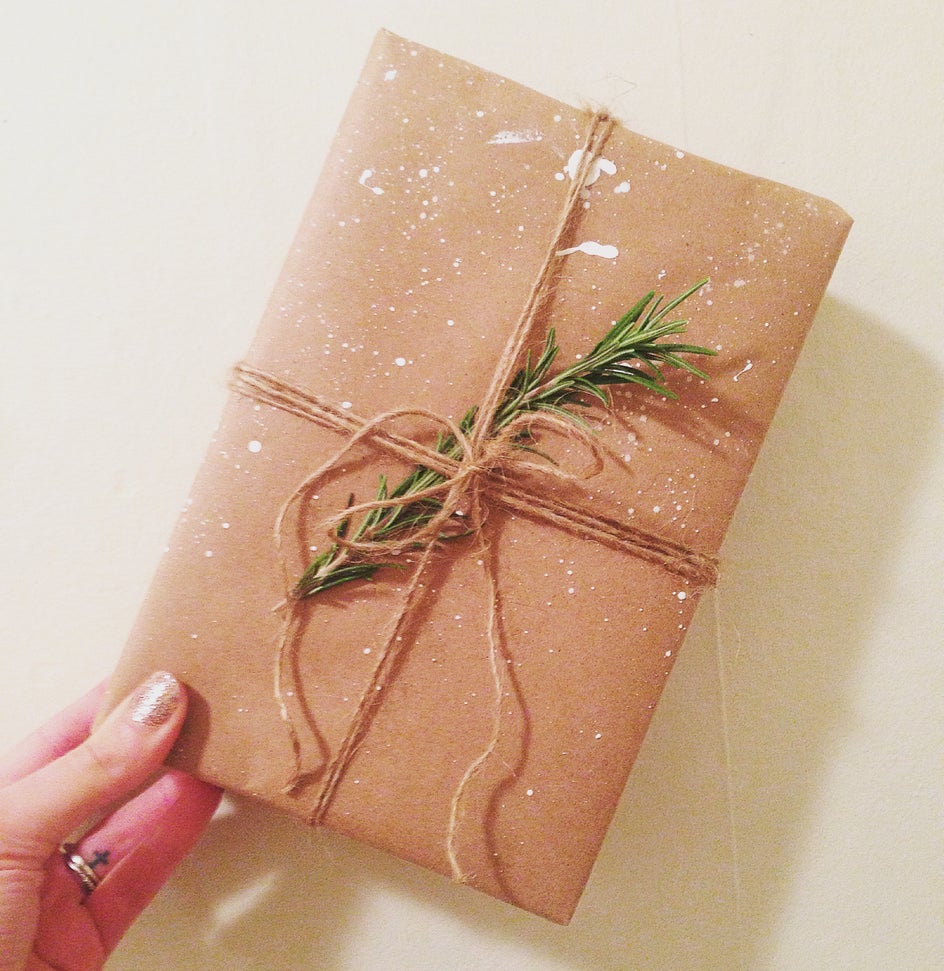
Paint Splattery Wonderland
Start with some acrylic white paint, water, and a paintbrush. You’ll also want to lay some newspaper or plastic down because the splattering can get a bit messy. Water down the paint to splattering consistency and splatter the paint onto brown shipping paper.
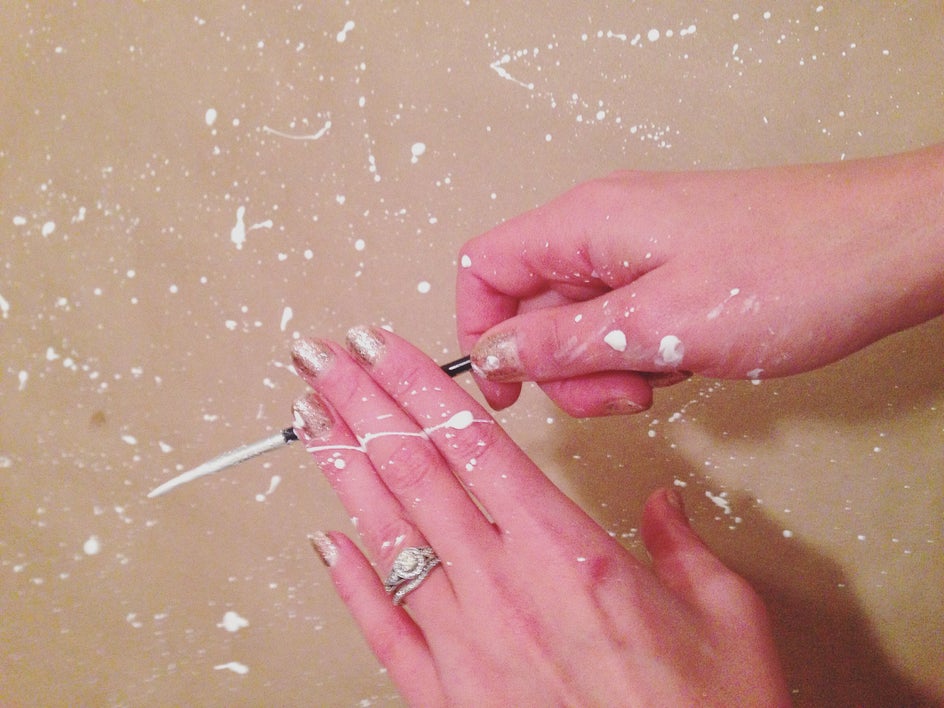
Finish it up with some twine and a sprig of rosemary or pine.
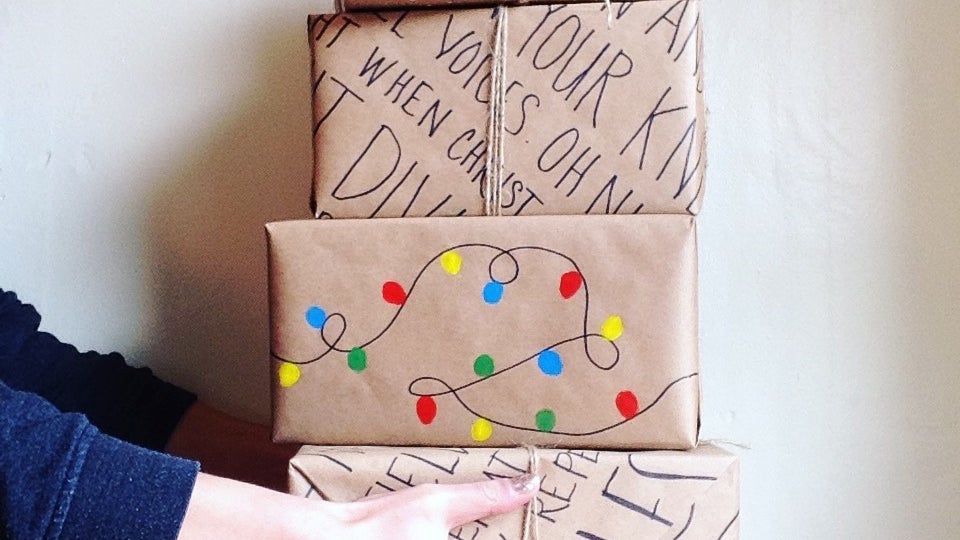
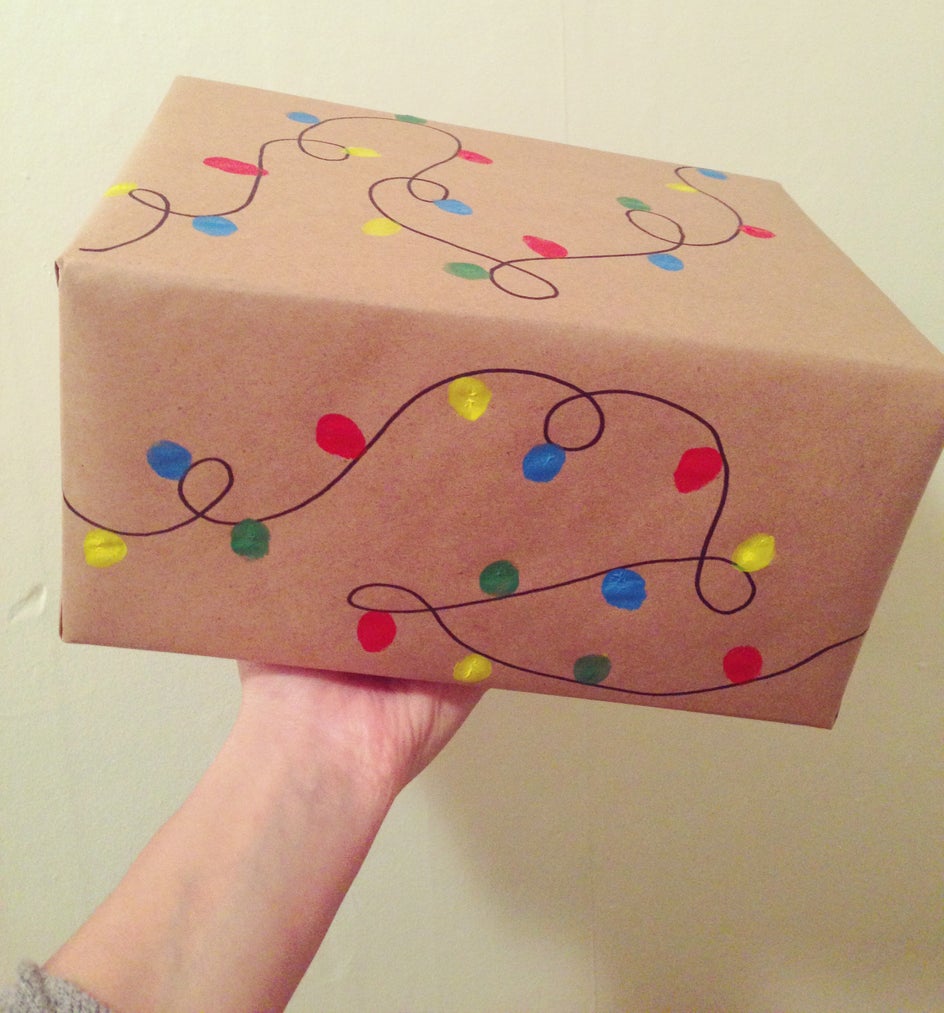
Christmas Lights
This one is super kid-friendly. In fact, if you’ve got little ones it would be the cutest thing ever to have them finger paint the Christmas lights. Basically, draw a cord with a Sharpie and finger paint the lights with acrylic paint.
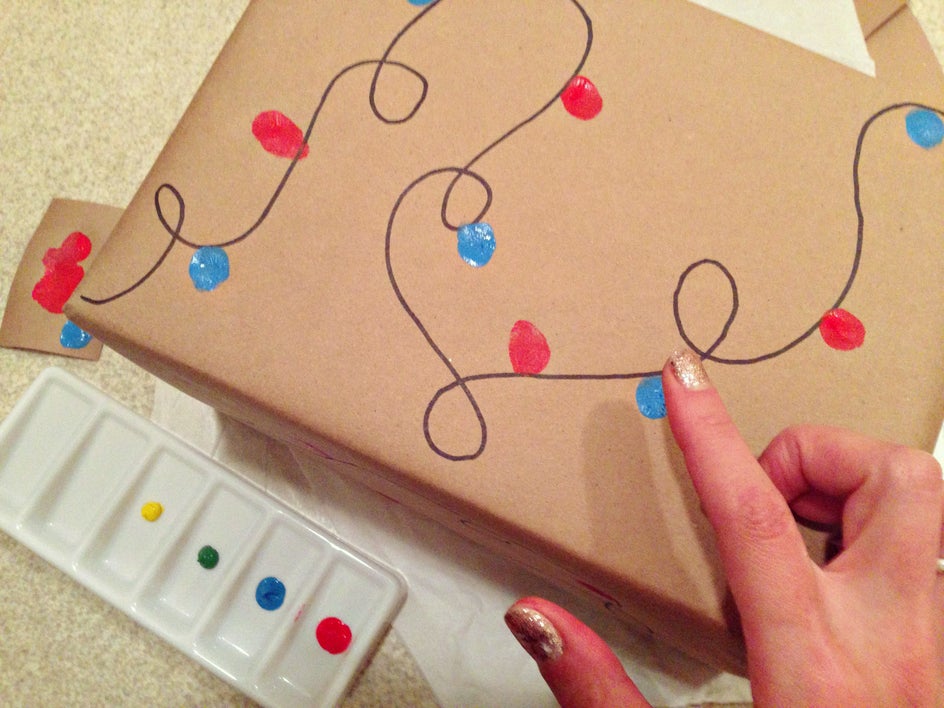
Then let it dry.
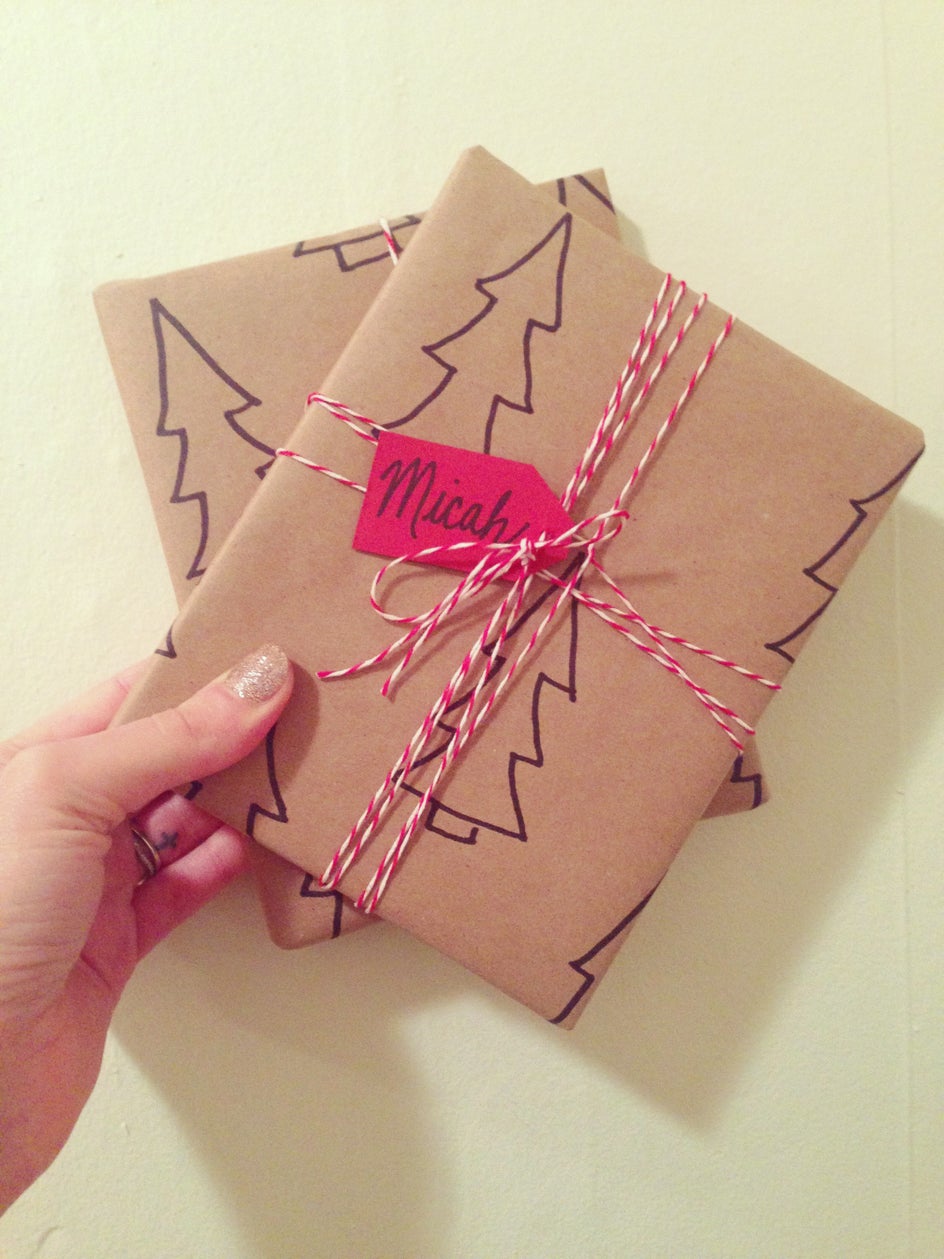
Christmas Trees
Take a Sharpie or white out pen and draw some Christmas trees on the shipping paper. They don’t have to be perfect, I just freehanded them and tried to keep them evenly-spaced.
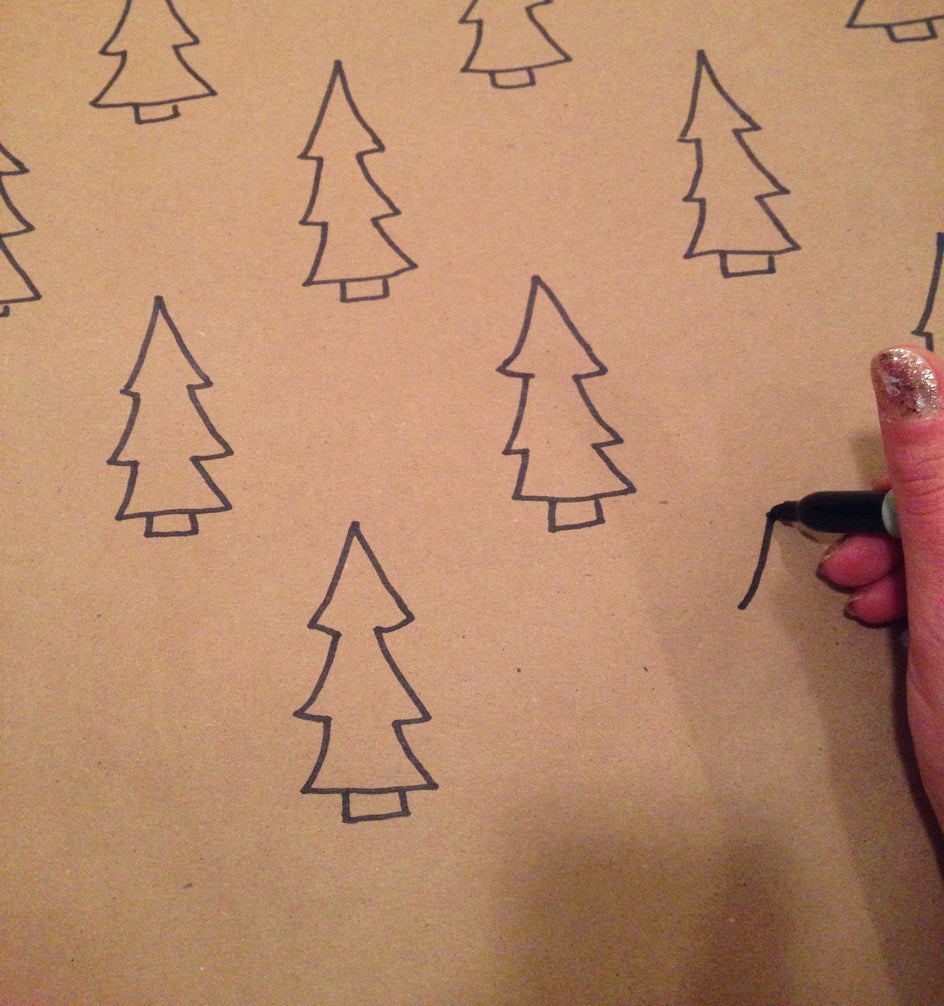
Then finish it off with some baker’s twine and a handmade tag. This tag is just construction paper and Sharpie.
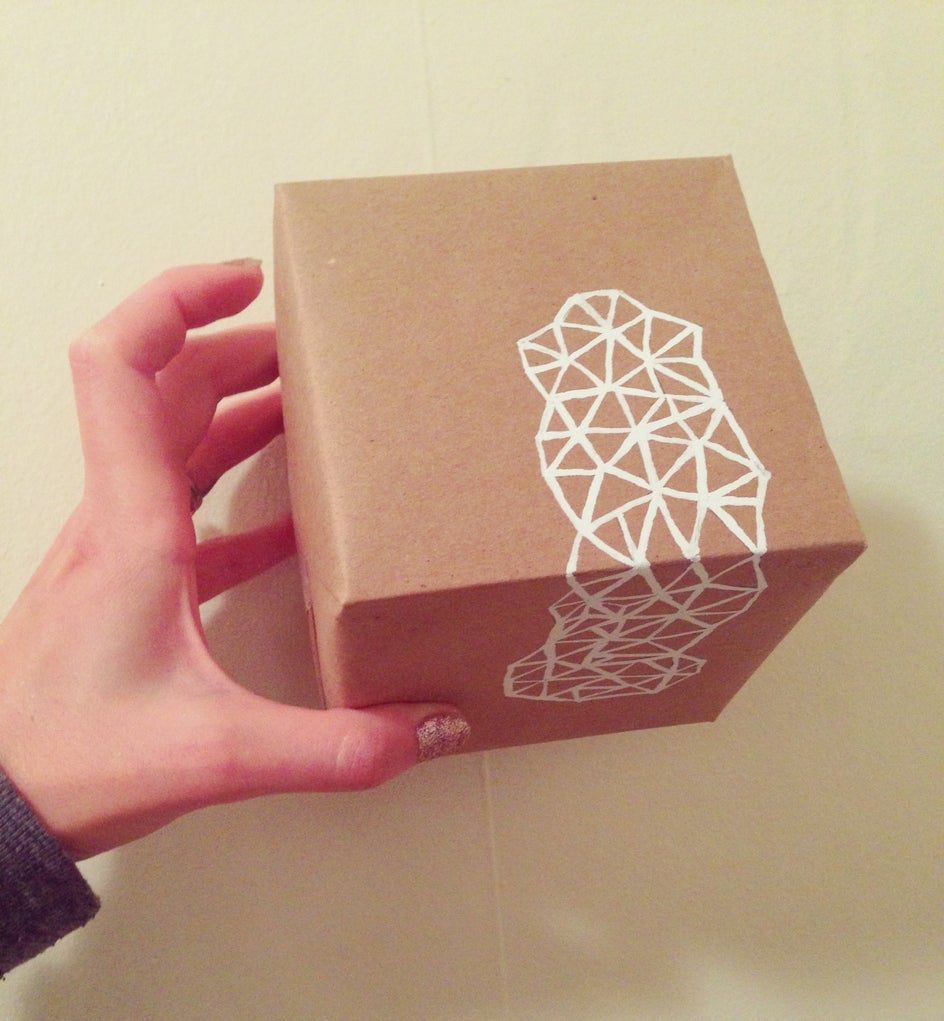
Geometric Patterns
Draw some geometric shapes with a pencil. I used a straightedge to draw triangle pattern.
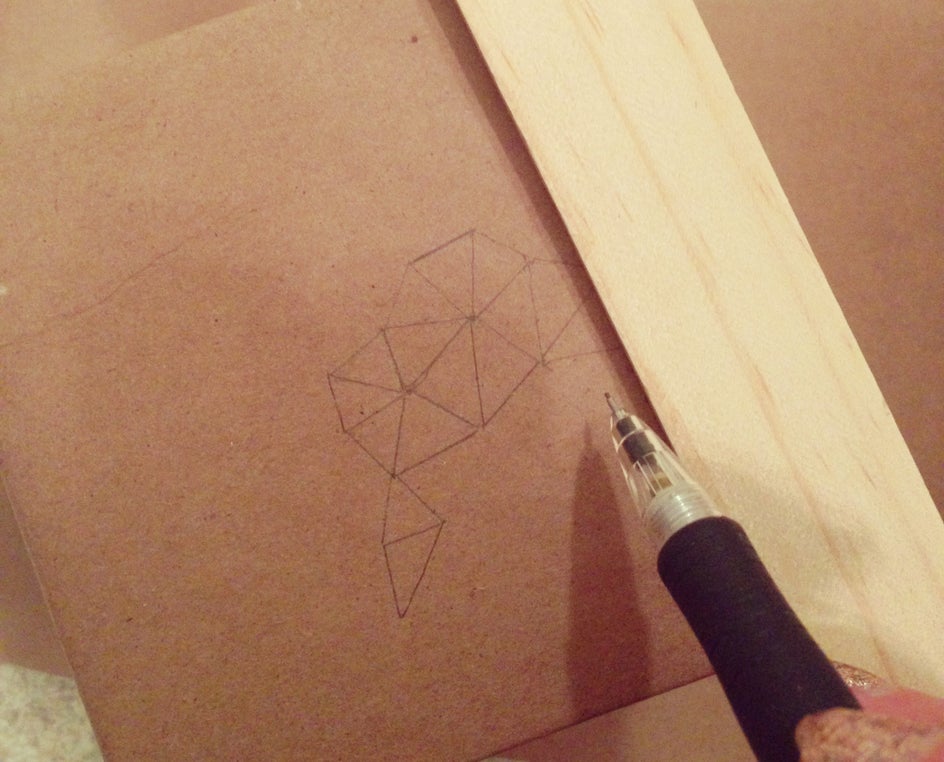
Then draw over the pencil with a white out pen.
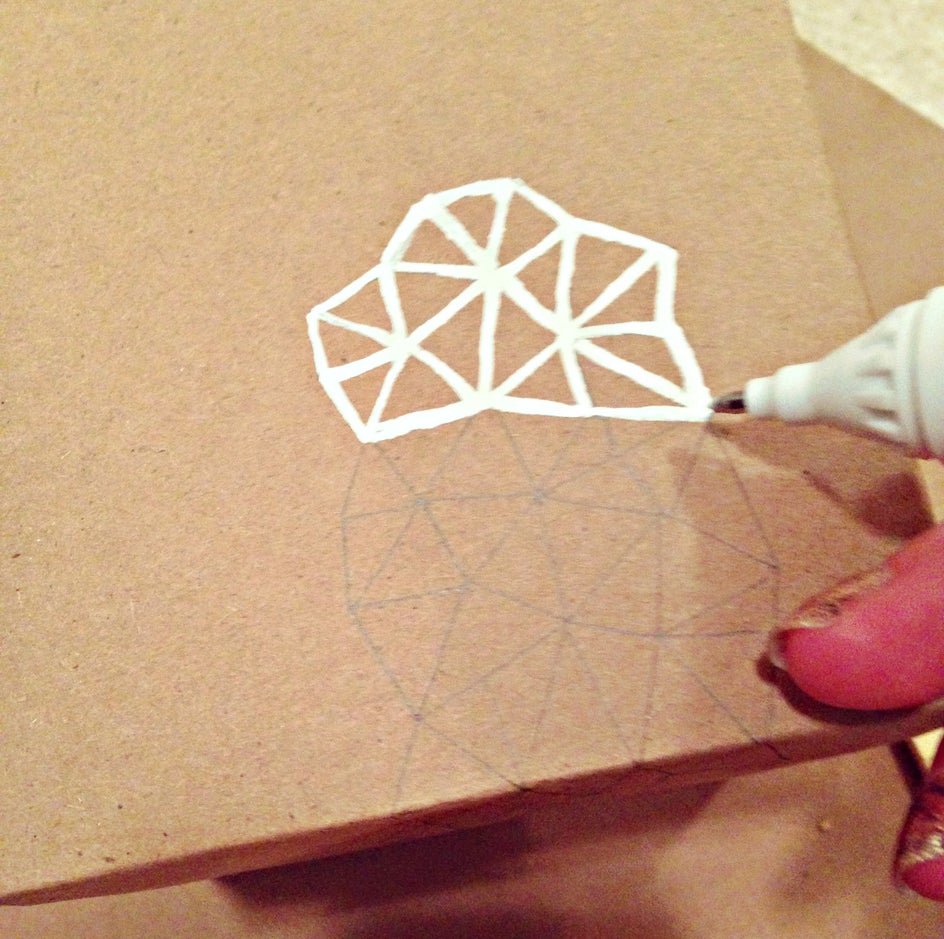
Voila.
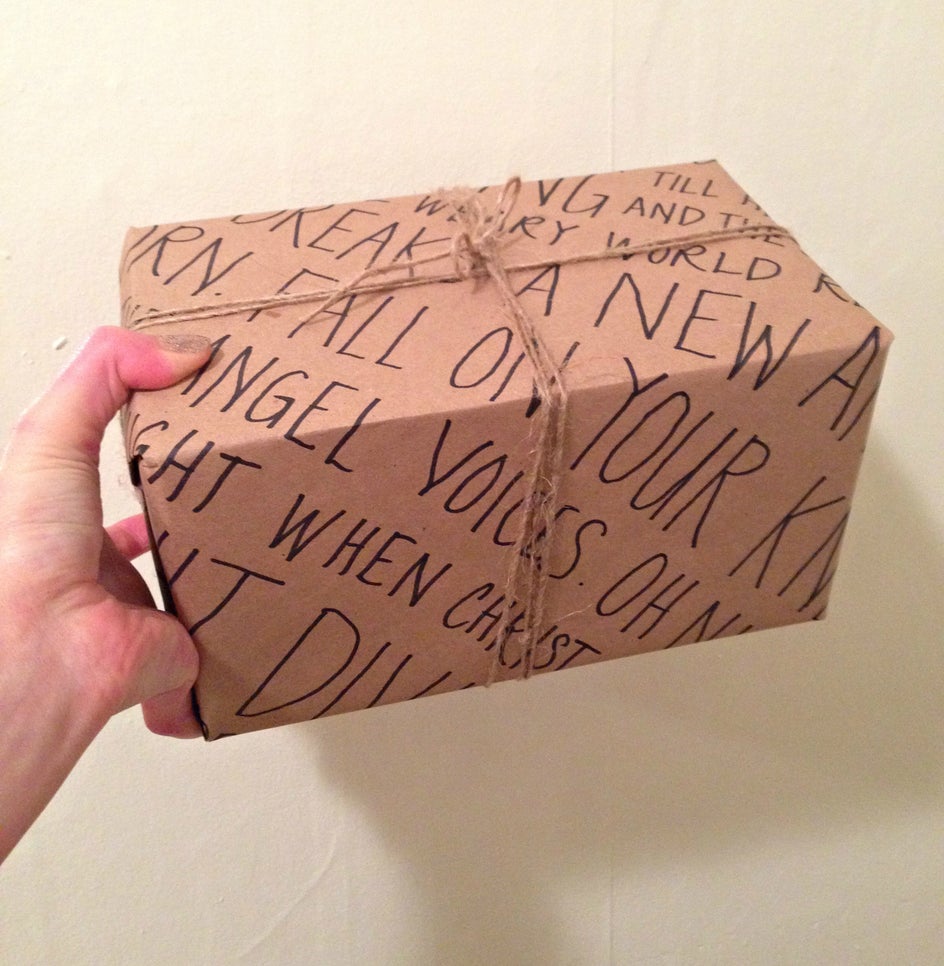
Christmas Song Lyrics
Write out the lyrics to your favorite Christmas song. I wrote the lyrics to Oh Holy Night with each line in different sized capital font.
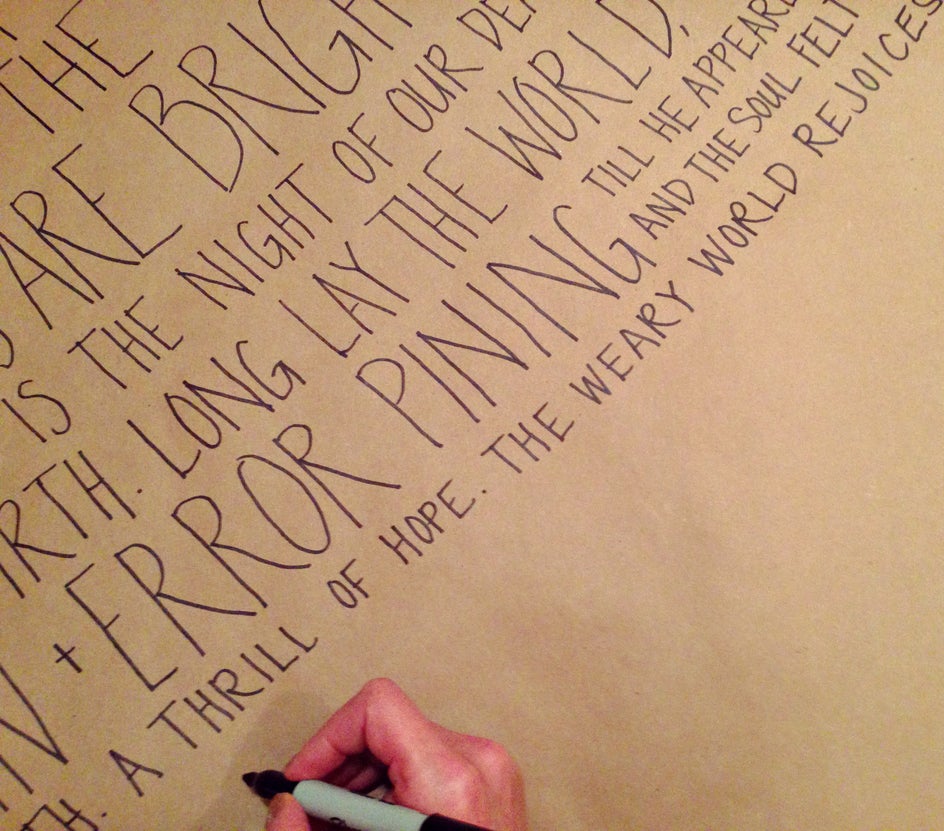
Then wrapped the present and finished it with some twine.
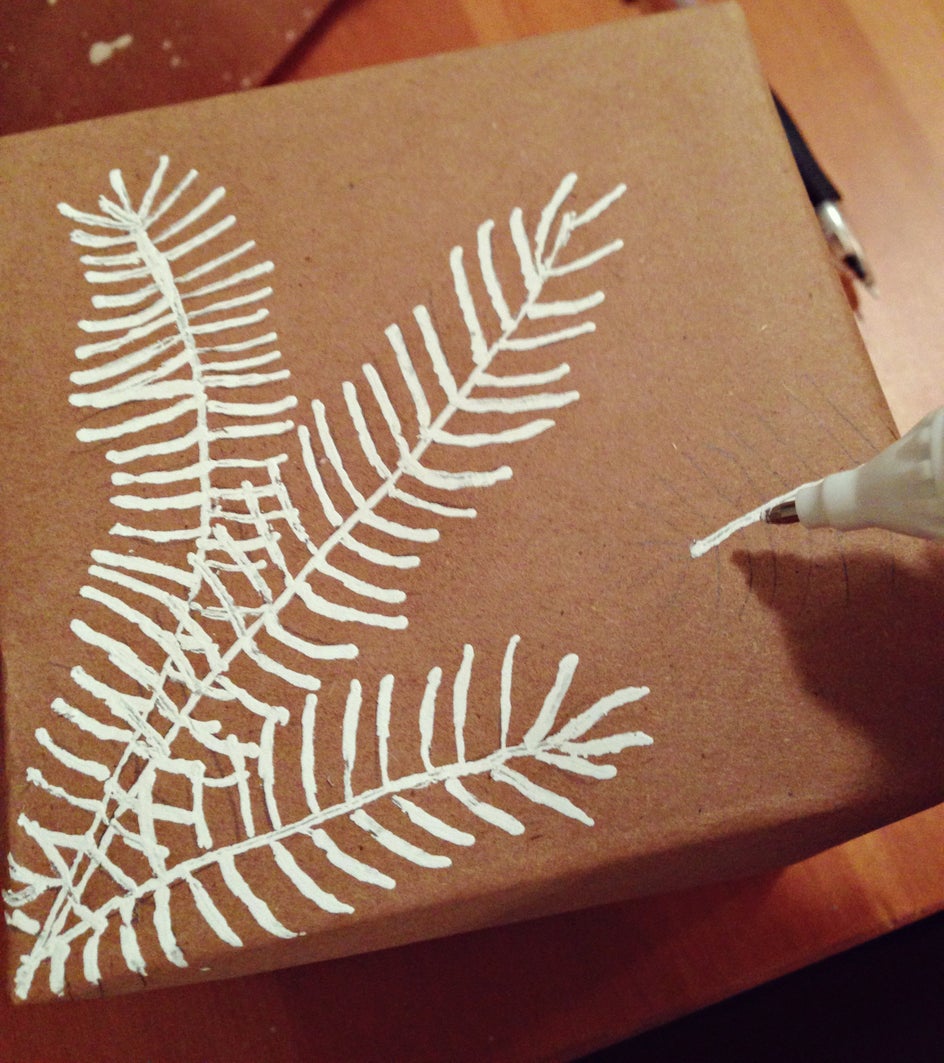
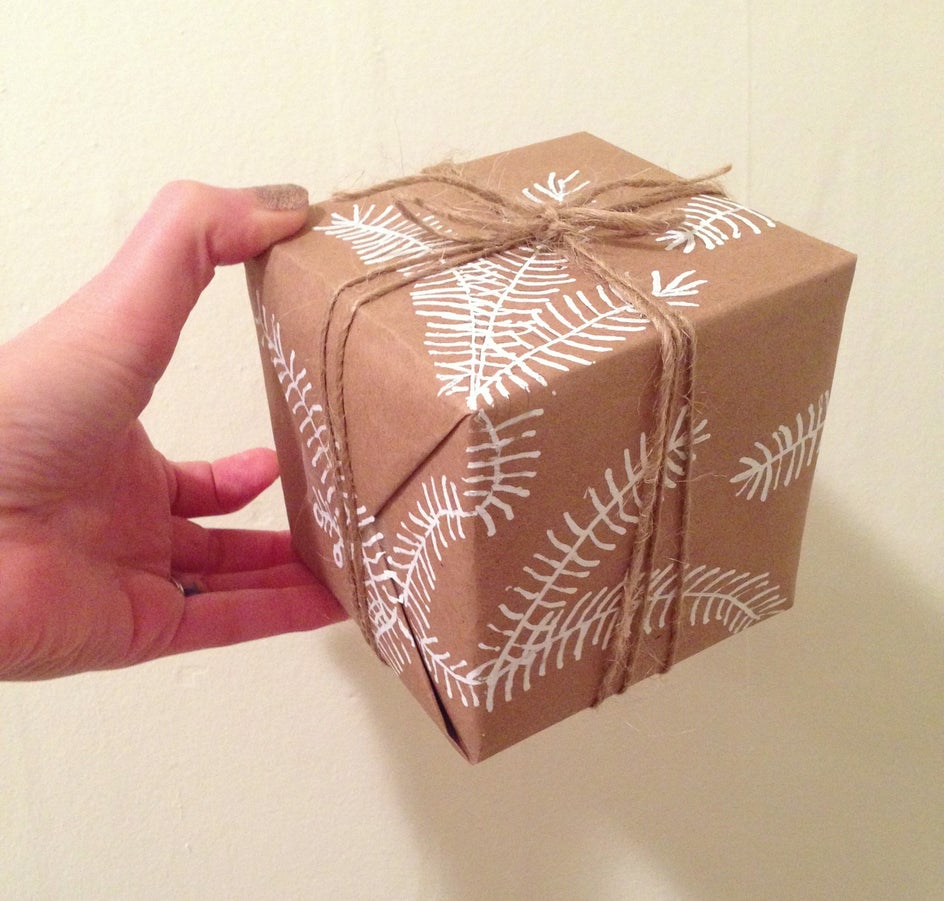
Christmas Pine
Start by drawing sprigs of pine all over the wrapped present in pencil. Then trace over the pencil with white out.
Finish it up with some twine and voila!
My Images Before And After
Remember how I told you the lighting in our house is awful? The splatter paint photo would have been a disaster without BeFunky. And y'all know how important it is to have sleek, eye-catching photos for blogs, social media, and more (if you're looking for holiday inspiration, the BeFunky Pinterest is chock full of goodies). Under the Edit tab in the Photo Editor, I was able to sharpen and brighten this dimly lit photo. Then I added a Chromatic 3 filter to give it that extra dose of wow. Here's a little before and after:
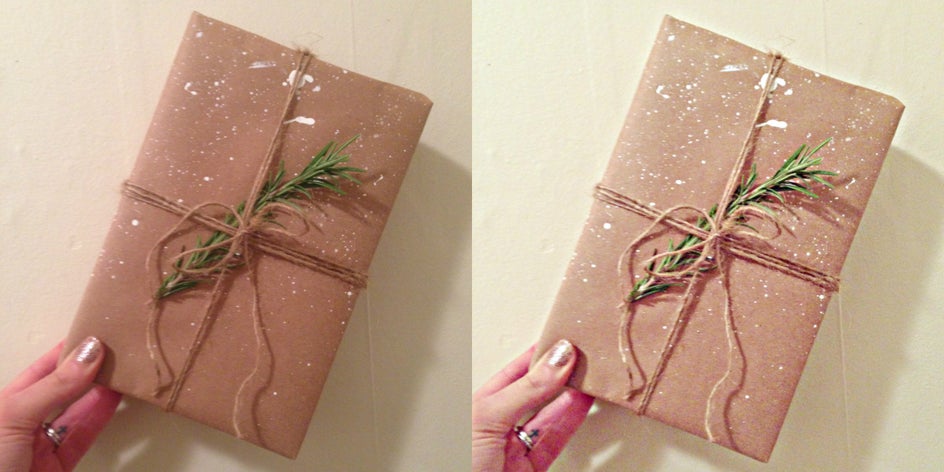
I used BeFunky's Collage Maker to show you this little side-by-side. See how these simple edits bring out the detail in my work?
Here's another example of how BeFunky came through to make my image pop. The original image included part of my sweatshirt that I was able to easily crop out via the Edit tab in the Photo Editor:
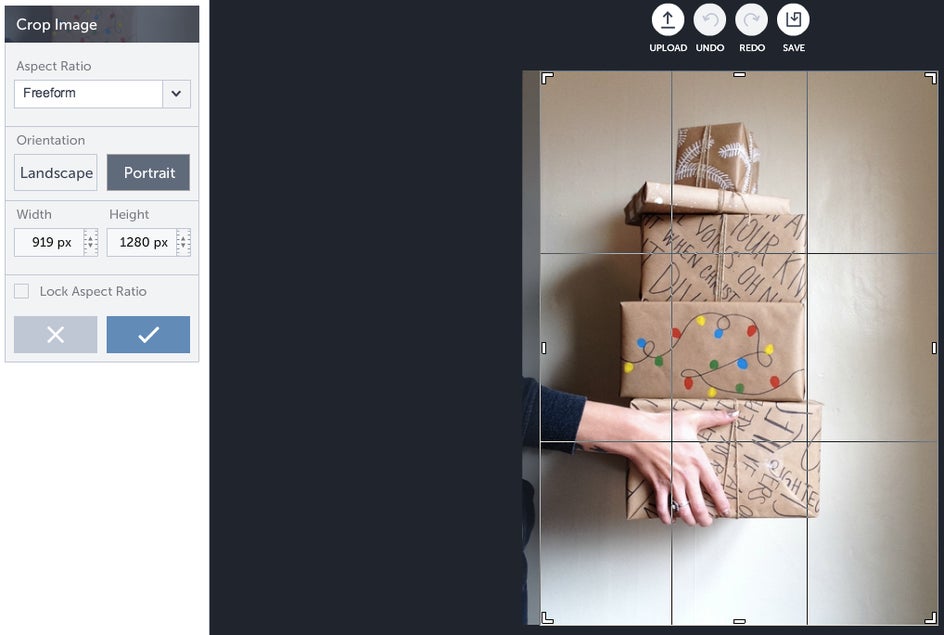
After cropping out my kangaroo pouch, I once again brightened up the photo using the Exposure scale, then sharpened and added the same Chromatic 3 filter to keep the images looking uniform. Here's a little before and after:

Ready to get to wrapping? Just let your creativity flow and remember, if you want to document your creative journey, BeFunky Photo Editor is the best way to sharpen up your images. Follow the link below and have yourself a merry little Christmas.