DIY Prints for Home Decor on a Budget
If you’ve ever moved into your own house or apartment, then you know just how expensive it can be. Once you’ve finished furnishing each room and buying other necessities, you no doubt turn your attention to all that empty wall space.
Wall art prints can be expensive, but just because your wallet is feeling empty doesn’t mean your walls have to be! Thanks to BeFunky’s Graphic Designer, you can create DIY wall art for next to nothing. Keep reading to learn how!
How to Make Wall Art Prints Using BeFunky
Ready to make a homemade wall poster? To get started, head to the Graphic Designer.
Step 1: Choose a Blank Canvas Size
When you start a design in the Graphic Designer, you can choose to select a premade template or start with a blank canvas. Click Blank Canvas at the top of the screen, then select your desired canvas size. For optimal print sizes, scroll down to the Print section, as pictured.
If you have a specific size in mind that’s not featured, you can also enter the pixel measurements in the Width and Height section to the left. If you need help determining these measurements, check out our helpful chart that converts inches to pixels for common print sizes.
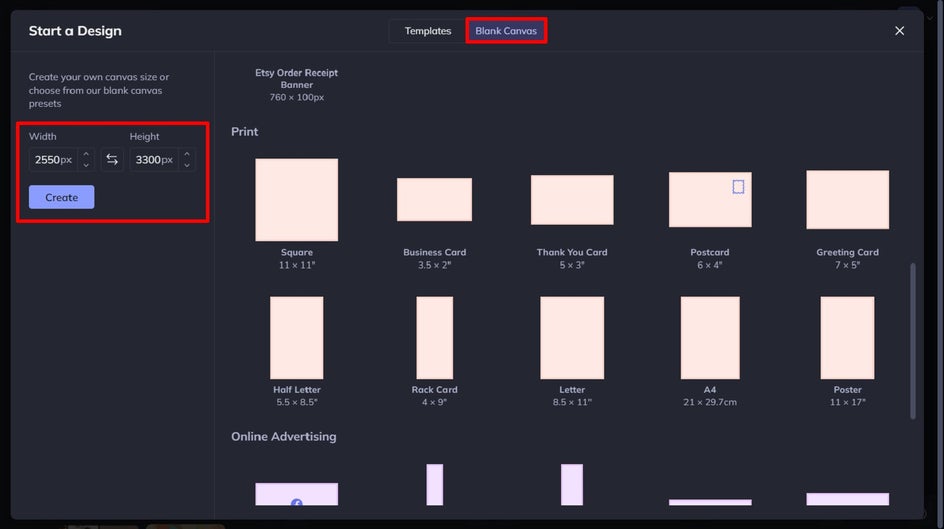
As a simple guideline, 1 inch equals 300 pixels in BeFunky. That means all you have to do is multiply the number of inches by 300 to get your inches to pixels ratio.
For this tutorial, we’re using a Letter-sized canvas for an 8.5” x 11” print.
Step 2: Add Your Background
Next, you’ll want to add a background to your canvas. You can either select a colored background by navigating to Customize in the main menu on the left, or add an image by clicking on Image Manager (located above Customize).
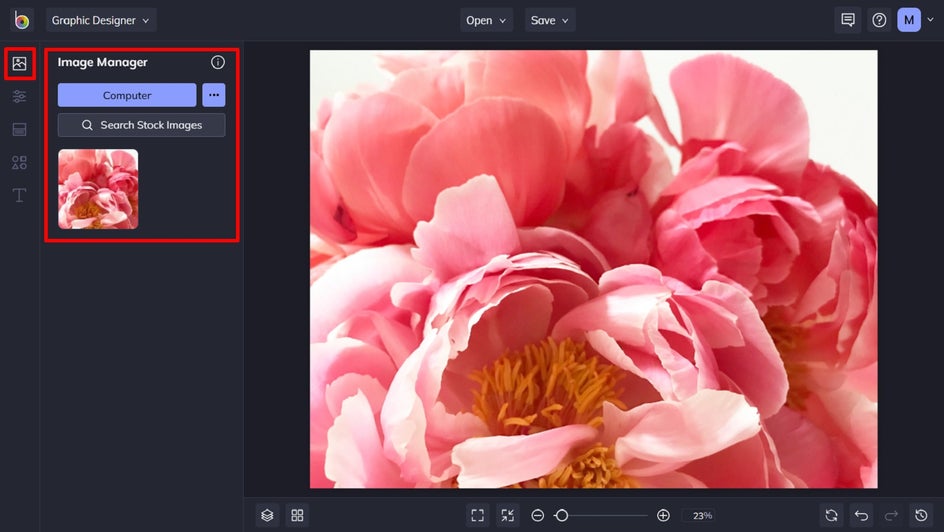
From the Image Manager, you can upload an image from your computer’s files or click Search Stock Images to choose from millions of free stock images. You can also click on the three dots (…) to add an image from your BeFunky account, Google Photos, or Facebook.
Once your image has been uploaded, it will appear as a thumbnail in the Image Manager. Simply double-click it or use your mouse to drag it onto your canvas. Then, resize by dragging the corners of the image inwards (to make it smaller) or outwards (to make it larger).
Step 3: Make Some Edits
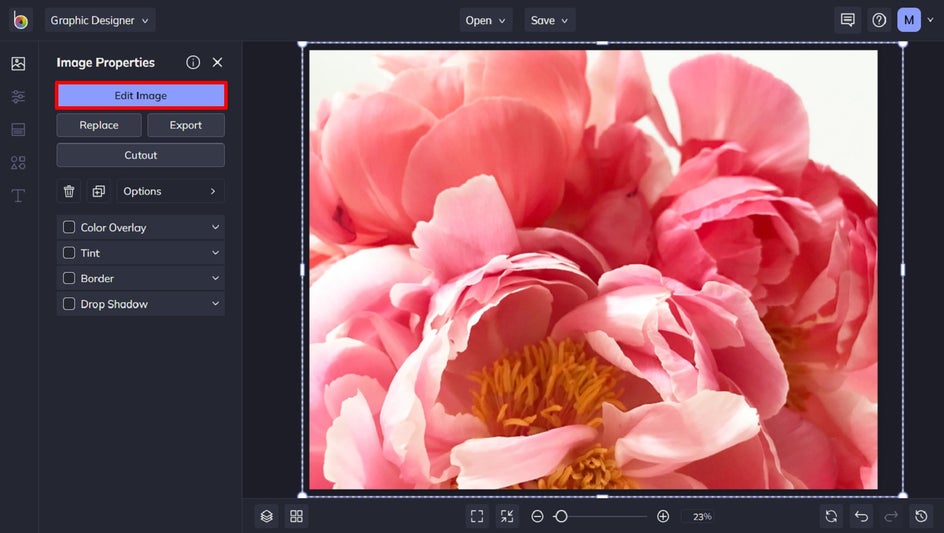
You can also edit your image directly in the Designer. To do this, select the image with your mouse and an Image Properties menu appears. You have the option to add a color overlay, tint, border, or drop shadow. Alternatively, you can edit the image in our Photo Editor, which allows you to add Photo Effects, Textures, Artsy Effects, and more. To do this, simply click Edit Image to open your image in the Photo Editor.
Step 4: Add an Effect (Optional)
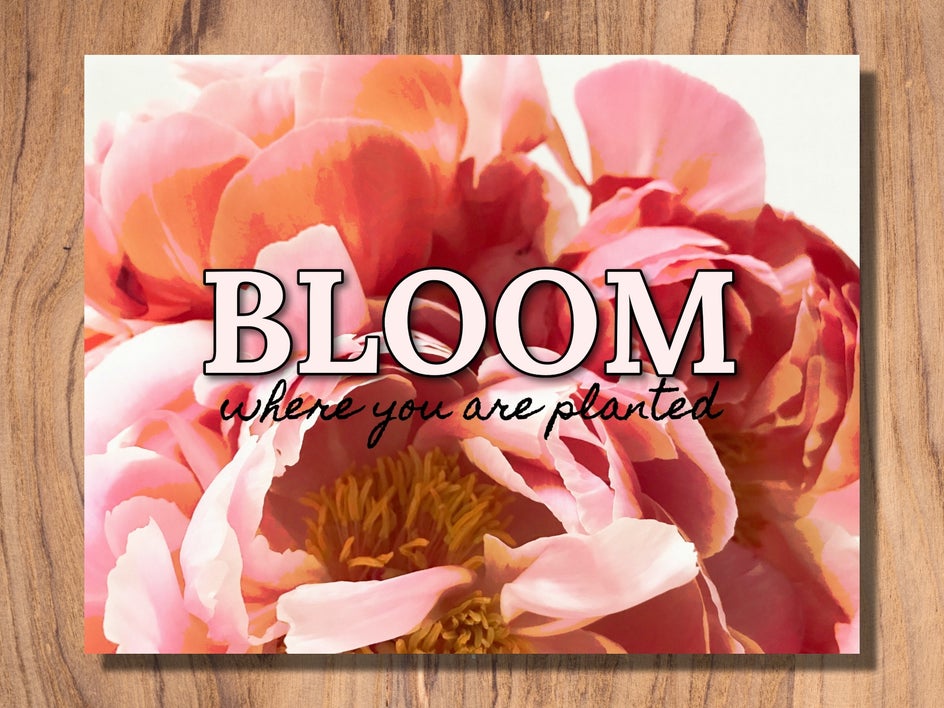
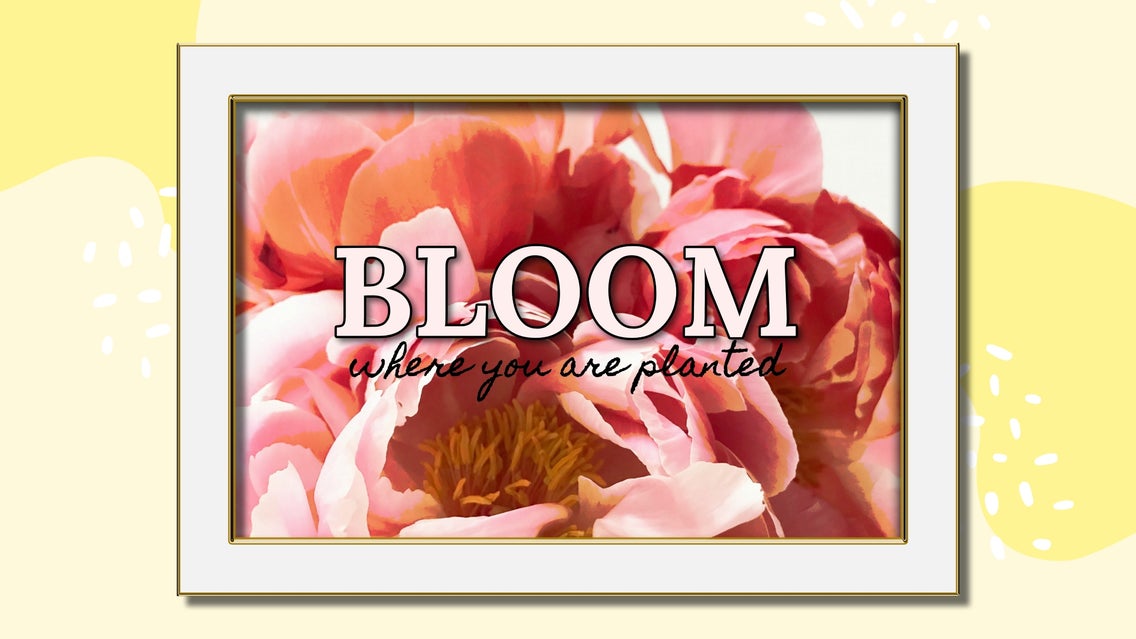
If you want to add an effect to your image, you can do so by clicking on the appropriate category from the main menu on the left. For our image, we want to add an artistic effect to transform it from a realistic photo into a softer-looking artwork.
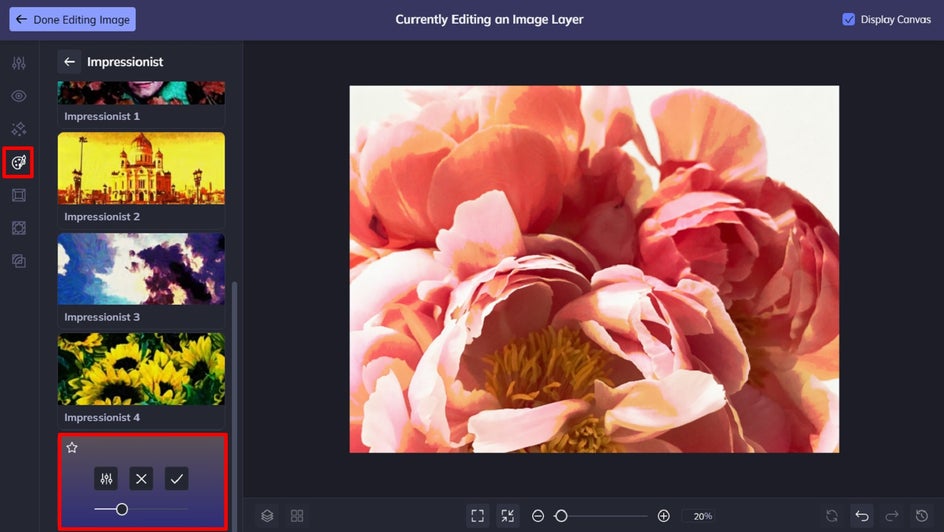
Therefore, we’ve navigated to the Artsy menu and selected Impressionist. There are so many categories of effects to explore, however, so take the time to look around and discover the perfect effect for what you have in mind.
You can also click on an effect to preview how it will look on your image, as we’ve done here.
You’ll also notice when you click on an effect, three options are available: Settings, which allows you to alter the effect further; Cancel, which cancels the selected effect; and Apply, which applies the effect as-is. You can also adjust the strength of the effect using the slider.
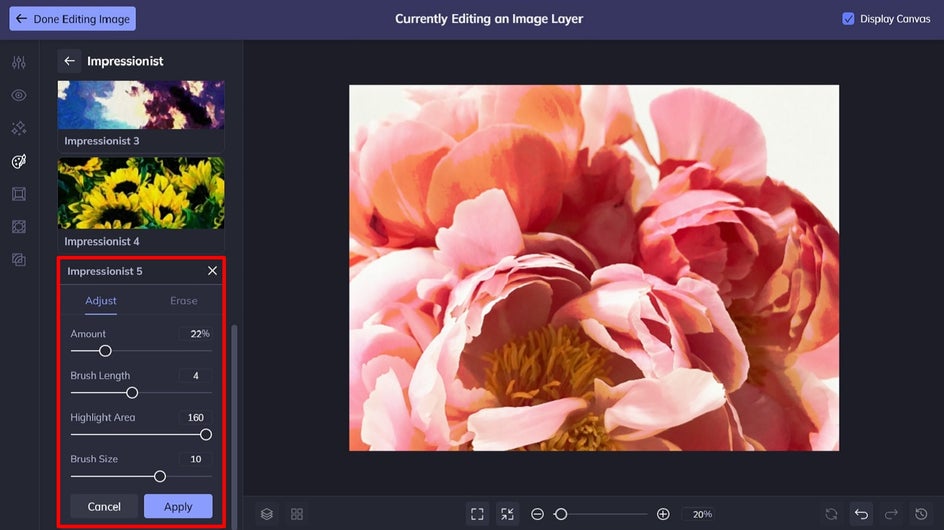
Once you’ve chosen the effect you wish to use, click Settings to see what further customization options are available.
Use the sliders located underneath each to increase or decrease the desired effect. Once you’re happy with how your chosen effect looks, simply click Apply, followed by Done Editing Image in the top-left corner.
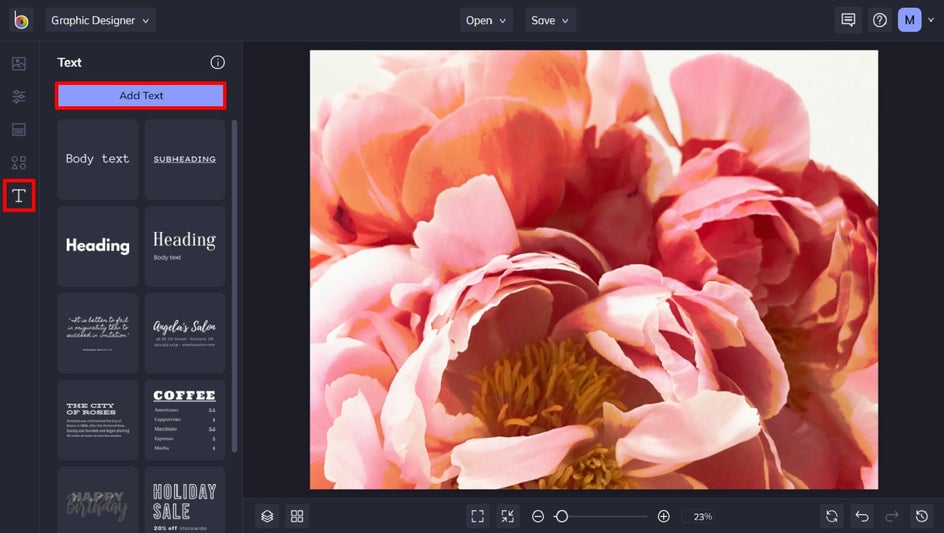
Step 5: Add Text (Optional)
If you wish to add a quote or word to your print, navigate to the Text tab in the main menu on the left, then click Add Text. You can also select from one of our curated text patches below. Double-click your new text box and type what you would like it to say.
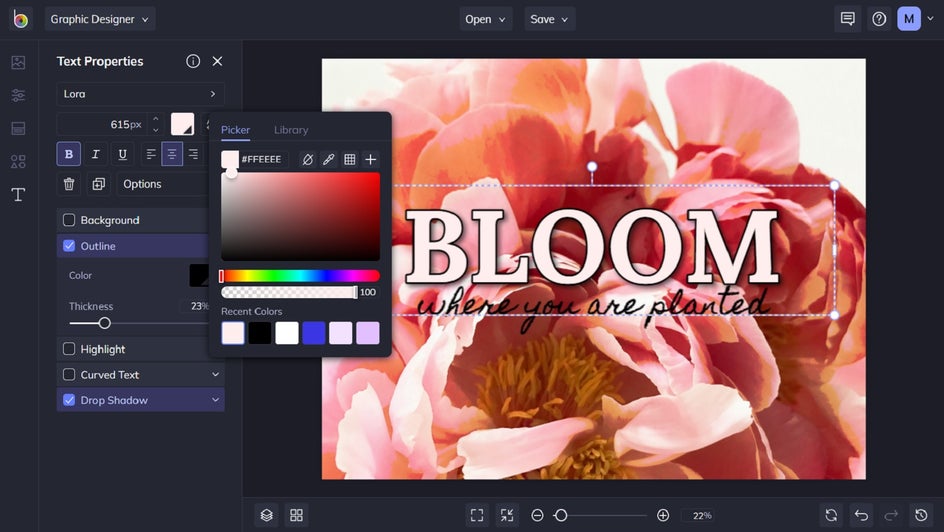
When you select a text box, a Text Properties toolbar appears where you can also adjust things such as the font, size, color, spacing, and more. Additionally, you can add a background, outline, highlight, drop shadow, or even curved text.
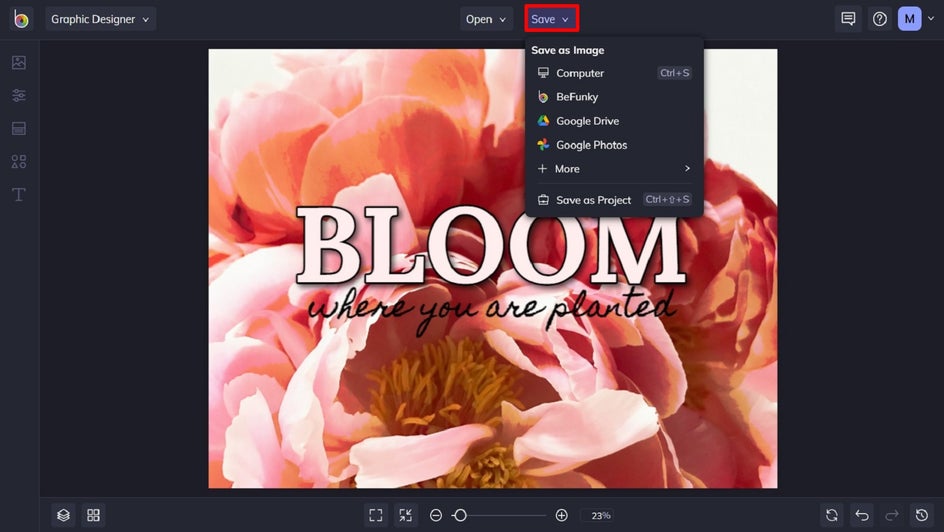
Step 6: Save Your DIY Wall Art Print
Once you’re happy with how your art print looks, it’s time to save it. Click Save at the top of the screen, then select your desired save location. We recommend saving your print as a PDF for the highest quality for printing.
Then, all that’s left to do is print your file, frame it, and hang it on your wall!
Final Results – Create DIY Wall Art on a Budget!
Forget paying a small fortune for interesting wall art. With BeFunky’s creative suite, making a homemade wall poster or print has never been easier or more affordable!