How to Achieve a Double Exposure Effect

Double Exposure images are the swoon-worthy surreal photos that make you wonder, "How did the photographer get the shot like that?" You might think that it's a very complicated effect to recreate, but in the age of digital photo editing, anyone can achieve the look with some great images and the right tools.
What Is Double Exposure Photography?
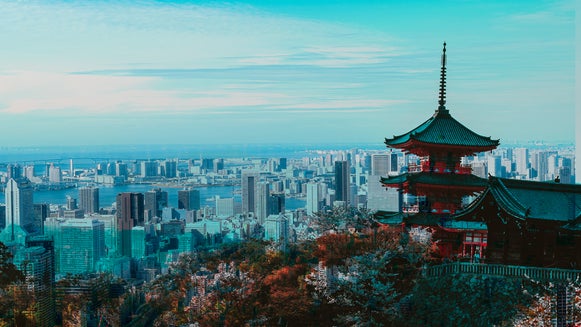
Double exposure photography is a term used for layering an image onto another to create a single photograph. Even though it's a popular effect now, the technique was most likely discovered by accident – by capturing a photo on a portion of film where another already existed.
Once the double exposure effect became something people wanted to recreate on purpose, photographers found ways to manipulate their photos in the darkroom by placing two negatives on top of one another while they developed their prints.
How to Add a Double Exposure Effect to Your Photo
Thankfully, with BeFunky, you won't need a darkroom to achieve this unique look. This technical feat that was once only accessible to a few camera-savvy individuals can now be created with just a few clicks in the Photo Editor. Read on to find out how!
Step 1: Add Your Background Photo
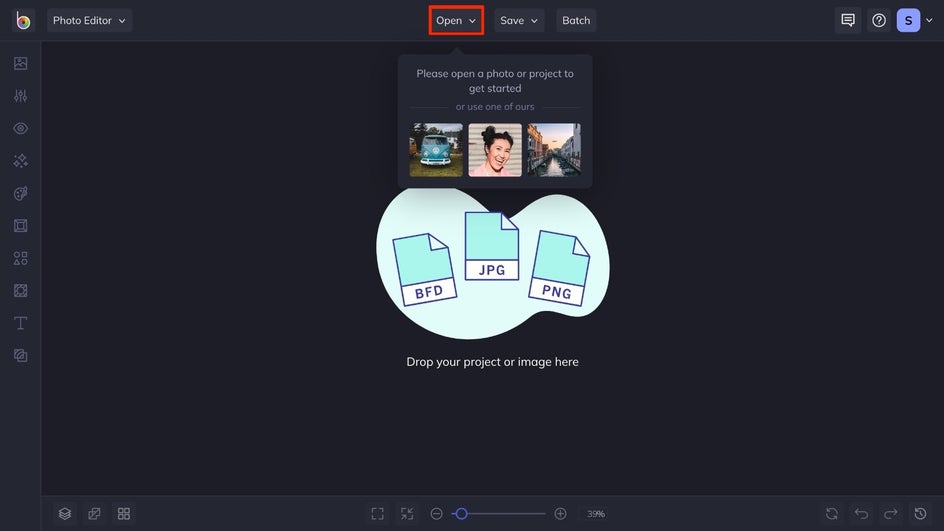
For this tutorial, we will be creating a double exposure image using the Photo Editor. First, select your image for the background. When you are choosing a background image, keep in mind that you will want something that has a lot of contrast. That way, when the overlay image is added, the end result will be more pronounced. You can open the photo you want to use as the background for your image by dragging and dropping it onto the canvas or by clicking the Open tab.
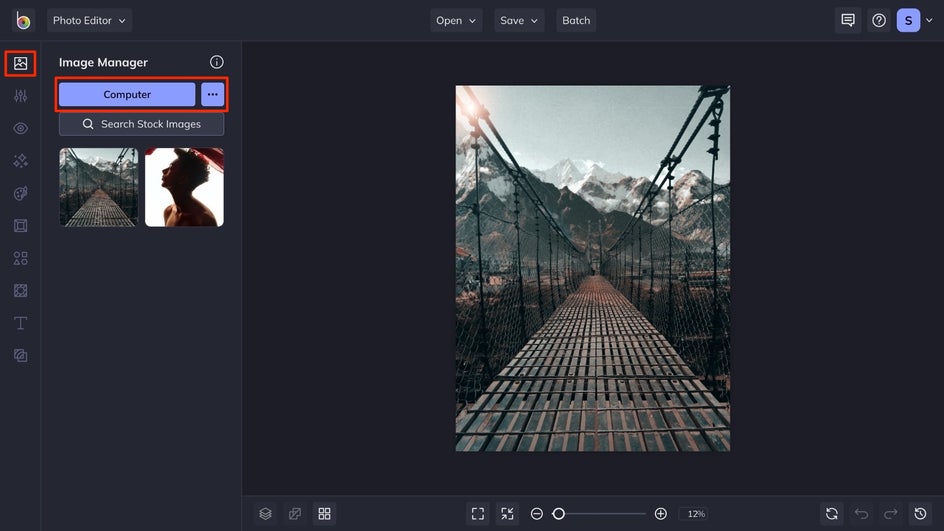
Step 2: Add Your Second Photo Layer
After you have selected the perfect first image, you will need to add a second image to create the look of a double exposure photograph. When you are ready, click the Image Manager tab, where you can drag and drop a photo directly into your library, or choose one of the other available options for uploading.
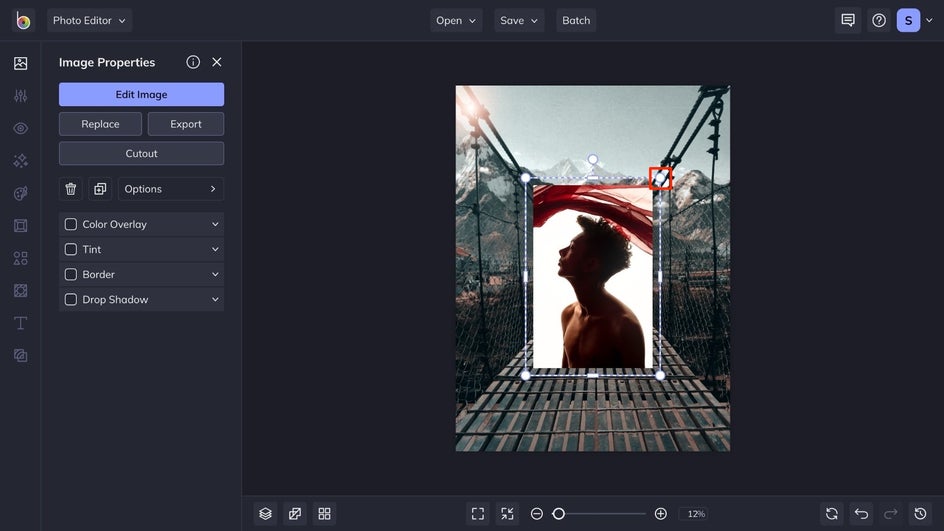
Next, it's time to resize the second image to fit the canvas by dragging the circles in each corner. Similarly, you can right-click and select Fit to Canvas or Fill Canvas. The second image should be the same size, or larger than the background, so that you have the best coverage. After you resize the image, you can move it around until it's in the perfect spot.
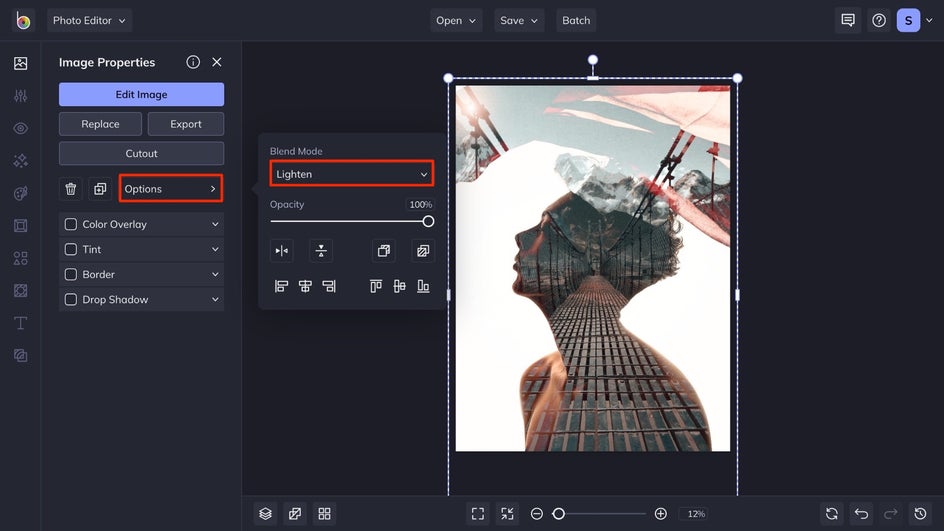
Step 3: Adjust the Blend Mode and Opacity
With the top image layer selected, click on the Options tab, followed by Blend Mode. To create the quintessential double exposure image, the best blend modes to use are Screen, Overlay, or Lighten. For this tutorial, we will use the Lighten blend mode.
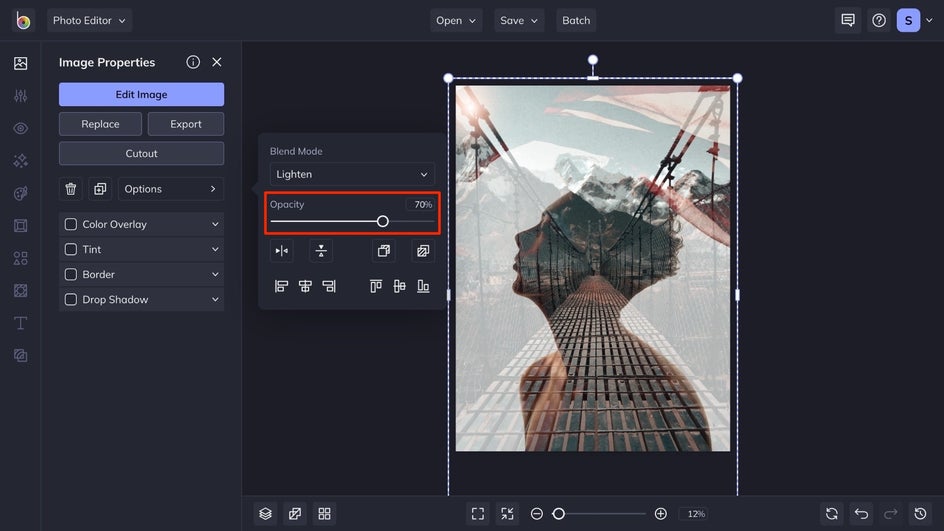
Once you've selected the blend mode that suits your image best, adjust the opacity of your image using the slider. This will help you get the authentic look of a double exposure image taken on a DSLR camera, but without the hassle!
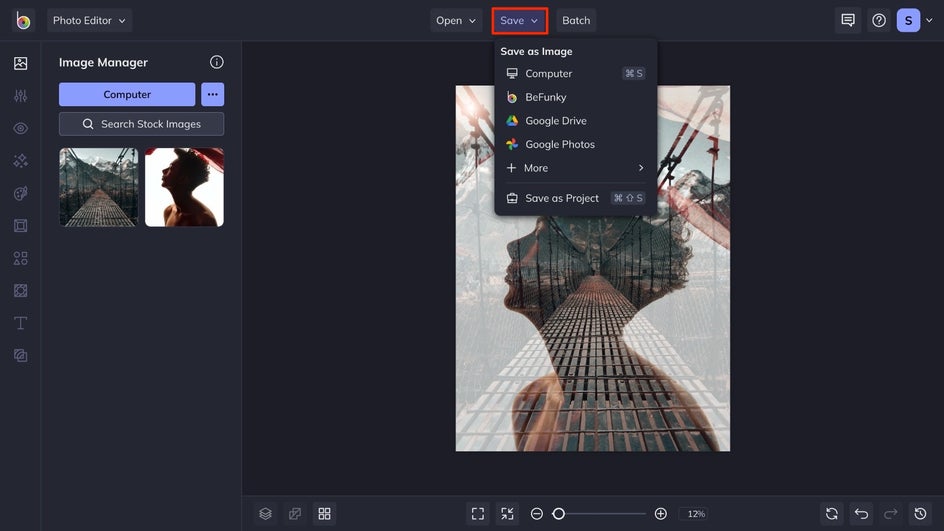
Step 4: Save Your Double Exposure Photo
Once you've perfected the look of your photo, click the Save button and choose your desired location. Share it directly to social media, as a PDF for printing, as a project to come back to later, and more.
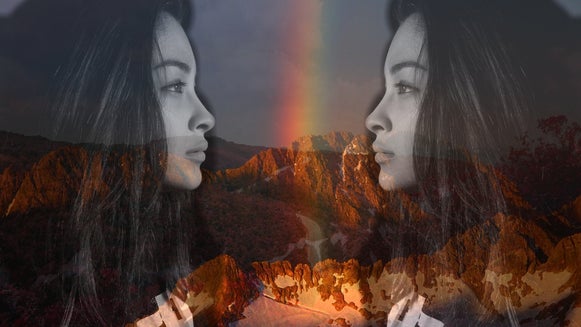
Double Exposure: Before and After
In just four easy steps, you are able to turn two photos into something that is eye-catching and unique with a double exposure! Check out how we combined this photo with a nature shot to create that double exposure effect.

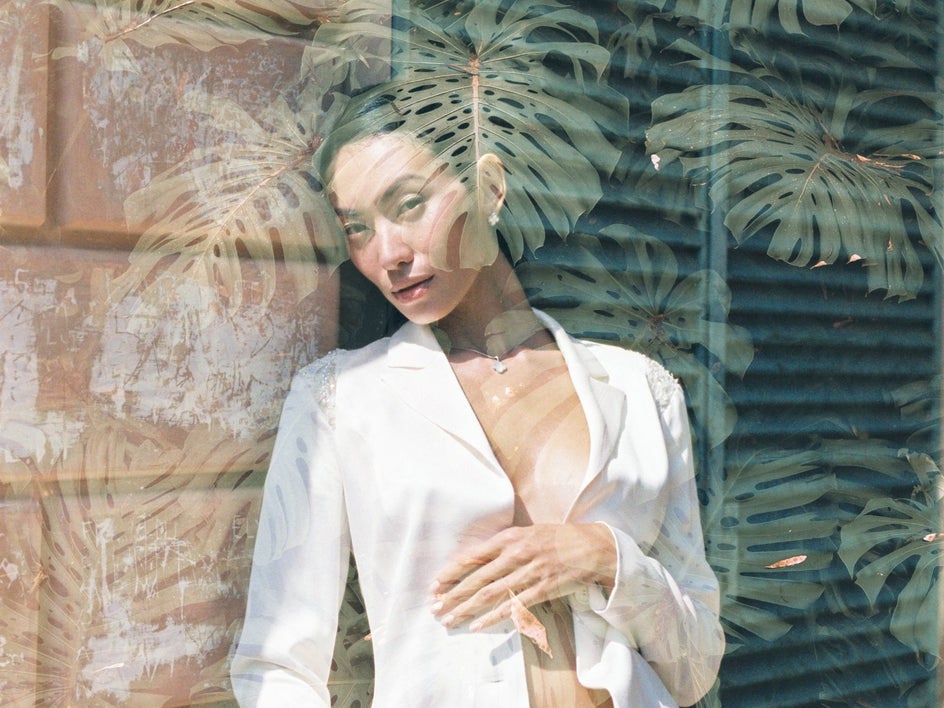
Create a Double Exposure Photograph in Just a Few Clicks
From elevating a portrait to a unique work of art, or emphasizing a cool landscape shot, you are able to create your own double exposure images in minutes. With the help of the Photo Editor, you can create an original double exposure with just a few clicks.
Get started on making your very own double exposure photograph!