Double Exposure Photography: A Basic How-To

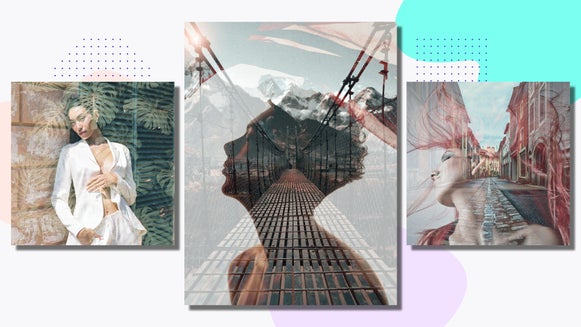
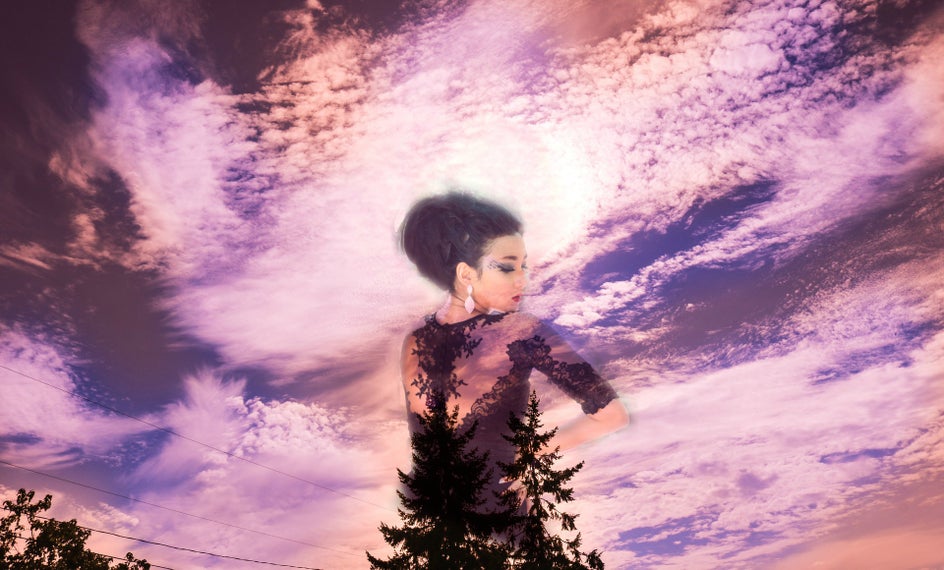
Double exposure photography is something I’ve been fascinated with for a long time. For those of you unfamiliar with the term, here’s a pretty little example:

You can instantly see why it’s so captivating. A double exposure photo is one in which you merge two or more separate photos together, and it’s often used to create surreal, texturally rich looks. It’s the oh-so-dreamy, effervescent stuff that makes your photos look like a million bucks, and of course, also happens to be the kind of thing you’d normally need a nice dose of Photoshop for.
But for all of us at home that don’t have the access or know-how needed to wizard your way around Photoshop, there’s an easy way to replicate the look, thanks to your handy dandy friends the Layer Manager and Cutout Tool in the Photo Editor.
Curious yet? We thought so.
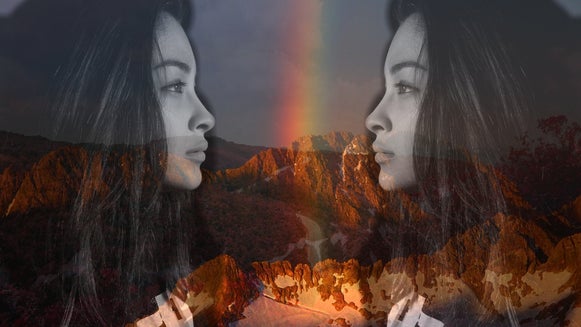
What’s great about double exposure photography is the contrast of textures at play in the photo. Framing a delicate portrait alongside a rushing waterfall, for instance, or taking a simple item like a dress and turning it into a piece of mother nature…
...these are just a few of the virtually unlimited, zany things you can do with this technique.
I know I’ve definitely got your attention now, so let’s get to work.
Step 1: Select Your Photos
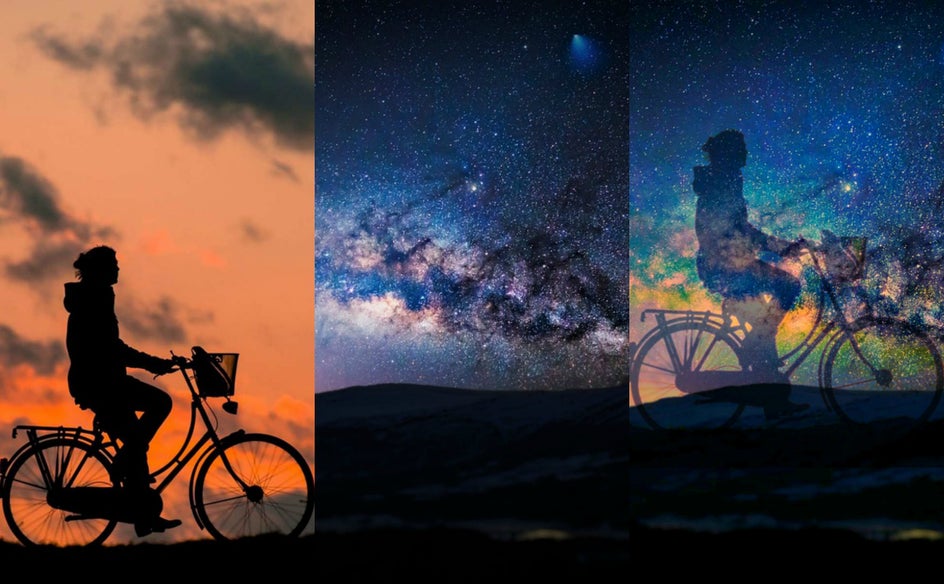
You’ll want to choose two different photos (or more, but we’re not rocket scientists here). Choose one that’s a nice big portrait—silhouettes, especially taken at a sideways angle, work especially well—and one that’s a landscape shot with a lot of texture. Start by uploading your landscape picture into the Photo Editor, and then adding in your portrait layer using the Layer Manager.
Pro Tip: Both of these photos were pulled off Pixabay, but you’re welcome to use whatever you have on hand.

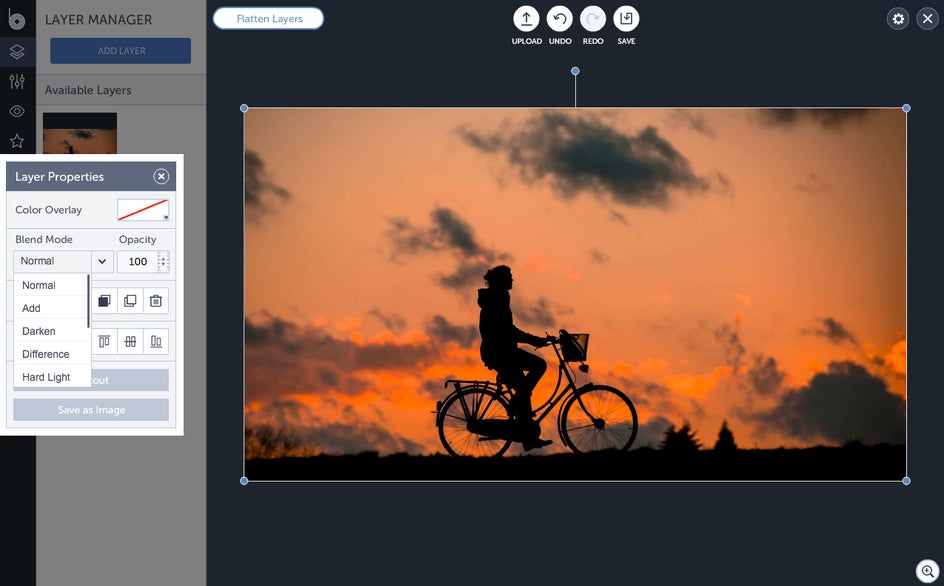
Step 2: Adjust and Resize
Double click or drag and drop the portrait over your landscape photo and resize to fit.
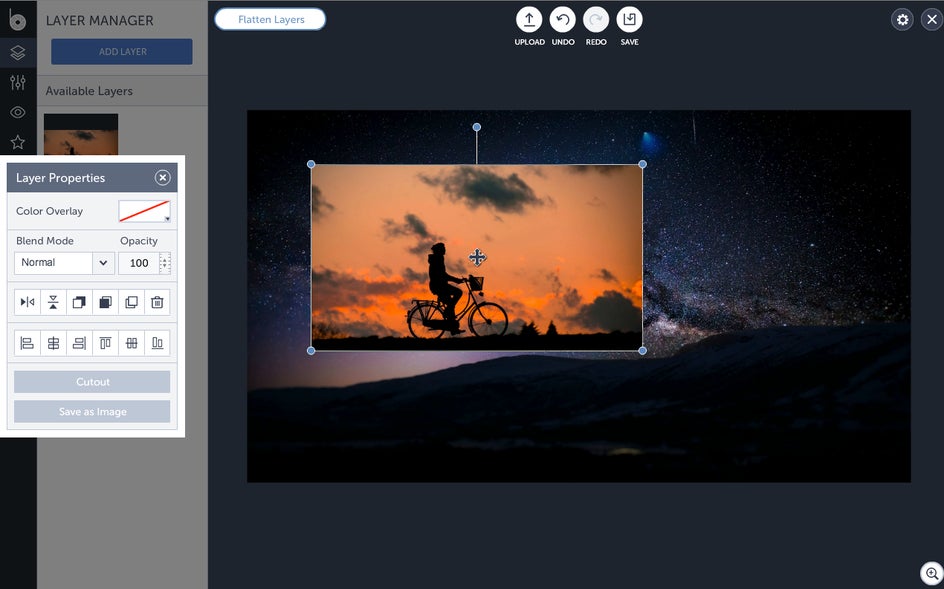
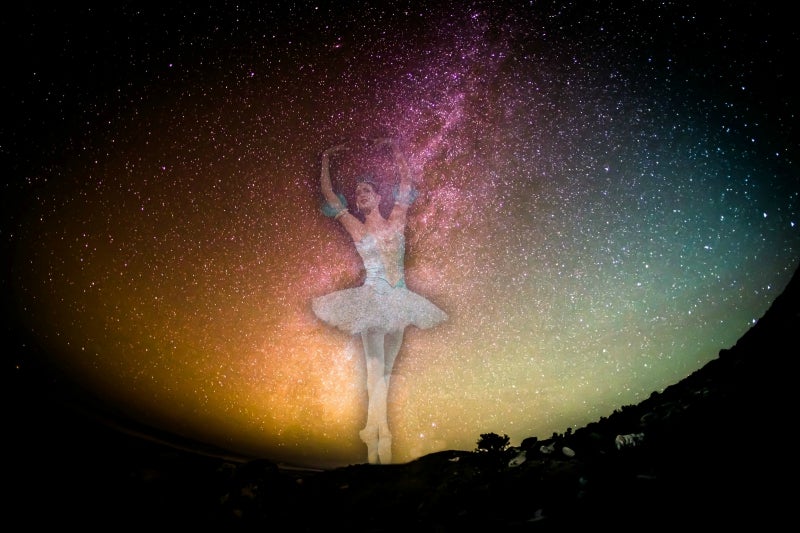
All you have to do now is turn down the opacity (I chose 72), and adjust the Blend Mode. Darken gave me this great silhouette to work with, but playing around with others yields all sorts of fabulous colors and effects.
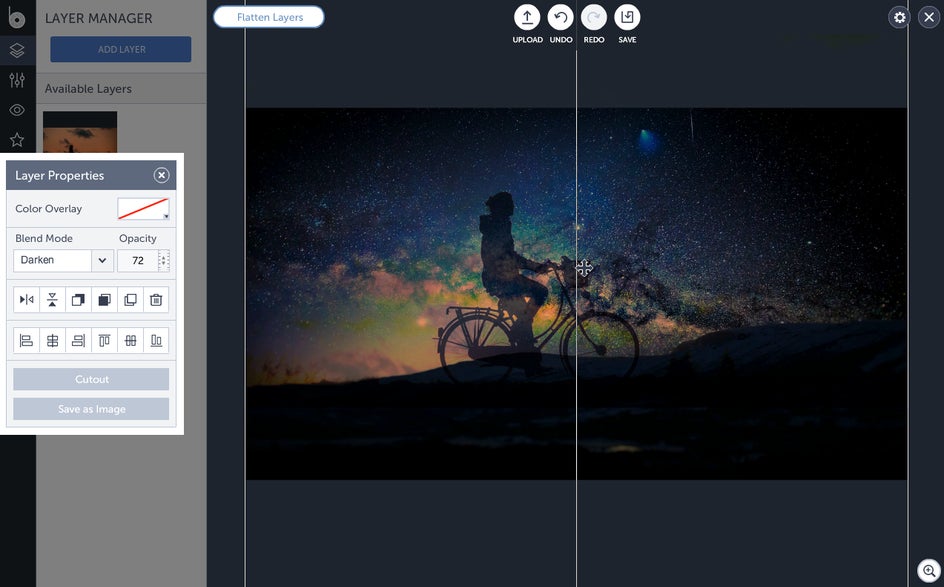
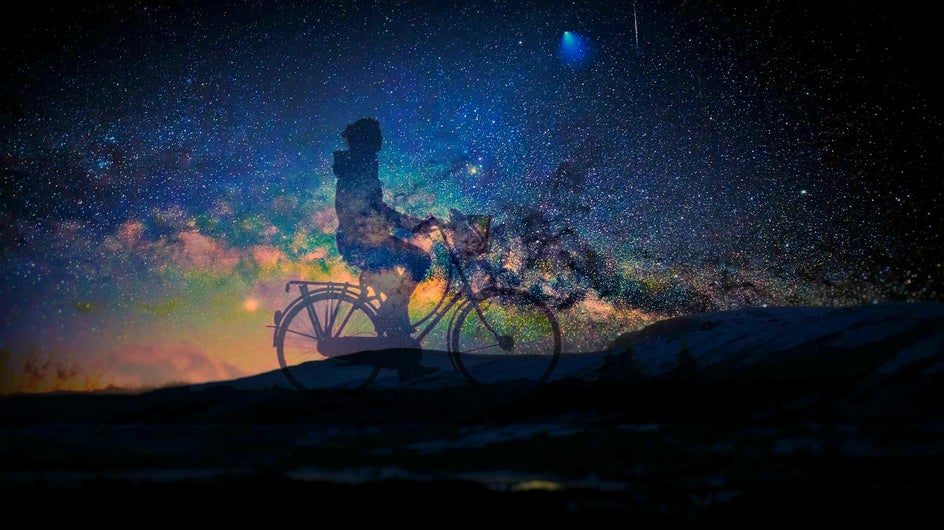
Finally, I made a few slight adjustments to the Exposure, Fill Light and Saturation after hitting "Flatten Layers" to yield what I like to call “galaxy boy”:
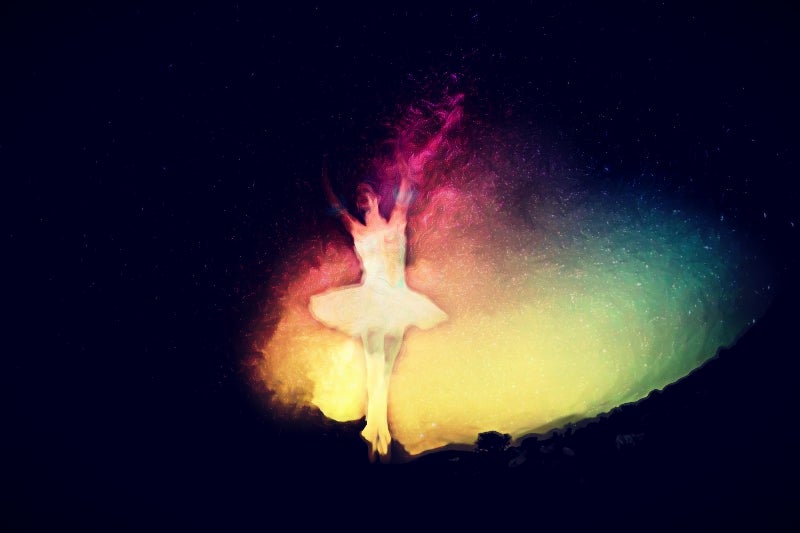
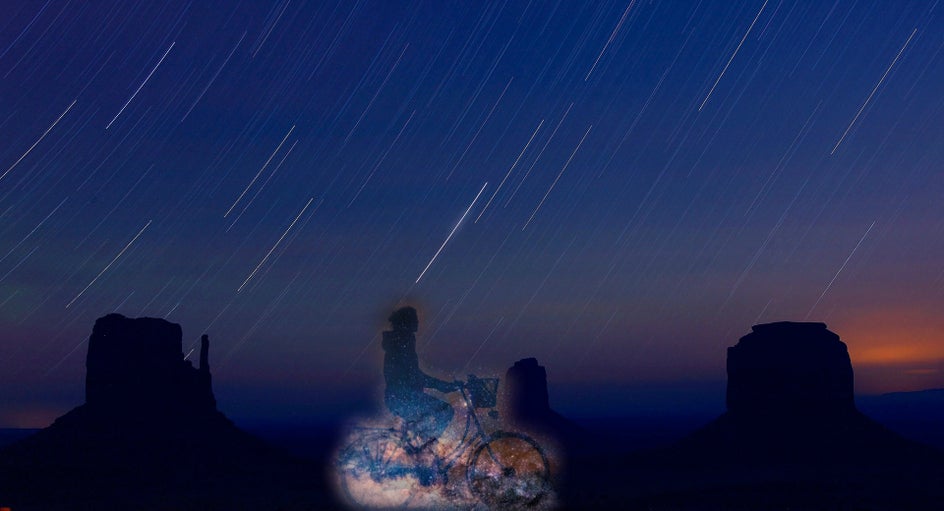
Pro Tip: If you’re about that Inception kind of photography, you can always take this a step further and use the Cutout tool to cutout galaxy boy, then add him onto another photo using the Layer Manager.
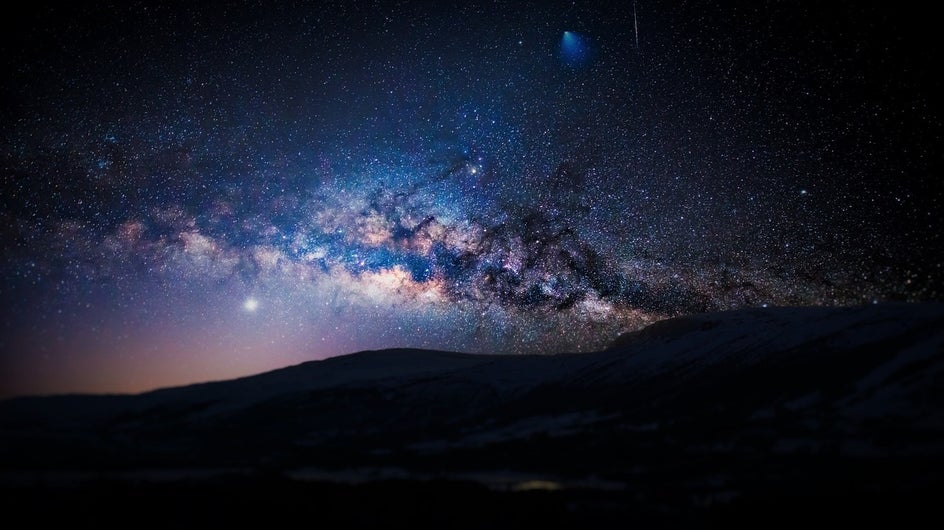
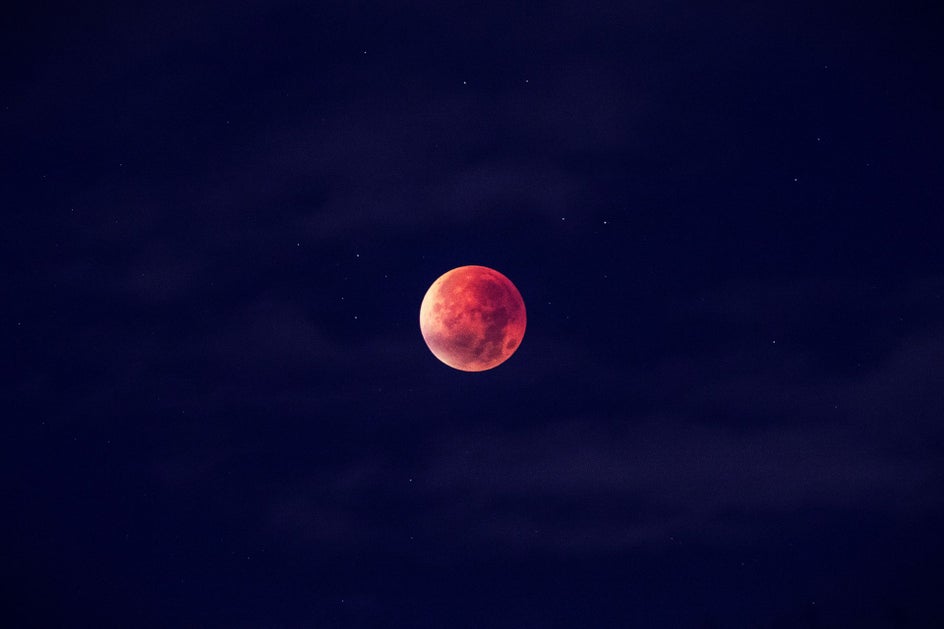
I was feeling pretty playful and inspired by the universe at this point, so I decided to poke a little fun at the moon with a couple of perspective shots. I found this gorgeous stock photo of a moon and hit it with Chromatic 2:
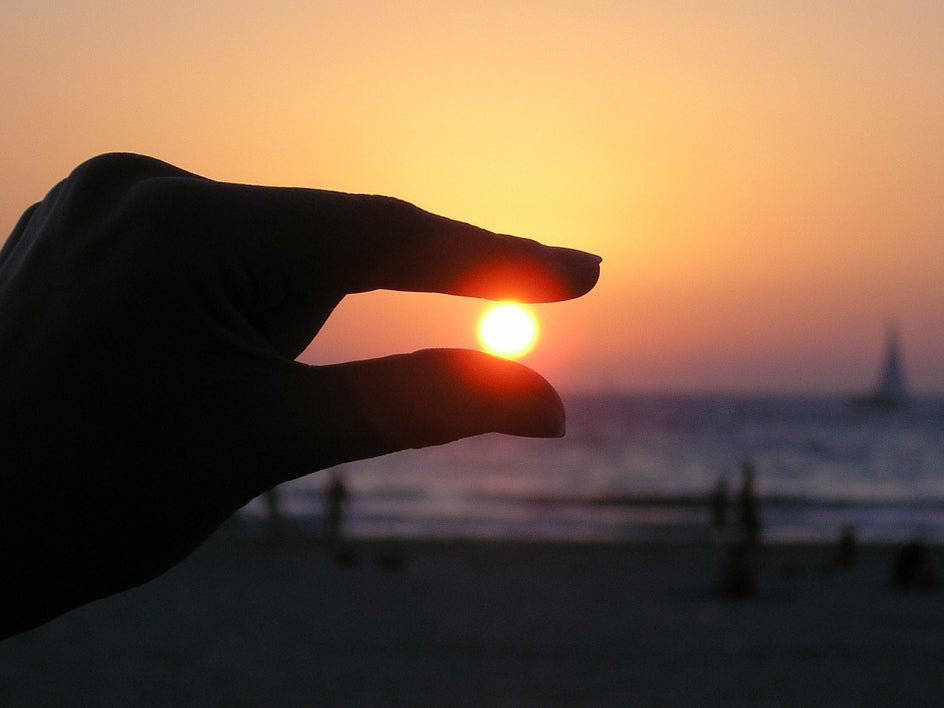
Then found a great photo for a perspective shot on Pixabay...
And repeated the technique again, this time cutting out the hand for the silhouetted photo.
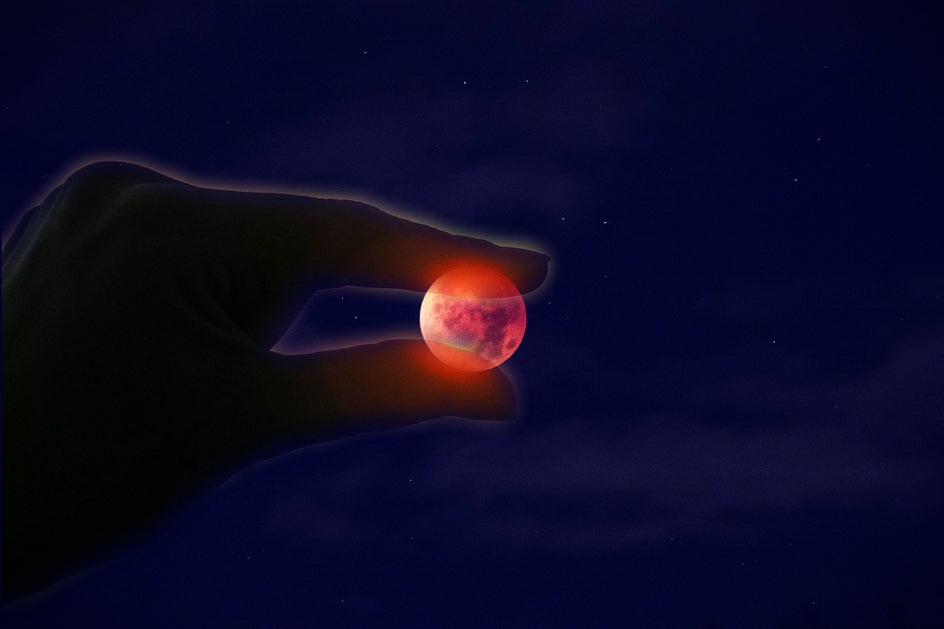
The universe can be such a strange and beautiful place.
Dying to get a killer portrait photo with the universe in your hair?