How to Create Facebook Ads That Convert

Over the years, Facebook has meant big business – especially for brands. The platform boasts an advertising audience of 2.14 billion, so it’s no surprise that 58% of marketers plan on increasing their use of Facebook ads in the next 12 months.

With more than 200 million businesses around the world using Facebook’s tools, however, you need to be design-savvy to ensure your advertisement stands out from the crowd. Thankfully, BeFunky’s Banner Maker lets you create an eye-catching Facebook Ad using professionally-designed templates. Simply swap out the existing text, imagery, or color scheme to match your brand. We’ll show you how!
How to Create Click-Worthy Facebook Ads Using BeFunky
Ready to create your own high-converting Facebook ad? To get started, head to the Banner Maker and click Facebook Ads.
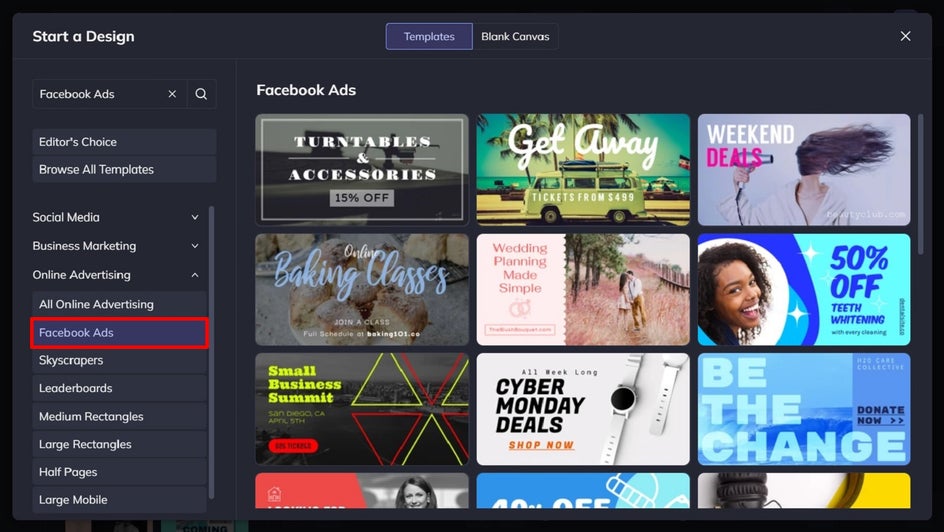
Step 1: Choose a Facebook Ad Template
Click on a Facebook Ad design that takes your fancy, followed by Use This Template to begin.
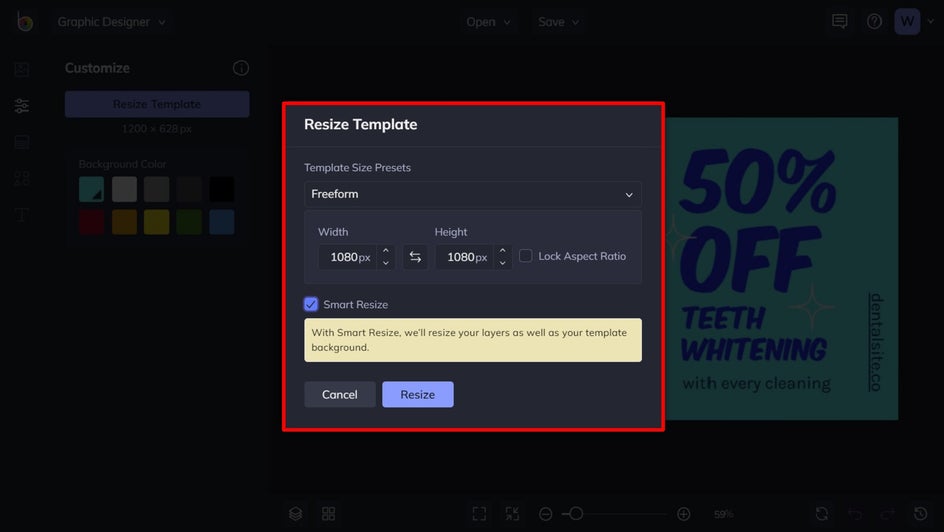
Step 2: Resize Your Template to Your Desired Ad Type’s Requirements
Facebook ad sizes have changed recently, with the platform recommending images, carousel, and collection ads measuring at least 1080 x 1080 pixels. Luckily, changing the size of your template in BeFunky’s Graphic Designer is easy!
Navigate to Customize from the main menu on the left, then click Resize Template. Simply uncheck Lock Aspect Ratio, then type 1080 (or any size larger with a ratio of 1:1) into both the Width and Height sections, followed by Resize. Be sure to keep Smart Resize checked, however, as this keeps your design looking perfectly proportioned!
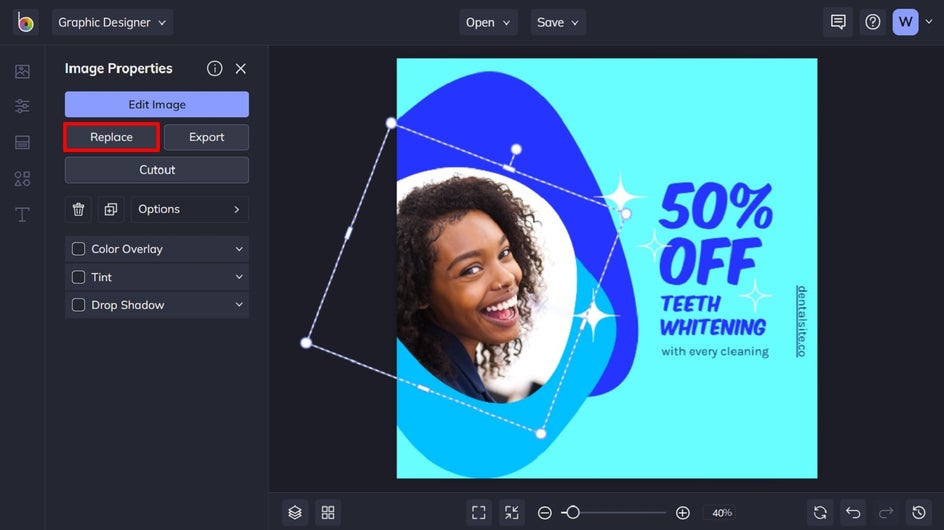
Step 3: Swap Out the Existing Image
Now you’re going to begin customizing your Facebook ad template so it’s in line with your own branding. Click on the existing image that you wish to change, and an Image Properties panel will appear. From here, you can select Replace Image, which will allow you to insert an image from your computer’s files.
Alternatively, you can navigate to Image Manager in the main menu on the left. From here, you can upload images from other sources, such as your BeFunky account, Google Photos, or Facebook. Just click the blue button featuring three dots to access these. Alternatively, you can insert a photo from BeFunky’s huge library of stock images.
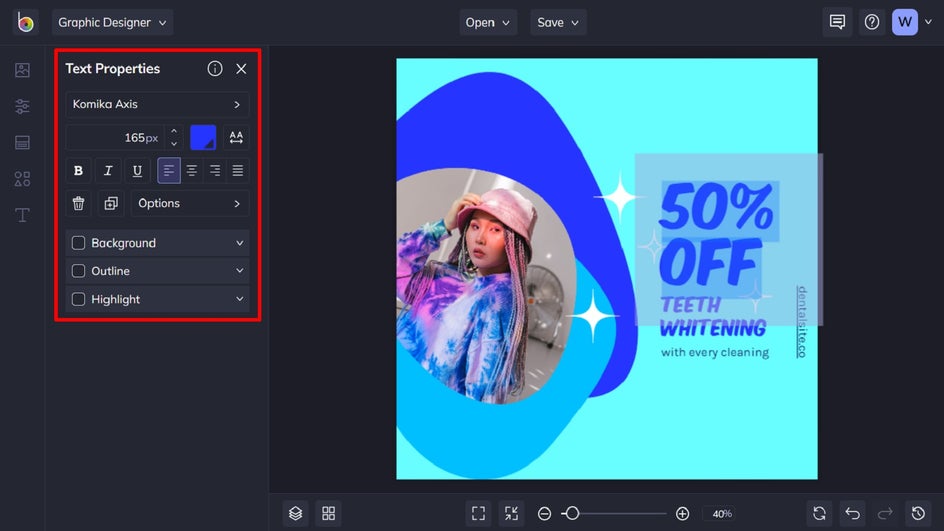
Step 4: Edit the Existing Text
To edit the template’s text, simply double-click on a text box and begin typing whatever you want it to say. When you click on a text box, a Text Properties panel also appears. From here, you can adjust elements such as the font, size, text color, spacing, and more.
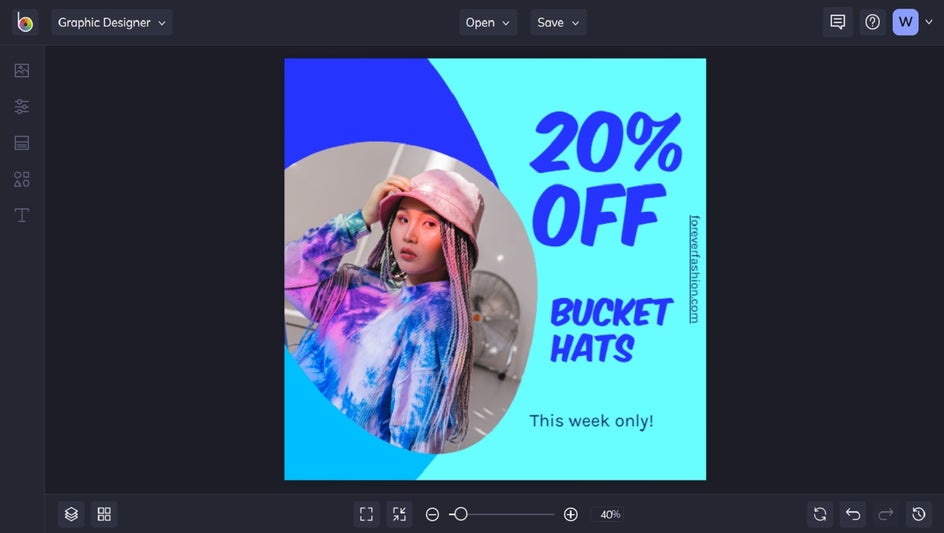
Step 5: Rearrange Elements
Need to rearrange any pre-existing elements? Simply use your cursor to click and drag them into their desired place. You can also drag the outer corners of elements inwards or outwards to make them smaller or larger. To delete any existing text or graphics, simply select them with your cursor, then hit Delete on your keyboard.
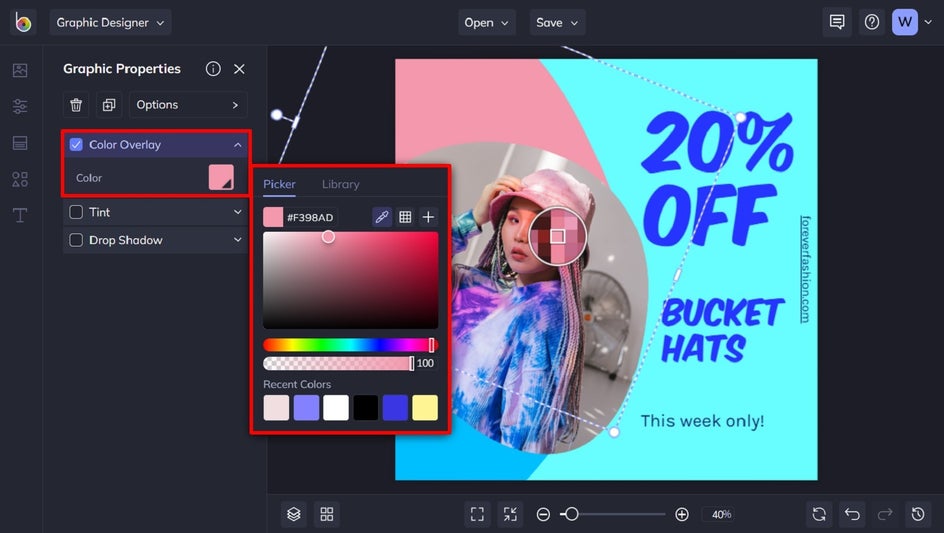
Step 6: Change the Color Scheme
You can also change the template’s existing color scheme so it’s more cohesive with your own branding. To change the color of graphics or other design elements, just select them with your cursor and click on Color Overlay from the Graphic Properties panel. You can then select a color from the Color Picker, type in your desired Color HEX Code (if you know it), or use the Eye Dropper Tool to select a hue already present in your design.
If you need to change the color of your text to reflect this new color scheme, simply click on the text you wish to recolor. Then, from the Text Properties panel, click the color swatch to open the Color Picker. From here, you can also select a color, type in the Color HEX Code, or use the Eye Dropper Tool.
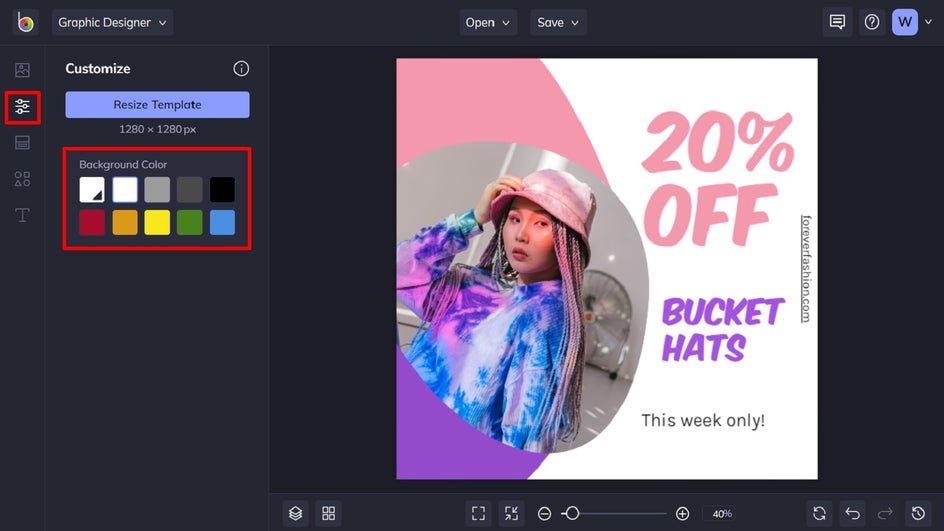
Step 7: Change the Background Color
Speaking of changing the color scheme, you might find that you also wish to change the existing background color of your template. If this is the case, navigate to Customize in the main menu and select a color swatch of your choosing. Similarly, you can click on the first color swatch (the one with the dropdown arrow) to open the Color Picker, type in the color’s specific HEX Code, or use the Eye Dropper Tool.
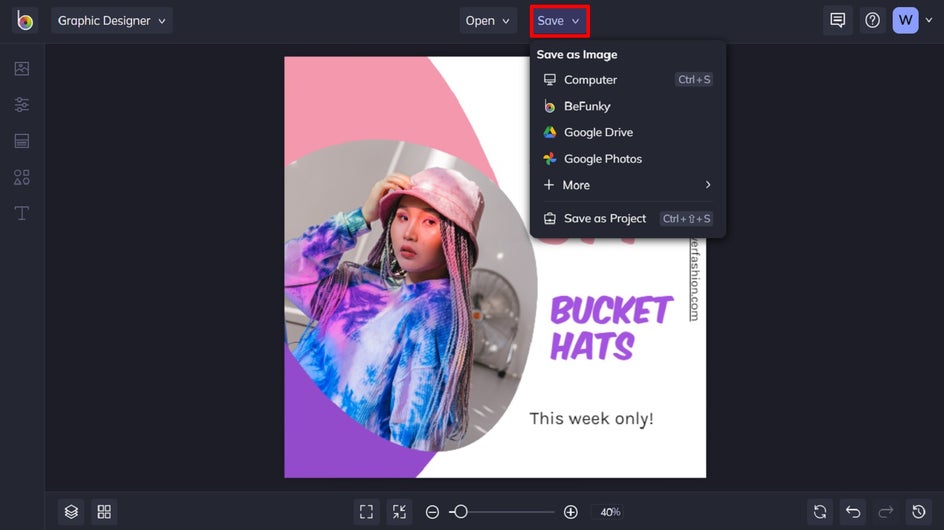
Step 8: Save Your Facebook Ad
Once you’re happy with your Facebook Ad, it’s time to save it so it’s ready to use in your Facebook advertising campaign. Click Save at the top of the screen, then select your desired save location. By hovering over the + More option, you can even save your image directly to your Facebook! The most important part, however, is that you save your design in JPG or PNG format, as per Facebook’s ad requirements.
An Eye-Catching Ad
There you have it – an eye-catching Facebook ad in a few simple and quick steps. Try creating your own today with our Graphic Designer!