Add a Realistic Film Grain to Your Photos for Free
Film photography gives photos such a unique look that many photographers today base their filters and edits on the look of popular vintage film. Not only are the colors bold and unique, but the textures in the film also give it that look that people are envious for.
One of the textures that people covet is film grain, which was produced during photo processing. Because we don’t process photos physically anymore, film grain isn’t naturally a part of high-quality digital photography. Thankfully, this effect can be achieved with the Film Grain effect in BeFunky’s Photo Editor. It’s part of our collection of Cinematic effects that will add tons of character to your images.
When Should You Add Film Grain to Photos?
Film grain is easy to get editing-happy with. Knowing which kinds of photos to add film grain to is part of the process. You want the effect to be subtle and natural-looking, making people wonder if you really did take the photo on film. Here are some examples of the kinds of photos I would add film grain to.
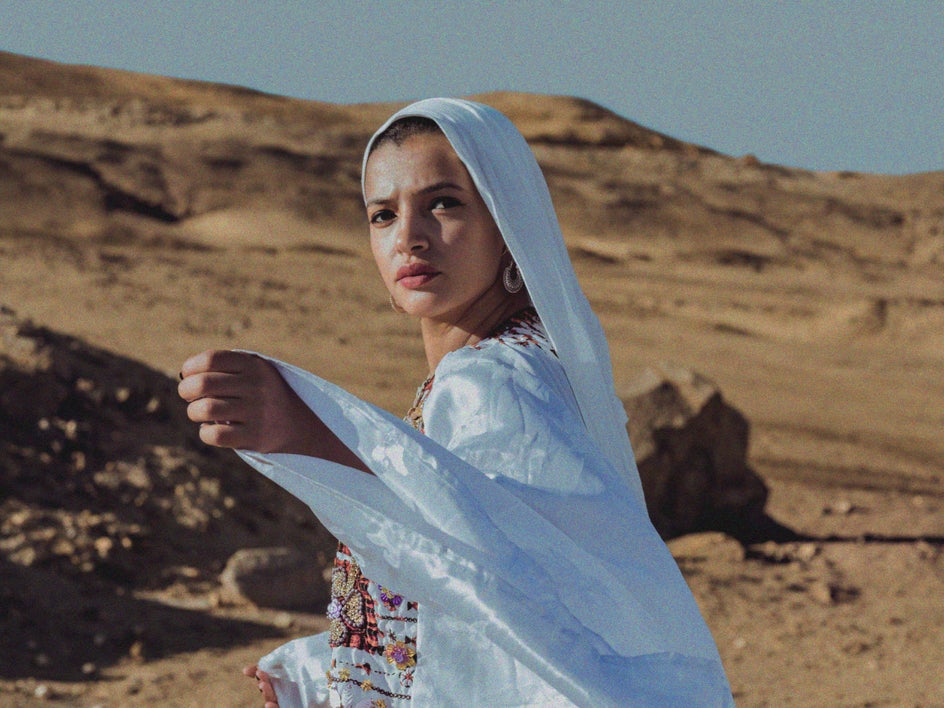
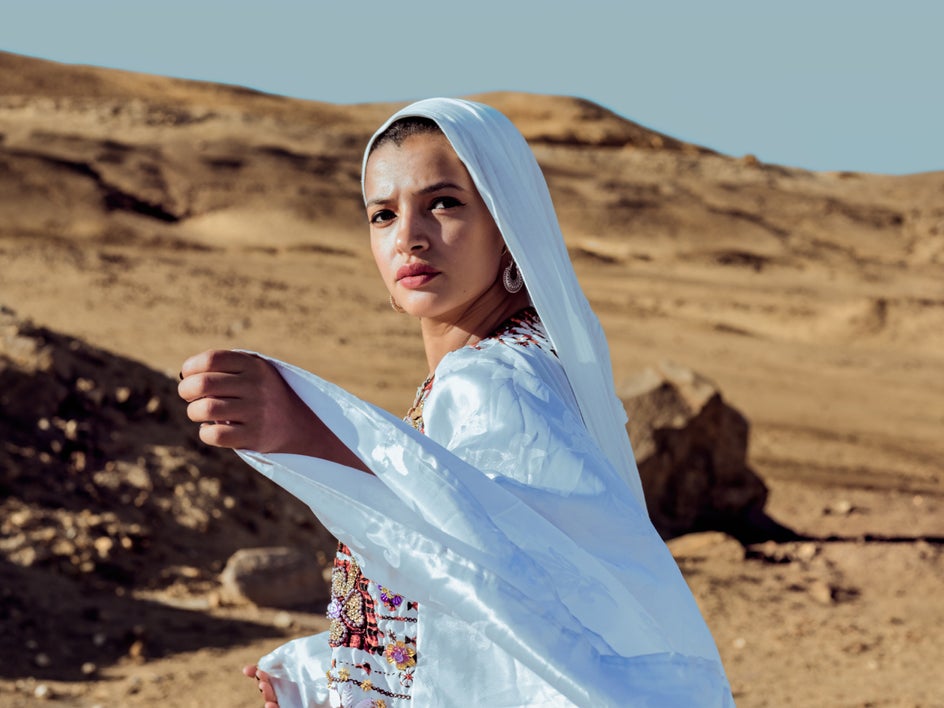
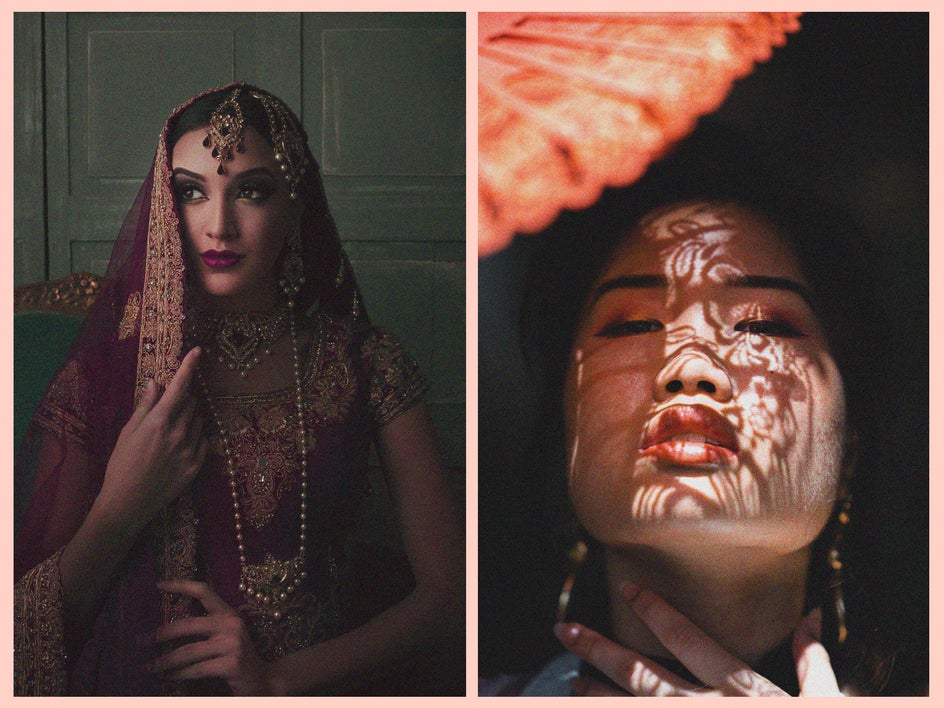
Portrait Photography
There’s just something about film grain that gives portrait photography a calming, classic effect. Whether your portrait shots are colorful, monochromatic, or black and white, the added texture of film grain will give it a vintage look.
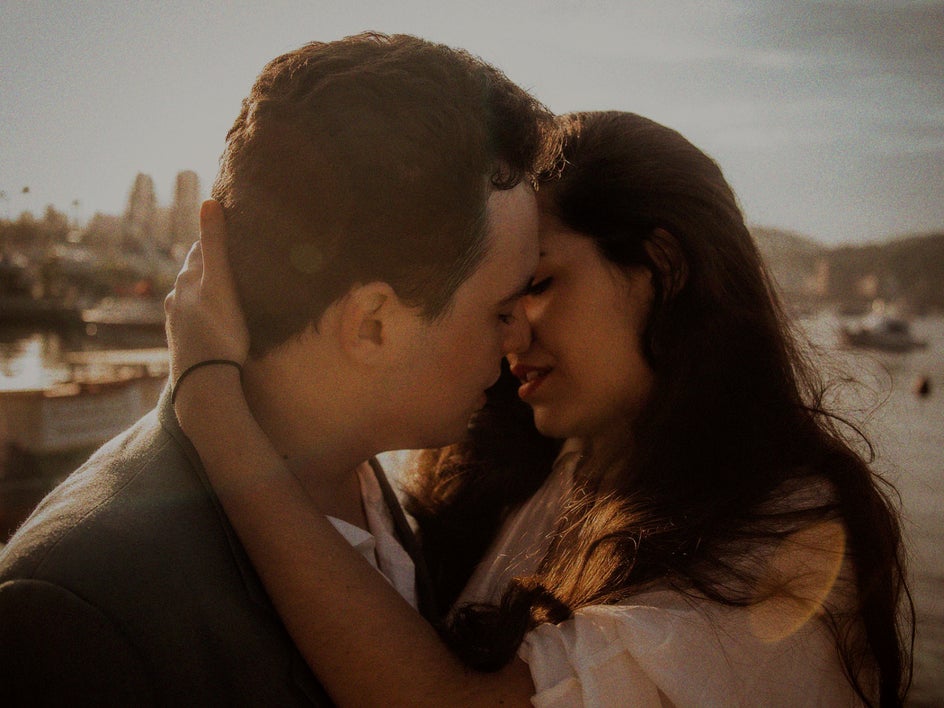
Couples Photography
There is something special about film grain that can really add a romantic effect to your photographs. Not only does film grain provide a soft texture, but that mixed with the photo subject leads to an overall romantic essence that you just can’t replicate otherwise.

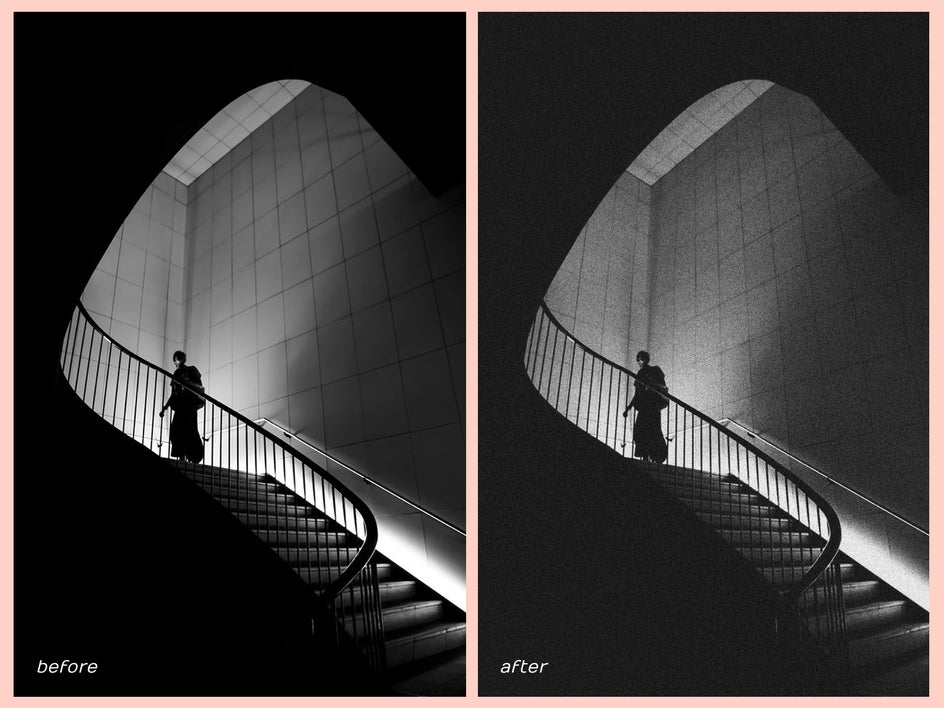
Black & White Photography
Film grain looks great added to black and white photos. The best part about the Film Grain effects in BeFunky is that you can choose to add RGB (red, green, and blue) film grain to colorful photos or select the Monochromatic option for muted tones or black and white photos.
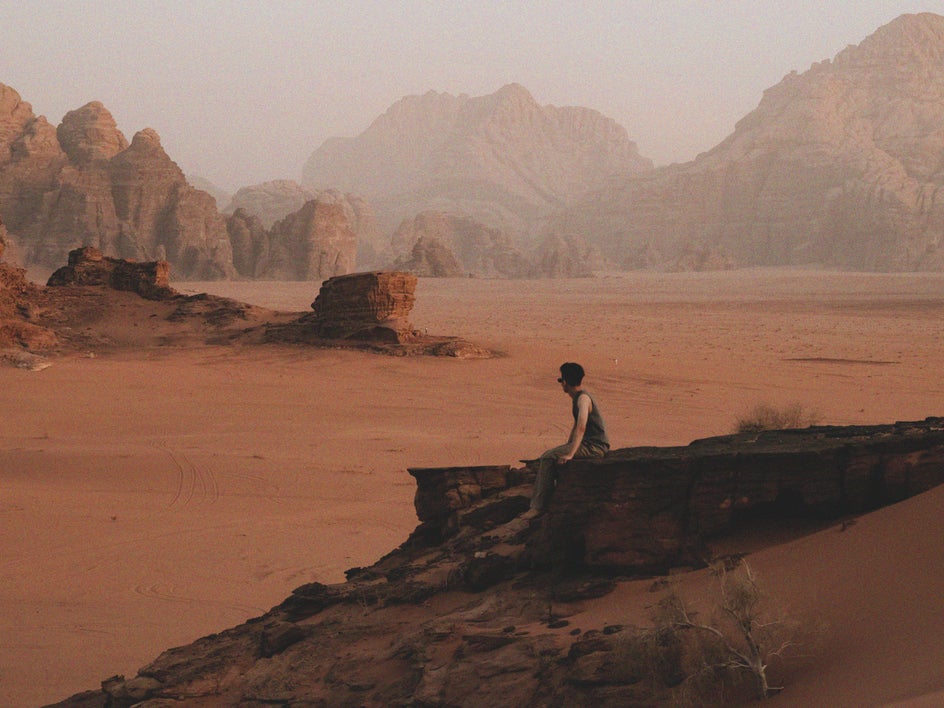
Matte Effect Photography
Blending and layering photo effects can create some truly great effects. Whether you are editing travel photography, landscape photography, or portraits, anything with a matte effect pairs perfectly with a film grain effect.
Try blending your effects and filters to create a unique edit. If you create something that is unique enough, you could even start a new trend on Instagram that other people want to re-create!
How to Add Grain to Photos Using BeFunky
Once you’re ready to add a grain filter to a photo, head on over to BeFunky’s Photo Editor. Upload your desired photo using the Open tab at the top of the screen, or simply drag and drop your image file into the interface.
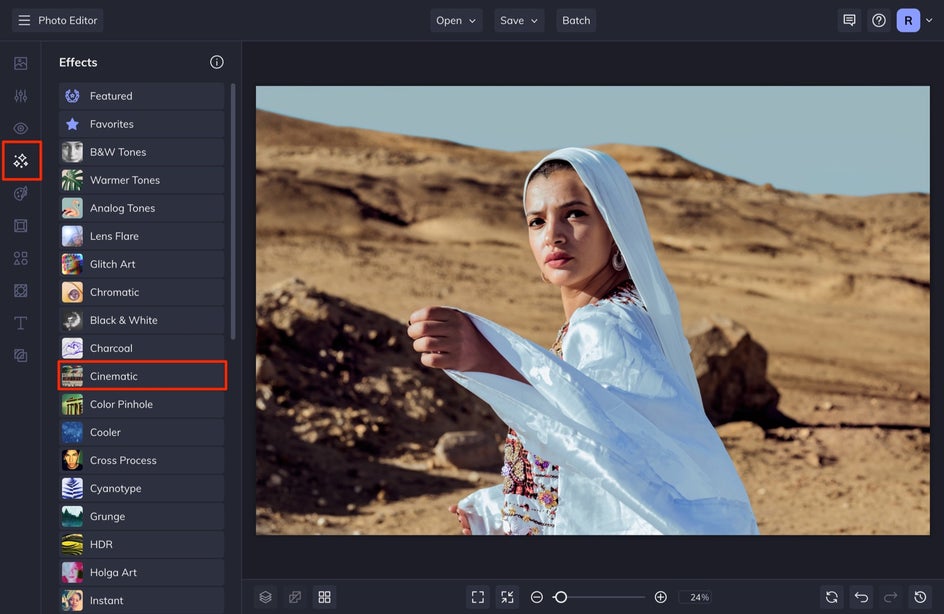
Step 1: Select the Film Grain Effect
Click on the Effects tab in the left-hand menu and then select Cinematic. Once here, click Film Grain.
Step 2: Customize to Your Liking
Once you click on the effect, you will see it applied over your photo as a preview. You can either select Apply or head into the Settings tab to make adjustments.
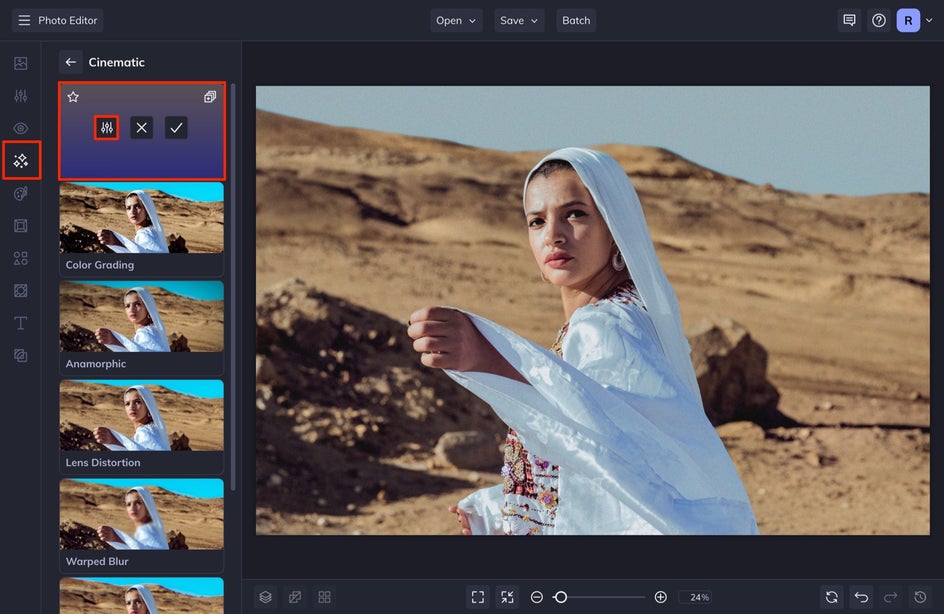
In the Settings menu, you can adjust the Intensity of the film grain by dragging the slider to the left or right. You can also select whether you want your grain to be monochromatic in color. To keep your changes, click Apply.

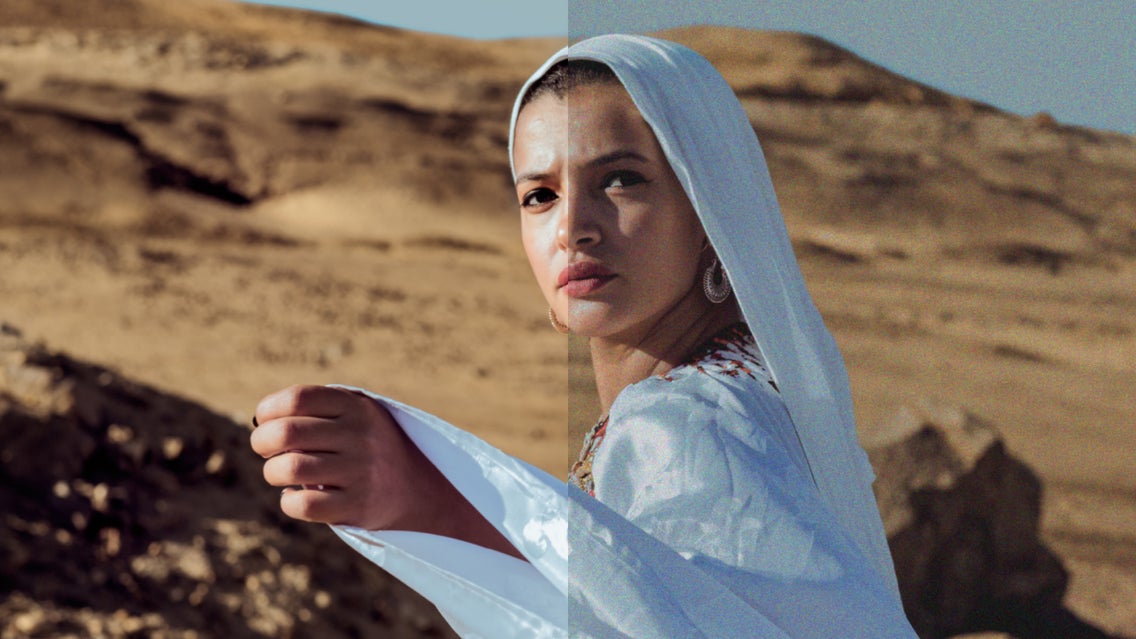
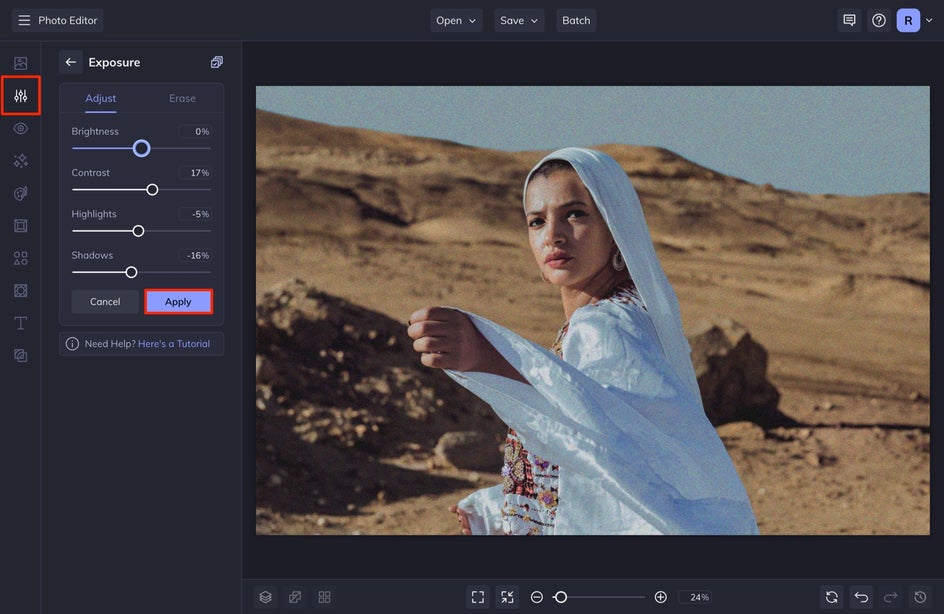
Step 3: Adjust the Exposure
You may see that once you apply the film grain effect, it makes your photo lose its depth. In order to add this back in, I like to adjust the Exposure of my image and add back in some Contrast and Shadows to my image. To do this, select Edit from the left-hand menu and then select Exposure. Adjust the selections to your liking. I changed the contrast, highlights, and shadows specifically.
After this, you can edit your photo like normal – adjusting the color, size, or adding other effects you like.
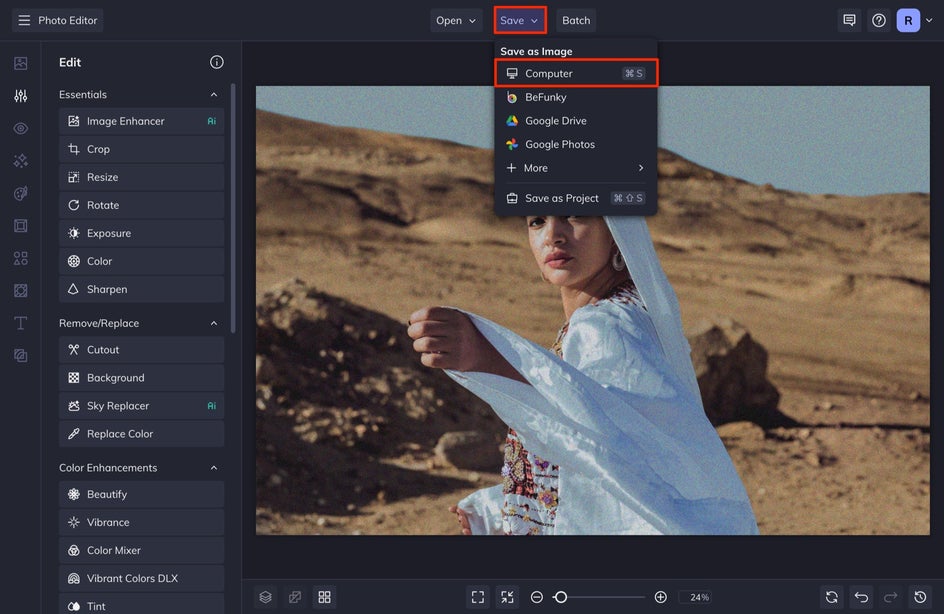
Step 4: Save Your Film Grain Photo
When you are all finished with your edits, click on Save at the top of your screen to save your work to your Computer. In the window that appears, select JPEG and then click Save.
Add Realistic Film Grain to Your Photos
All it took was a few easy steps to achieve this realistic film grain effect using BeFunky’s Photo Editor. Forget having to invest in a film camera or spending hundreds on real film just to have film grain in your photos. With BeFunky’s Film Grain photo effect, film grain is just a few clicks away.