How to Capture and Edit Flat Lay Photography Like a Pro

Flat lay photography is a great tool to use when capturing products or food-related scenes. This is a type of photography that is taken from the top down, directly above an arranged scene. These kinds of photos are great for Instagram, promotional material, or marketing images.
Since flat lays have objects laid out flat, you can’t rely on a subject moving in front of you to create movement. In order to create movement, you have to master the lighting, object arrangement, layering, color, and texture.

While there is a rhythm to setting up the perfect flat lay, we’re here to show you everything you need to know – from setting the scene to editing your flat lay photos with BeFunky’s Photo Editor.
3 Tips for Capturing Perfect Flat Lay Photos
The key to a great flat lay is to capture the photo from an angle that is parallel to your flat surface. In order to do this, you must get directly above your subject. This may involve grabbing a step stool or shooting your items on the ground to position your camera directly above your scene. If you want more detail on how to arrange your flat lay photos, check out this article 7 Tips for Setting Up and Editing Flat Lays for some tips that go beyond what is shared here.
To start, plan out your scene and get the necessary props for your shoot before you begin. Aim to choose objects of varying sizes and shapes and choose 2-3 unifying colors to create a cohesive environment for your shot. This may look like shooting on a warm-colored spectrum, or a cool-toned spectrum. Whichever you choose, just make sure that you are being consistent with the overall aesthetic. This article does a great job of explaining this process. For technical tips on how to set up and edit your flat lays, check out these suggestions below.
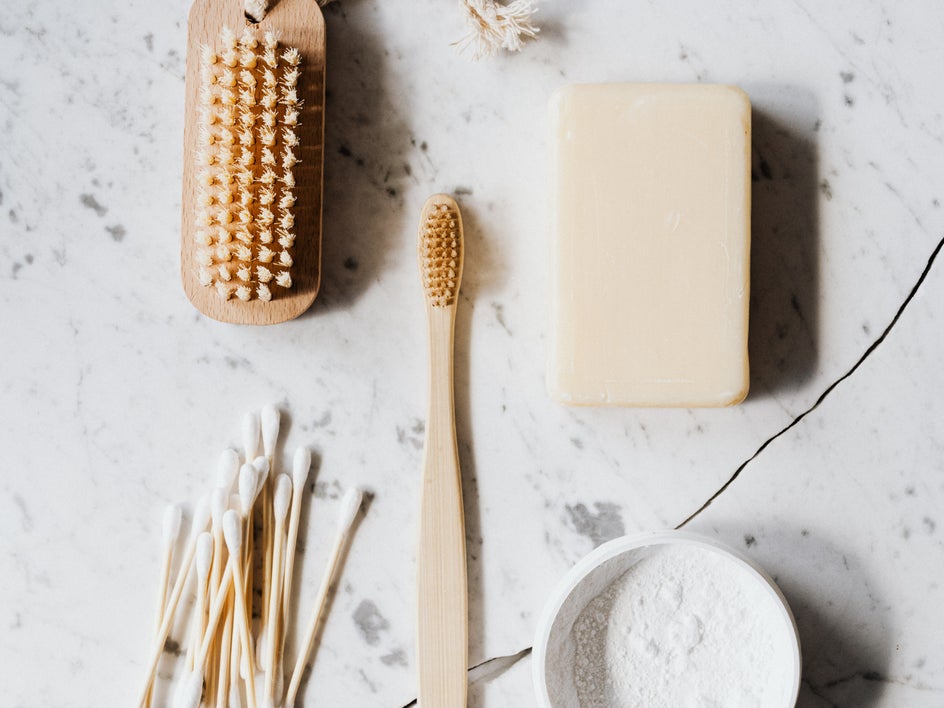
1. Prepare a Flat Surface With Everyday Items
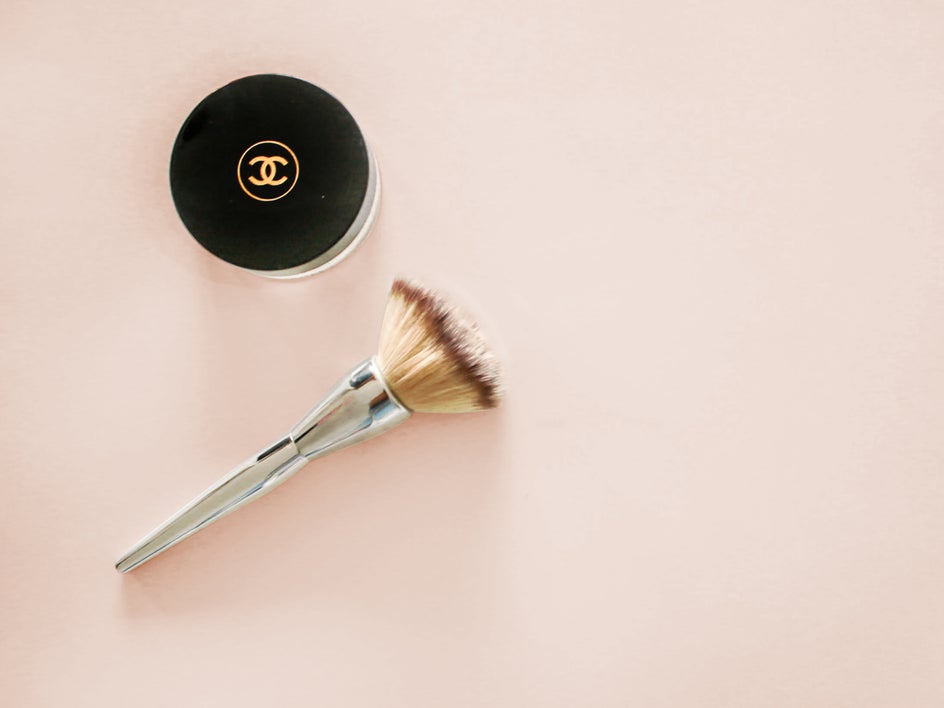
Flat lays can be captured on a dining or coffee table, a desk, a sheet, or the floor. As long as the surface you’re shooting on is relatively flat, you’ll be starting off on the right foot.
Flat lay photography works really well when there are many items laid against a neutral background, free of distracting patterns or textures. If the surface you are working on is not neutral in color or texture grab a foam core poster board from the craft store. I have used these during shoots and they work well every time.
If you want to take it even further, you can create your own scenes by laying down contact paper on the surface of your foam core. I have done this with different colors (make sure they have a matte finish rather than gloss) and it has turned out really well. If you want a pattern or texture, you can find contact paper that looks like real or weathered wood, or even kitchen or bathroom tile.
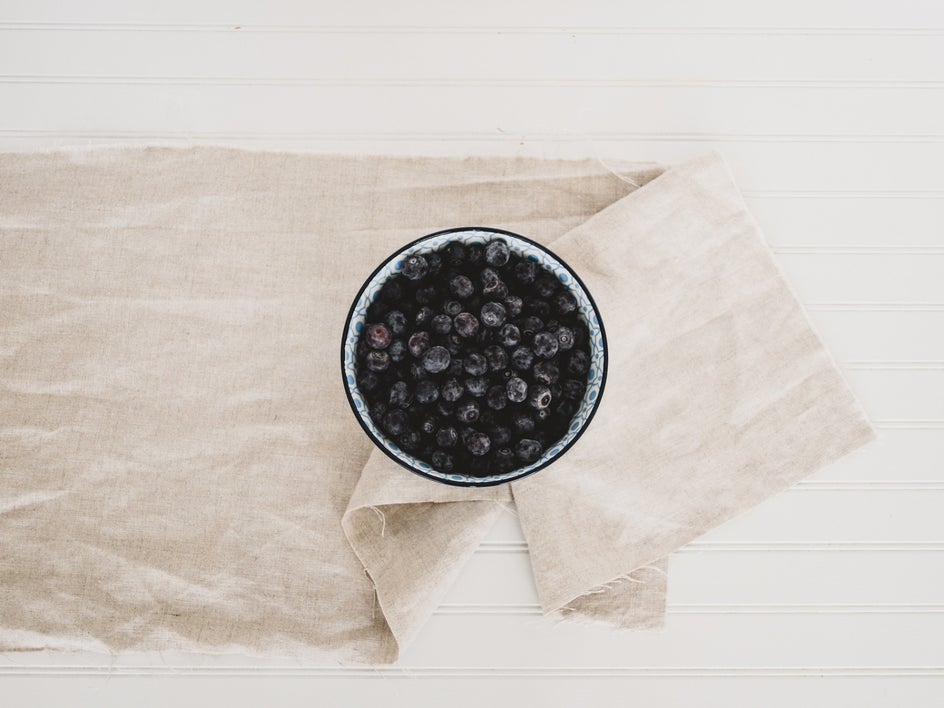
2. Create Dimension With Layers and Textures
Now that you have the main background of your flat lay all set up, you can either take the photos directly on this or you can start adding textures on top of the surface to create texture and dimension. If I am doing food photography, I use props like baking sheets, kitchen bowls and plates, and cloth napkins. This creates interest within your scene.
3. Arrange the Objects With Movement in Mind
A great photograph creates movement within the frame. The way to create movement in a flat lay is through object placement and lighting. You can arrange your objects randomly or in any kind of grid-like pattern.

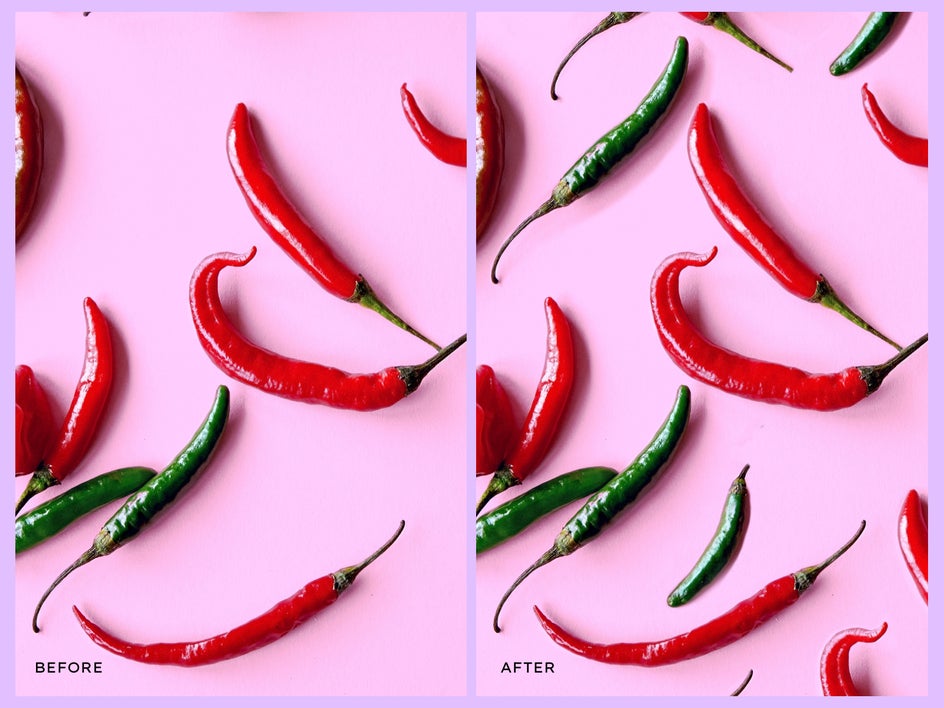
For object placement, rather than placing all of your objects in the center of the shot with a border of negative space surrounding them (you can do this as well!), arrange your objects so that they overflow out of the frame and only part of some objects are in the frame. You can easily clone objects with the Clone Tool in BeFunky’s Photo Editor to achieve this effect in post-production. This creates intrigue and makes you feel as though you are seeing a snippet of a larger scene, engaging the viewer’s imagination to think beyond the frame.
How to Edit Flat Lay Photography
Now that you know where to begin with your flat lay photography, we’ll show you how to make your images stand out by editing them in BeFunky. There are a few key tools that will really help you in post-production, especially if you forgot something while you were shooting. When you are ready, Upload your photo into BeFunky’s Photo Editor. We are going to make a thumbnail image for our food blog and need this photo to pop.
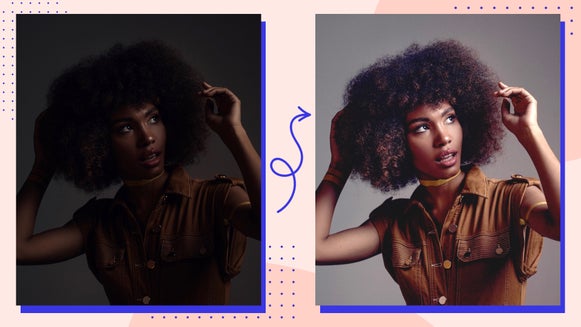
Step 1: Adjust the Exposure
A good starting point is to adjust the exposure, as this sets the tone for the rest of your editing choices. Select the Edit tab in the left-hand menu, and then press Exposure.
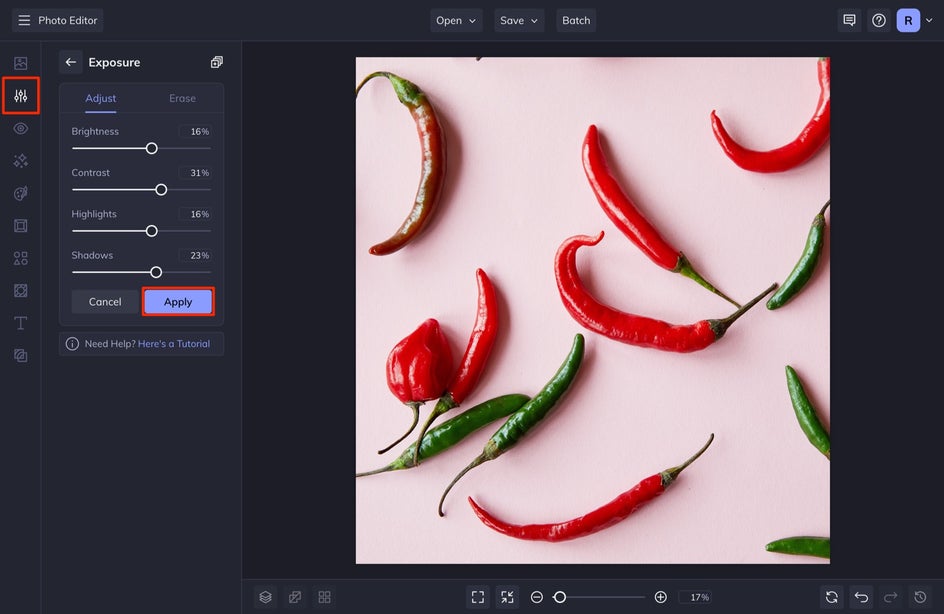
Using the sliding scales, you can adjust the Brightness, Contrast, Highlights, and Shadows until you balance it to the right aesthetic. We want this to be bright and colorful, almost surreal looking – so we are going to make sure that we keep it bright with high contrast. When you are done, select Apply.
If you want more control over your highlights and shadows, try using the Levels tool!
Step 2: Sharpen the Objects
BeFunky’s Sharpen tool is a must-have when working with flat lays, as it helps to bring out detail. This is a great tool for enhancing drops or condensation, or where the light bounces off of your objects.
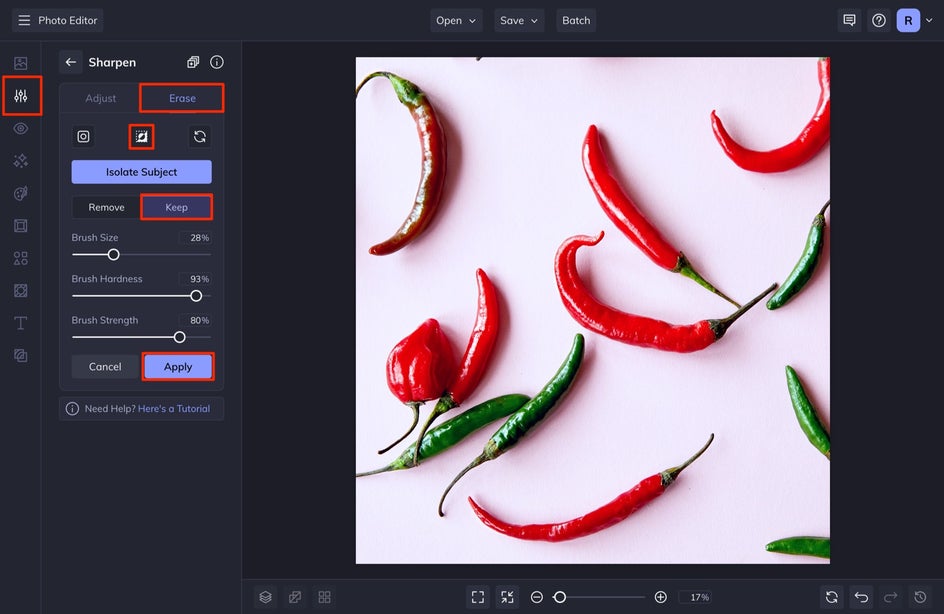
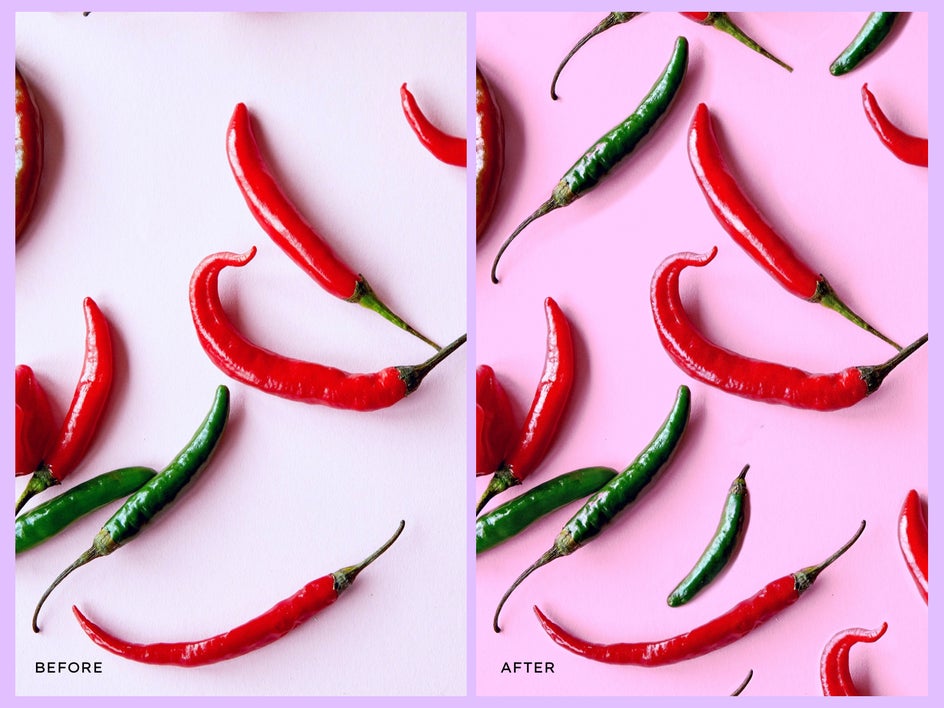
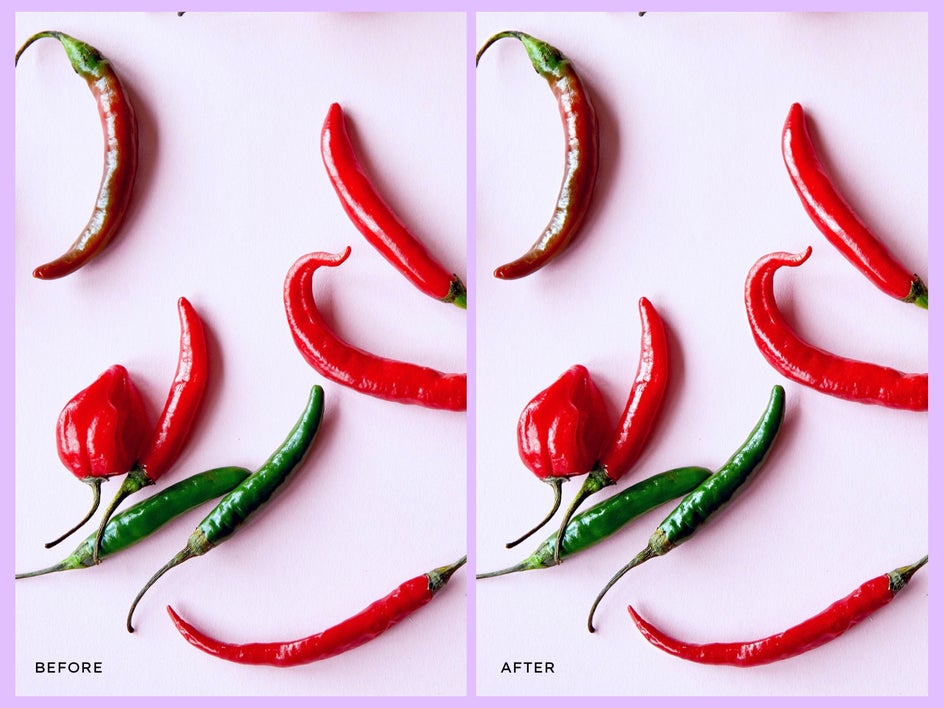
In the Edit menu, select Sharpen. Immediately select the Erase tab and then Invert Selection and Keep. This makes it so that you can use a brush to apply the sharpen tool wherever you want it. I make my brush small and then just go over the sections mentioned above. Any drops of water or light reflections I sharpen. Especially with food, this really helps to bring out textures and patterns. The enhancements here should be subtle, as you can see in the before and after. This tool just helps to bring back some life and dimension to your objects. When you are done, select Apply.
Step 3: Enhance the Color
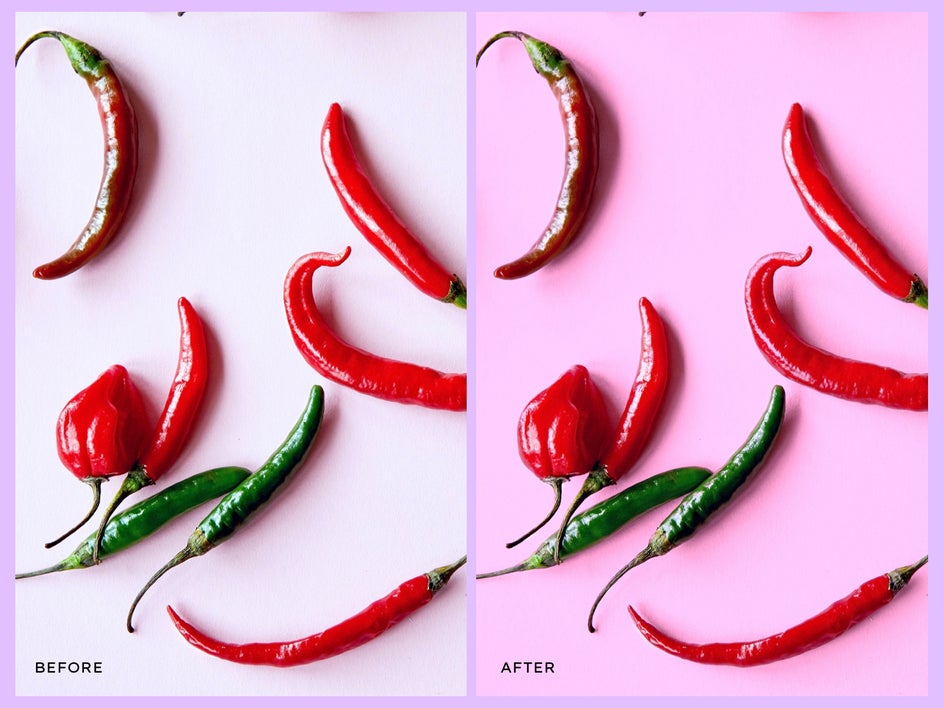
You can see when we edit the exposure, the pink background fades. We want to enhance this color since it gives the image a playful look. We are going to do this in two ways.
First, we are going to enhance the saturation. To do this, in the Edit menu, select Color. Bump up the Saturation. We also make our Temperature cooler so that the red looked juicer. When you are done, select Apply.

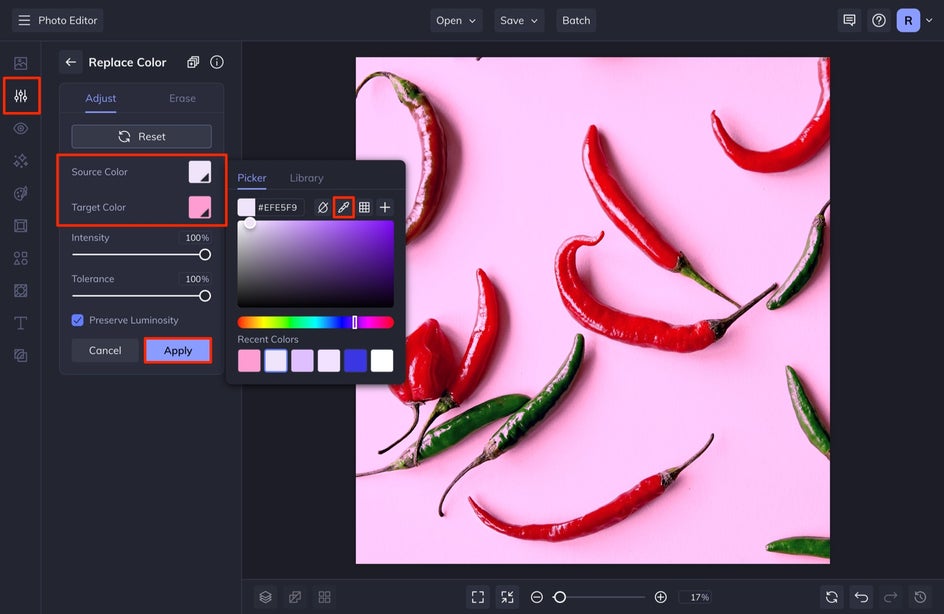
After we do this, we are going to select Replace Color in the Edit menu. We are going to enhance the pink background since we lost some of its color during Step 1. Select your Source Color by selecting the swatch and then using the Eye Dropper Tool to select the background color. Next, select Target Color and choose the color you want as your background. In this case, we are going to go with more of a saturated pink. Don’t Apply this step yet until you continue reading.
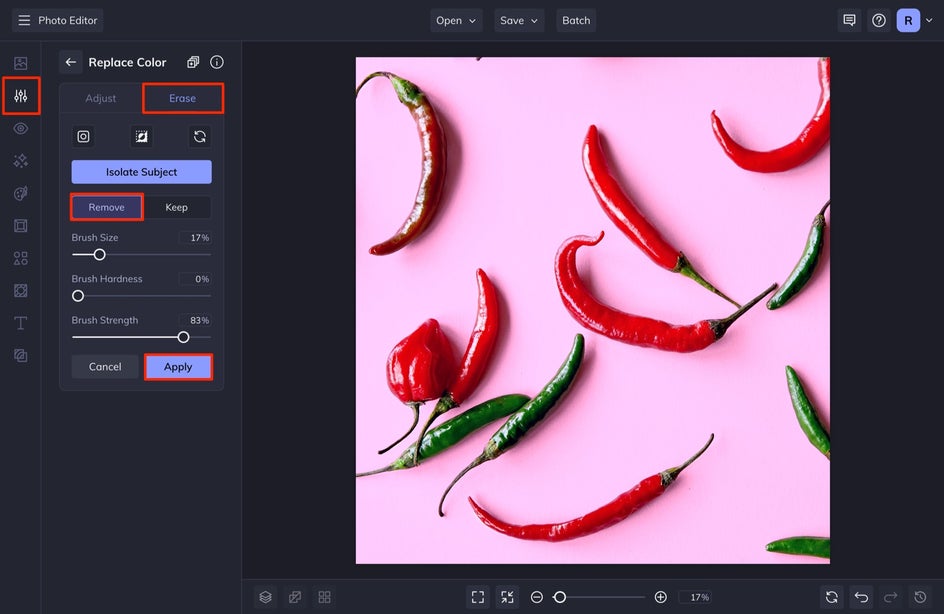
After this, select the Erase tab. As you can see, some of the peppers have been compromised and have some pink hue in their reflection. We want to make sure that these pop and also look natural so we are going to brush over them, removing the effect of the Replace Color tool on these areas.
To do this, make sure your Brush Size is smaller than the area you want to erase, lower your Brush Hardness all the way to zero, and keep your Brush Strength high. When you are done, select Apply.
Step 4: Replicate or Remove Items With the Clone Tool
If there are any unwanted objects in your shot, like crumbs, or you are wanting to replicate items to create a fuller scene, the Clone Tool can do it. You’ll find it in the Touch Up tab in the left-hand menu. With it, you can virtually remove objects from photos that are distracting or clone objects you want to replicate.
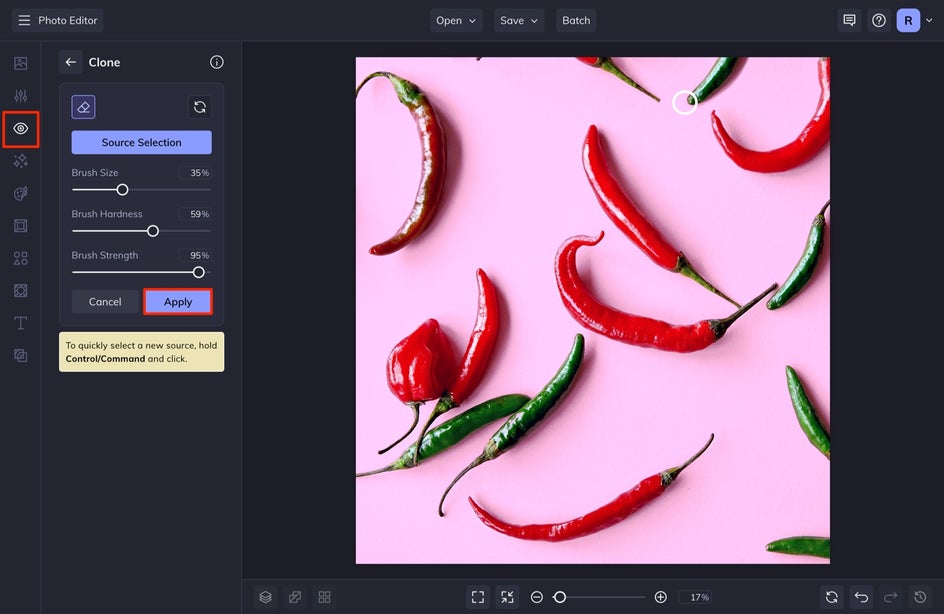
First, press down Control/Command on your keyboard and then click on the object you want to clone. Next, move your cursor to the space you want to place the cloned item and click and paint. You will see the cloned item painted on by the brush.
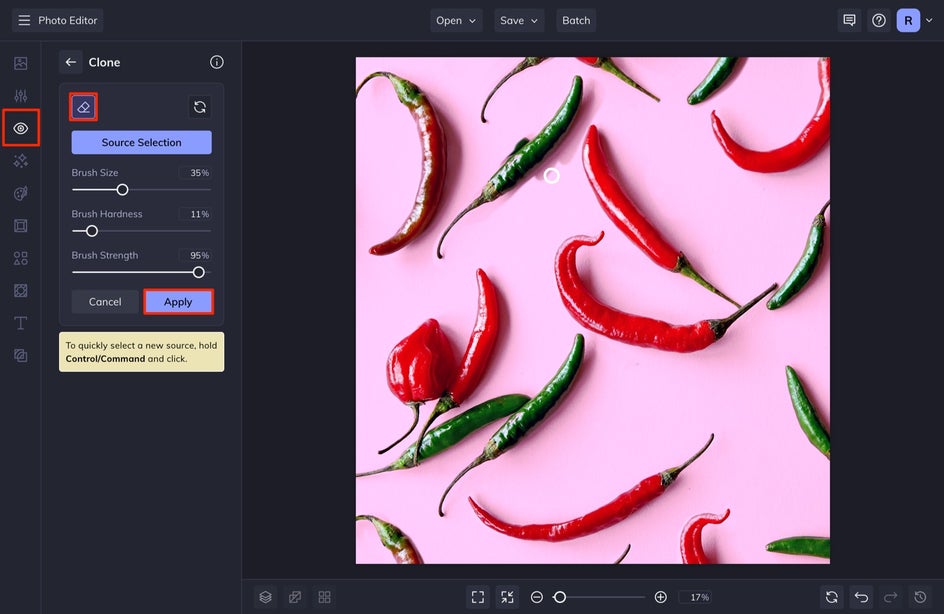
If you need to clean up the edges, select the Erase button in the menu and go over the part that you want to erase. I keep my Brush Hardness low here and then have my Brush Strength in the middle. Adjust your Brush Size depending on the object you want to clone. When you are done, select Apply.
Take and Edit Perfect Flat Lay Photos
Now that you know how to create a flat lay scene and use Befunky’s powerful editing tools in Photo Editor, your flat lay photography is about to transform. You can use flat lays for anything from marketing material to your next Instagram post. Try out these powerful tools for the best flat lay photography!