The Ultimate Guide For Perfect Food Photography
People love beautiful food photos. They should elicit a specific feeling that goes beyond hunger. A photo of orange juice, if done correctly, will provoke thoughts of summertime or hosting a brunch with friends on a Saturday morning. A photo of a warm, comforting-looking stew will encourage memories of the winter months. This is what your goal should be when taking photos of food.
The best part is that these images are not that difficult to create – you most likely have the majority of the tools you need for food photography right in your home! With the ease of the BeFunky Photo Editor and these helpful tips, you’ll be able to create photos that are worthy of all the likes.
How to Edit Your Food Photos to Perfection
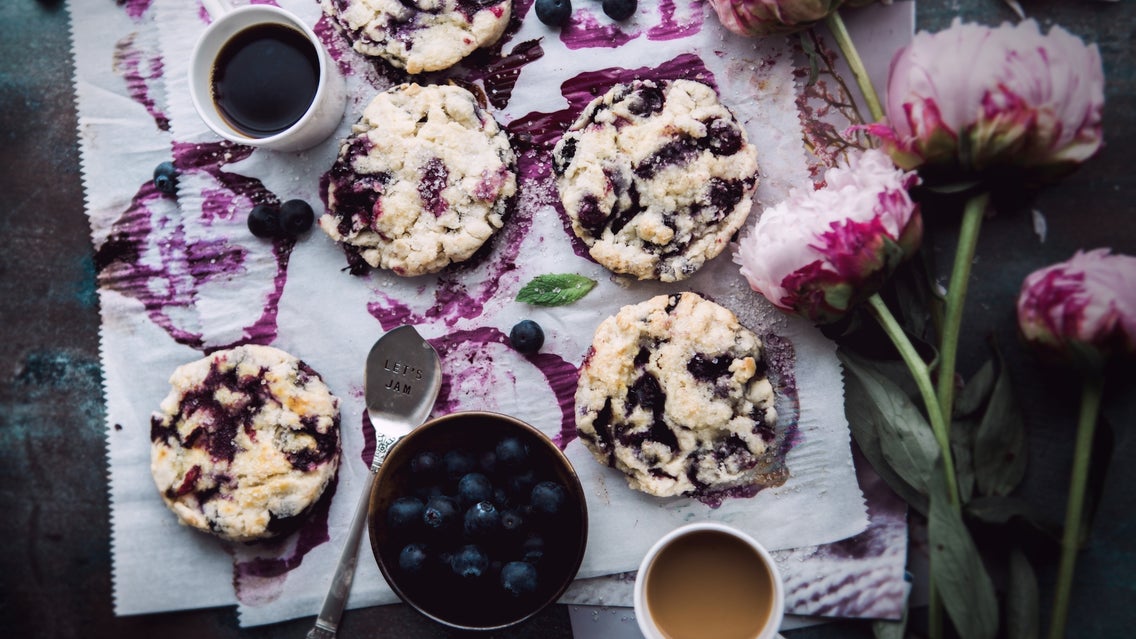
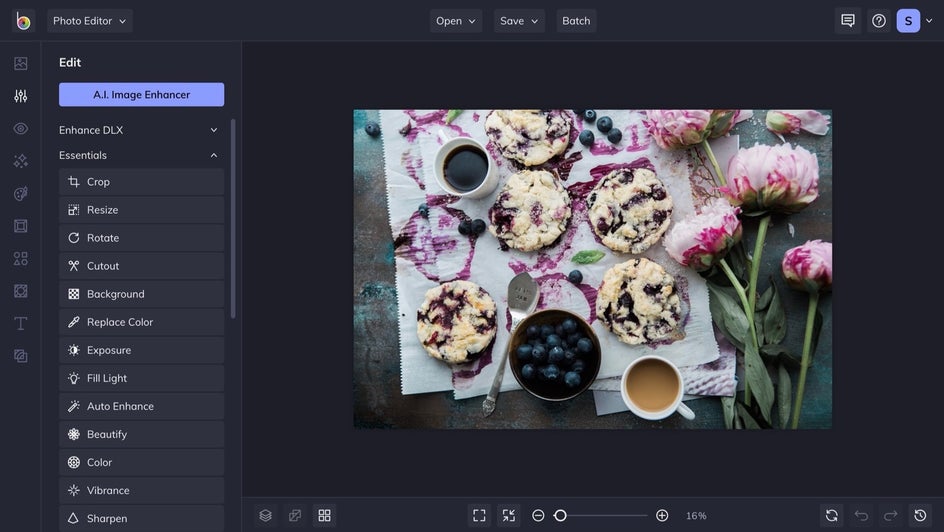
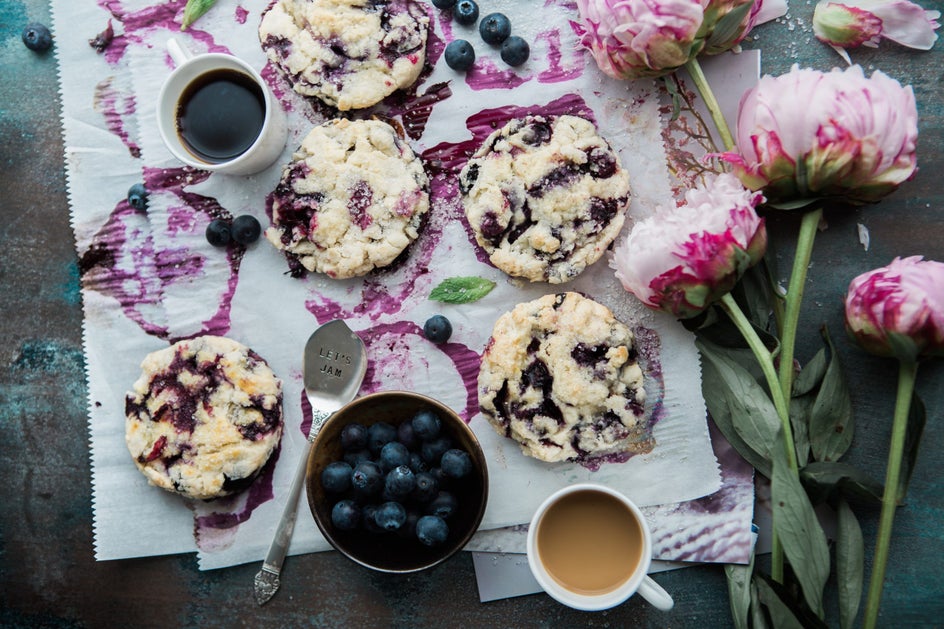
Let's go to the BeFunky Photo Editor. Upload one of your favorite photos from the shoot. This photo of blueberry pastries looks good, but the colors are a little muted. And while we're fixing that, we can play with some other tools to make the photo really pop.
Step 1: Edit the Lighting
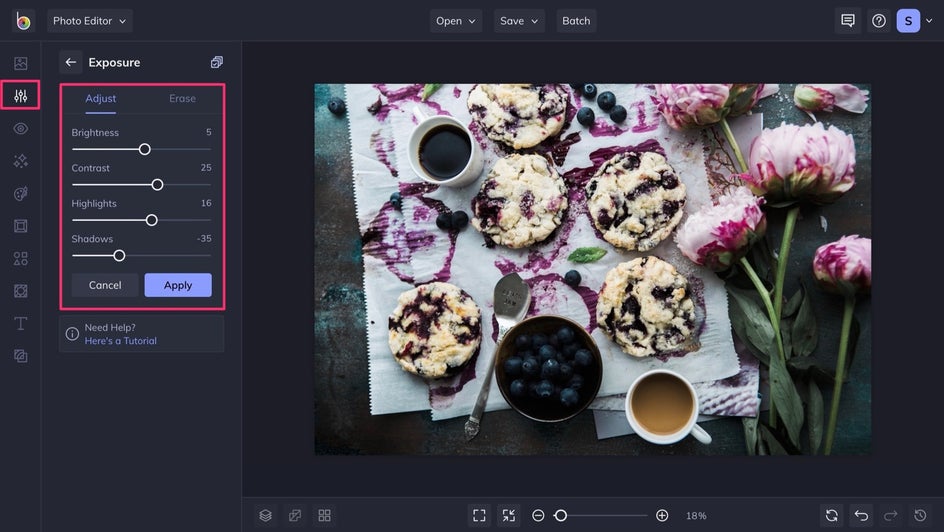
In the Edit panel on the left, we will choose Exposure under Essentials to start brightening up our photo.
When you click on the Exposure tool, you’ll be able to adjust the Brightness, Contrast, Highlights, and Shadows. Sliding each scale will alter the light in your photo, and a good rule of thumb is to adjust the exposure based on the brightest part of your photo. You want to make sure that the lightest part doesn’t look over-exposed.
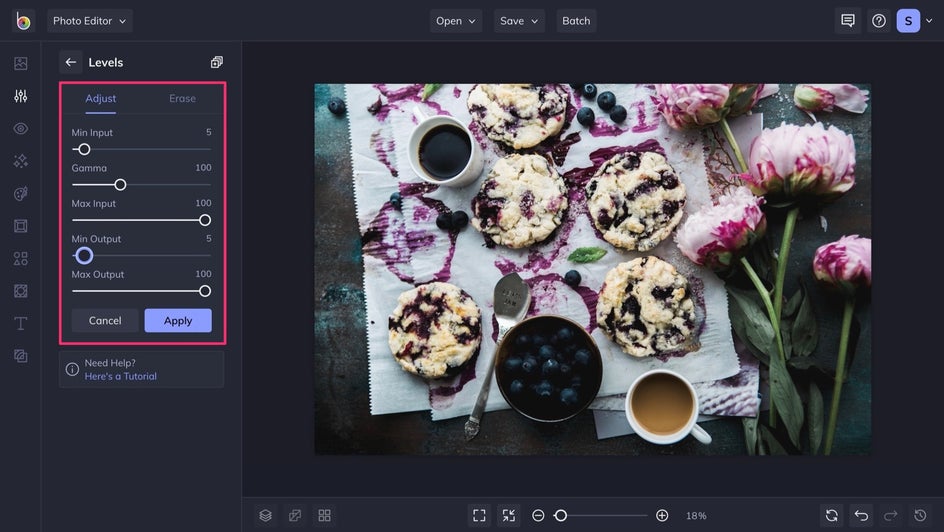
Step 2: Enhance Your Photo With Levels
To take your exposure a step beyond, select the Levels tool from the Edit panel, which can be located towards the bottom of Miscellaneous. Levels adjust shadows, mid-tones, and highlights a little more in-depth than exposure. Play around with this tool, as it is a way to meticulously edit your photos to get them exactly where you want them to be.
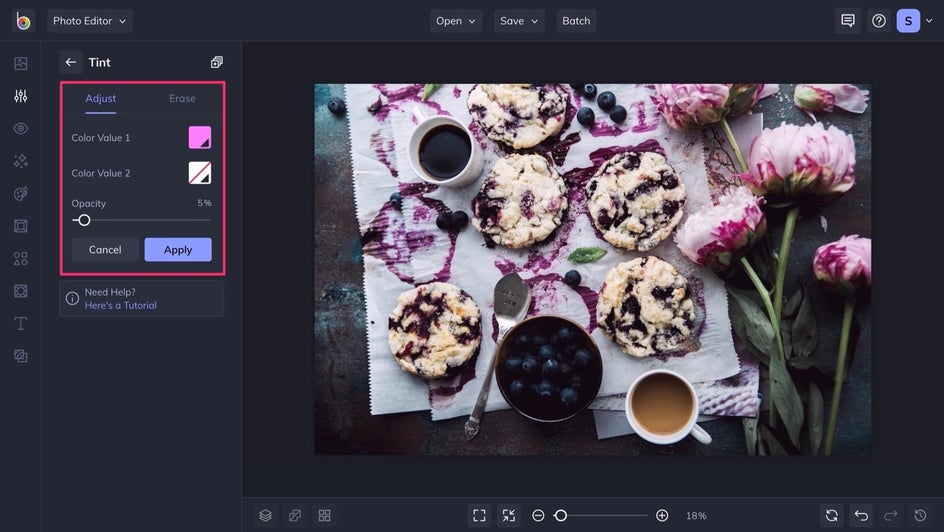
Step 3: Add Some Color With a Tint
Next, we’ll make the color more cohesive with the Tint tool. It can be found right above the Levels tool. Tints are a great way to place a color overlay across your whole image (kind of like a custom filter), which can really change the mood of your photo. We changed the color value to a vibrant fuchsia and lowered the opacity to make sure the image is still clear. This tint adds a subtle pop of color and compliments the pink and purple hues that are already present in the photo.
Step 4: Create a Focal Point
Now we’re going to highlight the focal point of the shot with the Funky Focus tool. In the Edit panel, you’ll find Funky Focus under the Blur & Smooth category. It’s is a great way to add depth of field in post-processing. If you want to have your audience focus on one part of your image, you can achieve this easier by blurring out the parts of your photo that aren't as delicious looking.
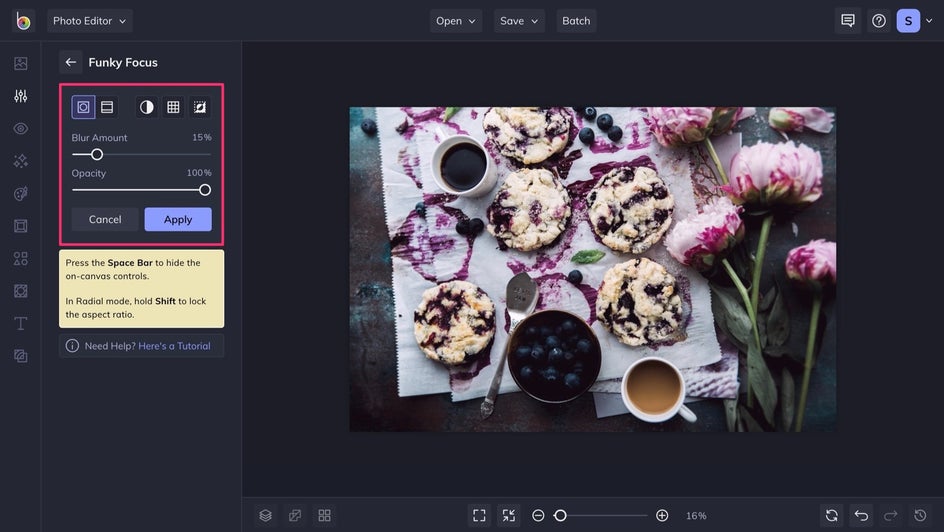
Move the Funky Focus target over the part of the photo you want to remain in focus, and feel free to use the white circles and squares to resize the target. Sliding the Blur Amount scale to the right will increase the amount of blur in the portion of the photo that’s not inside the target.
Here, we are putting the focus on the baked goods to further accentuate the subject of this photo. Although the flowers and beverages make the photo all the more interesting, our goal here is to take excellent food photography.
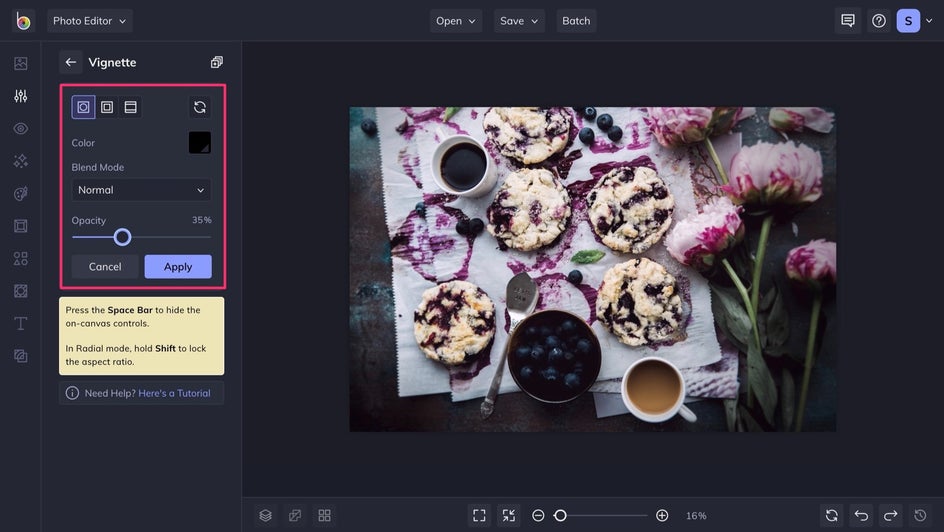
Step 5: Add a Vignette
Next, using the Vignette tool helps to direct light to the focal point of your photo by slightly darkening or lightening the edges. You’ll find this in the Edit panel under the Essentials category. You can make the vignette whatever color you want. Here, we went with black to add more shadows to the edges of the photo – which increases the depth and focus.
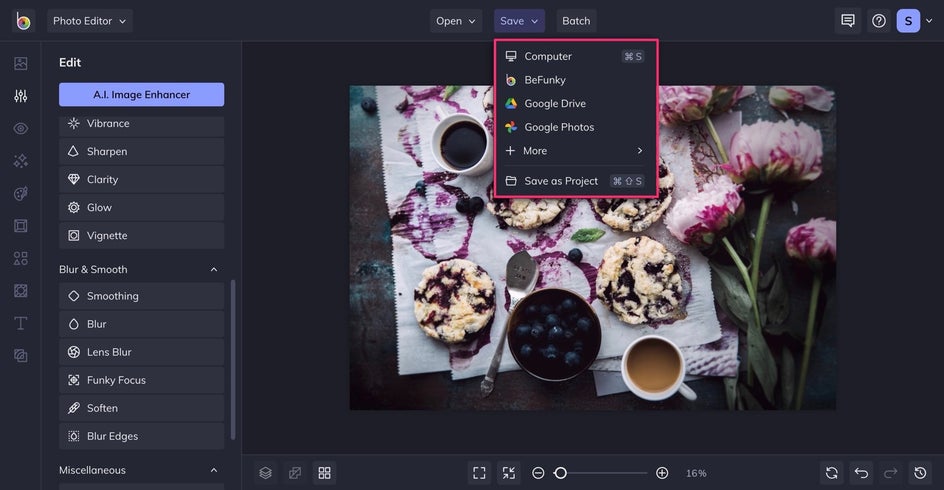
Step 6: Save It!
When you're satisfied with the results, save your project to the location of your choosing – including BeFunky or Facebook.
Final Result
With these simple editing tools from BeFunky’s Photo Editor, you can create more intriguing (and mouth-watering) food photography in minutes! And a totally different mood. Take a look at the before and after:

Below, we've also included some essential tips to bring your food photography to the next level. Once you have that perfect shot, head over to the Photo Editor to get started!
5 Essential Tips to Nail Your Food Photography
Creating beautiful food photography doesn’t have to be complicated. We’ve broken it down for you to capture your food at its finest, with some simple, memorable tips for your next shoot. It all begins before you even hit the capture button.
1. Establish the Mood
Allow the recipe to dictate the mood you will create. For example, s’mores scream fire, warmth, and comfort – while a salad has a more energizing vibe. With the right mood in mind, set the scene by finding props that evoke a similar feeling. If you whipped up a cozy dish, it's best to use a rustic and neutral palette for the background and props.
2. Get the Lighting Just Right
You don’t need expensive lighting equipment to produce amazing food photography. In fact, some of the best food photos are shot using natural light, which is absolutely free! In your home, find a large window that lets in a lot of light. Or, if the weather's nice, bring your food outside. Anywhere that is well-lit will work great.
You can also work to diffuse the light for better shots. If you’ve ever shot a photo outside when the sun is at its highest point, you probably found that it makes shooting more difficult. Diffusing light helps to distribute an even amount of light over your entire scene. This is why photographers love a cloudy day; it evenly distributes the light and makes editing a breeze! To diffuse harsh light when it's not cloudy, you can hang a white sheet over your window, or bounce the light with a white poster board to bring more light onto the darker areas of your shot.
3. Create Harmony With Color
Before you start tossing props into the shot, you’ll need to think about color. By shooting colors that work well and look good together, you are creating harmony and have a better chance that someone will like your photo – even if they are not conscious about it!
We are talking about food photography, so think about the colors that ignite the appetite. Think about the colors that make food look delicious. For instance, this photo of persimmons uses the complementary colors of orange and blue, while the photo of the plums uses complementary colors yellow and purple, and analogous colors blue, purple, and red. Complementary and analogous colors create harmony for the eyes.
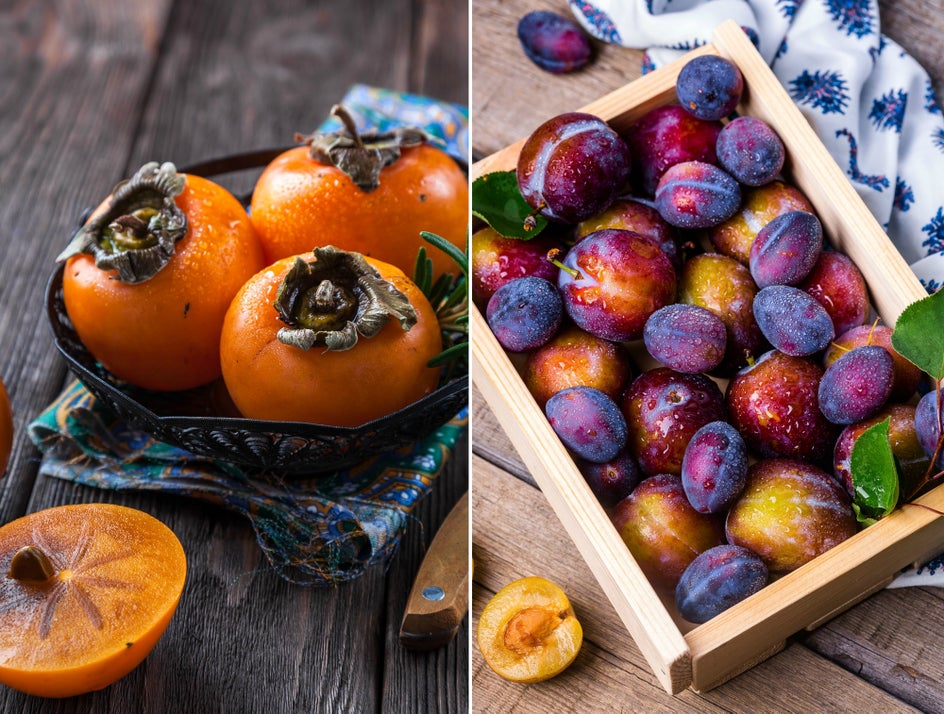
For instance, this photo of the persimmons uses the complementary colors of orange and blue. On the other hand, the photo of the plums uses the complementary colors yellow and purple – and analogous colors blue, purple, and red. Complementary and analogous colors create harmony.
4. Set the Scene With Props
Start noticing the props used in flat lay photography and food photography. You’ll find that many photographers will use linens or old, scratched-up pans as their surface or backdrop. Think of the materials you have in your home and utilize those items before going out and buying all new props! You can do a lot with an old pan, a cutting board, and a sheet. Think about depth and texture.
Visual differences in a photo such as height variance, object depth, and texture create interest and intrigue and allow the eye to move freely throughout your photo. Adding other props and ingredients to your photo helps to add visual differences that create more interest.
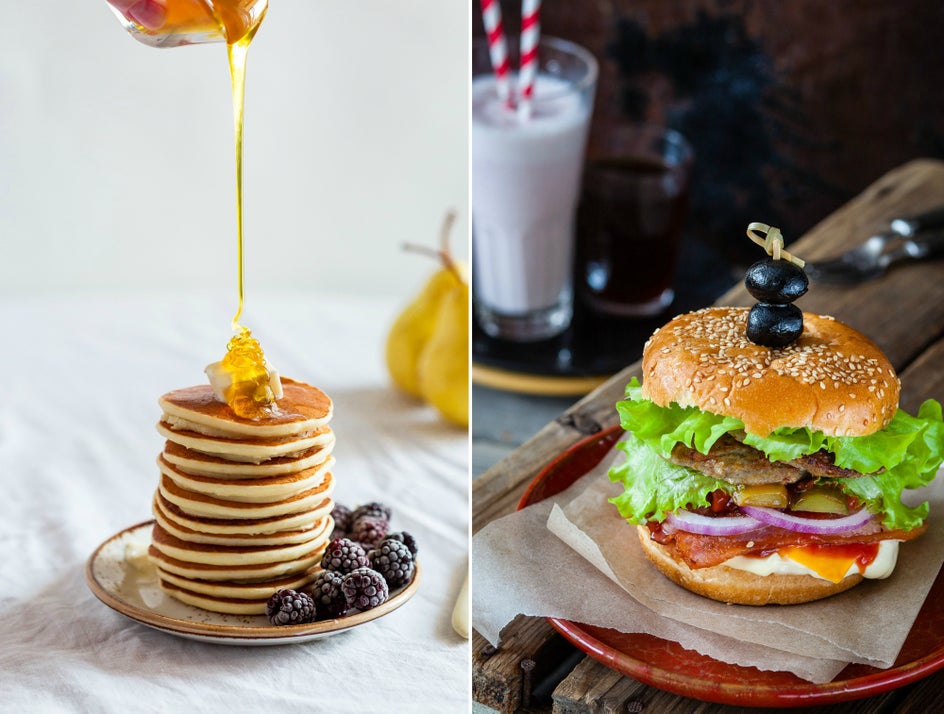
This photo of a stack of pancakes establishes the sweet treat as the subject. Notice the white background and white sheet underneath. The photographer used berries, pears, and dripping honey as a way to create height differences. This allows your eyes to move throughout the frame. The photo of the burger gives you height variance as well with a different prop, the beverages. It also has texture variance with the paper under the bun. These elements add extra visual interest.
5. Play With Composition
Composition is such an important aspect of photography and is more a sum of many techniques coming together. Think of composition as figuring out where to place the subject in the frame so that your eye focuses on that first. You can use framing (using smaller elements in a photo to frame the main subject), the rule of thirds (place your main subject where the lines intersect), balance (making sure there are equal weights on either side of the subject), and simplicity (using neutral backgrounds as not to distract from the subject). All of this helps draw attention to your subject.
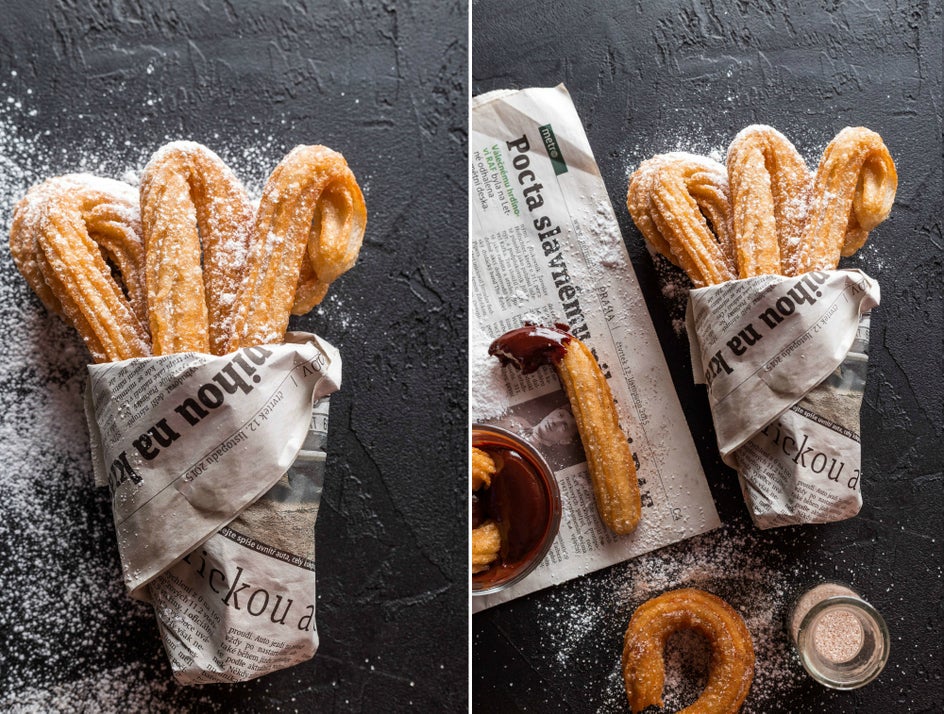
The first photo is crisp and beautiful. It’s a good shot. But the second photo adds other elements, all while keeping the pack of churros as the main subject. The use of framing and the rule of thirds is used here as well. This creates a lot more visual stimulation for the viewer. And notice that the photographer didn't blow away the messiness of powdered sugar in the shot. These details help the image feel lived-in, rather than staged.
Remember these tips you’re shooting to create engaging photos and continually look at good food photography for inspiration. Study images and recreate them with the items you own. Practice, practice, practice!
Create Mouthwatering Food Photographs
With all of this information in your back pocket and the ease of the BeFunky Photo Editor, all of your food photography will reach delectable status! Your friends and followers will thank you as they drool looking at your feed.