Add a Glow Effect to Your Photography

Sometimes it’s hard to capture the true essence of an object on camera. Particularly, something shiny like a sparkly piece of jewelry or a gleaming light source. Unless you have the fanciest camera on the planet, objects like these tend to fall a little flat or blur important details together when an image is captured. This can be increasingly frustrating if those details are critical to the overall photo, like when you’re trying to capture product photography and the shininess is a selling point.
The camera lens captures all that it can, but for those sparkly details that get left behind, the Glow tool in our Photo Editor is here to save the day! Whether you’re wanting to put the bling back into an image of a diamond ring, highlight the shiny paint job on your car, or make anything look as glinty and glowy as it does in real life, we’ll show you how to enhance it all. Let’s get started, shall we?
When to Use the Glow Tool
The nature of the Glow tool is to brighten the highlights in your image to naturally make shiny objects appear even shinier. It will add a standout glow to any type of photography, but the best images to use with this tool are ones where shimmer and shine are important to the overall look. Here are some of those instances:
Add Bling to Product Photography
Since the Glow tool is designed to make objects look shiny, it’s superb at enhancing certain types of product photography. Specifically, jewelry. If you’ve ever taken a photo of a gemstone ring and found it to be lacking in the bling department, using the Glow tool will make all the difference.
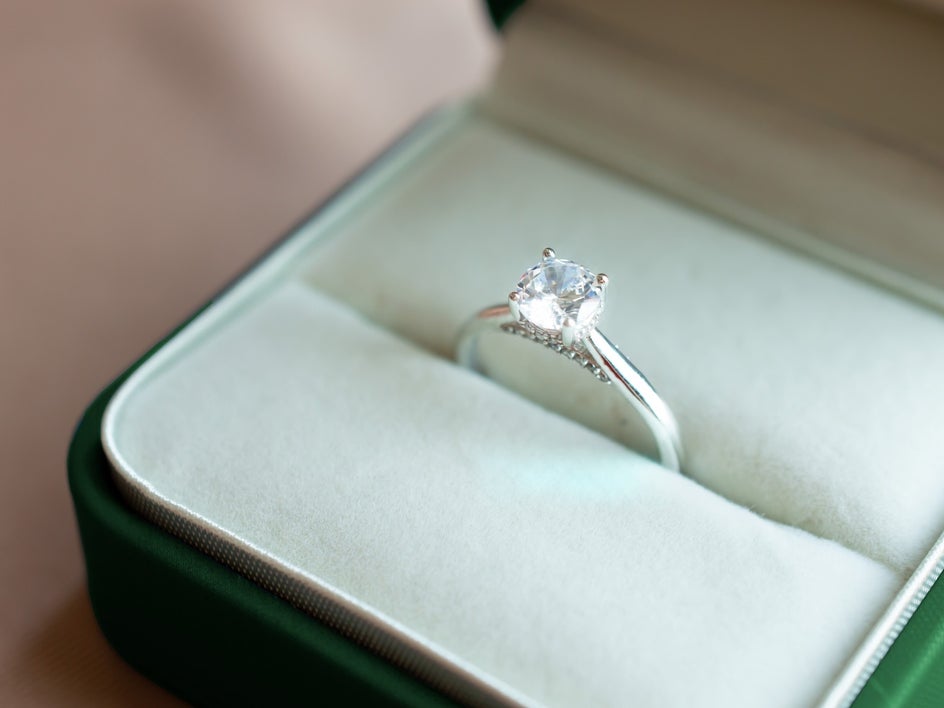
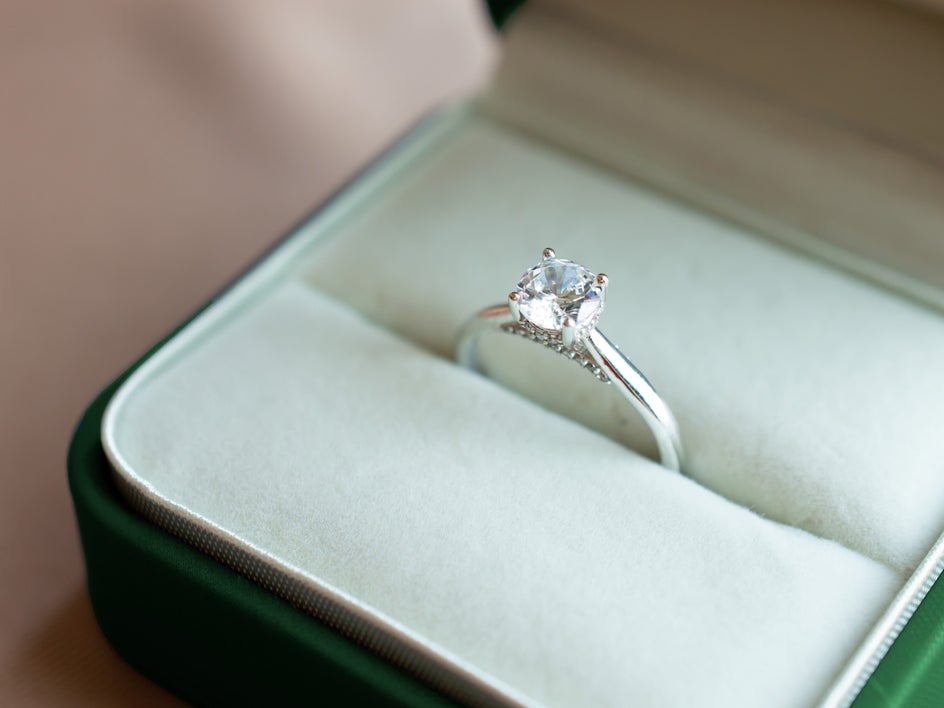
Just look at the details that are added back to those otherwise dull diamonds.
Make Light Sources Look Radiant
If you’ve ever tried to take photos of a neon sign or city at night, you know that it looks a million times more glowy in real life. The cool thing is, the Glow tool can fix those types of images and recreate the radiant details your camera didn’t capture!


You can add as much or as little glow as you want, so you have total control over how bright you want your light sources to appear.
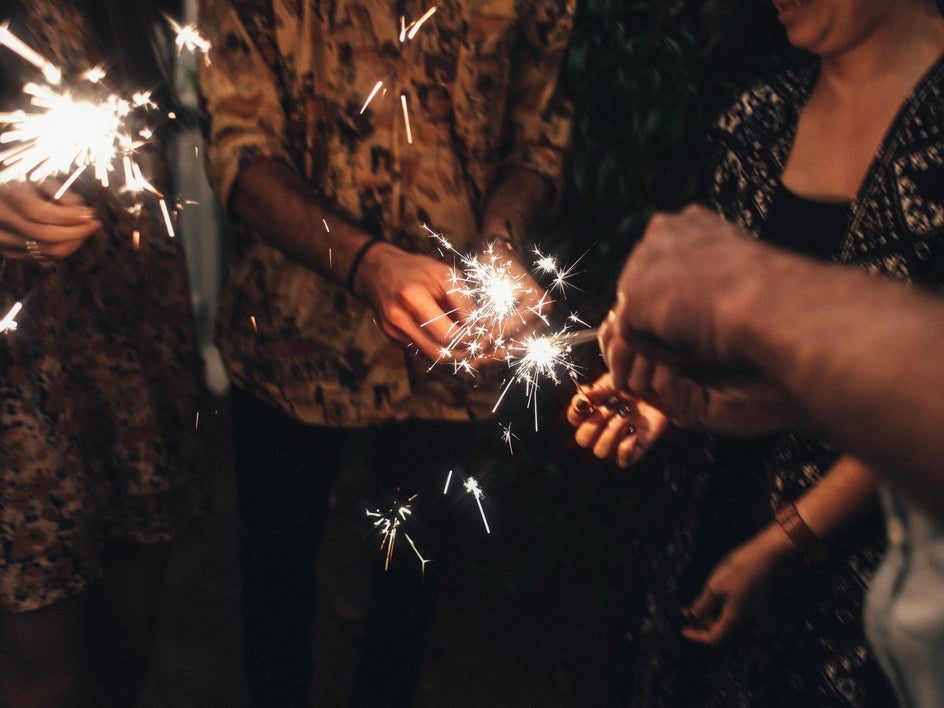
Highlight the Sparkles
Whether it’s a fantastic fireworks display, ornaments glittering on a tree, or any object that you want to make stand out, the Glow tool has your back.

How to Enhance a Photo With the Glow Tool
Whatever kinds of images you’re enhancing, the Glow tool can add that extra bit of intrigue and highlight the important details. We’ll show you how easy it is!
Step 1: Upload a Photo
Ready to bring out the shiny details in your image? If so, head to BeFunky’s Photo Editor and upload an image by clicking the Open button at the top of the Photo Editor or dragging and dropping an image right into the interface.

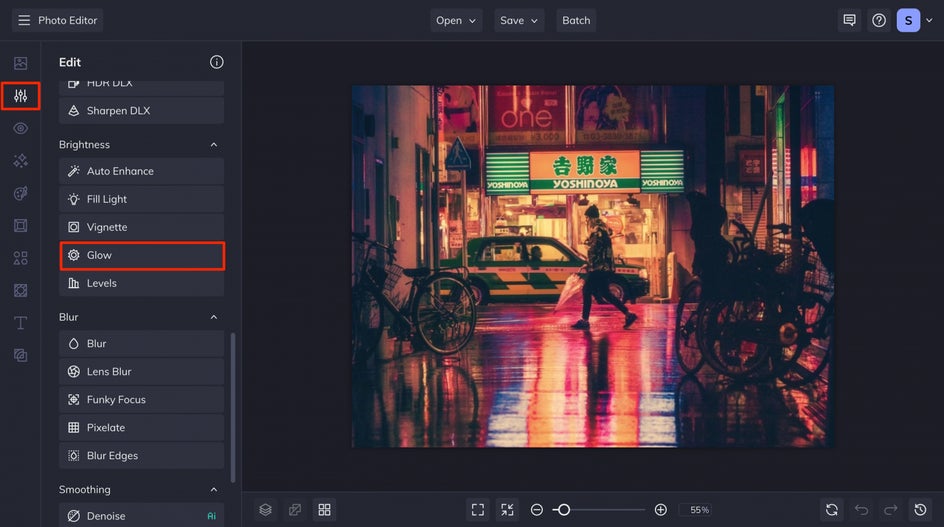
Step 2: Head to the Glow Tool
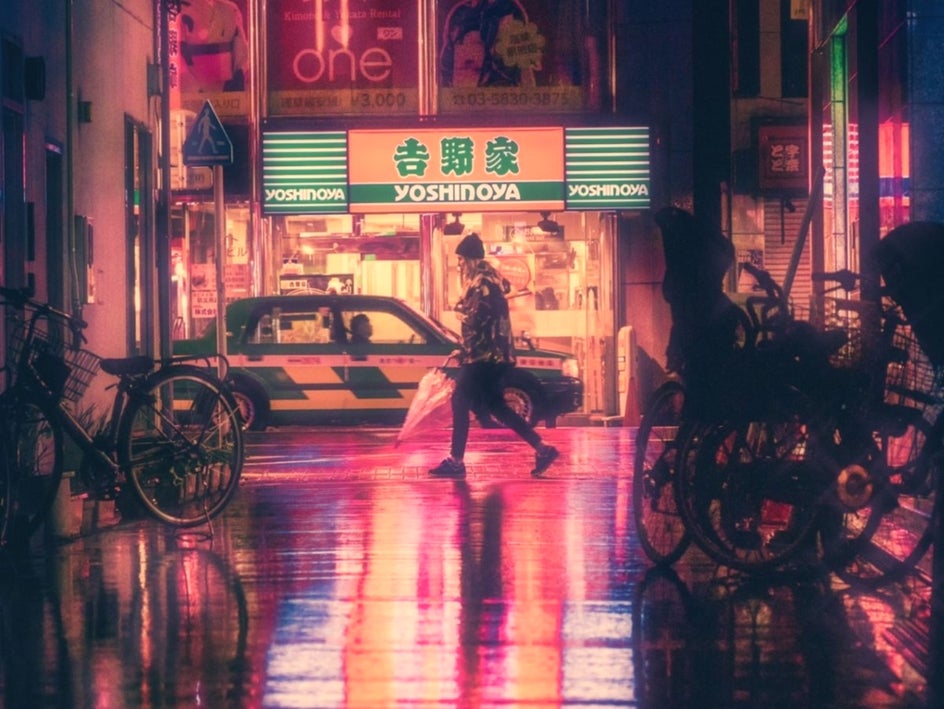
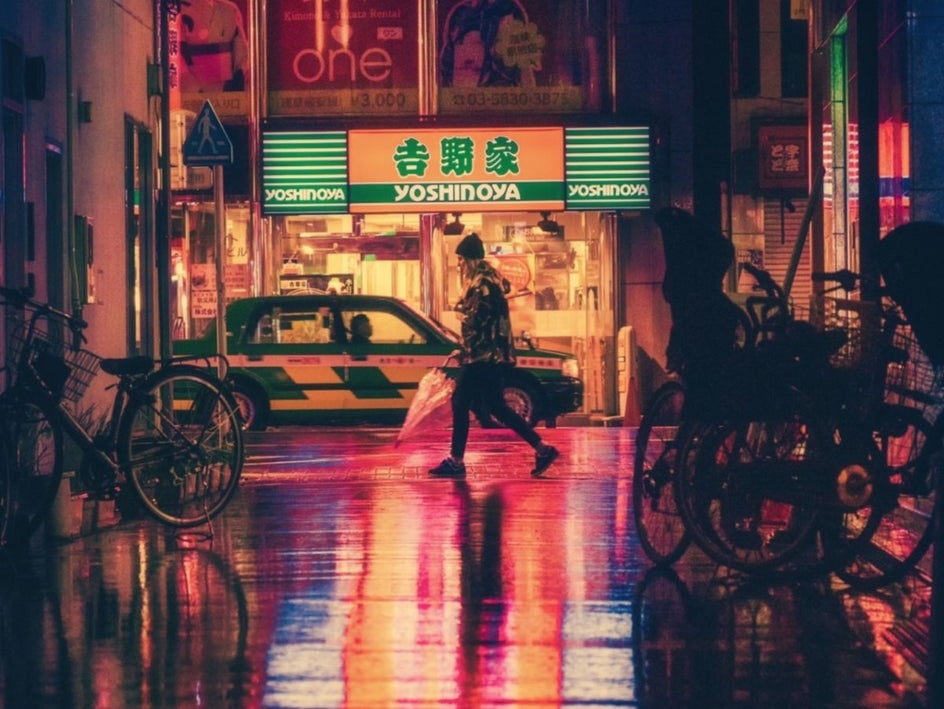
Once it’s uploaded, click on Glow from the list of tools in the Edit menu on the left. In this particular image, we already have a good amount of shine coming from the fluorescents of this street scene, but the overall tone is quite muted. We’ll show you how the Glow tool can add another level of shine.
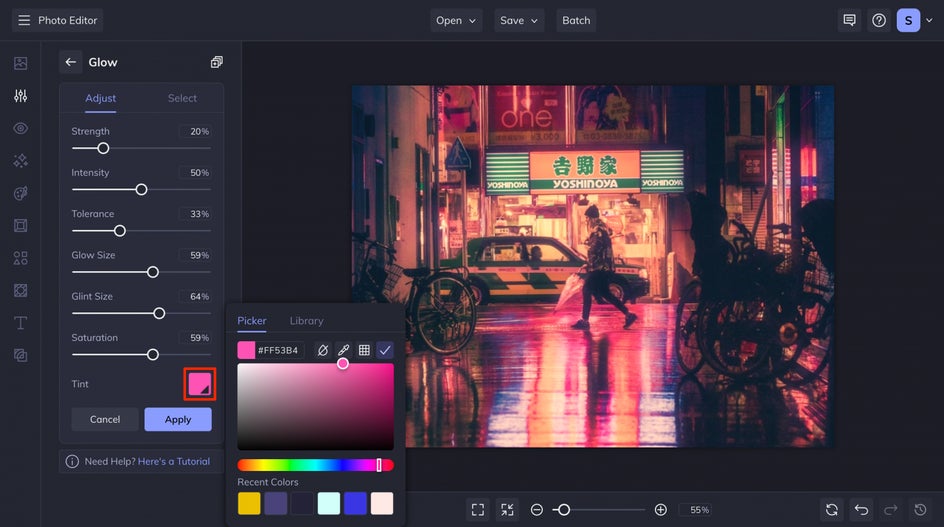
Step 3: Customize Your Glow
Once you’re in the Glow tool menu, you’ll notice several options for customizing the effect. They all work in tandem to create a completely customized effect, so keep in mind that finding a balance between them all is key. The Select tab features several ways to apply the Glow effect selectively as well.
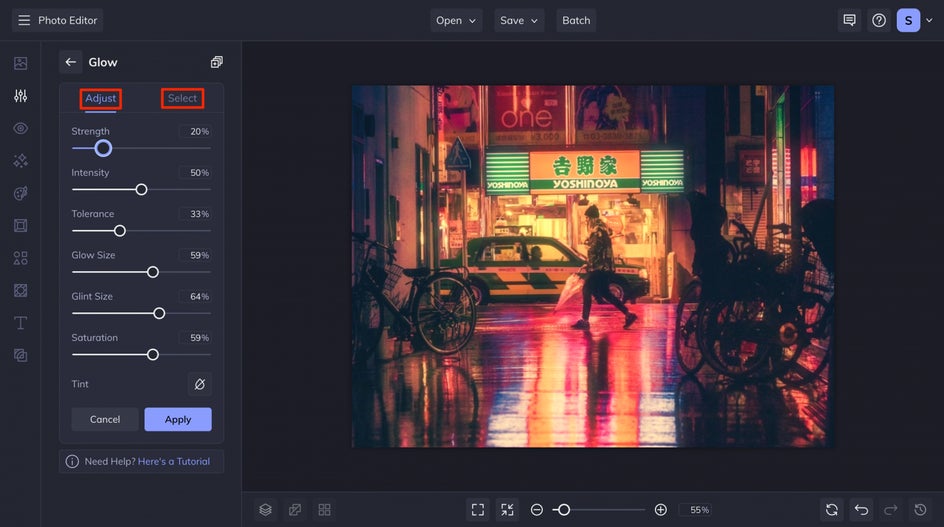
You can also add a tint to your glow to completely change the mood, intensity, and color palette. Here, adding a bright pink helped create a more uniform color palette throughout.
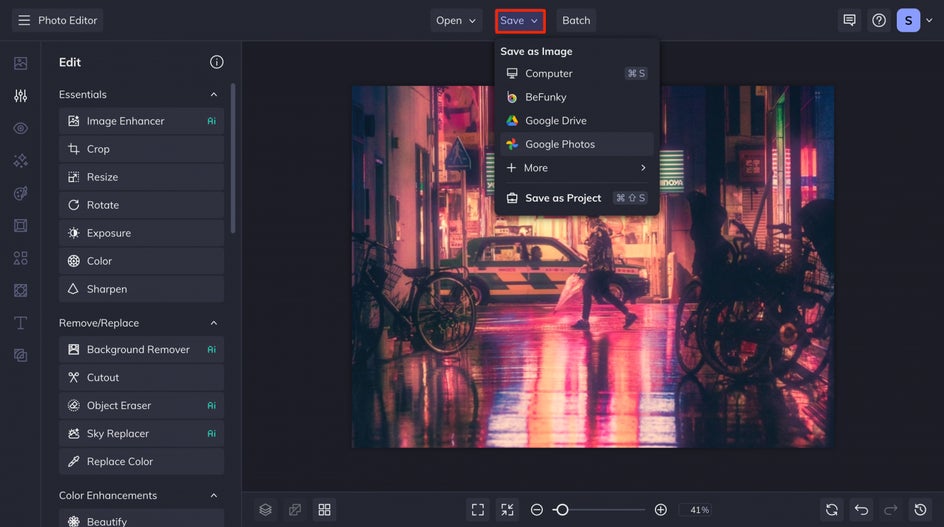
Step 4: Save Your Photo
After you’ve found the perfect balance of Glow for your image, click the Apply button to apply all of your edits. From here you can keep on editing with more tools, or click the Save button at the top of the Photo Editor. In the Save menu, you can choose a destination for saving your image or sharing directly to social media. You can also save it as a project for later edits!
Make It Glow With the Glow Tool!
With the perfect balance of Glow Size, Glint Size, and amount of Glow, look at how much more these earrings shine! The Glow tool is an easy way to replicate the bling your camera couldn’t capture.