How to Create Halftone Duotone Photos
Duotones have been used in the design industry for decades but gained popularity ever since Spotify began using them in its brand identity. This effect took over a year to develop for Spotify and gave them the playful and bold look that is so recognizable now.
We’ve shown you how to turn photos into brilliant duotones before. Now, with the added texture of Halftones, you can give your photos or design pieces a pop-art effect that applies a fresh new take on the duotone standard.
This brings up an important part of design that a lot of people forsake: patterns. Patterns not only add interest and dimension to a design piece but when you utilize them when creating a brand pattern, it can strengthen your brand recognition.
Creating a halftone duotone is easy with BeFunky’s Photo Editor. With our Halftone Duo Effect, you can achieve this look with a simple click and a few slider adjustments. This is perfect for poster design, social media images, web graphics, and use as a branding element.
What Are Duotones and Halftones?
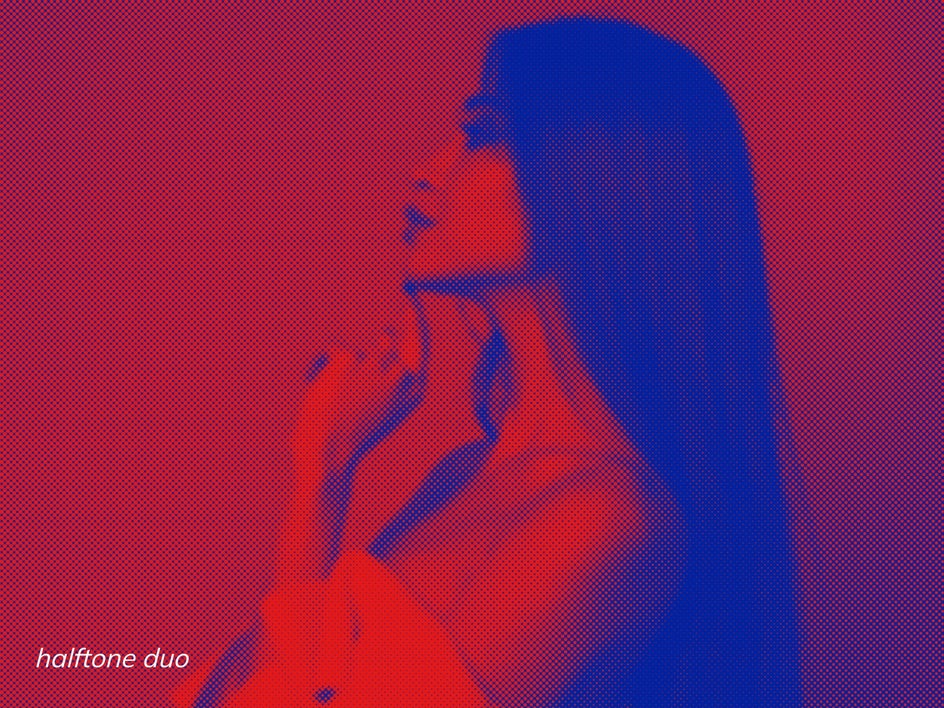
A halftone duotone is a combination of two different photo editing effects: halftones and duotones. If you have never heard of either, we’ll show you both effects separately, then show you how when they work as a pair, so you can create a really unique effect.
Duotones
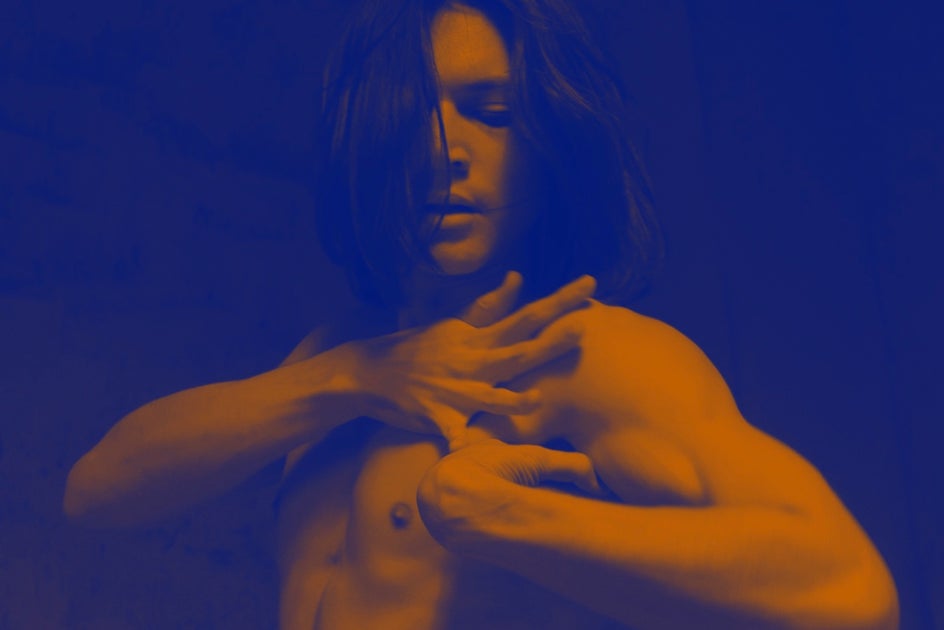
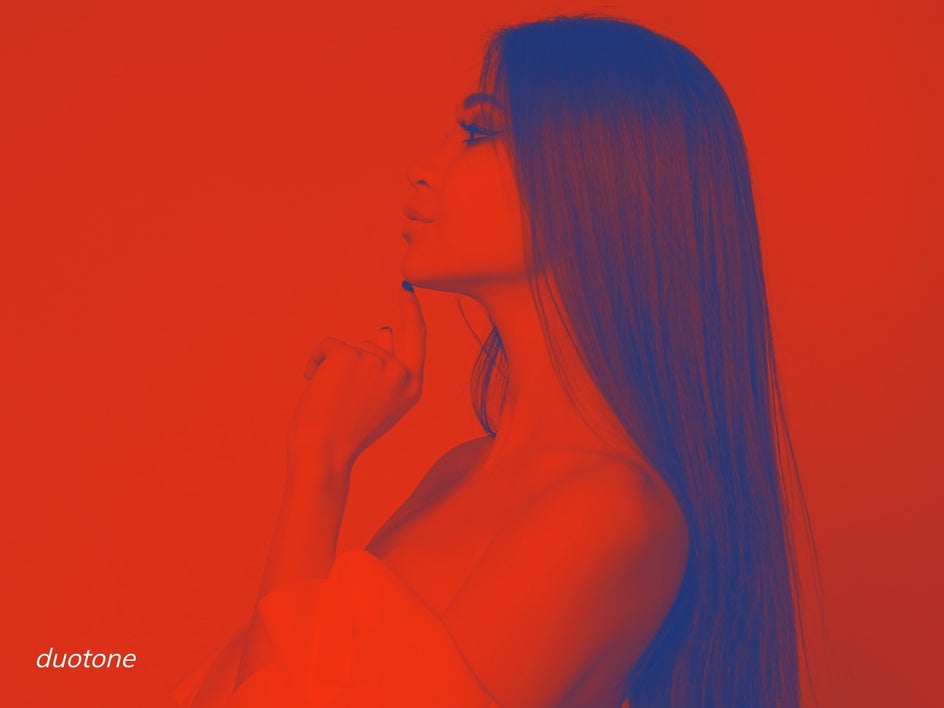
Duotones, just like the name suggests, are comprised of two contrasting tones, or colors. In a duotone photo, the highlights in an image are represented by one color, and shadows are represented by another. This technique gives your image a very punchy look, and can often be seen in marketing graphics today, both online and in print.
Halftones
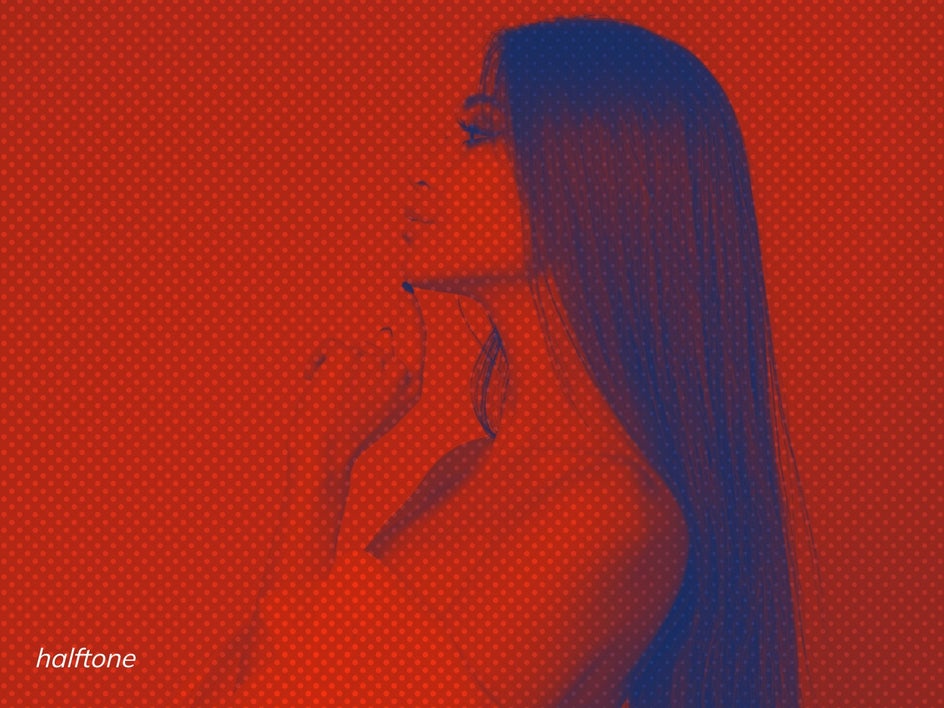
In print work, halftones are a reproduction of an image using dots that vary in size and spacing. These dots work together to form shadows, highlights, and contrast to recreate an image, which was especially important for saving ink when printing on mediums like newspapers and magazines in decades past. If you look closely at an image in an older newspaper, you’ll see that it’s comprised of thousands of dots, but from afar will look like a solid image.
Combining Halftones and Duotones
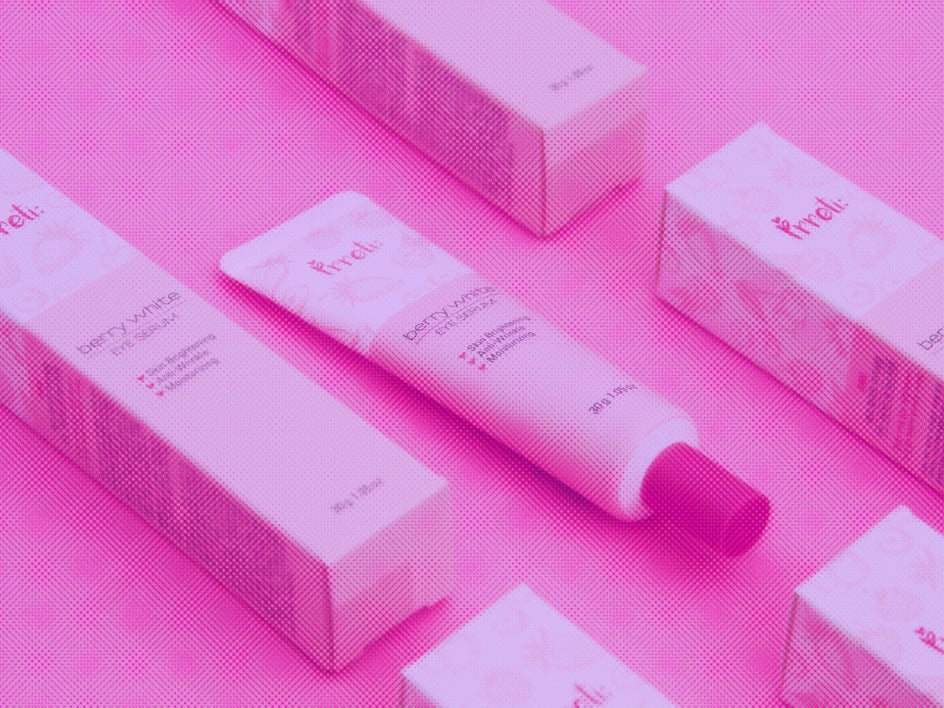
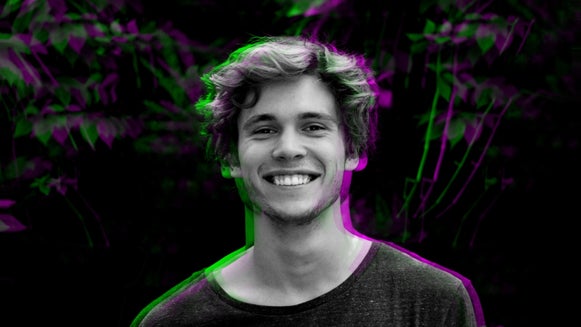
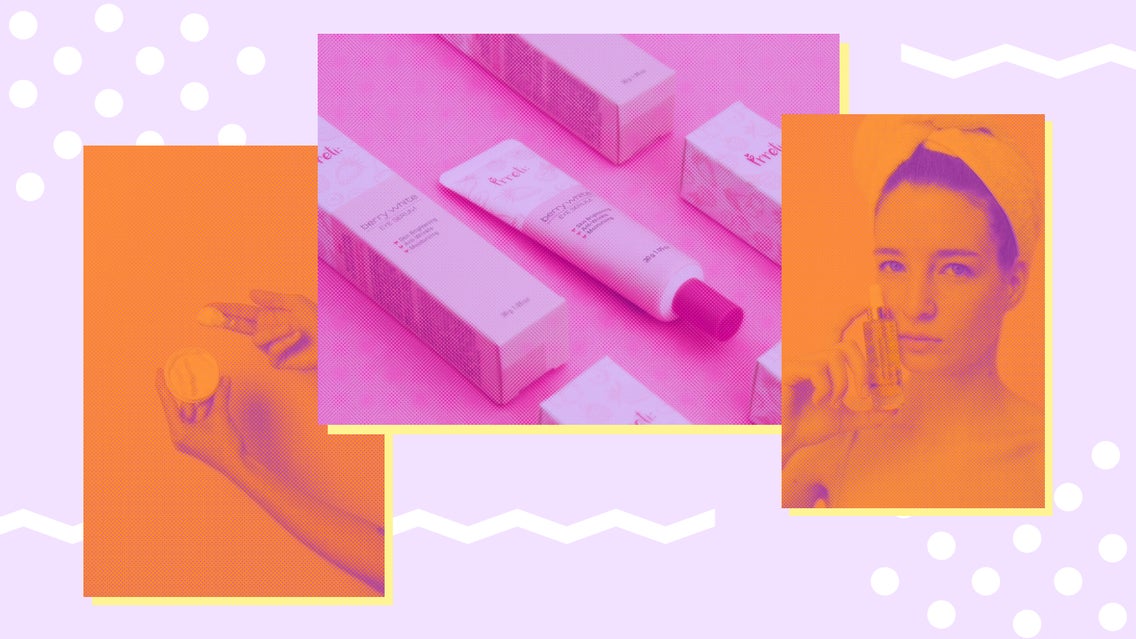
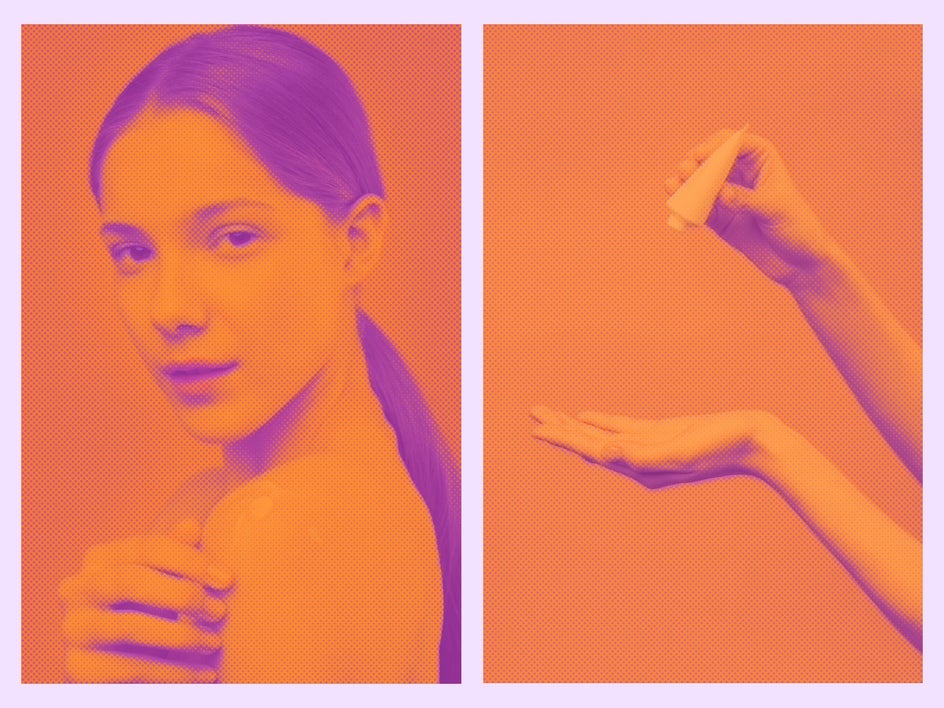
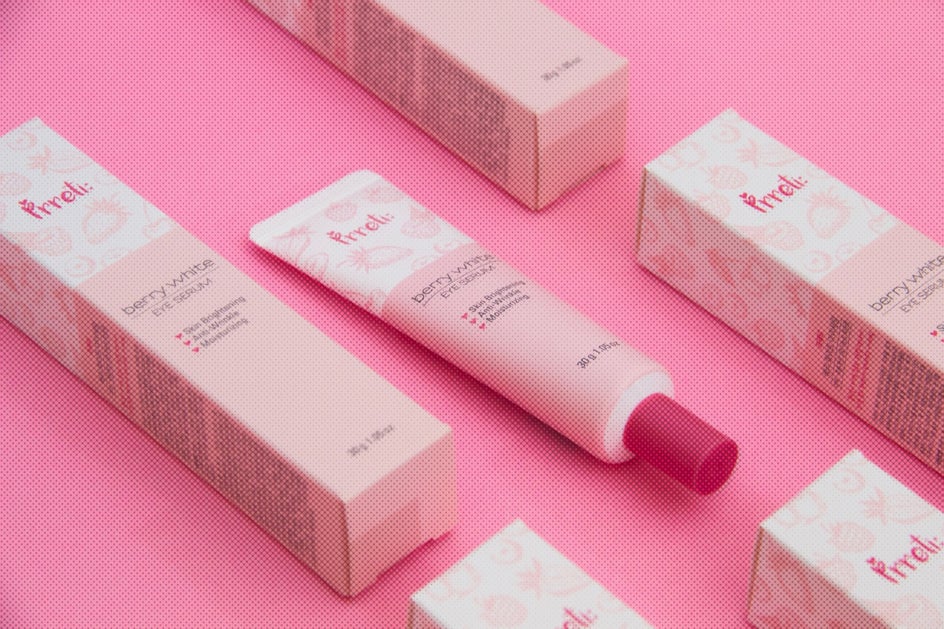
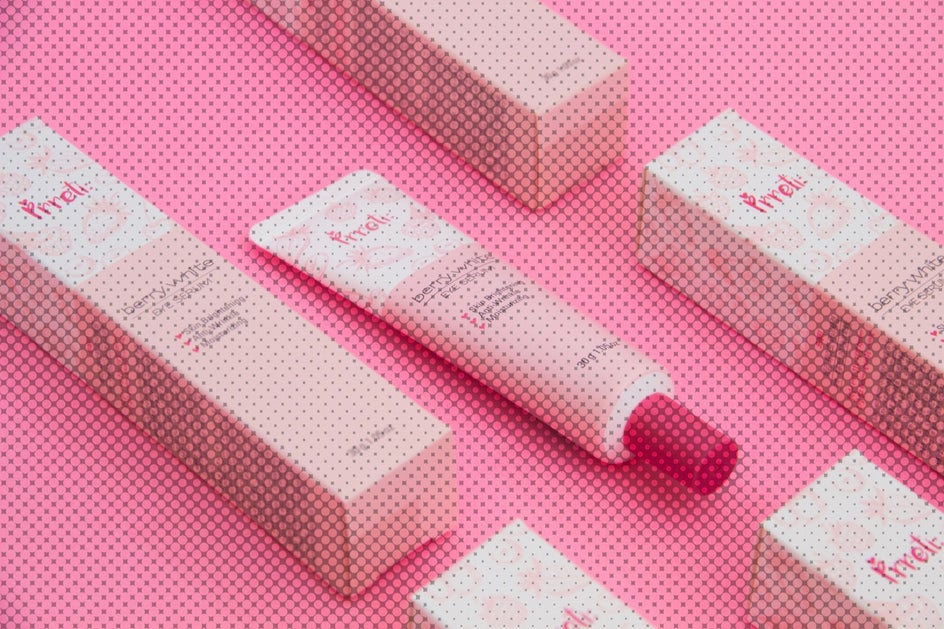
When these two photo editing techniques are combined, the result is a halftone duotone: an image comprised of various-sized dots, colored with two contrasting tones. Together, this technique gives your image a texture and color combination that adds to the uniqueness of your image or graphic. It is very distinguishable and this is a perfect effect to make your graphics and brand stand out.
How to Create a Halftone Duotone Photo
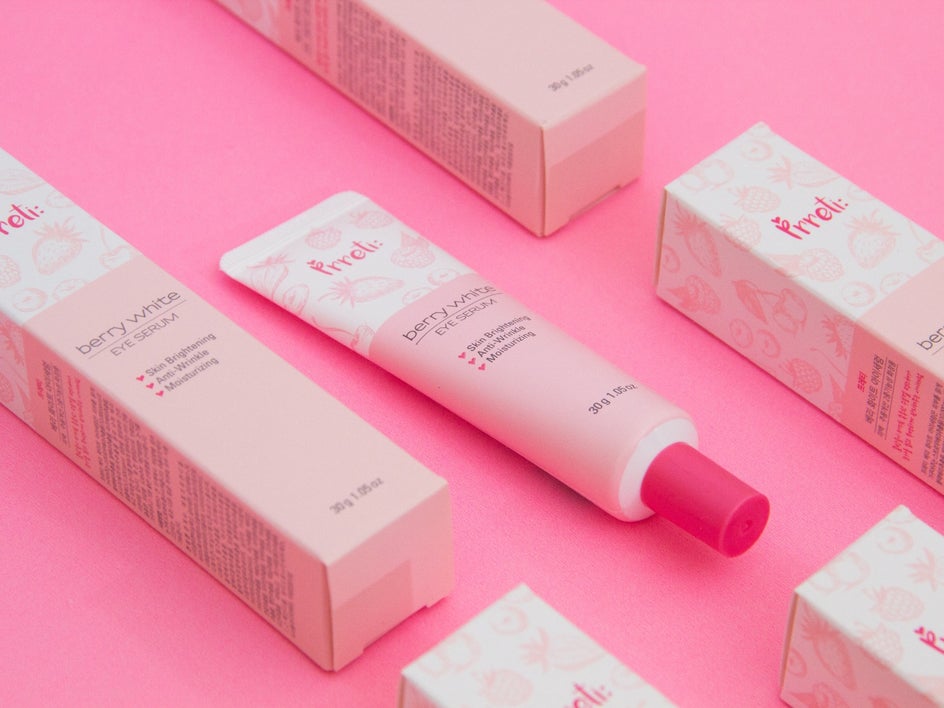
With BeFunky’s Halftone Duo effect, you can fully customize the dot intensity and color palette. We’ll show you how to create your own custom halftone duotones in the next section! We are going to show you how to create a halftone duotone as a brand effect for a product launch campaign - this can be super helpful when you are releasing new products or there is an upcoming sale that you need a campaign for. When you’re ready, head to BeFunky’s Photo Editor.
Step 1: Select an Image
Upload a photo using the Open tab at the top of the page, or drag and drop your image file right into the interface.
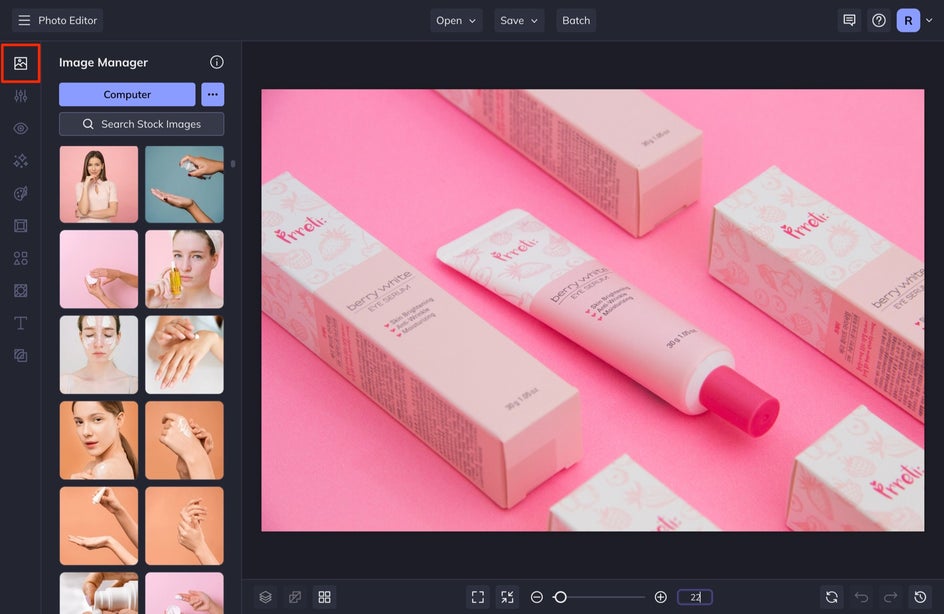
This technique will work with any photo, but high-contrast imagery looks best.
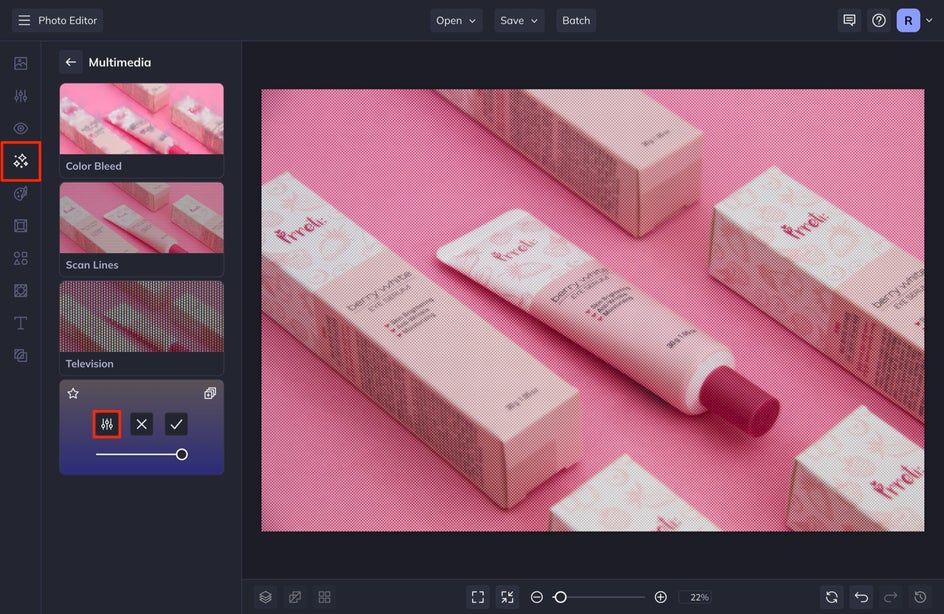
Step 2: Apply the Halftone Duo Effect
Click on the Effects tab in the left-hand menu and scroll down to the Multimedia category.
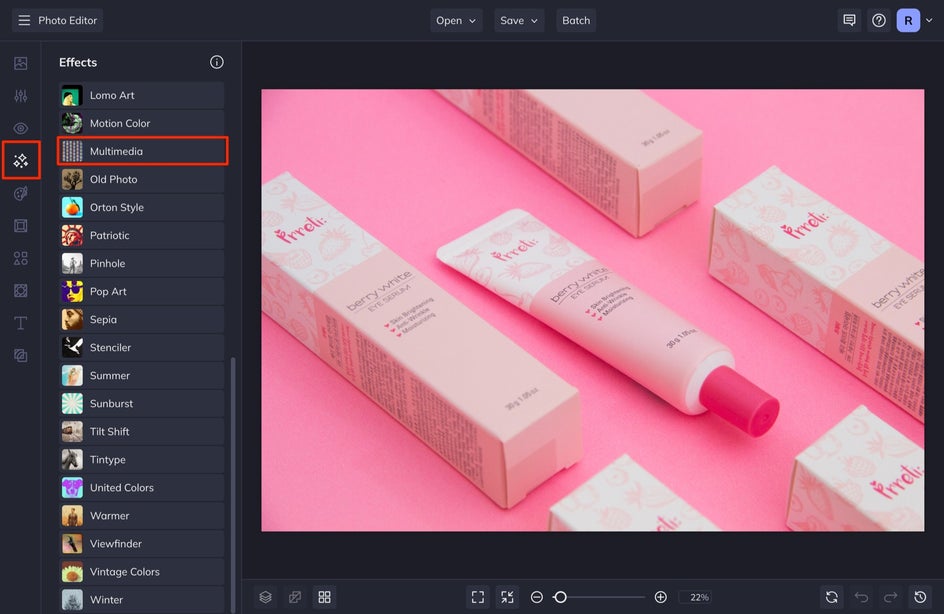
Once here, select Halftone Duo and watch your image instantly becomes dotted with halftones.
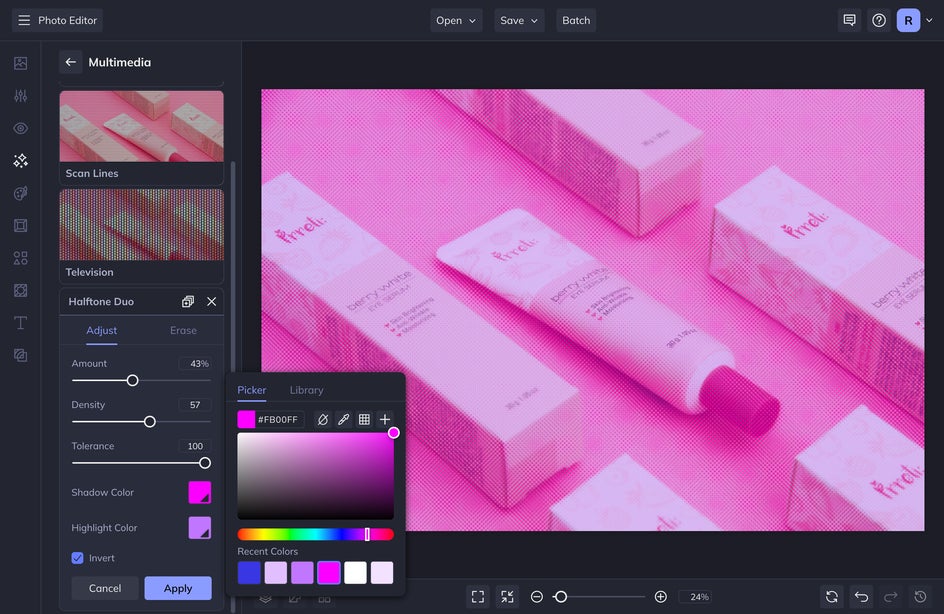
You’ll notice that there are three main buttons that appear on the Halftone Duo thumbnail: Settings, Cancel, and Apply. Click on the Settings button to customize the effect and choose your duotone colors.
In the Settings menu, you’re able to customize the halftones using the Amount, Density, and Tolerance sliders.
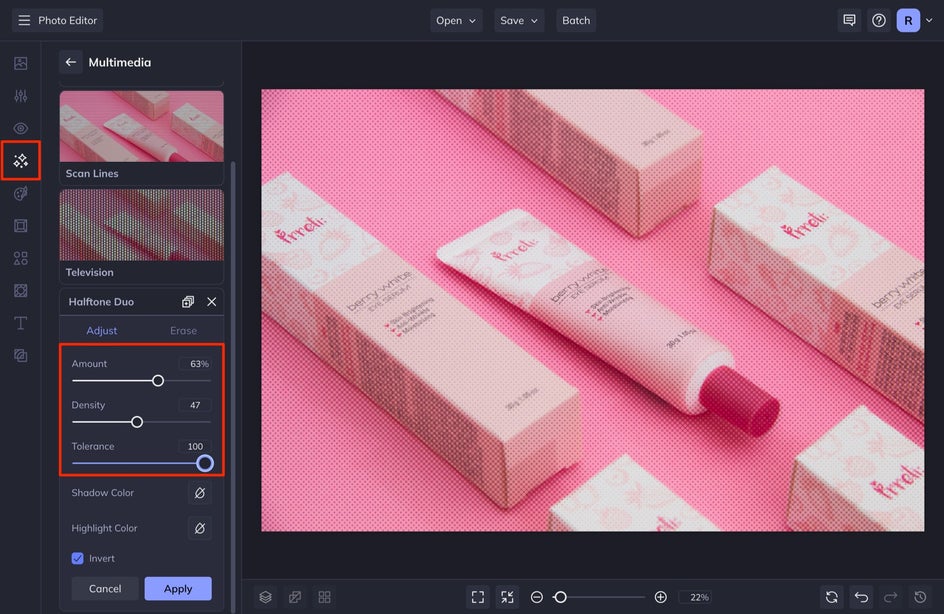
The Amount slider will increase or decrease the opacity of the halftones. The Tolerance slider will adjust the weight of each individual halftone. The Density slider will make the halftone dots more or less dense – sliding it to the left will make the halftones larger and less spread out and sliding it to the right will make the halftones smaller and closer together, like in the images below:
Step 3: Add the Duotone Effect
Before hitting Apply, let’s add a duotone to the effect.
In the same Settings menu, select a Shadow Color by clicking on the color tile and using the menu that appears to choose a color. Next, select a Highlight Color by clicking the color tile and assigning a hue. It’s best to select a darker color for the shadows and a lighter color for the highlights, but try experimenting to see what you like!
After you’ve assigned your duotone colors, you can play around with the halftone sliders to create the perfect balance of texture and color.
Pro Tip: Click the Invert selection to invert the effect. This will fill the negative space between the dots, while the dots will represent the negative space.
Step 4: Save Your Halftone Duotone
Once you’re finished with your photo edit, click the Save button at the top of the page to save your image to your computer.

Creating Halftone Duotone Photo Effects for Upcoming Campaigns
You can now use your photo as a hero image in your next digital campaign, add graphic elements to it, or use it in a poster or an ad. Adding a Halftone Duo effect is a great way to add some artistic flair to your images and create a look that is easily recognizable for branding and campaign usage. Get started with your halftone duotone editing with BeFunky’s Photo Editor by clicking here.