How to Add Depth and Fine Detail With HDR DLX
HDR has been a popular photography feature for over a decade now and there is a reason why. When you try to take a photo and there are both bright highlights and dark shadows, you usually end up compensating for one over the other. If you compensate for the highlights, you lose detail in the shadows and if you compensate for the shadows you lose detail in the highlights. HDR allows you to take a photo with balance where both your highlights and your shadows are equally represented.
What Is HDR?
So, what is HDR in a technical sense? HDR stands for High Dynamic Range. It allows you to capture a scene that better represents what you can see with your natural eye. In the past when taking photos, you weren’t able to capture bright highlights and deep shadows in a single photo because of the camera’s technological limitations. With black and white photography and darkroom processing, you would take an over-exposure and an under-exposure of the same image and then composite them together so that you could get a balanced image of both shadows and highlights. Now, with technology, most cameras can capture this live, having beautifully lit shadows and highlights in one image.
BeFunky's HDR DLX effect, part of the Enhance DLX toolset, does all of this work for you. It uses adaptive exposure technology, meaning it will automatically separate your photo into virtual regions and apply different levels of enhancement to both the light and dark areas of each region. This means that with one click, you can create an image with more balanced lighting in both the highlights and shadows - creating an image that looks way more natural and realistic.
When to Use HDR DLX
The HDR DLX effect is smart enough to balance the parts of your image that need it most. Here are three situations where it really comes in handy:
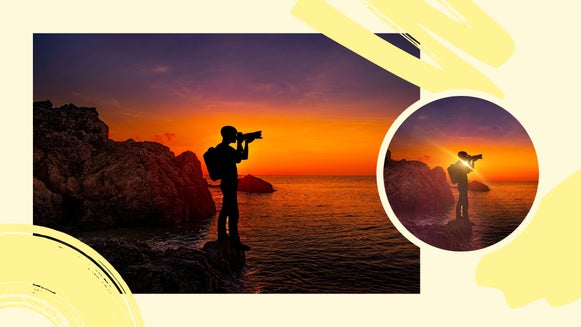
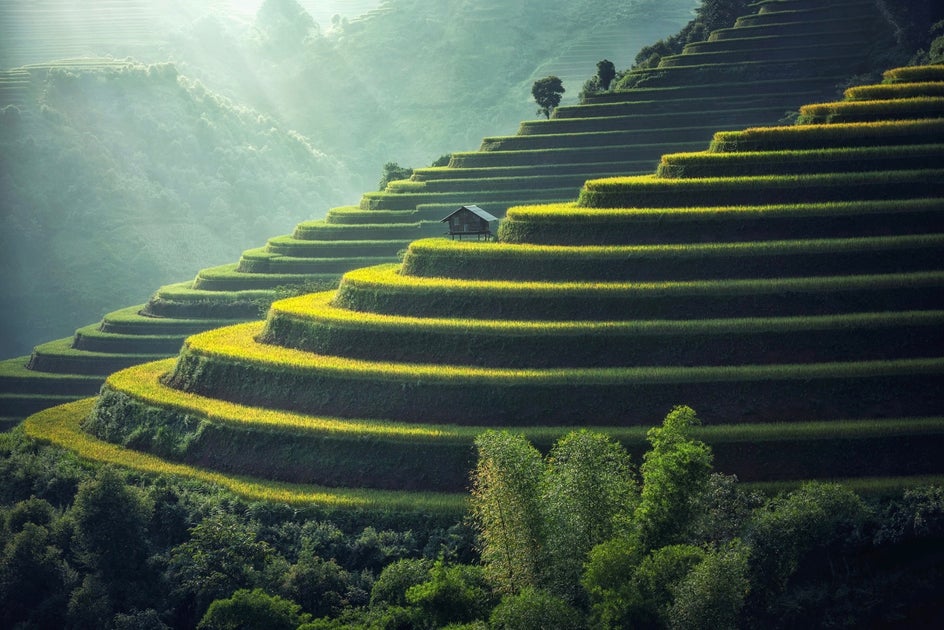
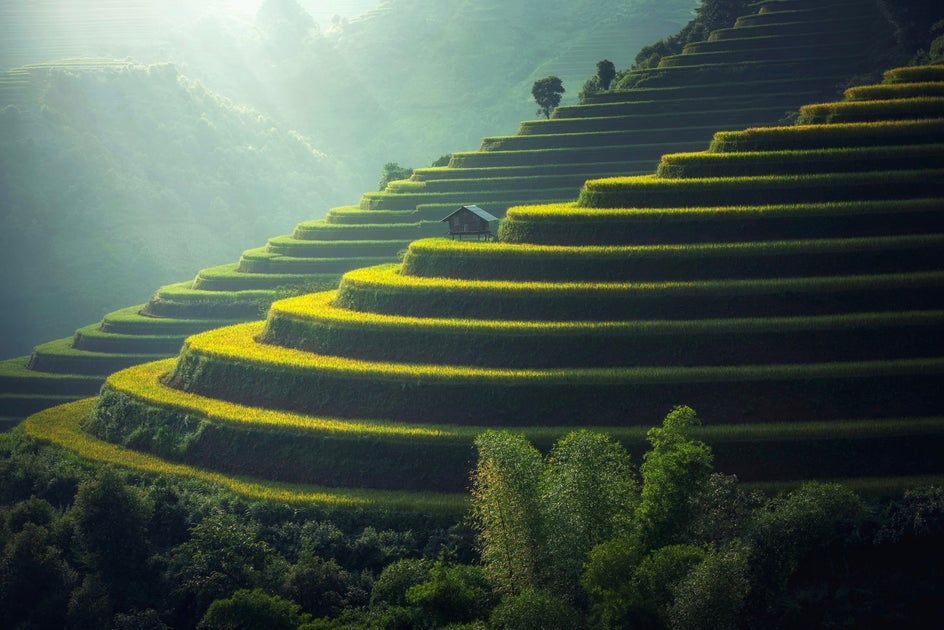
Landscape Photography
Landscape photography typically produces images with high contrast lighting. This is what we see in nature. You generally get very bright skies and to salvage the information in these bright areas, a photographer will usually compensate by under-exposing, thus sacrificing their shadows. With HDR DLX, you can capture details in both the sky and landscape to create a more balanced image.
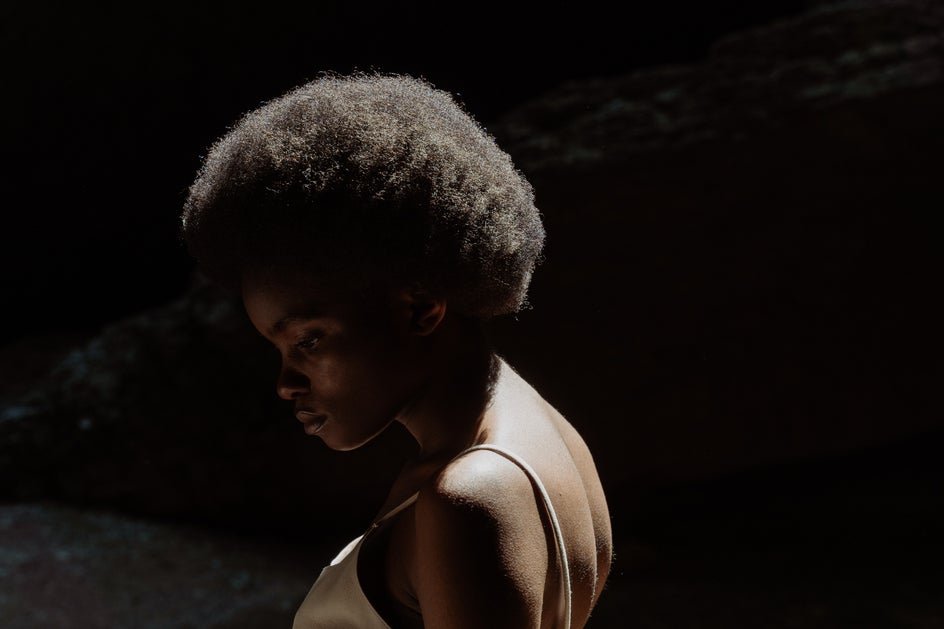
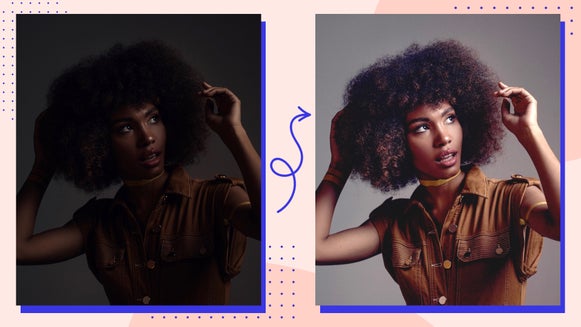
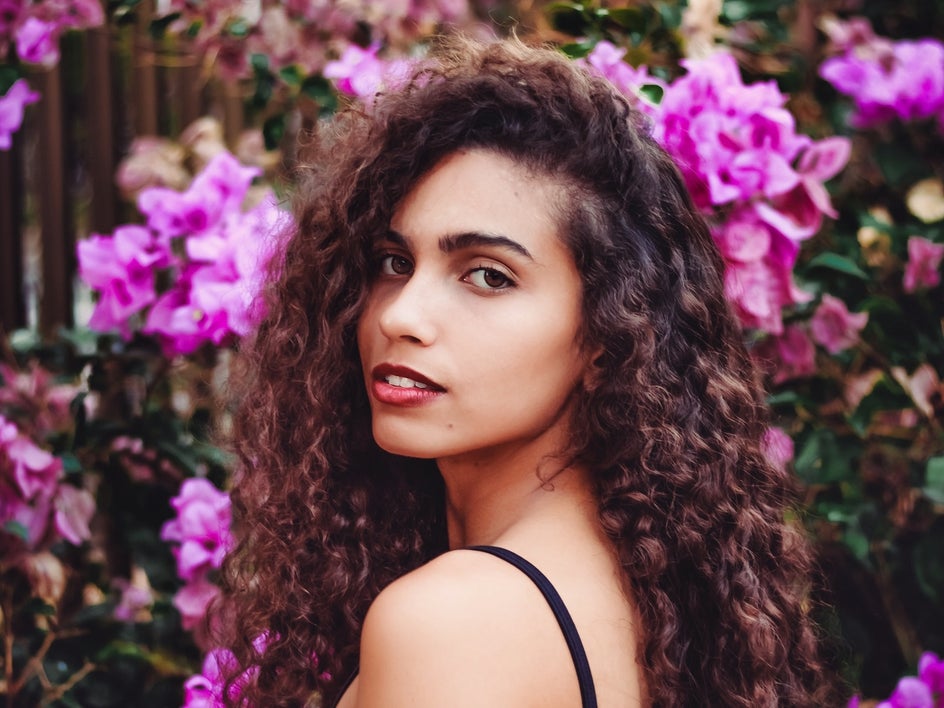
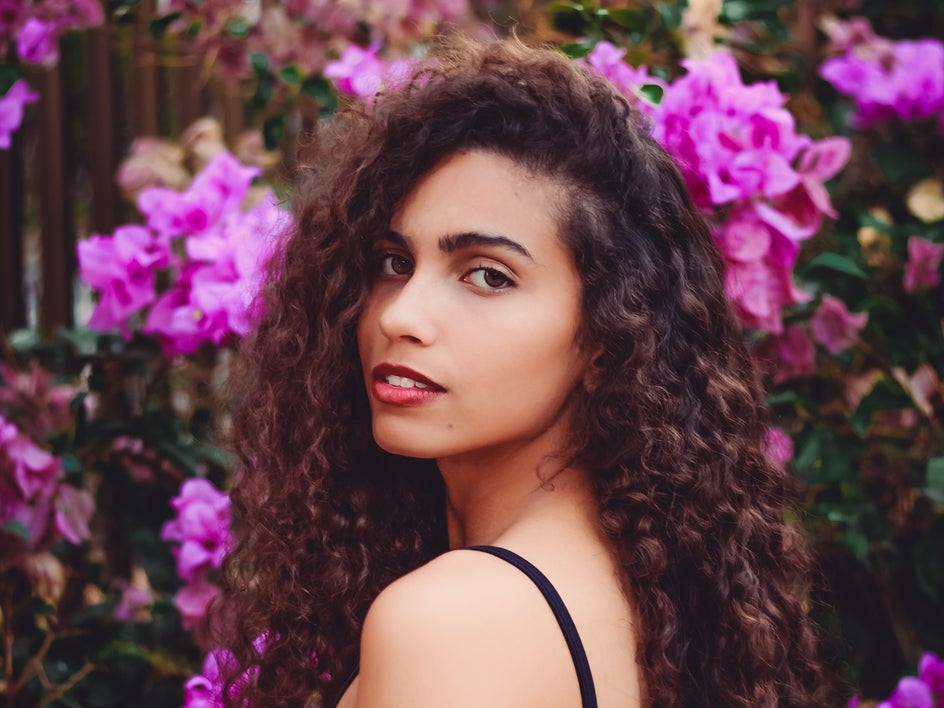
Portraits in Sunlight
Typically this is not a photographer’s ideal situation. Not only does harsh sunlight equate to bright highlights but it also means that the shadows come along with it. When working with portraits, this can be a maddening situation, especially because editing for either of these extremes oftentimes brings out the texture in the skin that you wouldn’t have to worry about with something like landscape photography.
HDR DLX is able to analyze this type of photograph and fix the lighting so that your subject can be evenly lit without all the texture.
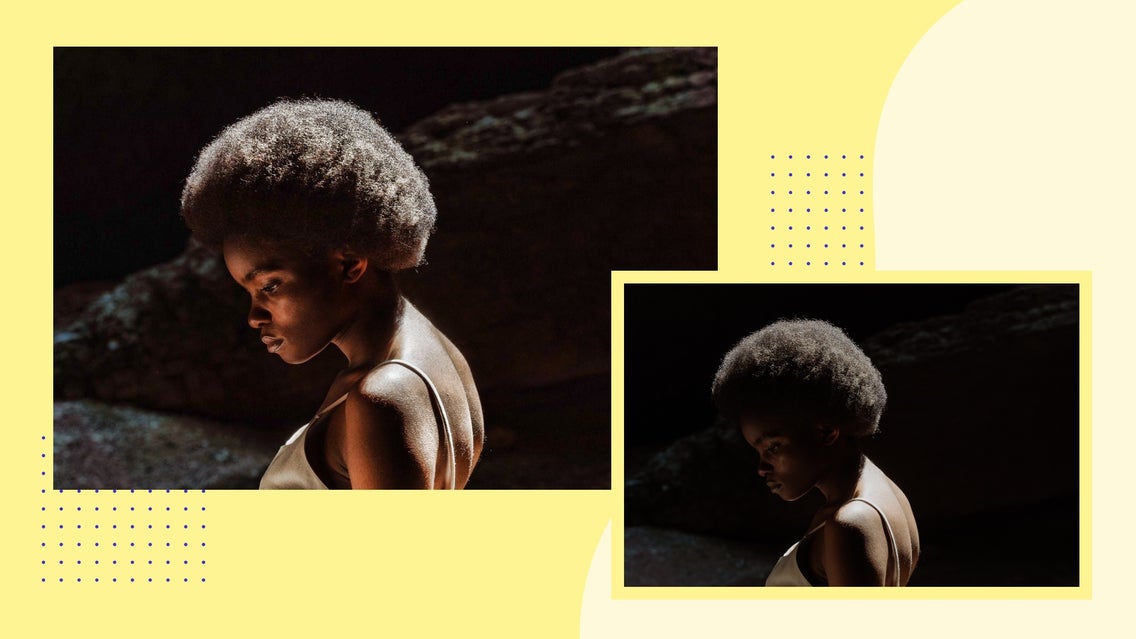
Low-Lit Scenes
Night photography can be a real pain. Typically when shooting in low-light settings, you need to bump up your ISO to compensate for a lack of light. When you do this, you end up inviting in a lot of unwelcomed “noise” to the image as well - giving that grainy look.
HDR DLX will balance the contrast without adding in extra noise and texture.
How to Create Balanced Images With HDR DLX
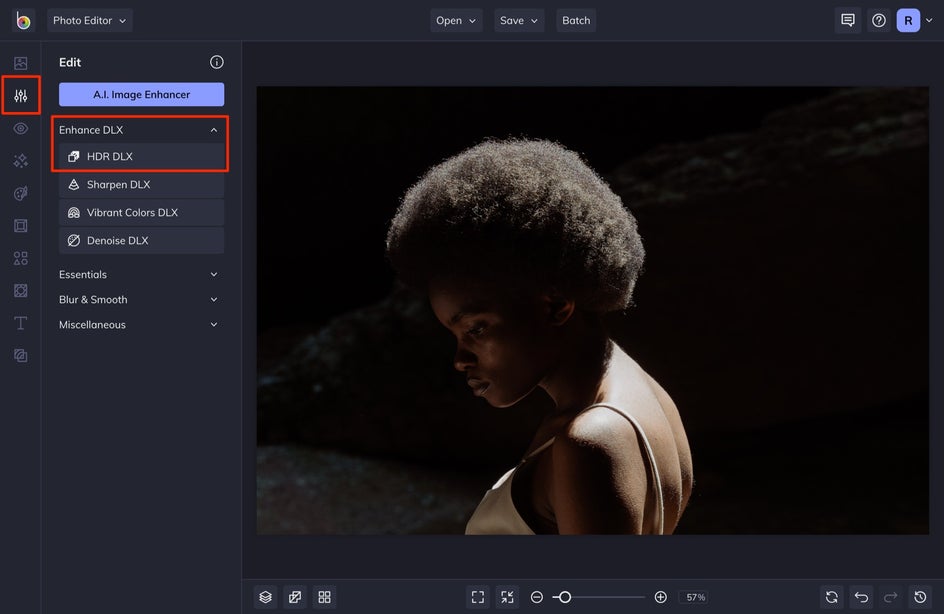
Start by uploading your photo into the Photo Editor. Next, select the Edit tab in the lefthand menu. Click the Enhance DLX dropdown menu. Once here, select the HDR DLX button. All it takes is one click of the HDR DLX to add depth and balance to your photo.
You can get even more detailed with your editing process by adjusting the Amount, Strengths, and Regions in the Adjust tab within the HDR DLX effect.
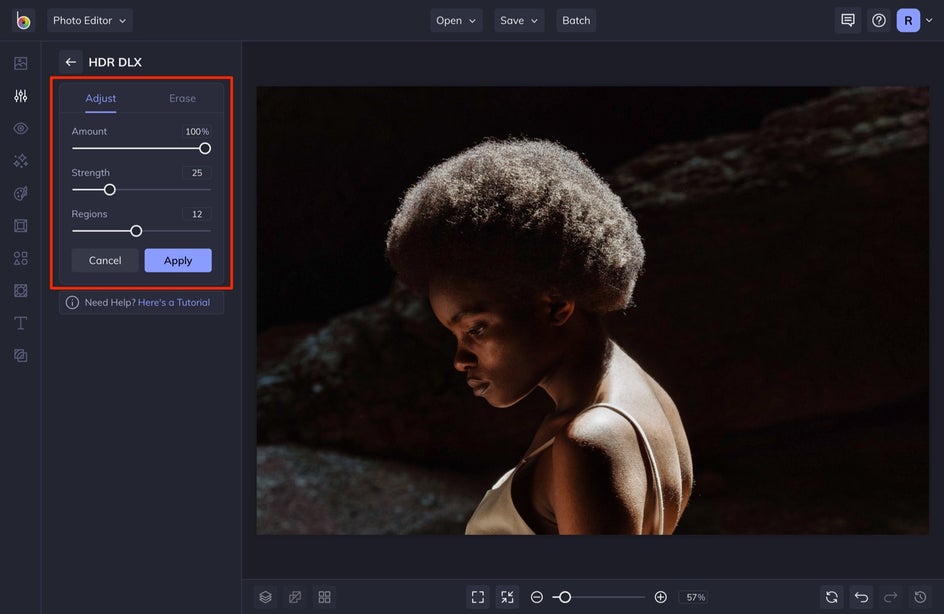
Adjusting the Amount slider will allow this effect to have a greater or lesser effect on the image. When the slider is all the way to the left, the effect is more transparent, showing more of your original image. When the slider is to the right, it adds more of the effect to your image.
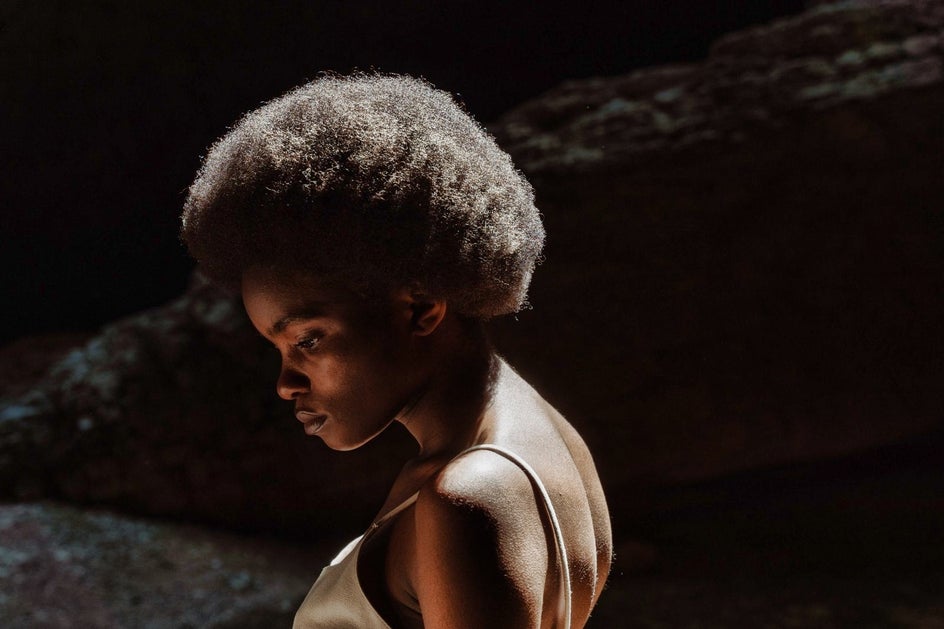
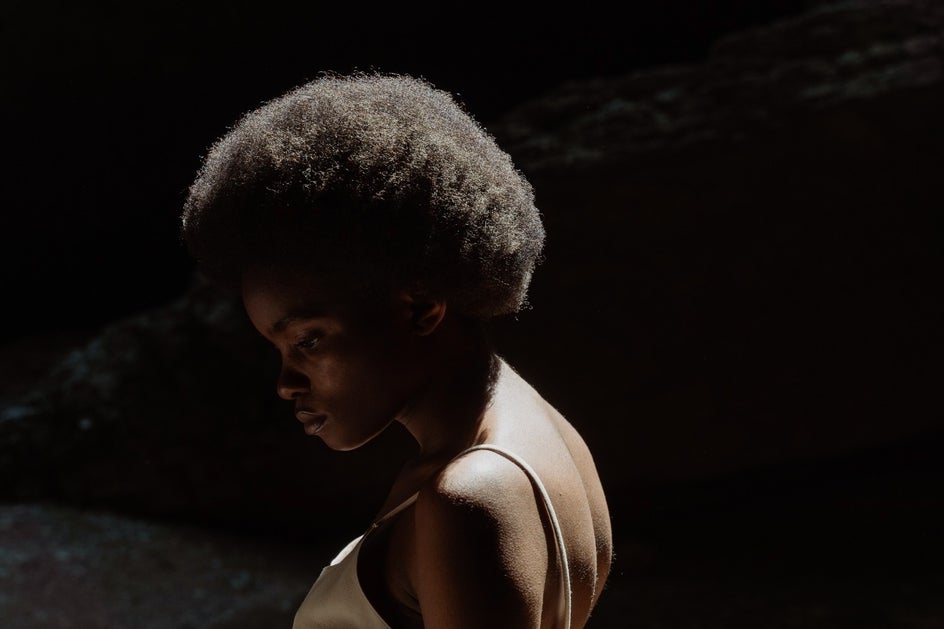
The Strength slider affects the power of the effect. Increasing this setting adds more power and intensity within each region. Take a look at the difference between this photo with 12 regions set at 0% strength versus 50% strength.
The Regions slider adjusts the number of regions your photo is being split into. When the amount of regions is increased the area of each region gets smaller, allowing the HDR DLX effect to add even more attention to detail within each region.
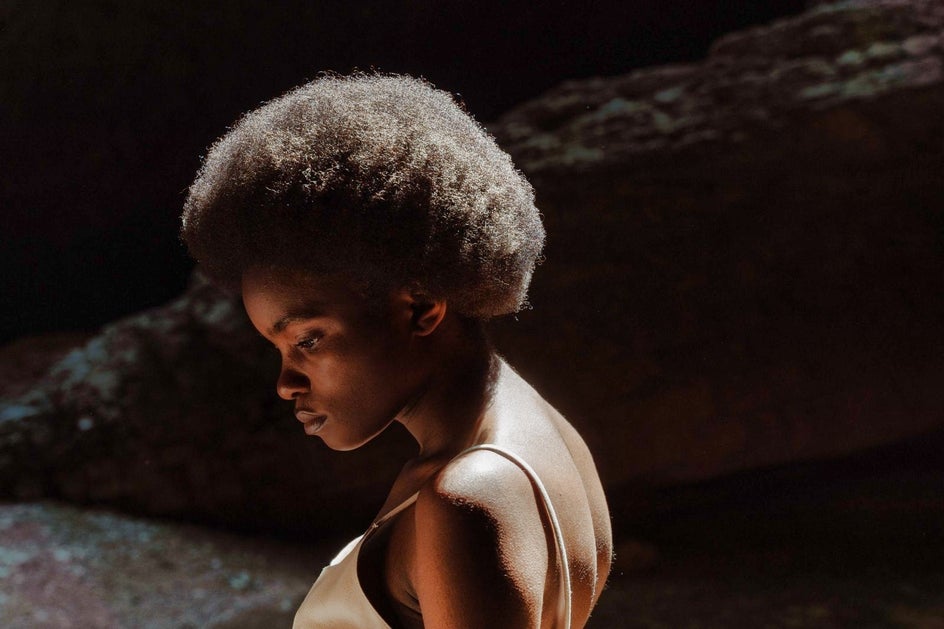
Here’s what those regions might look like with the regions slider set at 5 versus 25. Notice the light and dark areas within each region. Keep in mind that these “regions” are on a digital grid that you cannot see.

Depending on the photo you start with, more regions aren’t always the best choice. The more regions you use, the less strength you might need. So try adjusting the relationship between the sliders to customize the effect.
Balance Your Photos With HDR DLX
With BeFunky's HDR DLX, you can edit your photos into balance. No more harsh highlights and deep shadows that cause you to lose precious detail in your image. Just one click of this effect creates a more balanced, detailed photo without having to spend hours using complicated software.