How To Create An Epic Branded Logo
The wonderful world of blogging. It’s a place filled with intrigue, hard-working writers hunched over their laptops and struggling artists hiding out at Starbucks just for the free wi-fi. Needless to say, it’s a jungle out there. Successful bloggers are so much more than just savvy writers: to keep up with demand in an increasingly saturated market they’re somehow expected to be photographers, publicists, graphic designers and social media wizards, too.
When did it all get so complicated? Sure, it’s not very hard to make the occasional doodle on Paint from time to time (look mom, I can draw!), but when you ask me to take things a step further and make myself a fancy header or branded logo for my blog...I’m totally lost.
So, in honor of all you crazy talented bloggers out there trying to hustle that $$$, today I’m going to show you a quick way to create a branded logo for yourself using the BeFunky online Photo Editor. It’s a quick and easy way to create your own branded images—whether you want to whip up a logo, create a small Favicon or even create an album cover, BeFunky lets you can hack your way to a graphic designer without having to pay for all that fancy art school training.
1. Find your inspiration
Before you go all gung ho about firing up all the fancy effects, you’ll need to start out with a good photo. Choose something that inspires you, something that you think best represents your brand voice and stands you apart from the crowd. For the purposes of this tutorial I went with this gorgeous photo that’s just dripping in color:
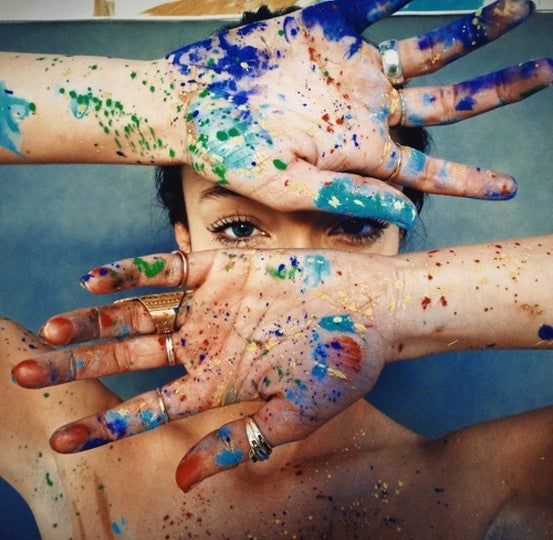
Meeeeow!
2. Dress up your shot
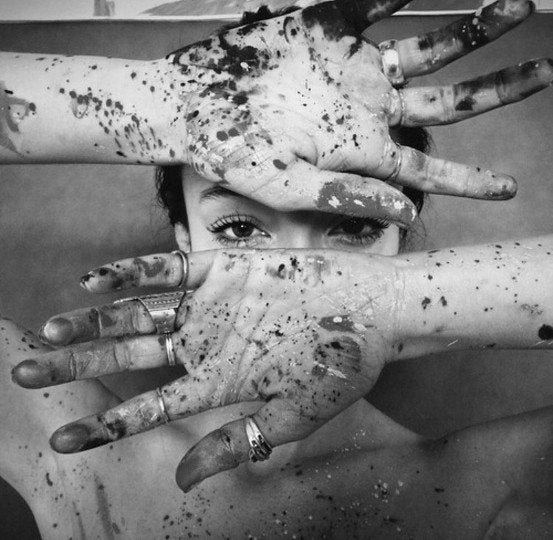
While this is a pretty excellent photo in its own right, there’s plenty of ways to spice things up and turn it into something extraordinary. To do that, I decided to do a little color manipulation of my own (muahaha).
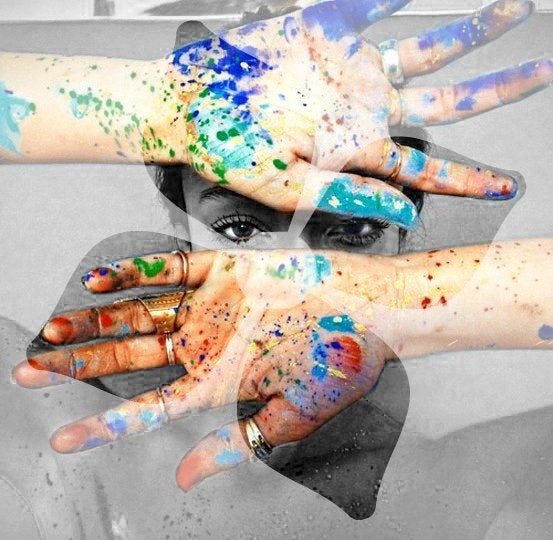
I started with the original picture, went to the Effects section and put a black and white frame over it…
And then used the paint tool to go over her hands, bringing back all that gorgeous color as a focal contrast point. I highly suggest zooming in and adjusting the paint brush size often to ensure keeping it neat and tidy:

When you’re done, you’ll wind up with something that looks like this:
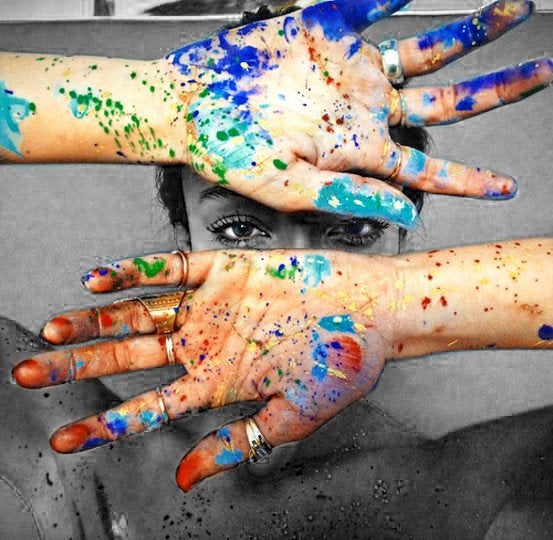
Epic, right? (we thought so, too).
Neat. Now that we’ve got the image let’s head on over to our lovely Overlay collection and experiment with a few designs to see what you like best. When you find an overlay you like, you can adjust things like the size, color and opacity of your graphic under Settings:
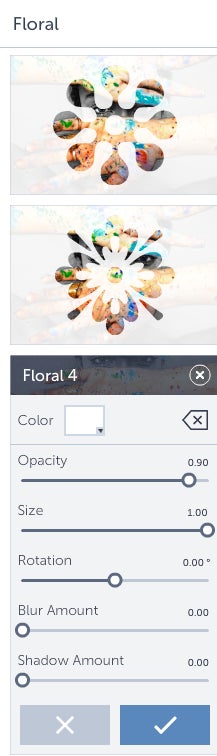
Turning it to the left allows for your image to be more transparent:
While turning up the opacity all the way to the right will yield an image like this:
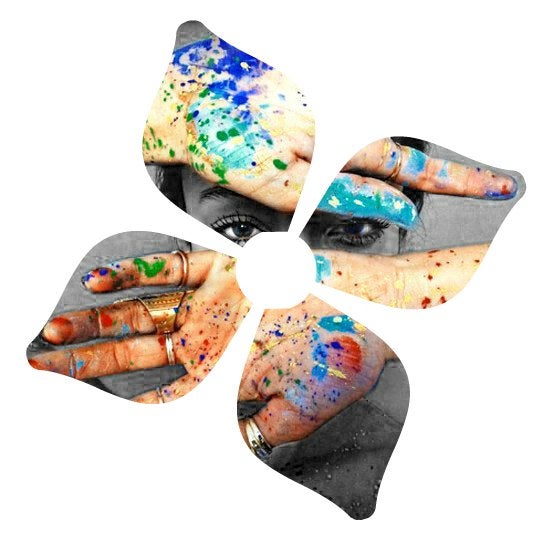
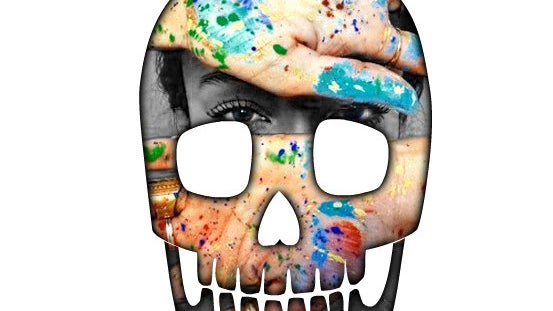
Beautiful! While the flower logo is pretty gorgeous, I’m feeling a little more Halloween today, so I went with a skull graphic, turned the opacity up to max and threw in a little shadow to give the image some depth:
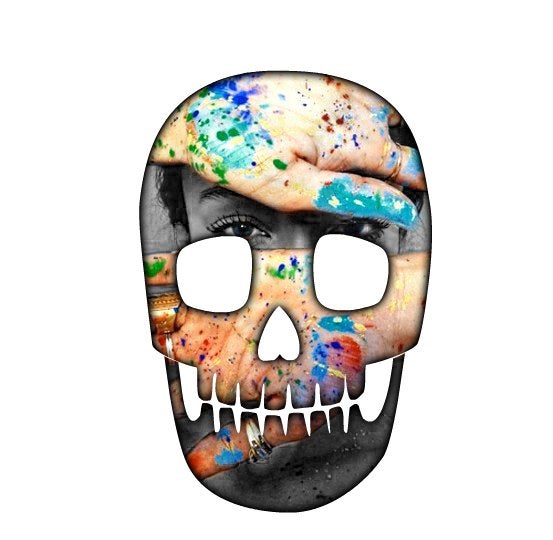
Hot damn. You can always take things to the next level and use multiple overlays to get some crazy patterns and texture or throw in some text to really nail that branding, but honestly...how cool is this?! #excite