Your Guide To Stunning Landscape Photography
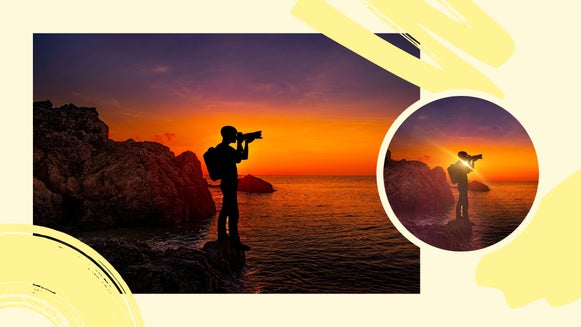
There’s a reason why landscape photography is popular; it can evoke strong emotions and transfer you to new worlds. One of the more famous landscape photographers in history is Ansel Adams. Take a look at Ansel’s work and try not to feel something. The way he captures landscapes through the use of his technical skills both in and out of the dark room allowed him to highlight different areas of his photos to make each one unique. He once said, “you don’t take a photograph, you make it,” which speaks volumes to his ability to both capture great landscapes and make them special with the art of post processing.

Adams knew that in order to create a great photo, he first had to capture a photo worth editing. Anyone can walk up to a waterfall or valley and capture a photo of the scene, but to really create a moment, something unique must be captured to bring you into the moment. In other words (also his), “a good photograph is knowing where to stand.”
If you’re not already inspired to up your landscape photos, prepare yourself. We’ve got all the photography tips you need to capture great landscape photography, plus edit them into something even more intriguing with BeFunky’s Photo Editor! We’ve got a lot of ground to cover, so here we go.
Tips for Capturing Unique Landscape Photos
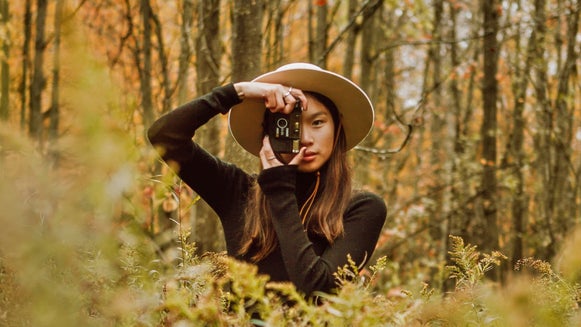
Before you go running out the door with your camera, there are a few things you need to know about capturing landscapes. Make sure that you’re well equipped with the right gear and knowledge of the landscape or area you are going to be in. It’s helpful to spend some time in that area for a day or two before capturing your photo. This way, you’ll know the weather, the right time of day to shoot, and you can scout out the best angles for capturing the focal point in the photo you’re wanting to make.
Focal Points and Angles
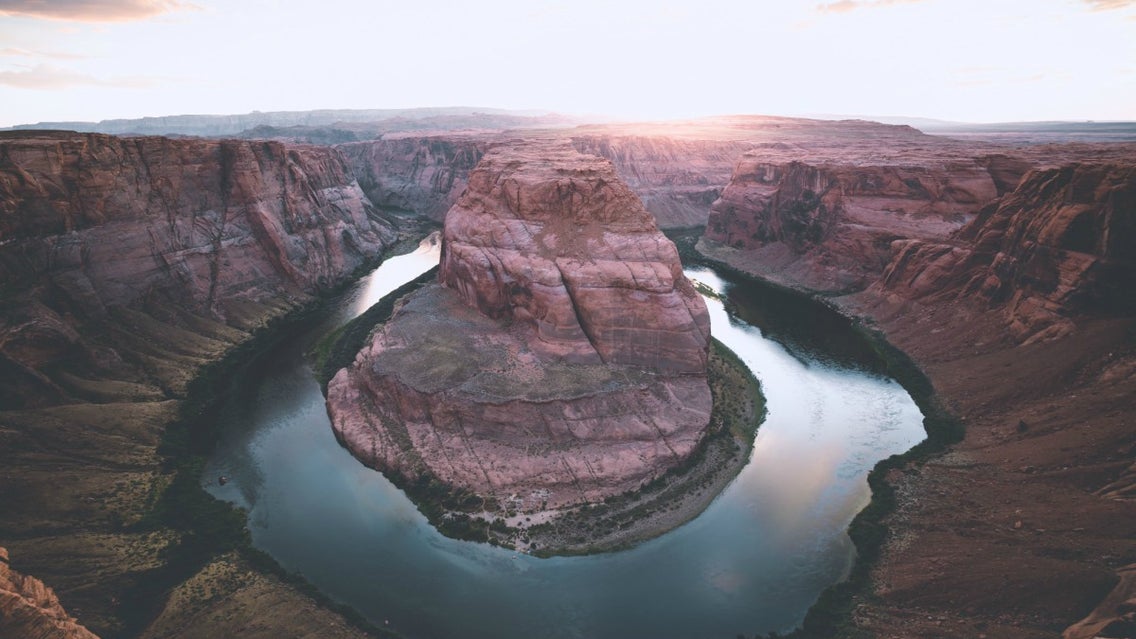
To make a great landscape photo, you’ve got to have a great focal point. In other words, you must have a main subject to focus on. This is where you want to draw the eye of your audience first and foremost. After you decide which object you want this to be, make sure that the angle you’re shooting at and any lines in your photo are drawing your audience’s eyes to the focal point. Lines can include streams, roads, or any part of the landscape that directs your eyes in a certain direction.
Try out the Rule of Thirds or The Golden Ratio when composing your shot. But remember that these are guidelines that can be broken in certain cases, so don’t feel the need to shoot by the books.
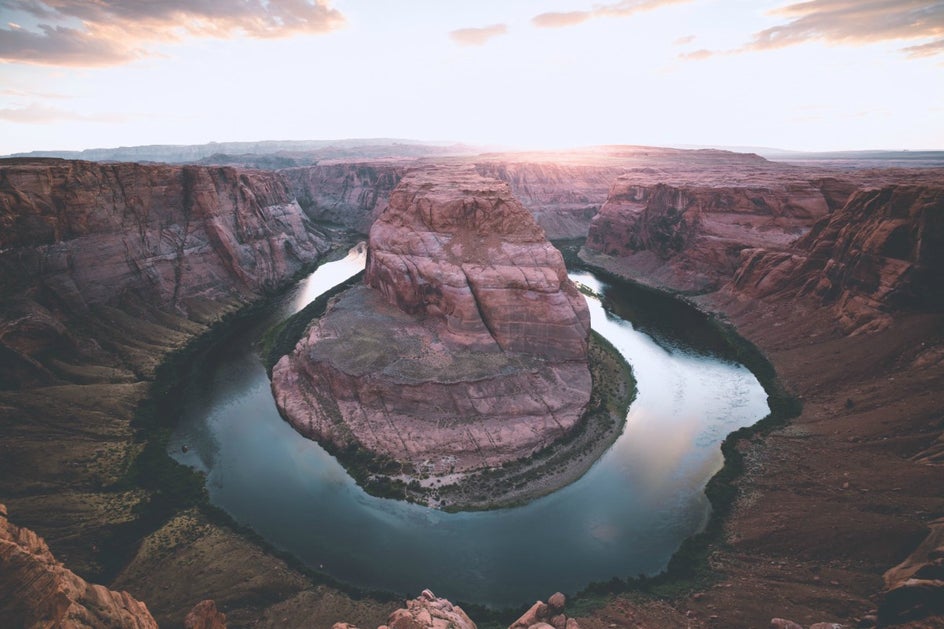
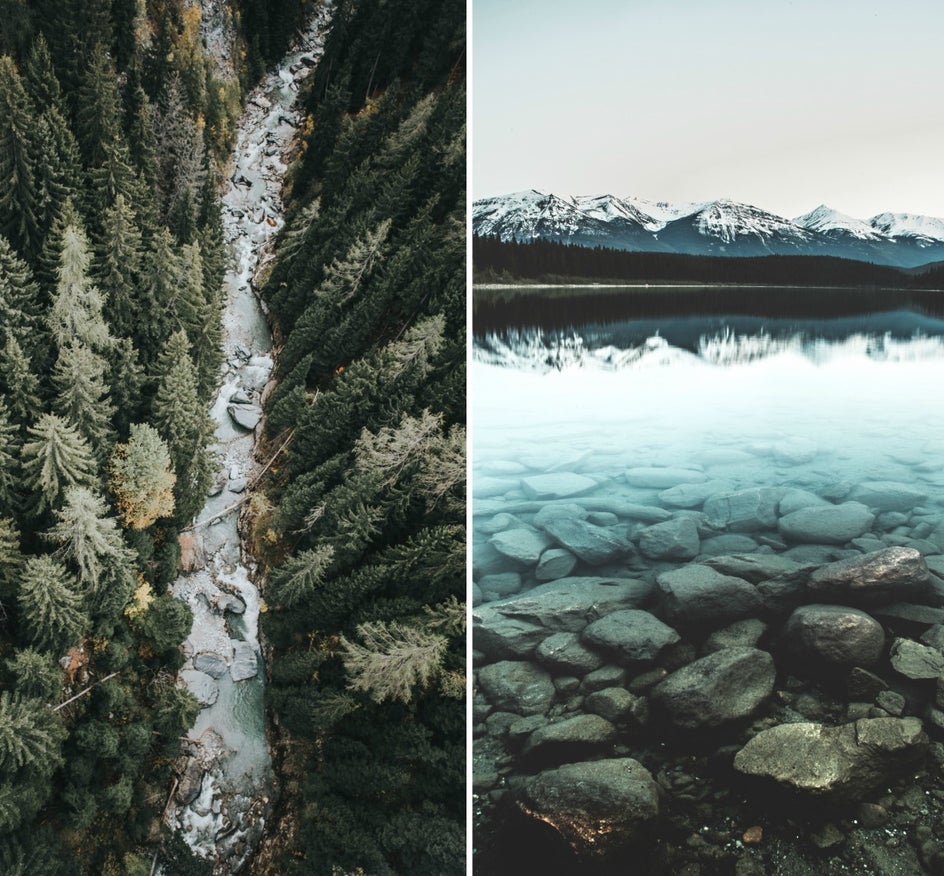
Knowing the relationship between you and the landscape is essential to creating a unique photograph. This can be created by shooting low to the ground or allowing something to be in the foreground of your image. Having a river frame your focal point is a great use of the landscape to draw your eye to the area of the frame you want your audience to notice. To gain extra perspective, try shooting low and allowing the wildflowers, pieces of wheat, or grass to get into the frame.
Camera Settings and Tripods
When shooting a landscape photo, it is essential that each part of the frame is in focus. This can be attained by having a high f-stop number (F/16+). The higher the f-stop, the darker your image will be. In order to let more light in, having a slower shutter speed is necessary. As you may know, having a low shutter speed allows any camera shake that occurs to show up in your frame as blurred portions of your image. In order to take crisp photos, a tripod and timer or remote are necessary.
Pro Tip: After setting up your shot, take a step away from your camera and shoot your photo with a remote. Pressing the shutter speed can give your camera micro shakes. This technique can also be done with the use of your camera’s timer.
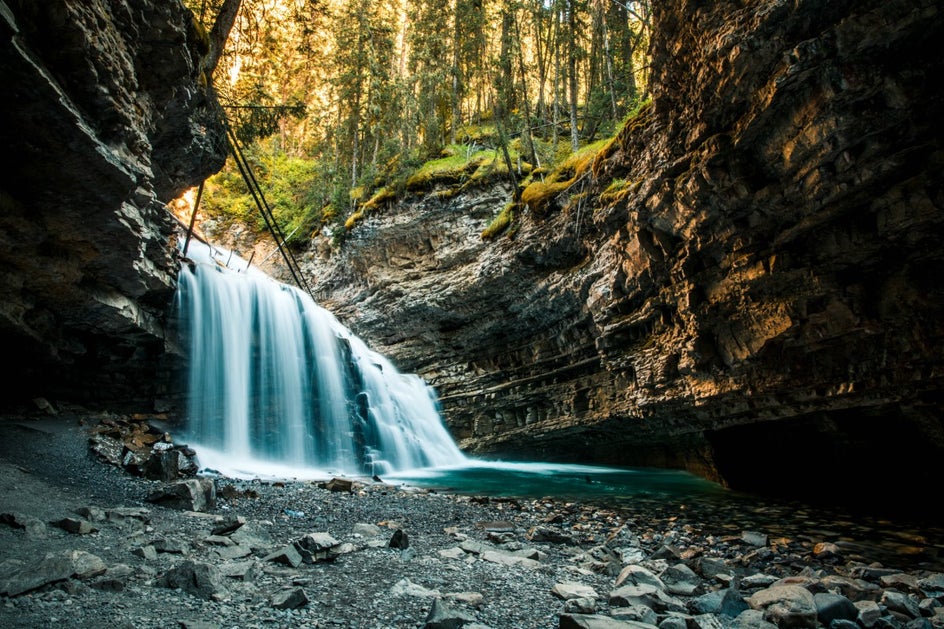
Setting your camera up in this way also allows you to capture movement, which is perfect for capturing water coming down a waterfall or stream.
Location, Weather, and Time of Day
Whenever you go to a location, make sure you are well aware of the weather and that, first and foremost, you and your crew are going to be safe. Take a hike and scout out certain locations where you want to shoot. Pay mind to the foliage around the area, the horizon line, and different focal points that are worth shooting.
Pay attention to the lighting during the time of day you want to shoot. The last thing you want is to hike 12 miles to a waterfall, only to find that the drought in the summer dried up the waterfall, the morning fog is completely blocking your focal point, or that the amount of time it took you to hike in caused you to lose all daylight.
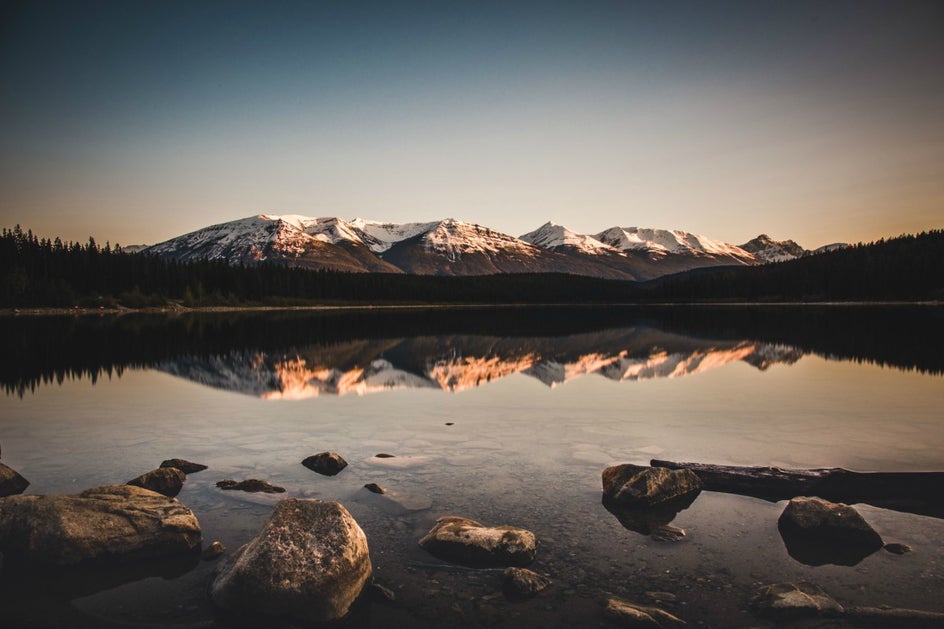
The time of day that you choose to shoot can also add character to your photo. Shooting during golden hour or blue light hour are going to produce different color tones and evoke different emotions in your photo. Always make sure that the emotion you are trying to convey is expressed in every decision when taking your photo.
How To Edit Your Landscape Photography
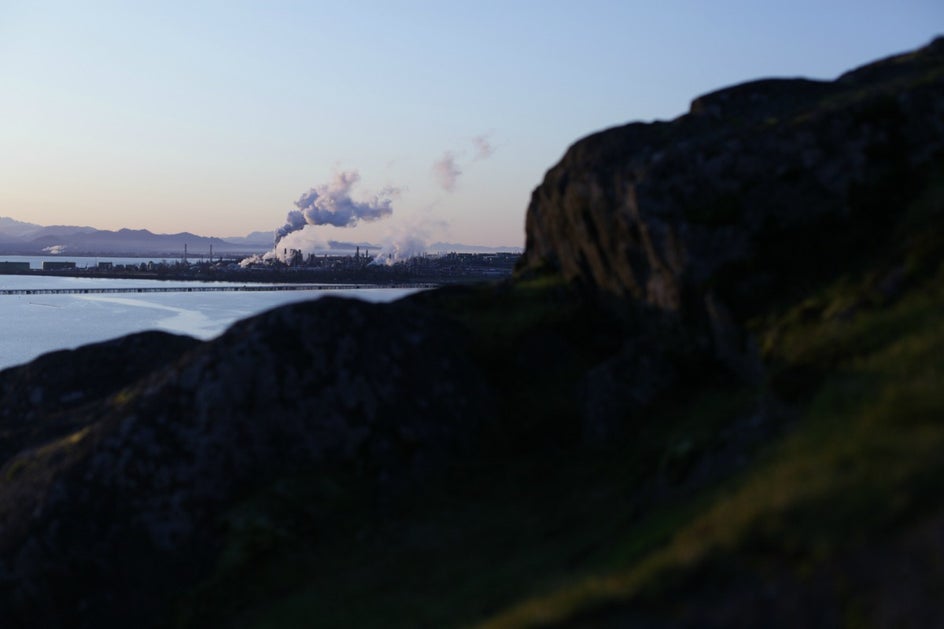
After you capture the exact photo you want, it’s time to use BeFunky’s Photo Editor to edit and enhance your image! To get started, head to the Photo Editor and upload your photo with your editing goals in mind. For instance, in the photo we’re editing, the goal is to evoke feelings of timelessness and nostalgia for the industrial era. With the smokestack as our focal point, all of the adjustments done in the editing process aim to accomplish this goal.
Adjusting the Exposure is always a great place to start. You can click on the Exposure tool in the Edit tab from the menu on the left to edit basic exposure elements like Brightness, Contrast, Shadows, and Highlights. Slide each scale to increase or decrease these elements until your shot is looking more balanced.
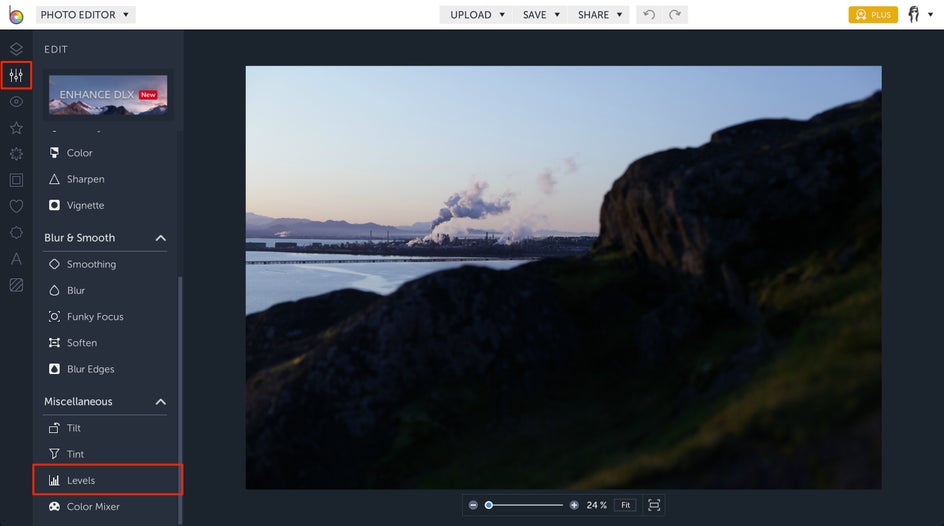
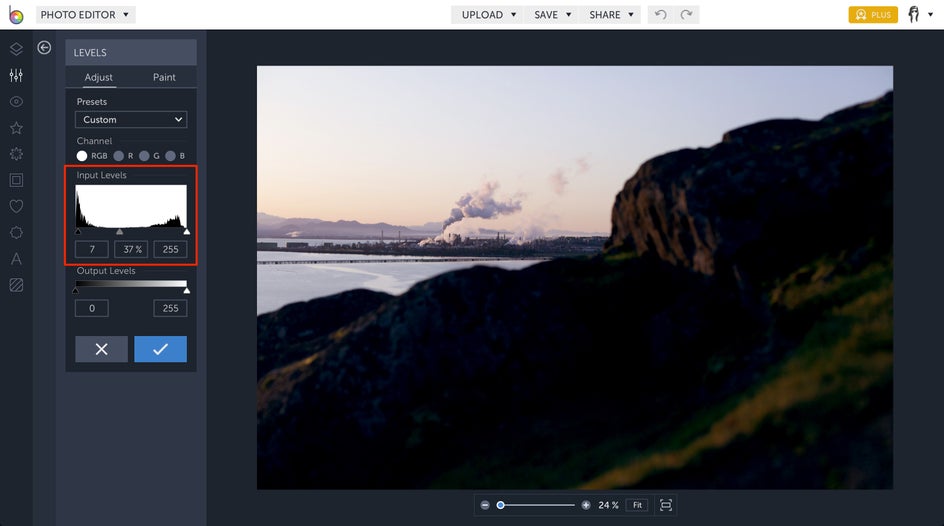
If you want even more control over your photo’s exposure (like we do!), click on the Levels tool in the Edit menu. You can use the dropdown menu to try out presets that focus on your midtones, lightening shadows, increasing contrast, and more. Alternatively, you can slide the black, grey, and white triangles under the Input Levels histogram to manually adjust exposure. The black triangle represents the darkest parts of your image, the grey triangle represents your image’s midtones, and the white triangle represents the lightest parts of your image. Sliding these triangles individually will give you total control over the exposure of your entire shot!
Next, we’ve chosen to enhance the colors in our image to create a more nostalgic look. To adjust the colors in your image, click on the Color Mixer tool (the last tool in the Edit menu on the left). The Color Mixer lets you adjust the temperature and tone of your image by editing the reds, greens, and blues individually. Using the color mixer gives you more control over what tones you would like to adjust, rather than placing a tint over the image and adjusting the image as a whole.
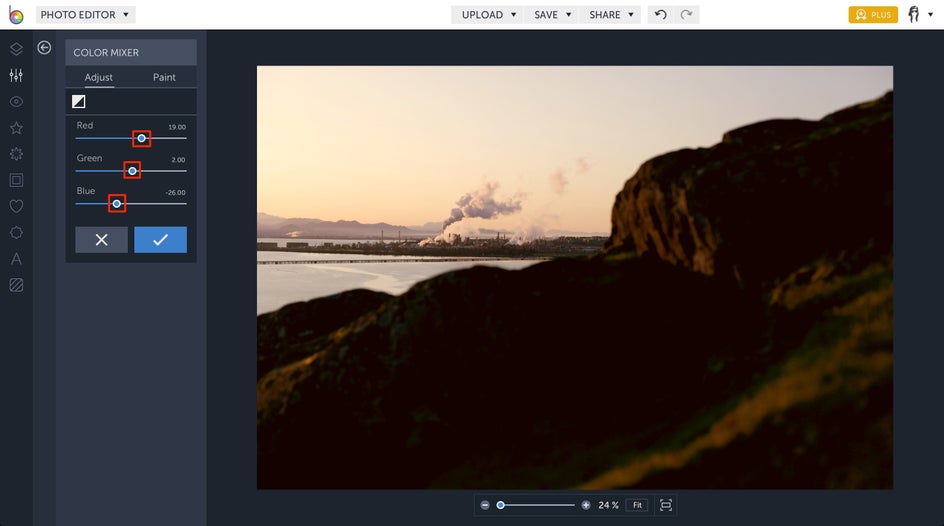
Sliding each scale to the right will give you more of that specific color in your image, while sliding the scales to the left brings out the complementary colors. For example, decreasing the Blue slider will bring out more Orange tones and so on. Remember, subtle changes are key. You want to keep your colors looking realistic for landscape photography.
To make colors look even more stunning, click on the Enhance DLX button at the top of the Edit menu and select Vibrant Colors DLX. This tool enhances the colors in your image without oversaturating them. You can adjust the amount of the effect using the sliding scale. Always start with less and increase the effect until you get your desired look!
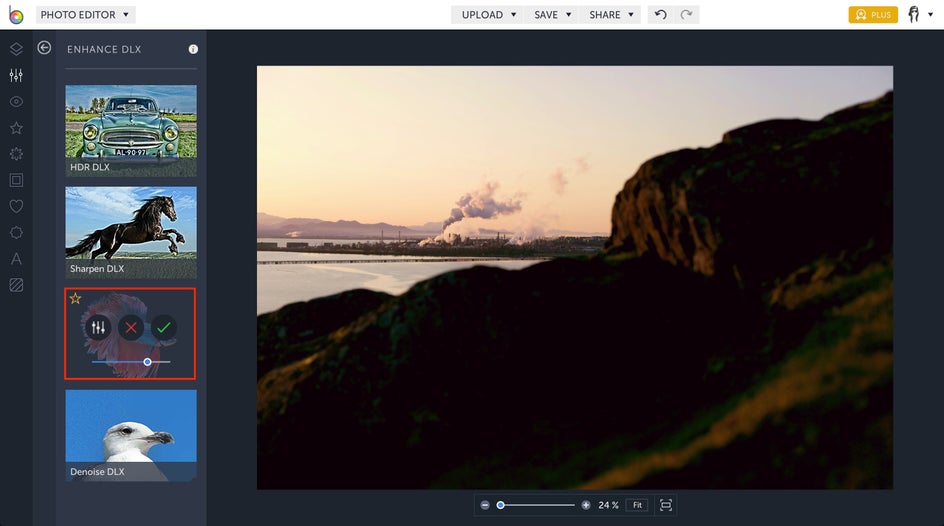
Pro Tip: If you need to sharpen your photo, get rid of image noise, or bring out more detail, try the other three Enhance DLX effects. They work magic on all kinds of photos, and can even fix the most problematic images!
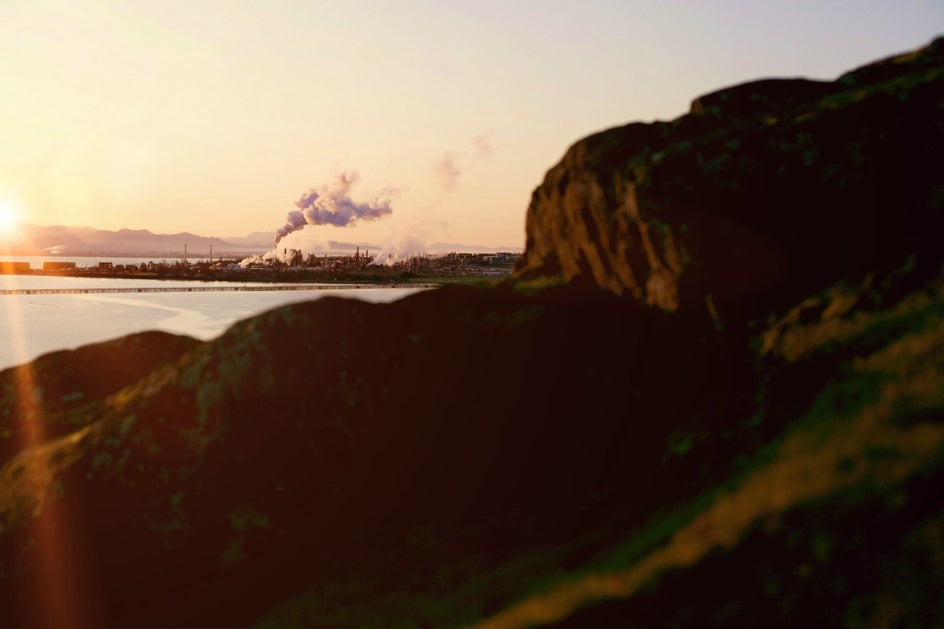
Lastly, to add some drama to your landscape photo, click on the Effects tab on the left and select the Lens Flare effects. You’ll find plenty of realistic-looking lens flares to add sunlight to your photo.
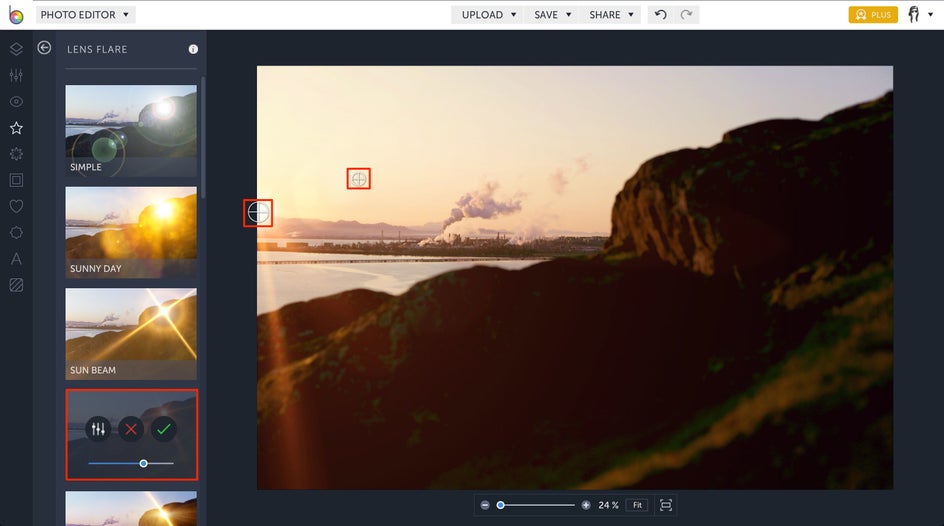
It’s important to place the Lens Flare effect in the area of the photo that makes the most sense. For instance, in our photo, there is a lot of light coming from the left side of the image - perfect place to add a Lens Flare and create some movement. To position your Lens Flare, simply click and drag the two targets around your image until you’ve got them in your desired location.
Before And After
With just a few simple edits, this landscape photo is looking super intriguing! We’ve nailed the goal of creating an Industrial Era vibe just by controlling the exposure, playing with color, and creating movement with a Lens Flare.
Excited to try out these techniques and edits? We hope so! And we can’t wait to see what you create with your camera and a little BeFunky magic. Be sure to tag us on Instagram and show us your favorite shots!