Bokeh & Blur Backgrounds With Lens Blur

For decades, achieving the depth of field in an image with a blurry background and a clear main subject was reserved for those with years of training, fancy cameras, and expensive lenses. This is no longer the case, BeFunky has made it possible for anyone to achieve this look with the Lens Blur tool in the Photo Editor. It senses the light sources in your shots, turning them all into beautiful bokeh, all the while allowing you to fully adjust the shapes and sizes of said bokeh.
Say goodbye to expensive cameras, and hello to a customizable tool that can make the backgrounds in your images buttery smooth! With BeFunky’s Photo Editor, you can achieve this look in just a few clicks.
How to Use Lens Blur
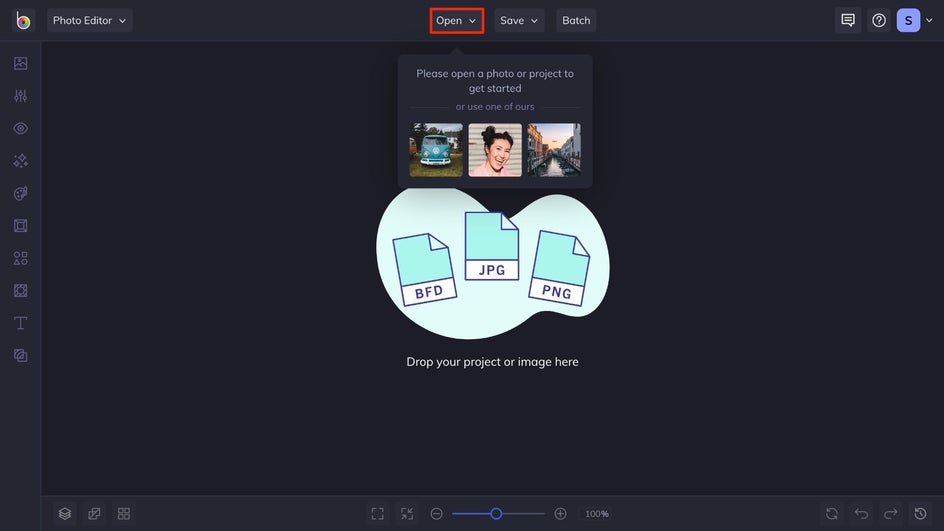
Found under the Blur and Smooth section of the Edit tab of the Photo Editor, Lens Blur helps you achieve an aesthetic blend of bokeh and blur that is typically reserved for a film SLR camera or digital SLR that has a fancy lens. To get started, click here to open up your image in the Photo Editor.
Step 1: Navigate to Lens Blur
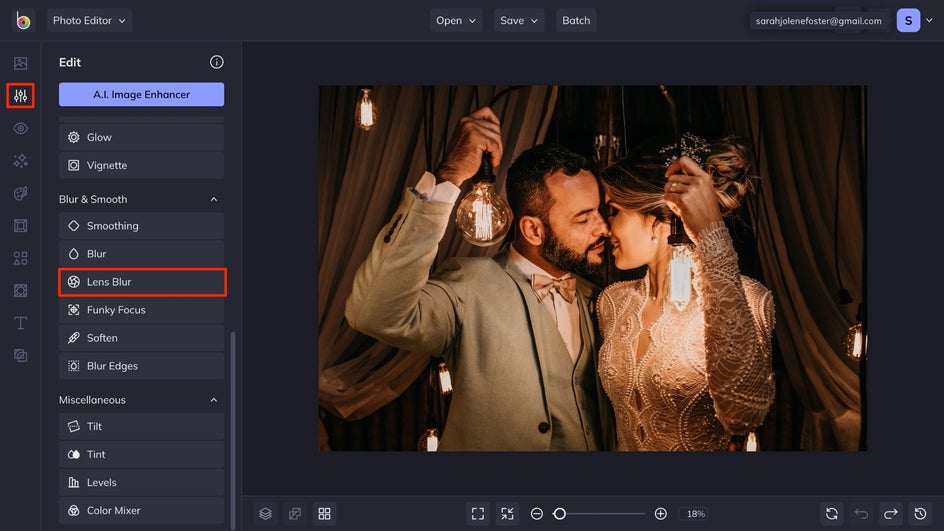
Once you have opened your image locate the Edit tab on the left side of your canvas, and select Lens Blur. It is found under the Blur and Smooth section. Click on it, and it will apply the tool to your entire image. This can be a little shocking at first, but the next few steps will help you create the perfect image.
Step 2: Customize the Settings of Lens Blur
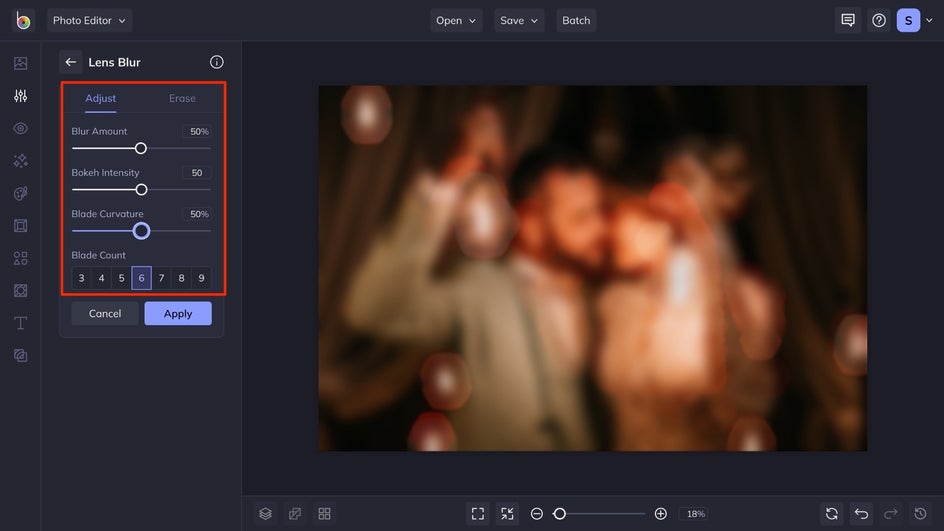
Play around with the sliders to see what effect they have on your image. Blur Amount will increase or decrease the amount of blur in your image, too much and your photo may barely be recognizable, and too little and there may not be much impact on your image. Bokeh Intensity is going to adjust the intensity of the effect to the light sources in your image, the more intensity you select the more the lights will have orbs around them. The Blade Curvature controls the shape of the bokeh orbs, decreasing the amount makes your bokeh shape have sharper edges while increasing it gives you round edges. The Blade Count refers to the number of blades you would find on a camera lens that controls the aperture. A standard DSLR camera lens typically has 7 blades, while film cameras have 6 on average. The higher the blade count, the softer the bokeh in your image will appear.
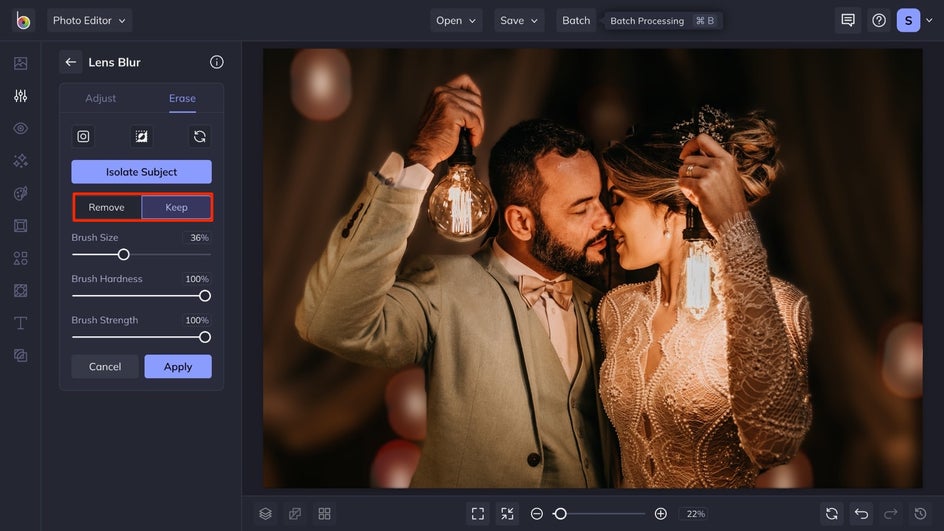
Step 3: Isolate the Subject of Your Image
If your image has a main subject that you want to isolate, you’ll select the Erase tab. This will pull up the settings menu for erasing the effect from your image. If you click on the Isolate Subject button it will automatically locate the subject of your image and erase the effect from it. This may not be perfect, so there might have to be some fine-tuning that occurs with this.
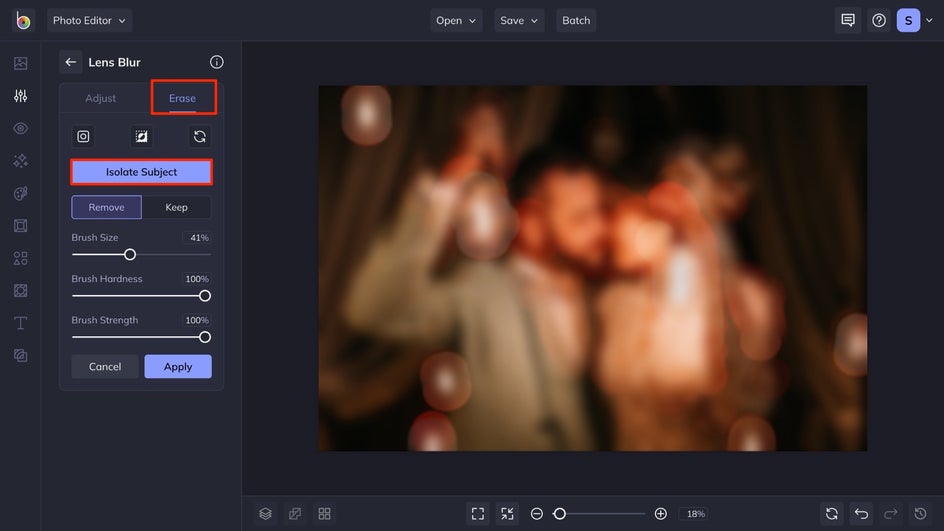
If a section of your subject is still blurred, the Remove button will remove the effect from certain areas that you use the brush on. Adjust the size of the brush with the slider so that you are able to click on the image with a brush size customized to the section that needs the effect removed. If there is a section that you want blur to cover that the Isolate Subject button removed it from, select the Keep option to use the brush over the areas you want the blur to stay.
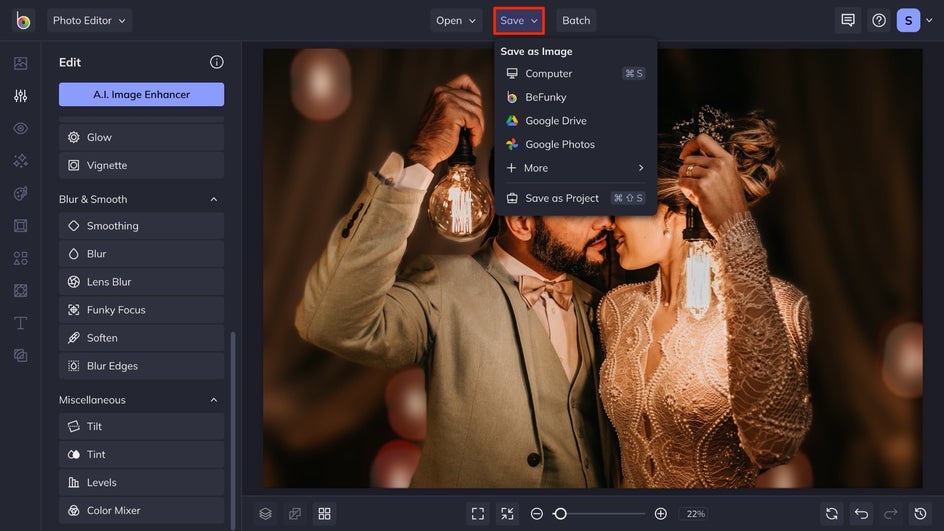
Step 4: Apply the Effect and Save
After you have achieved the perfect amount of blur and bokeh, and isolated your subject to your liking, click Apply. This will apply the effect to your image.

Next, select the Save button at the top of your canvas and select where you want to save your final image to. You can save it to your computer, or save it as a project as a BFD file in BeFunky or your desktop to come back to and work on later.
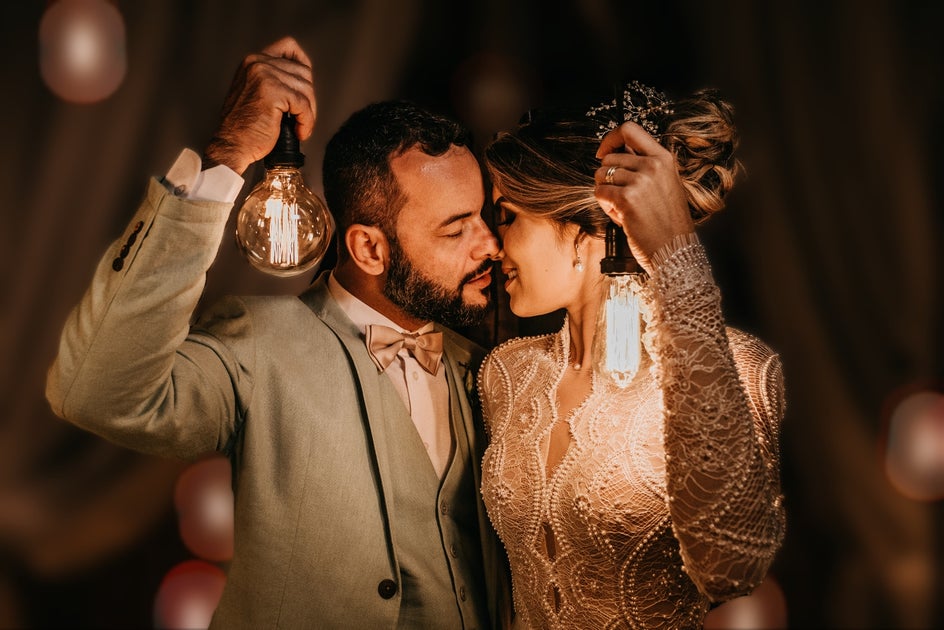
Final Results
Look at how we transformed this image in just a few simple steps. This boring and distracting background was transformed to highlight an intimate moment between the couple with the Lens Blur tool.

Get Inspired With These Ways to Use Lens Blur
Here are three examples to show you all the stuff you can do with the Lens Blur tool in BeFunky!
Make Street Shots Look Magical
Like we did in the tutorial, anywhere with light in the background can make an excellent bokeh effect. Simply click the Erase tab, and select the Isolate Subject button, this will use AI technology to isolate the main subject in your photo so that the blur isn’t affecting them. If it isn’t quite perfect, you can use the Remove and Keep options to fine-tune your image.


Add Drama With an All-Over Lens Blur
The Lens Blur tool defaults to a beautiful all-over blur, turning your photo into a bokeh masterpiece. This tool is particularly amazing for night photography like lit-up cityscapes and holiday lights. Play with the sliders of the tool to get your perfect combo of blur and bokeh to transform your image into a work of art.


Use a Targeted Bokeh Effect
Using Lens Blur in partnership with the Erase tab allows you to fine-tune exactly where you want the blur and bokeh to be placed. This means it doesn’t have to be only in the background, but it can be in the foreground or on the main subject as well! Get creative with where you place the blur to see what your favorite combination is!


Ditch the Expensive Camera Lens and Blur Your Images With the Lens Blur Tool
With the Lens Blur tool, there’s no need to buy an expensive camera lens to create those buttery backgrounds in your photos, simply click here to upload your photo and get started on turning your favorite photos into something phenomenal! There is no need to be a camera expert to have amazing photos, get creative with BeFunky.