How to Control Exposure With the Levels Tool

Photo editing should always be simple. But for years, complex programs have dominated the market, making photo retouching a specialized skill.
Luckily, BeFunky is breaking through that barrier. By designing an incredibly easy-to-use Photo Editor, we’ve made photo retouching easy and accessible for you.
A prime example of how we've done this is our Levels tool, which gives you complete control over exposure in your photos. Keep reading to learn more about this tool, including how you can use it to perfect your photo’s exposure, all within a few clicks!

What Is the Levels Tool?
The Levels tool is available for BeFunky Plus subscribers, and it gives you the option to adjust the Min Input, Gamma, Max Input, Min Output, and Max Output within your image.
How Does It Control Exposure?
In contrast to the Exposure tool, which can quickly help you adjust fundamentals such as overall brightness and contrast, the Levels tool gives you complete control over the highlights, mid-tones, and shadows within your image – all in one place. Even if the lighting was too dim or your camera settings were off while shooting, you can easily control the light using this tool to create a photo that looks naturally balanced.
The Min Input slider controls the shadows within your image, while the Max Input controls your image’s highlights. Harmony between each of the Input sliders will let you control the overall shadows and highlights more precisely than the Exposure tool sliders allow.
The Min Output and Max Output sliders will change the overall tonal range of your image, lowering the contrast between shadows and highlights. Increasing the Min Output slider will reduce the intensity of your photo's shadows, making the overall effect appear brighter. When you decrease the Max Output slider, the intensity of the highlights in your image is reduced, making the overall effect darker. You can also achieve a matte photo effect by moving both sliders slightly inwards.
The Gamma slider controls the overall exposure of your photo and is helpful if you simply want to brighten or darken the whole image. You can decrease the slider to darken the image or increase the slider to brighten it. It's a foolproof way to make intuitive exposure edits because it takes into account the range of highlights and shadows.
How to Adjust Exposure Using the Levels Tool
To try out the Levels tool for yourself, head to the Photo Editor and open a photo of your choice.
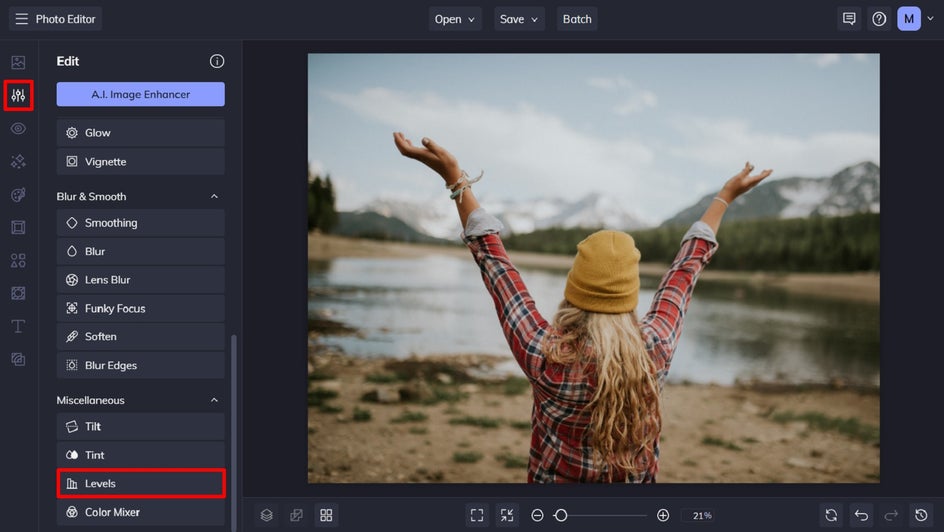
Step 1: Navigate to the Levels Tool
The Levels tool is located within the Edit menu on the left of the screen. Once in the Edit menu, scroll down to locate and click on Levels. You’ll find it within the Miscellaneous section.
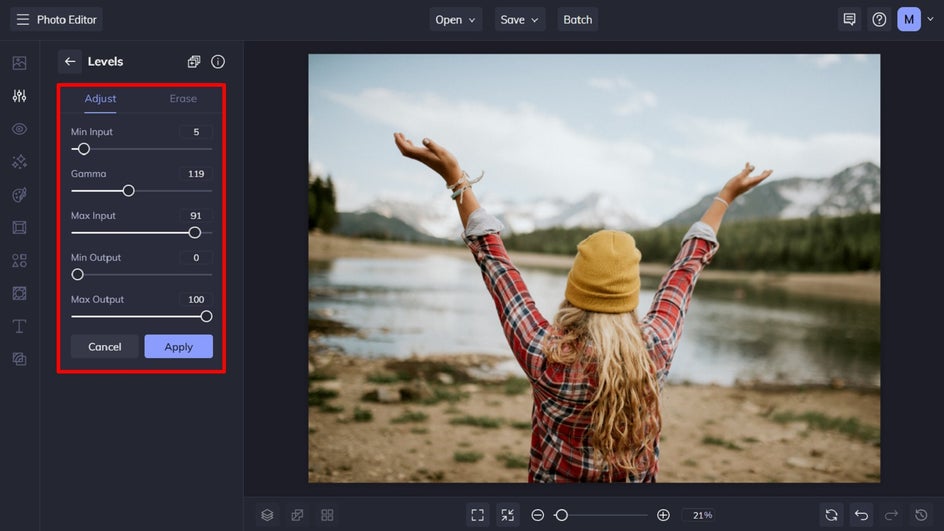
Step 2: Make Your Level Adjustments
Within the Adjust tab of the Levels tool, you’ll find multiple sliders relating to different elements of your image, including Min Input, Gamma, Max Input, Min Output, and Max Output. We explained each of these elements earlier, but for quick reference:
- Min Input adjusts the intensity of the shadows within your image.
- Gamma adjusts the overall exposure of your image.
- Max Input adjusts the intensity of the highlights within your image.
- Min Output adjusts the overall lightness of your image.
- Max Output adjusts the overall darkness of your image.
Moving a slider to the right will increase that element’s intensity, while moving it to the left will decrease it.
Once you’re happy with your changes, click Apply.
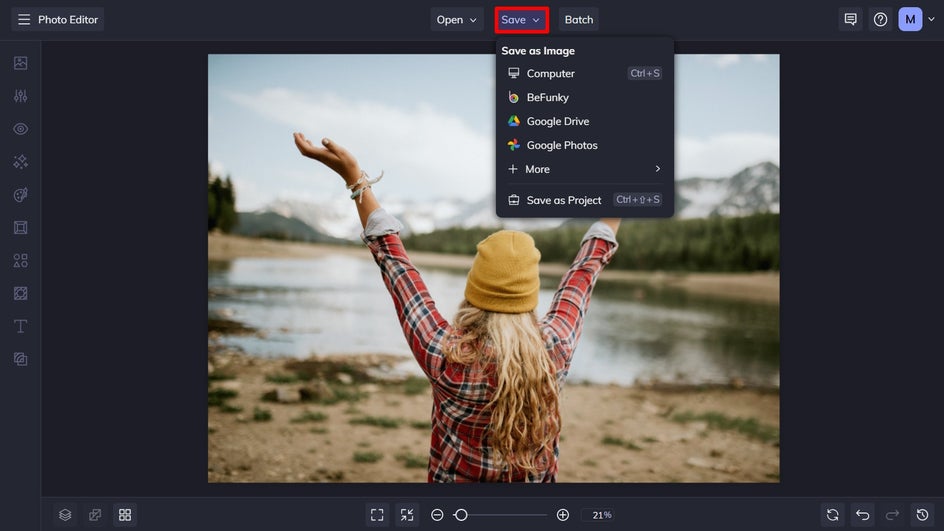
Step 3: Save Your Photo
You can either continue editing your photo using BeFunky’s other editing tools and photo effects, or if you’re ready to save your photo, click Save at the top of the screen. Then, select your desired save location.
Final Results: Changing the Levels of Your Photo
With BeFunky’s Levels tool, you can have greater control over the exposure in your photo than ever before, minus the expensive software!


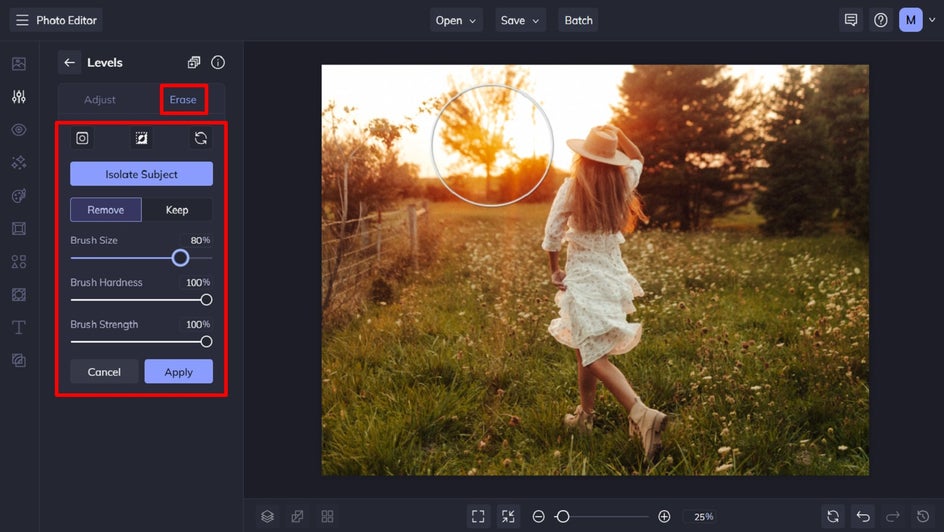
How to Apply the Levels Tool Selectively
Along with being able to adjust your entire image’s exposure levels, you can also only use the Levels tool on the parts of your photo that need it.
To do this, click on the Erase tab located next to Adjust. Then, select whether you want to Remove or Keep the selection. You can also modify your Brush Size, Brush Hardness, and Brush Strength using their corresponding sliders. Once set to your liking, hover your cursor over the parts of your photo that need editing, then click to apply (or remove) the effect.
If you make a mistake, you can also click the Reset or Undo buttons to fix this.
Adjust Your Photo’s Exposure . . . On All Levels!
Thanks to BeFunky’s easy-to-use Levels tool, you no longer need expensive or complicated photo editing software to get expert results. Want to experience more intuitive photo editing than ever before?
Check out the Photo Editor today to try out the Levels tool for yourself!