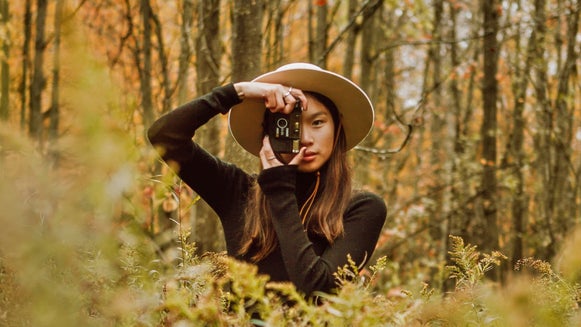
Perfect Your LinkedIn Profile Picture With BeFunky

LinkedIn is home to 830 million users worldwide, so how can you stand out on the platform? The key to making the best first impression lies in your profile picture, especially when it comes to capturing the attention of potential employers.
Thankfully, BeFunky’s Photo Editor has all of the tools and features you need to edit your headshot to perfection. From background removal and photo filters, to touch up tools, digital makeup, and more; we’ll show you how you can achieve your best LinkedIn profile picture yet!

What Makes a Good LinkedIn Profile Photo?
Before you edit your own LinkedIn profile picture, you might be wondering what type of image is most effective. We’ve included our top 4 tips for the perfect headshot below!
Proper Square Format
LinkedIn requires your portrait photo to be in square format measuring 400 x 400 pixels. If you’re wondering “how do I crop my LinkedIn profile picture?”, then you’re in luck. Achieving the perfect aspect ratio and size is as easy as using BeFunky’s Crop and Resize tools.
Perfect Lighting
You’ll also want to ensure your profile photo is neither too dark nor too light. The best way to do this is by capturing your portrait in natural lighting. If your environment is a little too dark, consider setting up some additional sources of lighting to evenly illuminate your face. If you still need to achieve the perfect balance with your photo’s lighting, you can use the Exposure tool to adjust brightness, contrast, highlights, and shadows.
Focus on Your Face
According to LinkedIn, your face should take up around 60% of your profile picture. Aim to capture your portrait from just underneath your shoulders to just above your head.
Friendly, but Professional
Because LinkedIn is a professional networking platform, it’s vital that your profile picture looks the part. Two of the most common questions users ask are “can my LinkedIn profile picture be casual?” and “should you smile in a LinkedIn profile picture?” It’s recommended that you capture a photo featuring the type of clothing you would wear to work, like a blazer or collared shirt, for example.
When it comes to smiling in your profile picture, studies have found that doing so makes you seem more likable, competent, and influential to potential employers.

How to Edit Your LinkedIn Profile Picture Using BeFunky
Ready to edit your own profile picture to perfection? To get started, head to the Photo Editor.
Step 1: Open Your LinkedIn Profile Photo
Click Open at the top of the screen, then select your file location. Alternatively, you can drag and drop your image from your computer into the Photo Editor screen. If you haven't cropped your image already, you can do so from the Edit tab.

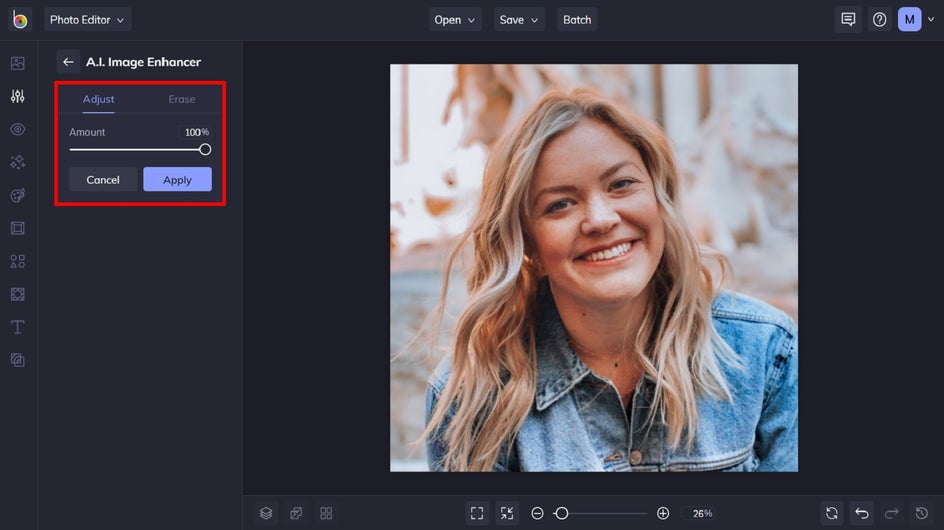
Step 2: Apply the A.I. Image Enhancer
Firstly, we recommend applying the A.I. Image Enhancer to perfect your profile picture. To locate this feature, navigate to Edit in the main menu on the left, then click A.I. Image Enhancer.
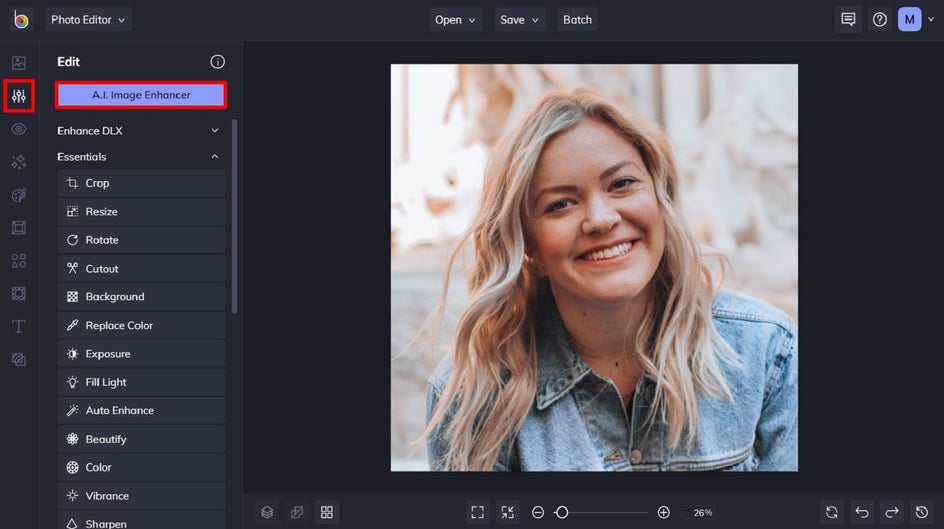
This feature uses artificial intelligence to balance your image’s exposure, adjust highlights and shadows, and enhance the colors all within a single click.
Once your whole image has been enhanced, it’s time to focus on those smaller details within your portrait.
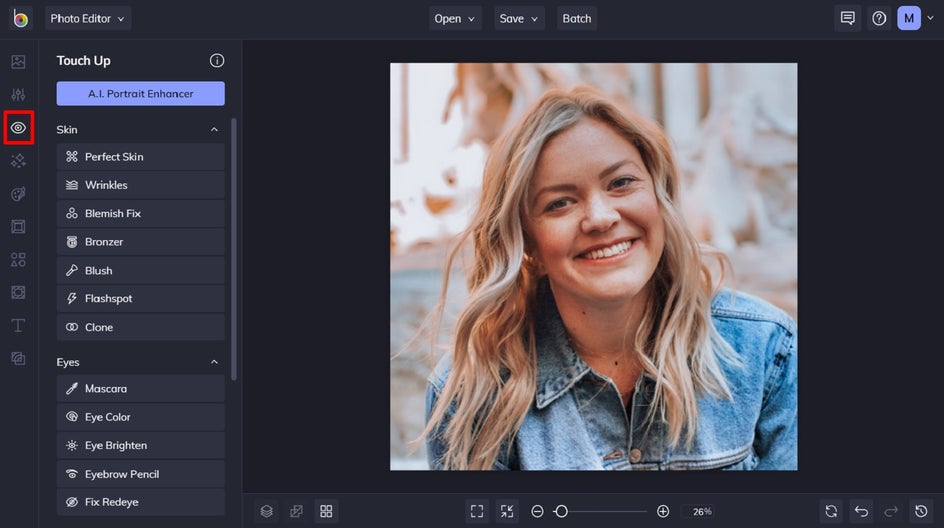
Step 3: Touch Up Your Portrait (Optional)
BeFunky’s Touch Up tools are designed to bring out your natural beauty. The Touch Up menu features tools for reducing blemishes and fine lines, evening out skin tones, whitening teeth, and brightening eyes (among many others). Plus, you can even access digital makeup tools to add lipstick, eyeshadow, mascara, and so much more to your portrait.
You can find the Touch Up tools by navigating to Touch Up (the eye symbol) in the main menu on the left.
The Touch Up tools you use will depend on the portrait you’re using, as well as your desired look. For the next few steps, we’ll be showing you how to use just three of these popular Touch Up tools, including Wrinkles, Teeth Whiten, and Lipstick. Below, we'll go over these optional tools.
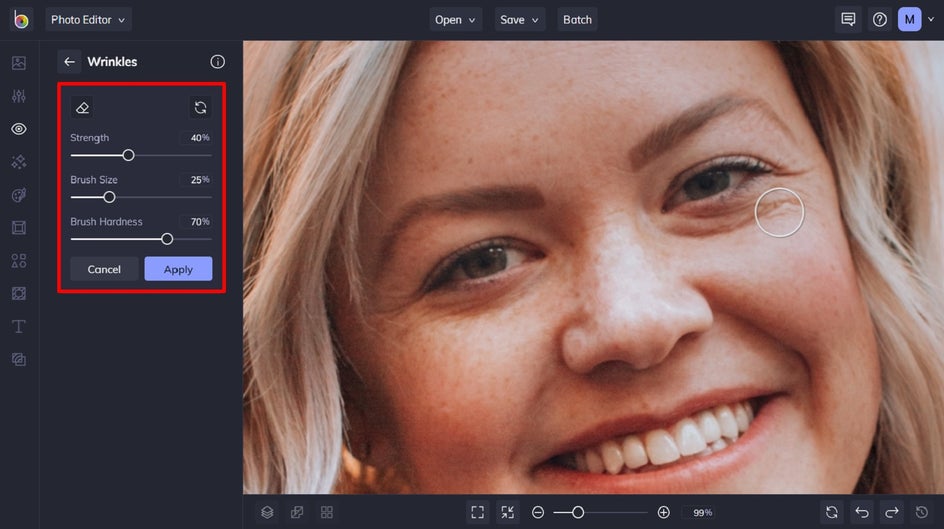
Remove Any Wrinkles
If your profile picture features any pesky wrinkles that you want to get rid of, then the wrinkle remover will do the trick. Click Wrinkles in the Touch Up menu. Then, set your desired Strength, Brush Size, and Brush Hardness. Using your cursor, click and drag the brush over the wrinkles you wish to remove. Once you’re happy with how your portrait looks, simply click Apply to apply your changes.
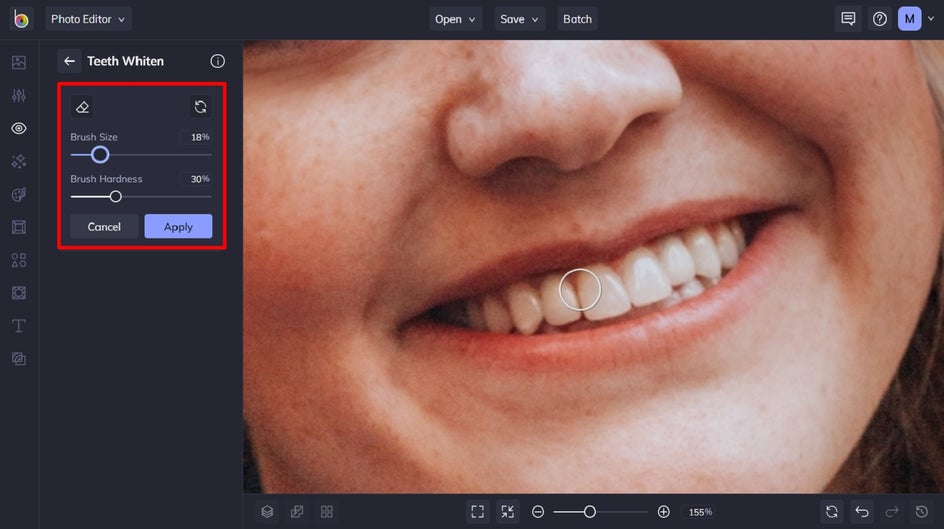
Whiten Teeth
The Whiten Teeth tool (also located in the Touch Up menu) can enhance your smile by making your teeth look whiter and more eye-catching.
Similar to the Wrinkles tool, the Teeth Whiten tool lets you adjust the Brush Size and Brush Hardness. Then, just click and drag the brush over the teeth you wish to whiten.
If you accidentally apply the brush to the wrong part of your portrait or simply want to remove the effect from an area, click Erase in the top-left of the panel. Then, click and drag the eraser over the effect you wish to remove.
Finally, click Apply.
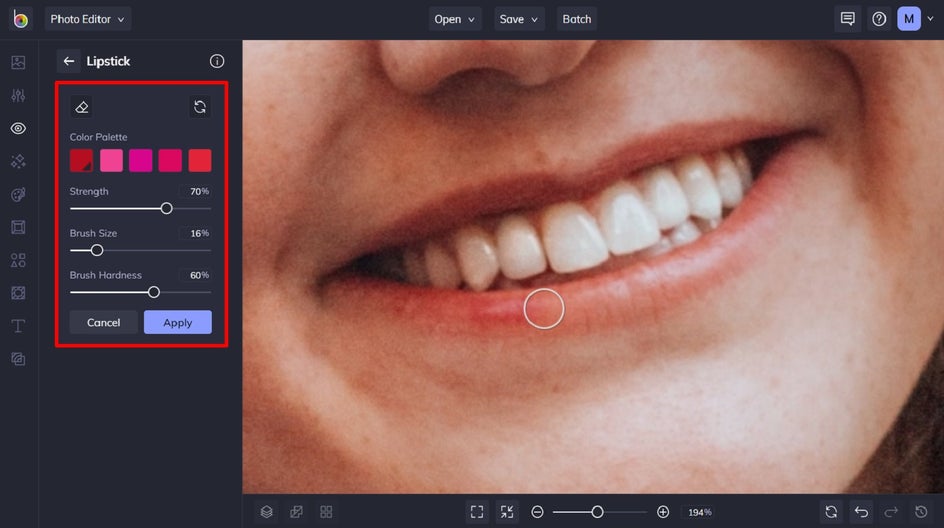
Apply Lipstick
Another great way to enhance the smile in your LinkedIn profile picture is to turn up the color on your lips. The Lipstick tool is perfect for this, and you can find it in the Mouth section of the Touch Up menu.
Select one of the preset lipstick color swatches, or click on the first swatch to choose your own hue from the Color Picker. Then, adjust the Strength, Brush Size, and Brush Hardness of the digital makeup effect. Finally, use your cursor to brush the lipstick color onto your lips, and click Apply to apply your changes.
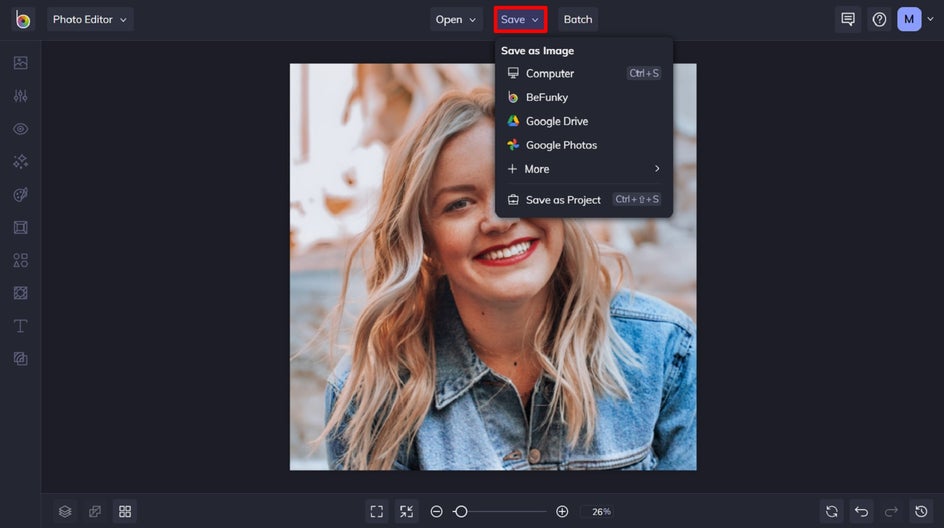
Step 4: Save Your LinkedIn Profile Picture
Click Save at the top of the screen, then select your desired save location. Finally, all that’s left to do is upload your image as your new LinkedIn headshot!
Final Results
Thanks to the Photo Editor, achieving the perfectly edited headshot is quick and easy. Think of it as your very own LinkedIn profile picture maker!

Other Ways to Edit a Professional LinkedIn Headshot
There are also plenty of other tools you can use to take your LinkedIn headshot to a whole new level! We’ve included three of our favorite features below.
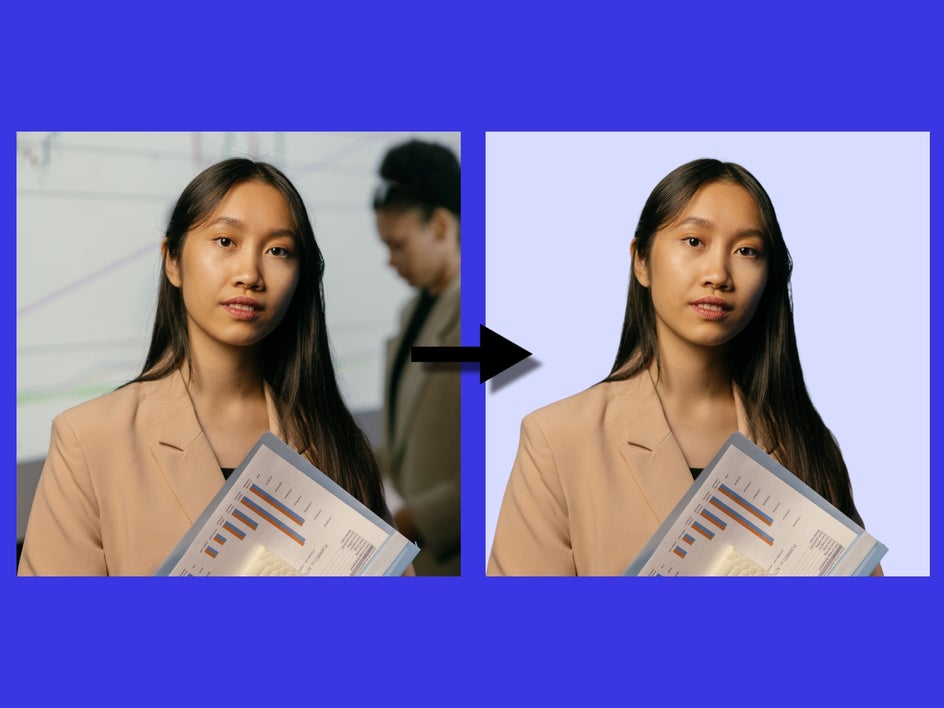
Remove Background
If you’ve got the perfect photo of yourself for LinkedIn but it features a less-than-ideal background, then all is not lost. The Photo Editor also has a Background Remover that lets you do exactly that! You’ll find it by navigating to the Edit menu, then clicking Cutout. Then, click the Remove Background button to let the feature work its magic.
You can leave your headshot’s background as transparent if you want to place your image over an entirely new backdrop, or you can click the box next to Background Color to choose a solid color instead. The result is extra professional and eye-catching!
Blur Background
If your background is too distracting but you don’t want to remove it entirely, then you can blur it instead. The Blur tool, located in the Edit menu, is perfect for achieving this. To apply the blur effect to the background of your headshot only, click Erase within the effect (located next to Adjust). Then, simply click the Isolate Subject button. How easy was that?

Black and White
Your LinkedIn profile picture doesn’t have to be colorful if you don’t want it to be. Black and white portraits also look very professional on the platform and can even help you stand out from amongst the crowd.
To apply a black and white filter to your headshot, navigate to Effects in the main menu on the left. Then, click on B&W Tones or Black & White to select a black and white filter from these categories. In this example, we used B&W Tones 14.

Turn a Good LinkedIn Profile Photo Into a Great One!
Don’t settle for an average LinkedIn profile picture. With the Photo Editor’s easy-to-use tools and features, achieving a perfectly edited headshot is simple.
Edit your own LinkedIn profile picture in the Photo Editor to see just how great it is!