Get Bold, Beautiful Lashes With the Mascara Tool
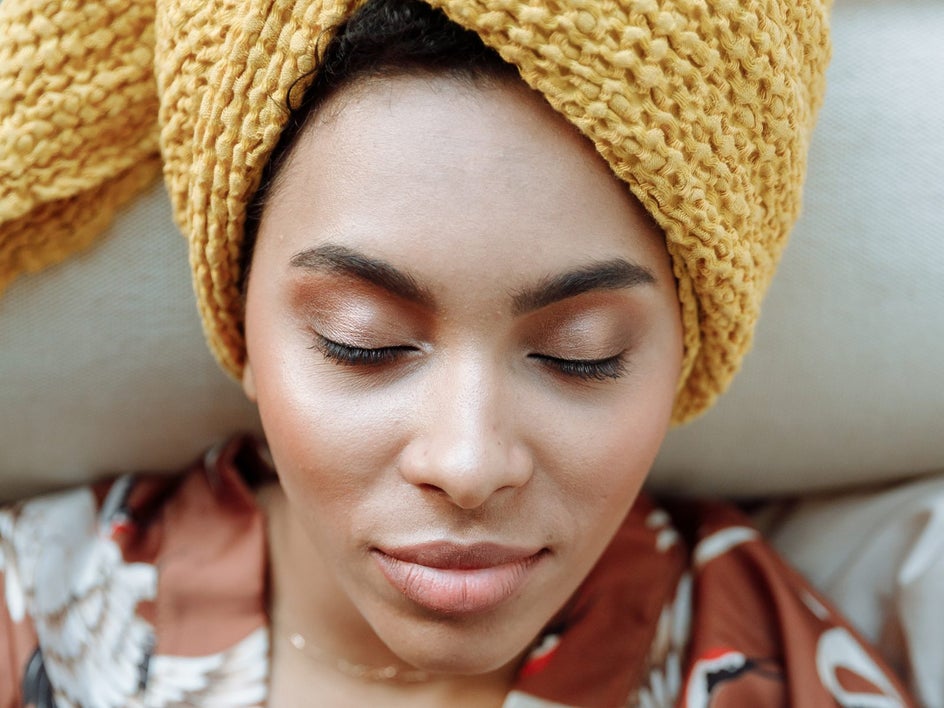
Luscious lashes may be all the rage, but you may not remember to apply them every day. Instead of hesitating to post photos where your lashes are lacking, you can upload a photo to BeFunky’s Photo Editor and the Mascara Touch Up tool will guarantee that your lashes are flawless. Never shy away from a camera again, just touch them up later!
What the Mascara Tool Does Not Do
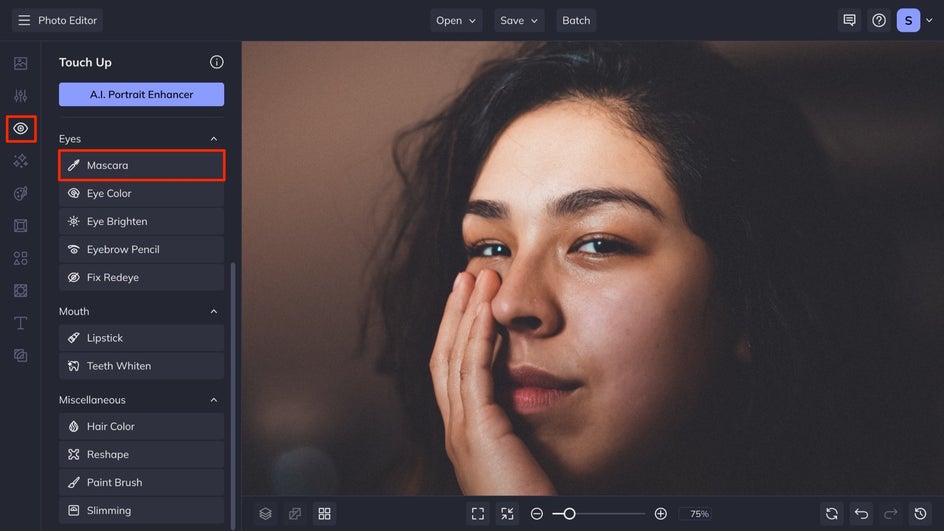
BeFunky’s Mascara tool is part of a set of tools under the Touch Up tab on the right side of your interface that can add makeup to your photos. However, it does not add lashes to your subject's eyes. Instead, the Mascara tool is used to make your subject's lashes more luscious. It enhances a subject's natural beauty by identifying where the lashes are, and darkening them to make them pop.
How to Get Bold, Beautiful Lashes
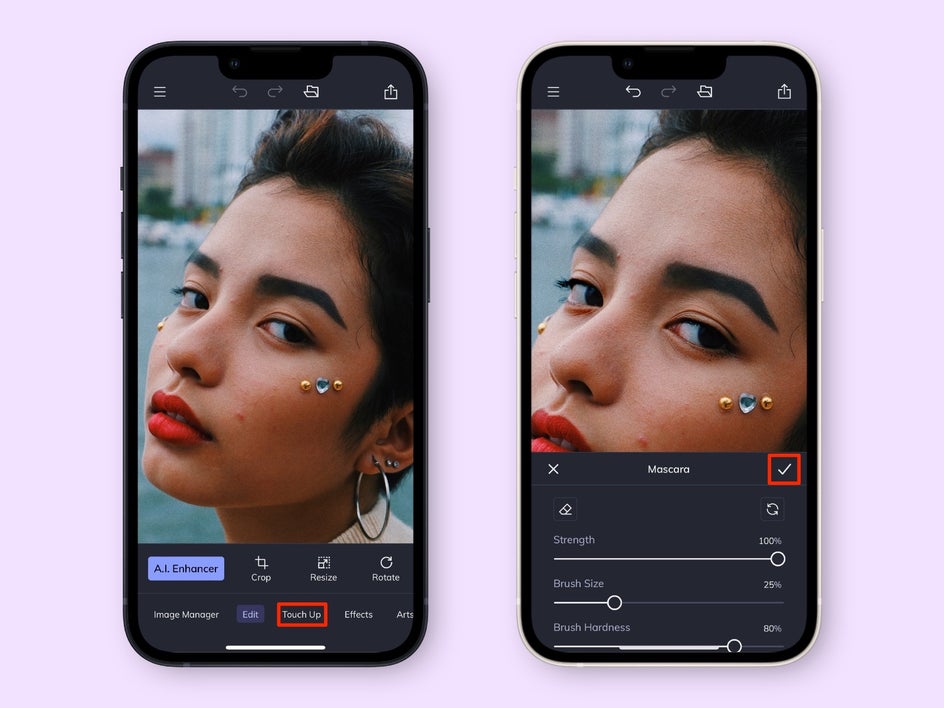
Adding makeup to your images is not about making yourself look perfect, but rather enhancing your best features! To make your eyelashes pop, click here to open the Touch Up tab. Open the photo you want to use and head to the Mascara tool, which can be found under the Eyes category.
Enhance Your Lashes in Just a Swipe
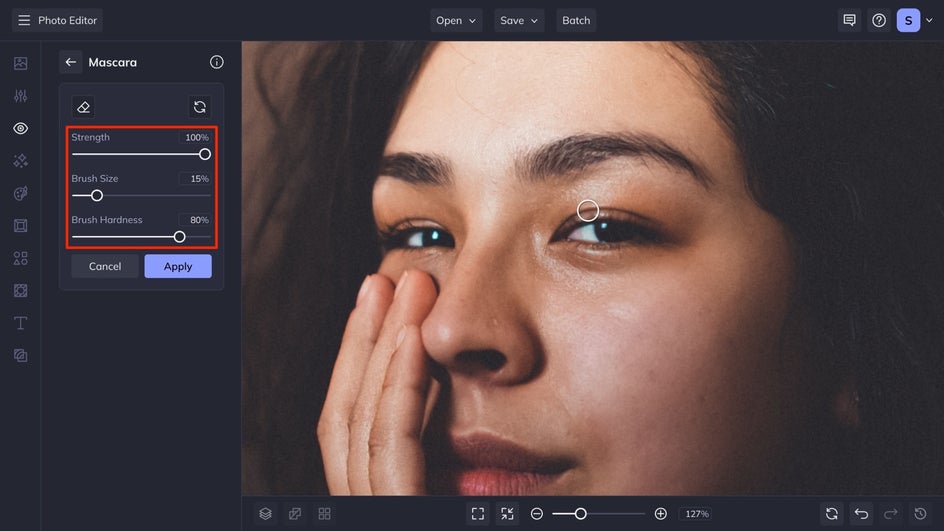
There are a few options available for enhancing your lashes with the Mascara tool. Increasing the Strength will give you darker results. Too much strength will result in an artificial look, and not enough will make the effect hard to see. Changing the Brush Size will adjust how large of an area the tool is applied to, so try to make it the same size as the lashes you are swiping across. Lastly, increasing the Brush Hardness will set a definitive line as to where the tool was applied, whereas lowering the hardness will have a more feathered look for the final result.
Refine Your Lashes in an Instant
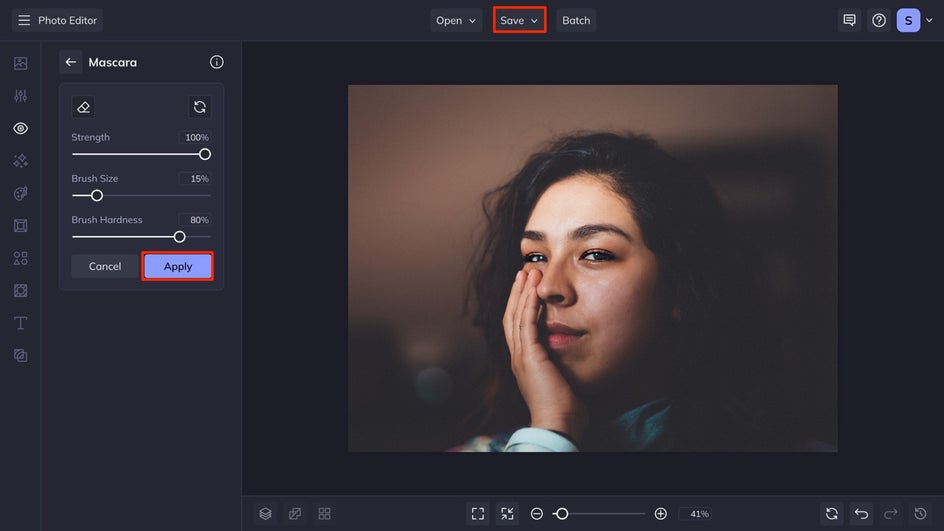
Swipe across the lashes like you would mascara, it will instantly darken and enhance them. Continue swiping the Mascara tool and adjusting the settings until you have achieved the look you desire. To make sure that you’re outcome is as refined as possible, use the plus and minus signs at the bottom of your interface to zoom in and utilize the erase function to remove the darkening on the spaces where you do not want mascara applied. After you are finished, click the Apply button and save your photo to your preferred location by clicking Save at the top of the interface.
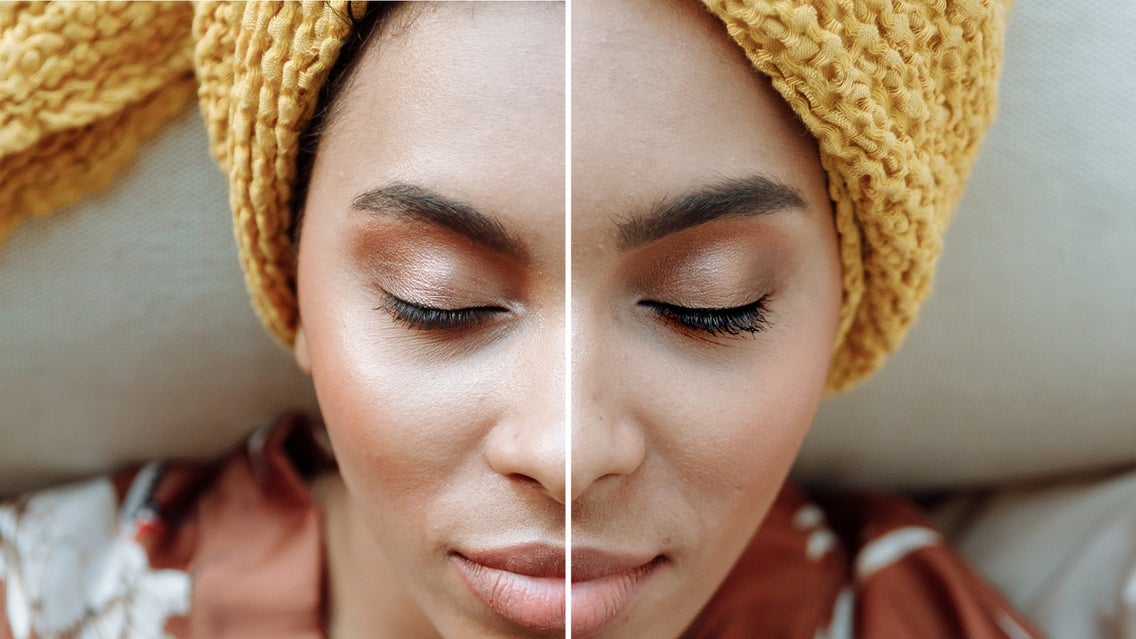
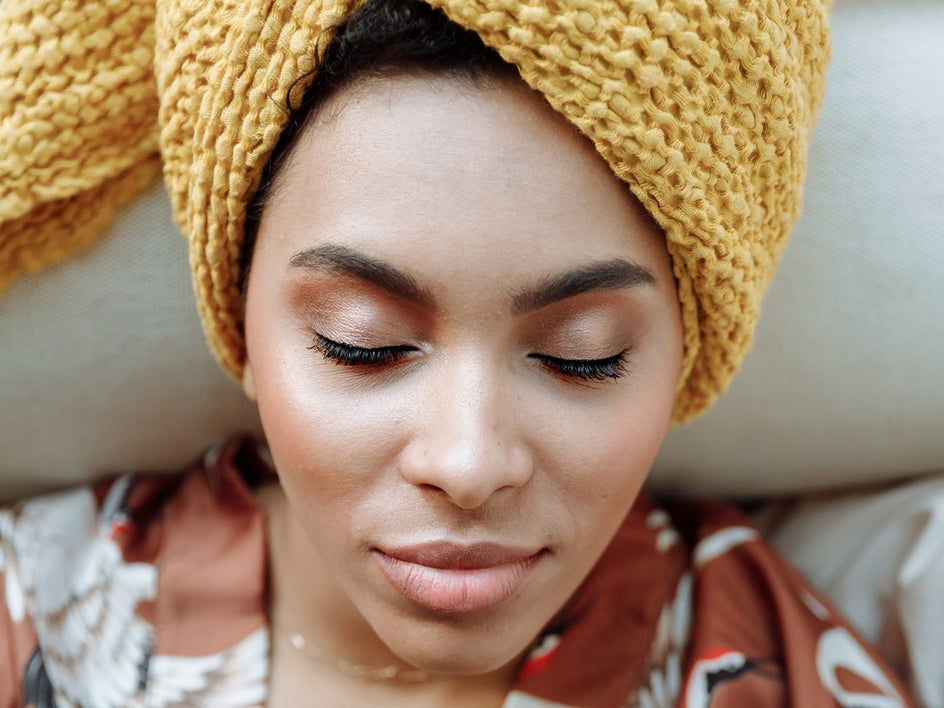
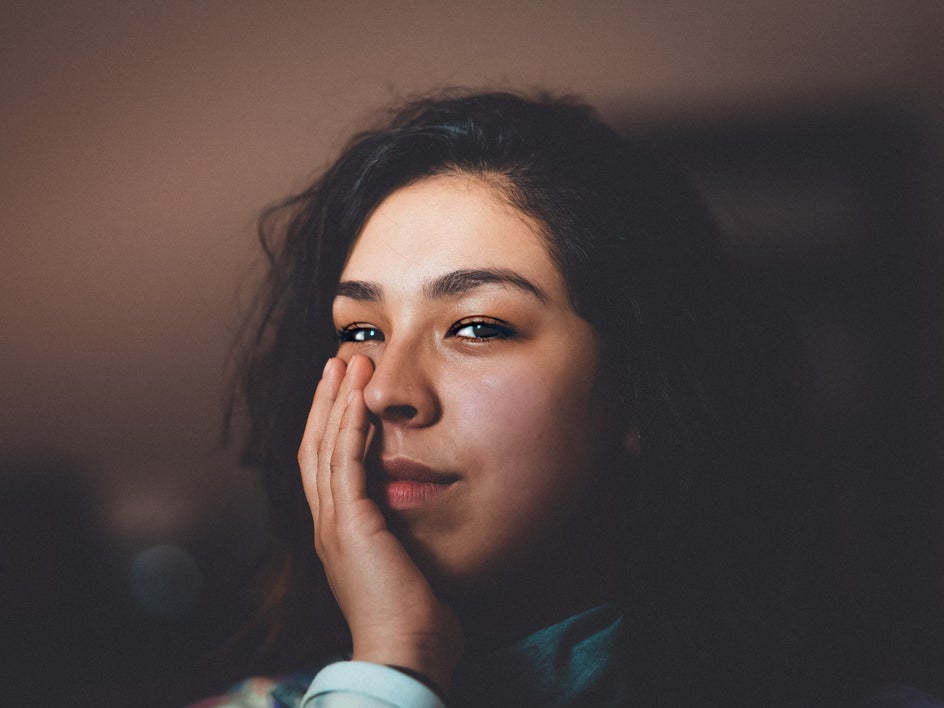
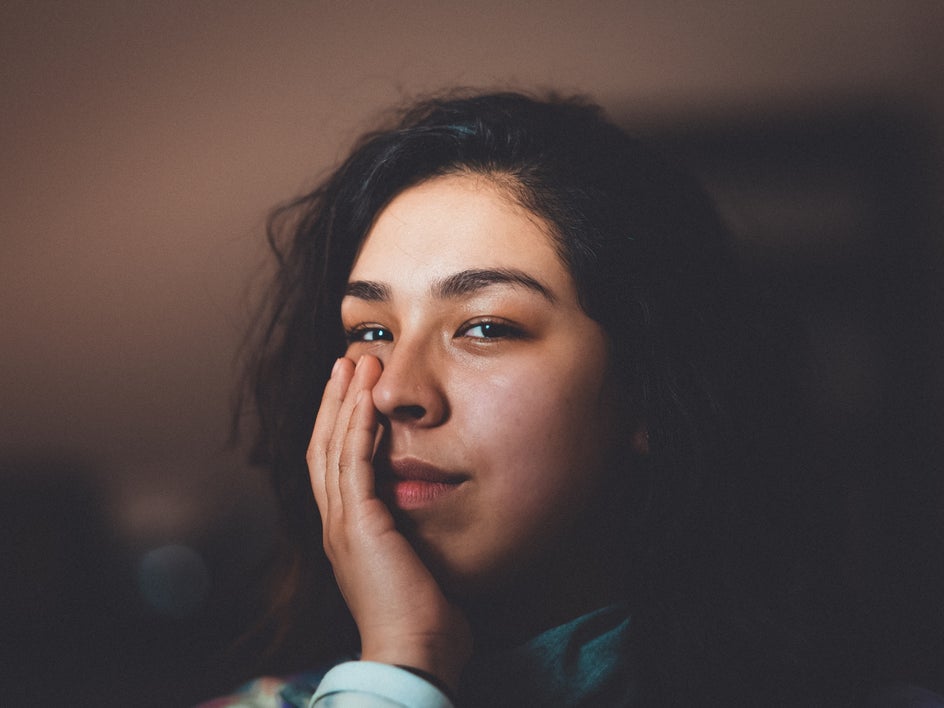
Final Results
Take a look at how we transformed this image in just a few clicks! A simple swipe of the Mascara tool can make a natural yet impactful difference. You can now focus on the moment and making memories instead of worrying about what the photos will look like when you forgot to put on makeup.
Edit on the Go With the Mobile App
With BeFunky’s Mobile app, you can add mascara on the go in the palm of your hand. Upload your photo to the Photo Editor, and then navigate to the Touch Up tab. Slide over to the Mascara tool and swipe on the mascara. To fine-tune the application of the tool, be sure to zoom in on the eyes to apply the mascara precisely.
Get Started Enhancing Your Beauty With Touch Up Tools
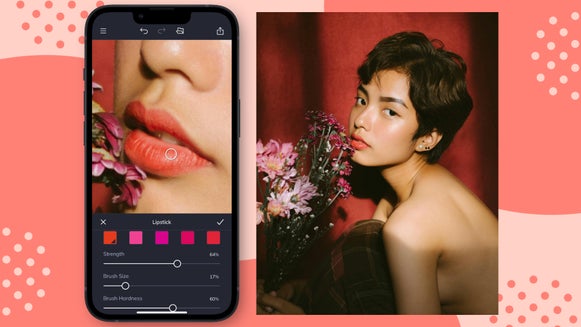
You don’t have to stop at Mascara! BeFunky has a whole suite of Touch Up Tools specifically for applying makeup. Try the Eyebrow Pencil to create a bolder brow, the Eye Brighten tool to make your eyes more striking, or brush some Blush on for a rosy glow!