Masters of Artsy Effects: Ross Reitzammer (2/2)
Continuing from Part 1.
To begin with, it all starts with selecting a photo that lends itself well to artistic rendering. Not all images lend themselves to artistic rendering. The subject or focal point should be well defined and stand out from the rest of the image. When I shoot, I sometimes use Aperture Priority and set my aperture to the lowest value (wide open). Get a tight focus on the subject so that everything in the background is out of focus. Pay attention to the colors in the background. Do they compliment the subject? Does the background offer enough contrast to the subject? Nothing in the background should detract from the subject. I avoid using the flash as the flash will wash out the natural colors. In low light situations you would normally avoid using a high ISO because the images come out grainy or noisy, but you know what? That's ok! If it keeps you from using the flash, do it! I prefer to get as much of the natural color as I possibly can. Sometimes I will play with the exposure to emphasize the subject. Learn how to use your digital camera to over emphasize your subject and remember you are trying to make an image that would look great as a painting or drawing not necessarily a perfect photo. The creative process begins with the camera.
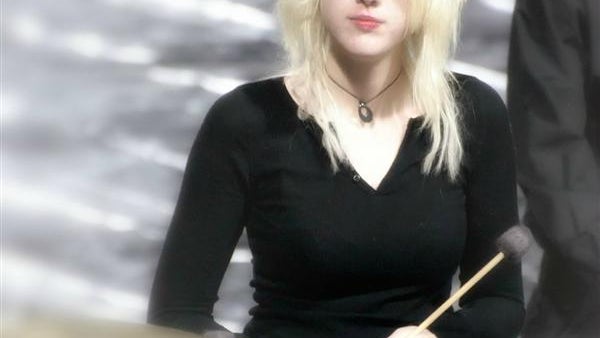
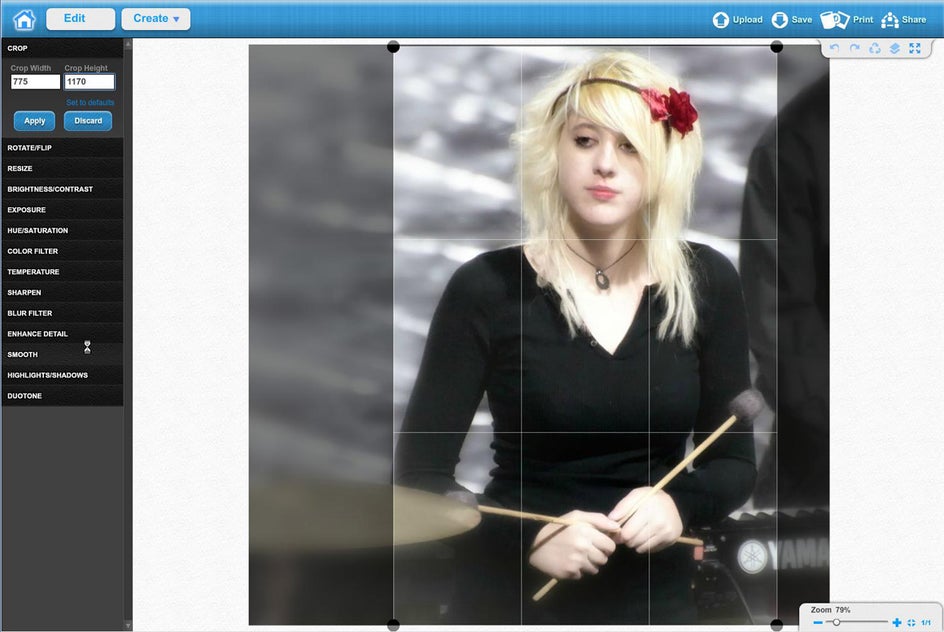
I have selected a photograph of a young lady that I captured at a drum line competition. It's not perfect as photos go. It is a bit over exposed, but it has some great contrasts to it. I especially like the contrast of the red flower against her blonde hair as well as the black outfit against her light complexion. It should make a nice artistic portrait, but there are some distractions I want to eliminate before adding any effects.
I have uploaded the image to my BeFunky.com library and I am ready to begin processing. This photo follows the rule of thirds where, in this case, the subject occupies the the right third of the frame. That's great for a photo, but in my mind I see a painted portrait where the subject is the center of focus, so I want to crop this image so my subject is dead center and eliminate anything that might be distracting.
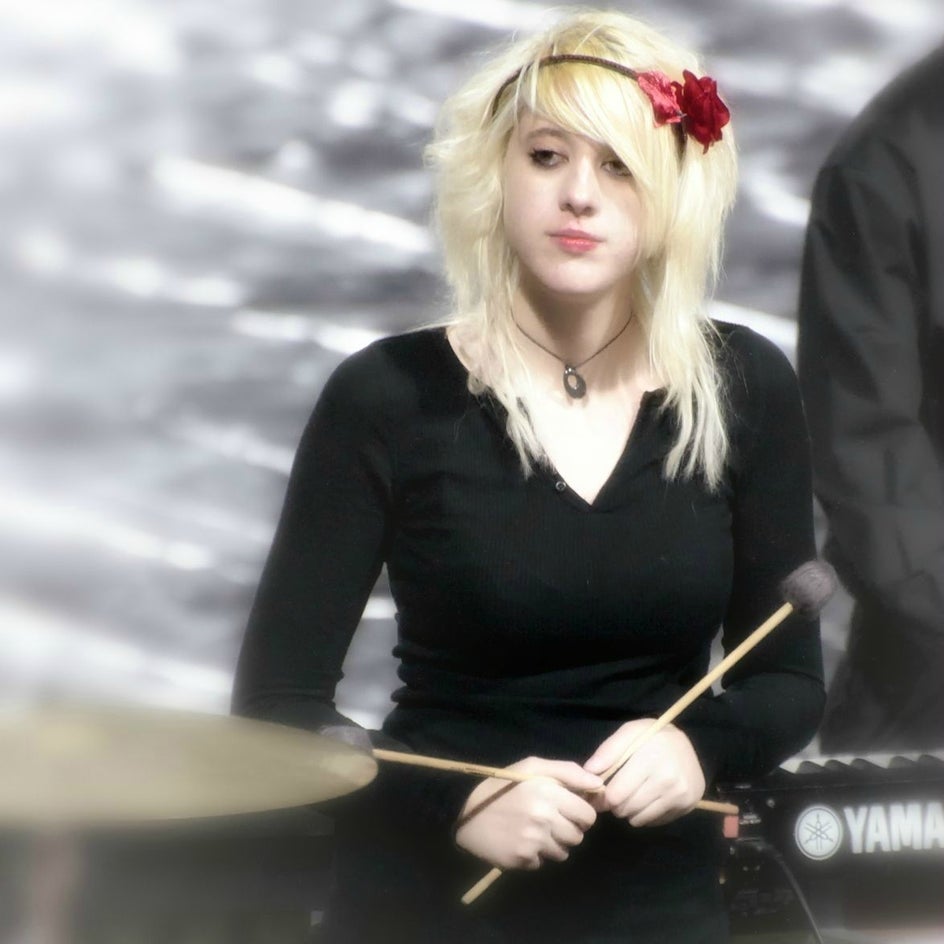
With this image I am beginning with the edit tools and starting by cropping the image. The Crop tool allows you to drag the frame and set it the way you want it. There are also size values you can adjust if you need the final image to be a specific size. It comes in handy if you want the resulting image to be a perfect square.
Now that I have the crop frame where I like it, I can apply it. Note that if you don't like the result, there is always the 'undo' button to put it back to where it was before you applied it. This is great for trying out different tools and effects. Don't be afraid to experiment with all the great tools they have here. You might be surprised by the results.
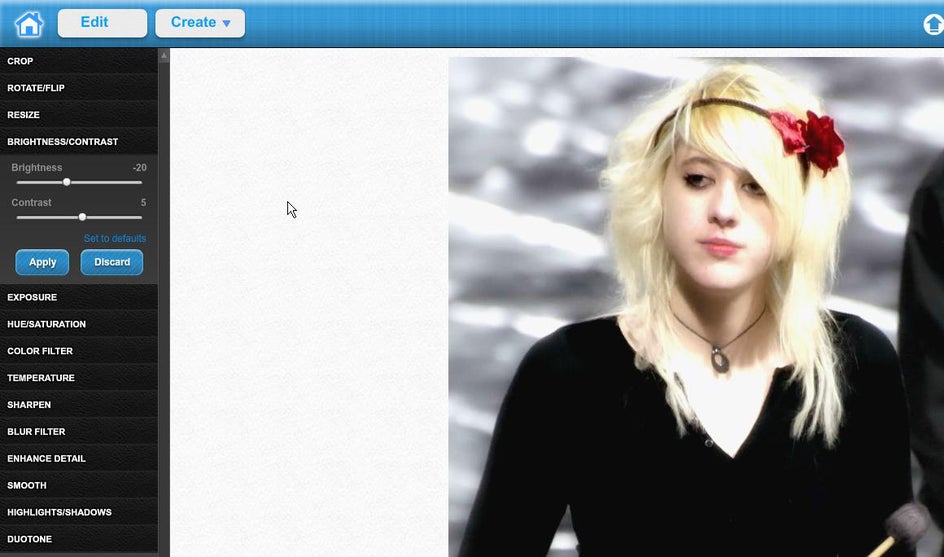
Since the image is a bit overexposed, I feel I should darken it and pop the contrast a little to emphasize the color and get a bit more definition before I render it with an 'Artsy' effect. I use the edit tools to get the most out of the other effects.
This may be a series of trial and error. Some effects will completely wash out the color, so to compensate, I may adjust the exposure or increase the saturation to bring out more color. Sometimes the color may be too overbearing so I may decrease the saturation for a desired effect. Don't be afraid to experiment!
Also, there is no 'proper' order to apply these effects. There are times I will use the editing tools after I apply a painting effect. You are the artist. Be creative!
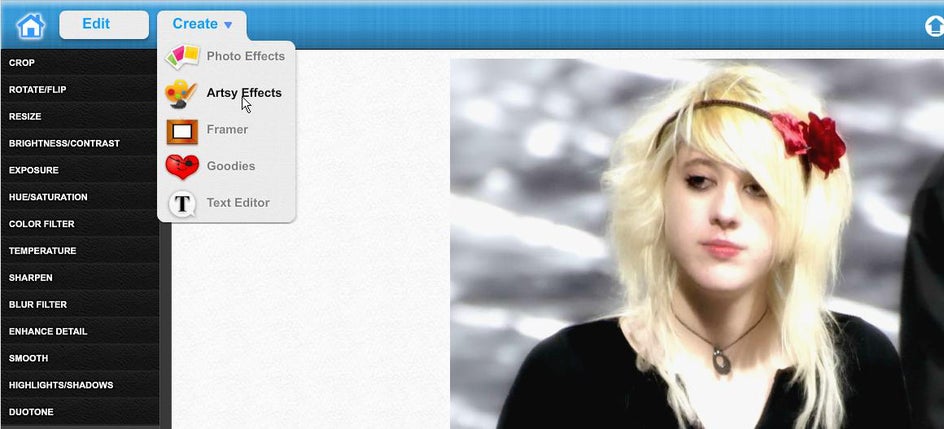
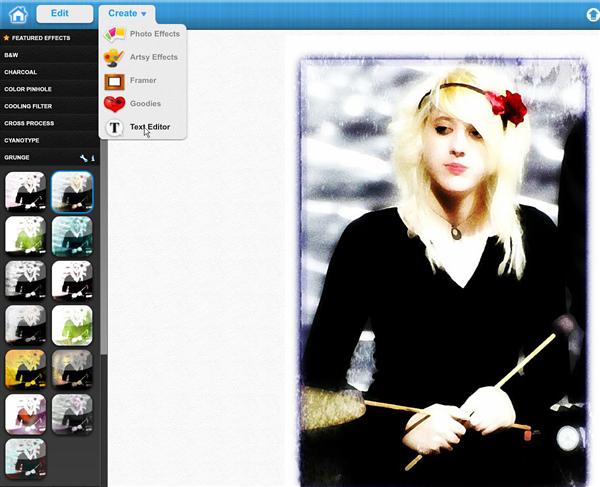
For this image I want to apply the Underpainting #2 effect. Select 'Artsy Effects' from the 'Create' drop down menu. Find 'Underpainting' in the tool panel on the left and select the effect you want to apply.
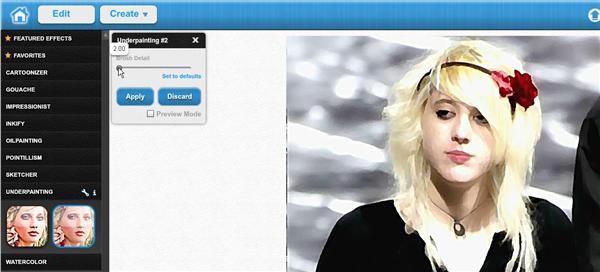
I have chosen the second Underpainting effect because I like the pronounced brush strokes it creates. It has a slider that allows me to adjust the brush detail. For this image I want to capture as much detail as I can, so I am going to slide it over to the left as far as it will go. After I had applied this effect I tried adding a watercolor effect over it to get a more realistic looking painted effect. It washed the colors out too much so I undid it and just kept it as an Underpainting effect. Don't be afraid to mix effects. The results can be amazing sometimes and sometimes not so amazing, but the tools are here for you to create with. Experiment, create, get to know the limits of each effect. (There is always the 'undo' button!)
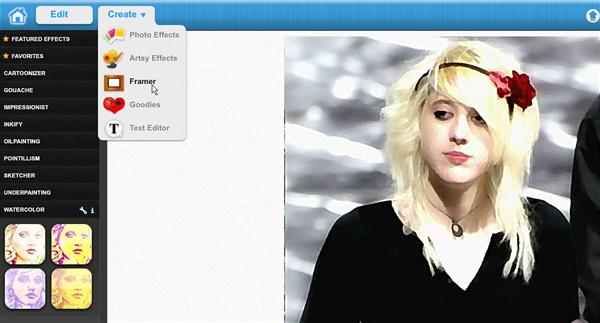
Now that I have my artwork where I want it, I want to add some frame effects to make it a bit more presentable as a stand alone piece of artwork. I want to use the basic border to create a beveled edge effect. To create this effect, select 'Framer' from the 'Create' drop down menu.
You may have noticed a ragged dark line down the left side of the image. It was created when I applied the 'Underpainting' effect. I'm not sure how it got there, but I like it and I’m going to use it! It may be a defect, but digital artwork is nothing more than a distorted, defective photo. The artist 'distorts' the image to project his/her feelings, mood, personality. The same way Monet, Picasso or Gauguin project their personalities through their work. To me, these imperfections make it more human and less digital
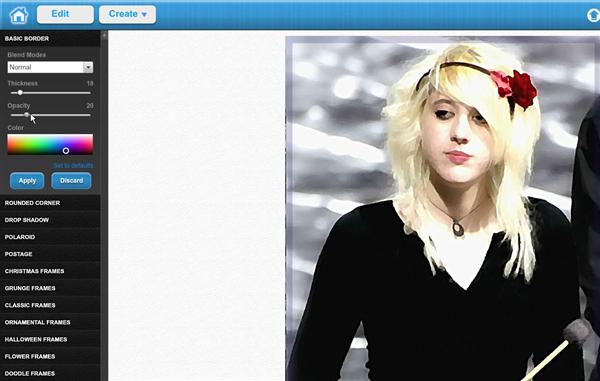
To create the beveled effect I selected the 'Basic Border' and thickened it up a bit moving the slider to about 18 (to where it looked good to me). This will make just a big black ugly border (no offense to BeFunky). To get the beveled effect, I dropped the 'Opacity' down to where the border was barely visible and the image could be seen behind it. Now adjust the color of the border to compliment the colors in the 'painting'. (I wish all the color selectors were like this one.)
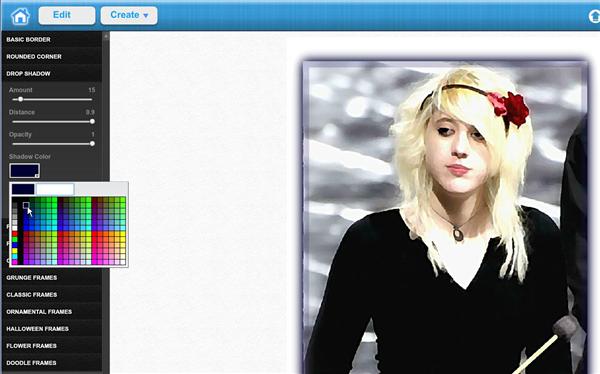
Now that I have a nice beveled edge, I want to give it a three dimensional feel by adding a drop shadow. This is where that 'defect' line makes the left side of the digital painting look torn and uneven which will look great with the final effect I want to apply. For the drop shadow, I have set the amount to 15 and left the Distance and Opacity as they were. The black shadow is a little harsh for me, so I prefer to change the shadow color to a dark blue. If you want rounded corners, be sure to apply that effect before you apply the 'Drop Shadow' effect.
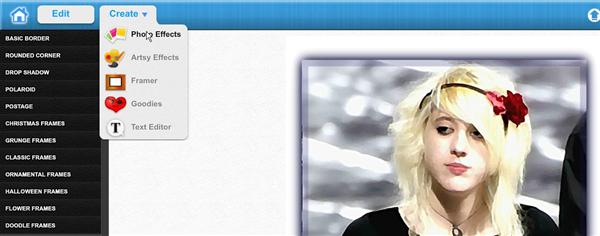
It still looks too much like a photo to me, so I want to mess it up a little to get the final artistic feel I'm looking for. I will do this with a 'Photo Effect'.
Select 'Photo effects' from the Create drop down menu. As I mentioned before, there is not always any set order I do things, but I try to apply effects over effects in an sequence that produces a desired result.
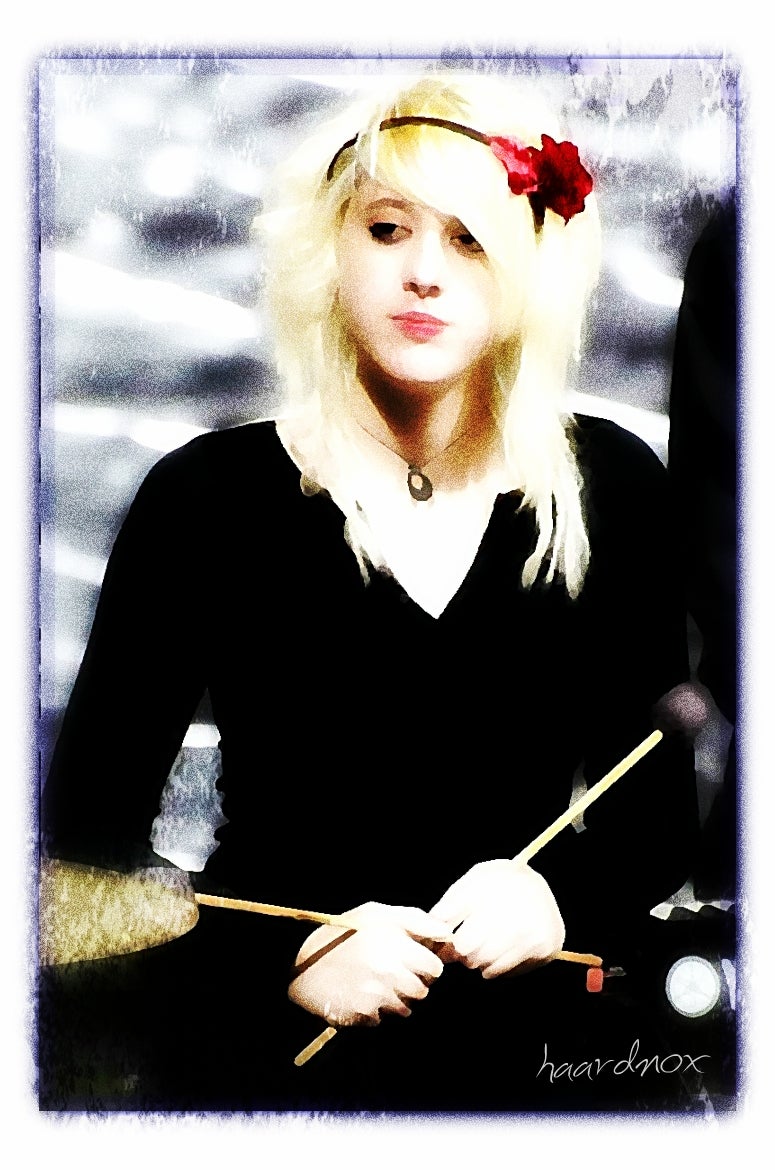
So, finally, I want to apply a grunge effect over my framed painting. There are no settings for the Grunge 2 effect. It is what it is.
I love the imperfection it adds to the painting as well as the way it creates a marbled look. It softens up the painting and brightens the colors. If the color is too bright for your taste, you can always use the Edit tool to back down the saturation to where you like it. Be yourself. Make it express who you are.
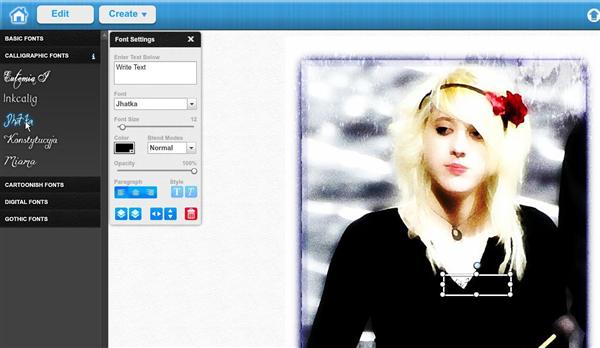
If you think the artwork expresses what you wanted, then put your brand on it. You can sign your work using the 'Text Editor'. Let everyone know this is your work.
There is a growing number of talented digital artists using BeFunky.com. Check out the BeFunky Gallery and the BeFunky group on Flickr to see what others are doing with the site. Look at some of the work by Noartinme, Lucymagoo, cris buscaglia lenz, Stella Kuru and WkHanson08 (to name a few). Don't be afraid to 'take it to the limit'. Express yourself. Be creative and always ... Be Funky!
Thanks to Ross for this great tutorial!
Do you have your own tips and tricks for great results? Let us know in the comments section below.