An Introduction to Our Cutout Tool & Magic Brush

Ever wanted to cut out objects from a photo and place them on a new background, or create transparent backgrounds around objects in an image? Our Photo Editor’s Cutout tool has always been a game-changer, but we’ve added some ground-breaking new features to the Cutout tool that will blow your mind!
Imagine an A.I.-powered Background Remover that erases backgrounds in a single click, a Magic Brush that helps you cut around objects like never before, and even the ability to use the Cutout tool on image layers. This feature-packed tool now has everything you need to create flawless transparent backgrounds and isolate objects the way you want!
Keep reading to learn how you can use these great new Cutout tool features.
One-Click Background Remover
The Remove Background button in our Cutout tool erases an image’s background in a single click! Built entirely by our in-house team, this AI-powered Background Remover works by detecting the subject in your image and removing the background around it. It’s the quickest way to create a transparent background (or a solid-colored one) for your products, portraits, pet photos, and any images with a defined subject.
This video shows just how quickly the Background Remover works in real-time:
As you can see, the Background Remover works best on images that have a defined subject for the AI to detect and cut around, so keep that in mind when utilizing this feature.
Whether you want to create a clean white background for your product photography, a transparent background for your portrait, or remove the background behind any kind of subject in your image, the Background Remover is your new go-to!
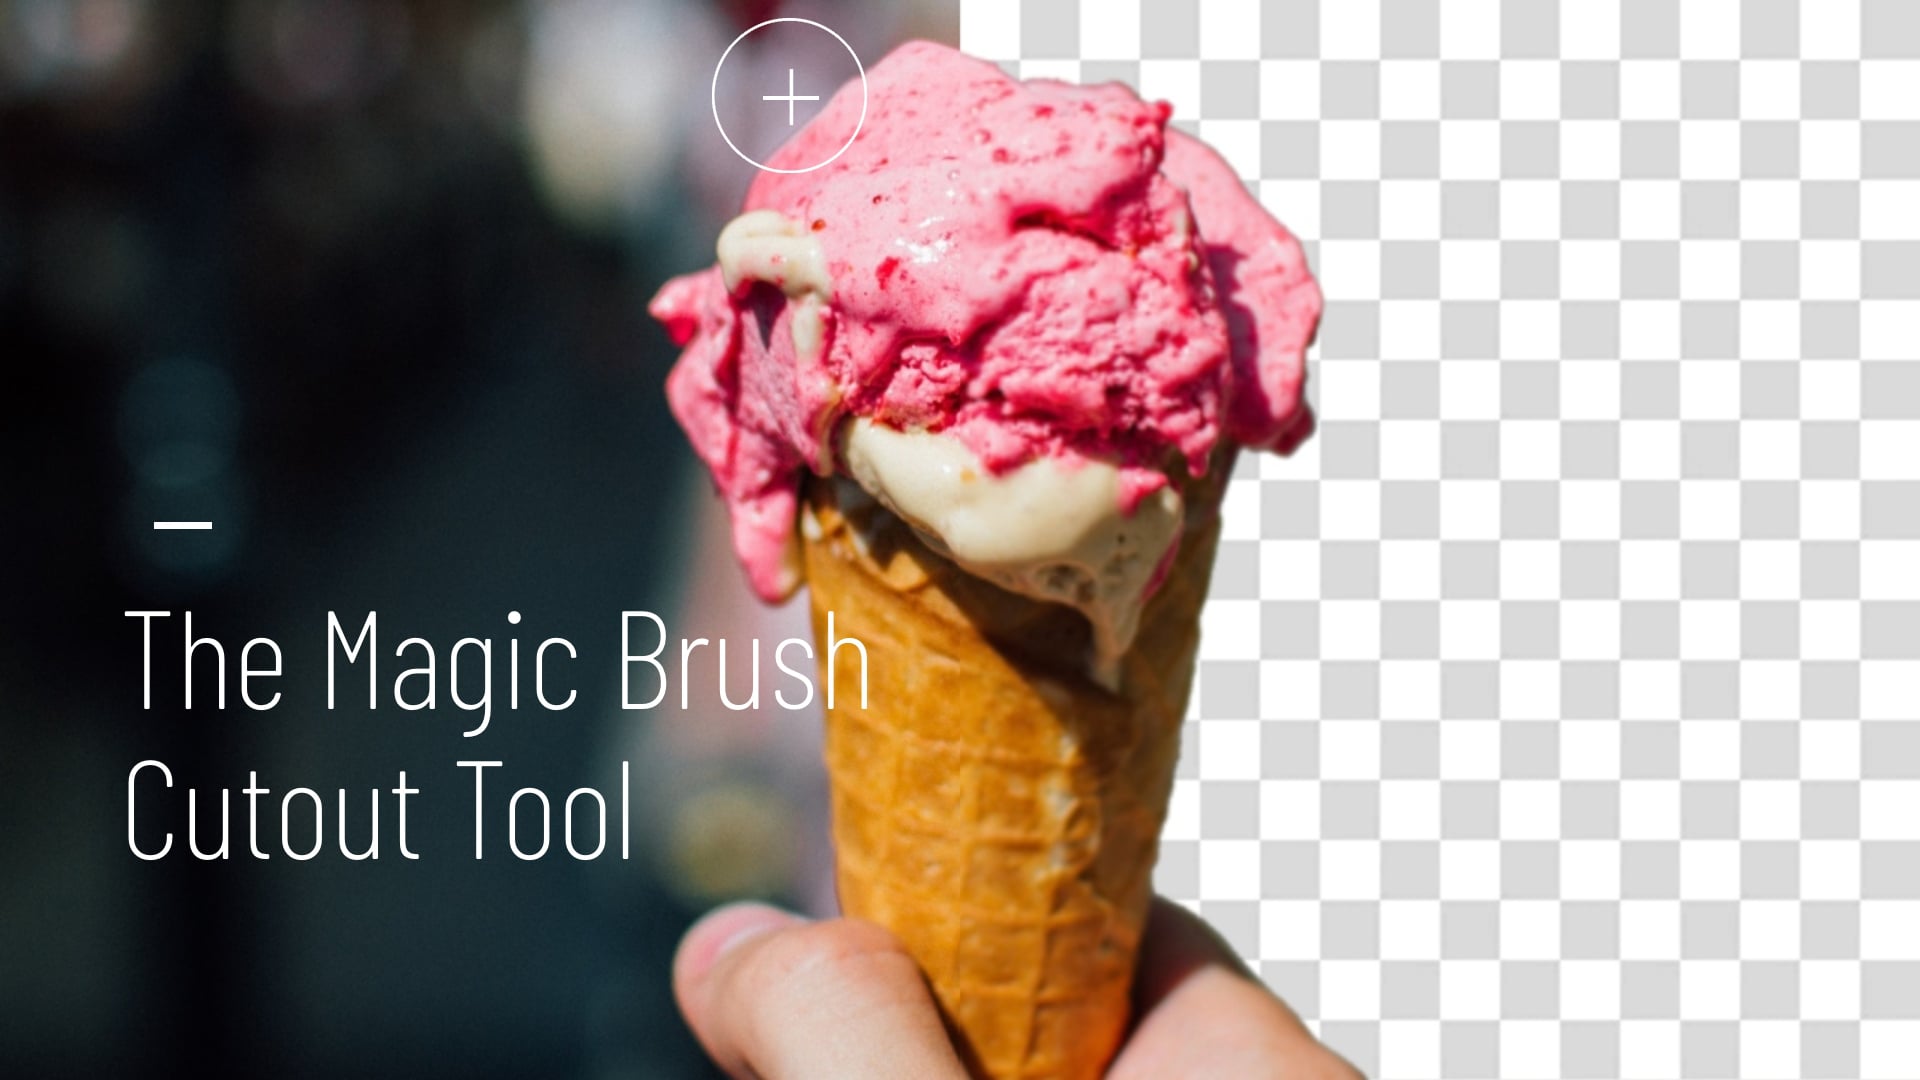
Cut Out Images Like Magic
Our Cutout tool offers a variety of brushes to help you cut out objects in your photos. The most intuitive brush of all (and first in the lineup) is our Magic Brush. It works by removing the background color of wherever you click and drag, leaving non-similar colors alone. The Magic Brush is perfect for quickly cutting out objects that differ in color from the background they’re photographed on – whether it’s a solid-colored background or a busy one.
Watch this quick video to see the Magic Brush in action:
As you can see, wherever you place the Magic Brush target, it will remove that particular color as you click and drag. It works best on images that have a different colored background (even if that difference is slight) than the objects you wish to cut out. It’s incredibly accurate and intuitive!
Easily Cut Out Image Layers
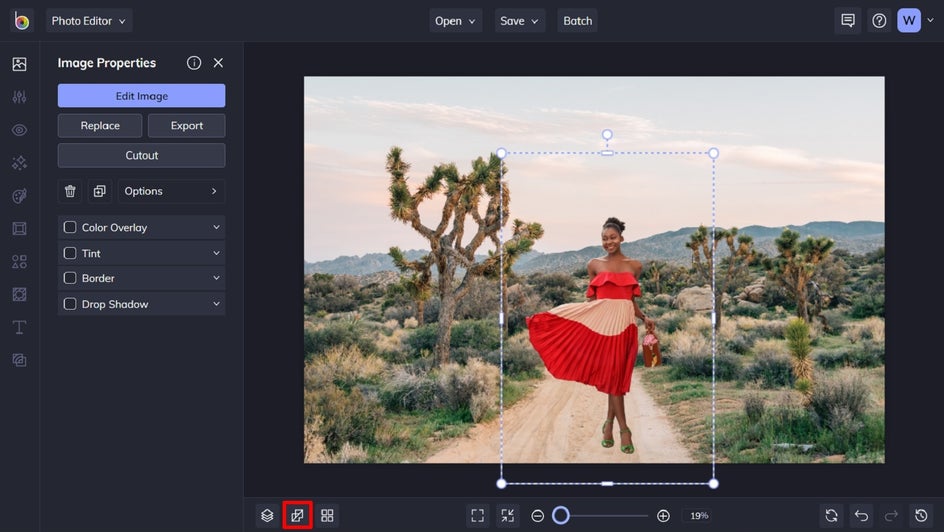
In addition to using the Cutout tool on your images, it’s also available to use on any image layer! Whether you’re in the Photo Editor or Graphic Designer, you now have quick access to every Cutout tool feature any time you click on an image layer! Instead of having to use the Cutout tool on a photo-by-photo basis, simply click the Cutout option in the Image Properties menu to bring the Cutout tool right to your image layer - all without leaving the rest of your project behind.
Here’s a quick video to show you how efficient it is:
We’ll show you the ropes of everything below, whether you want to remove the background of an image or erase part of an image layer.
How to Erase Image Backgrounds With the Background Remover
The Background Remover in the Cutout tool couldn’t be easier. Simply upload your image into BeFunky’s Photo Editor to begin.
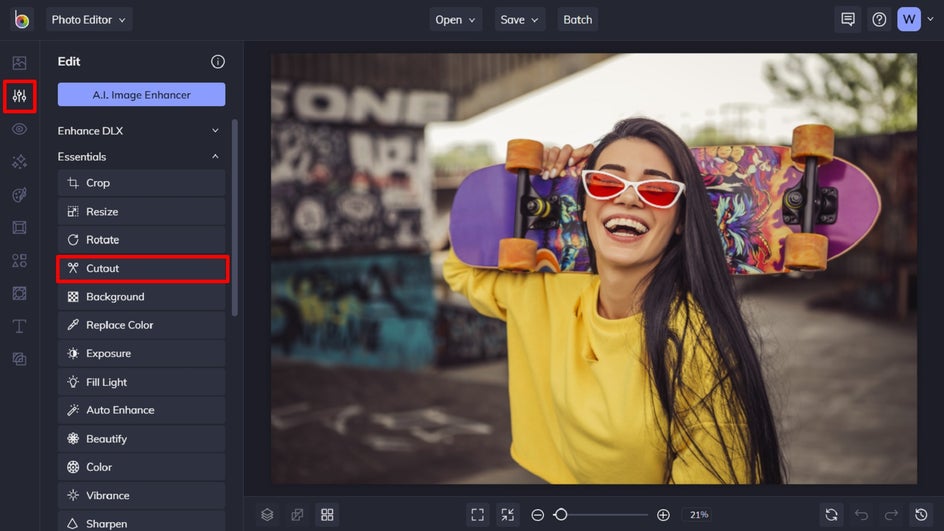
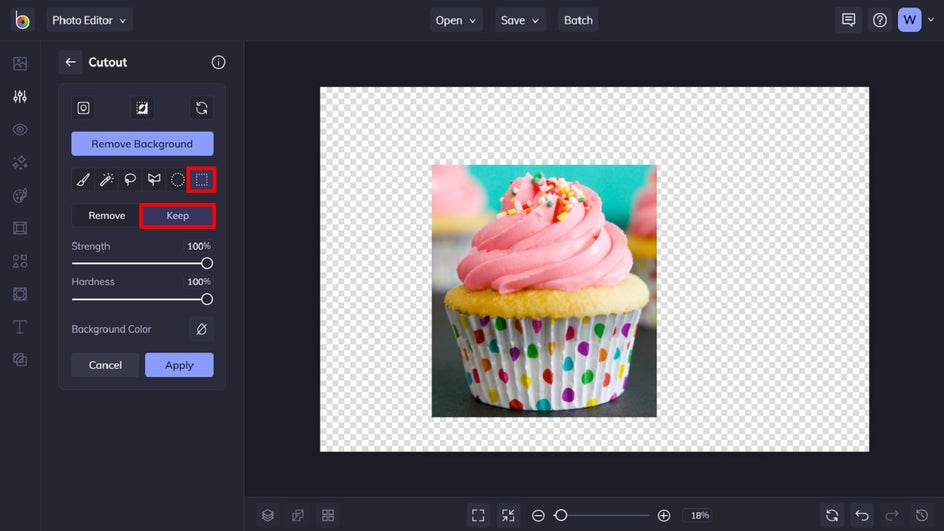
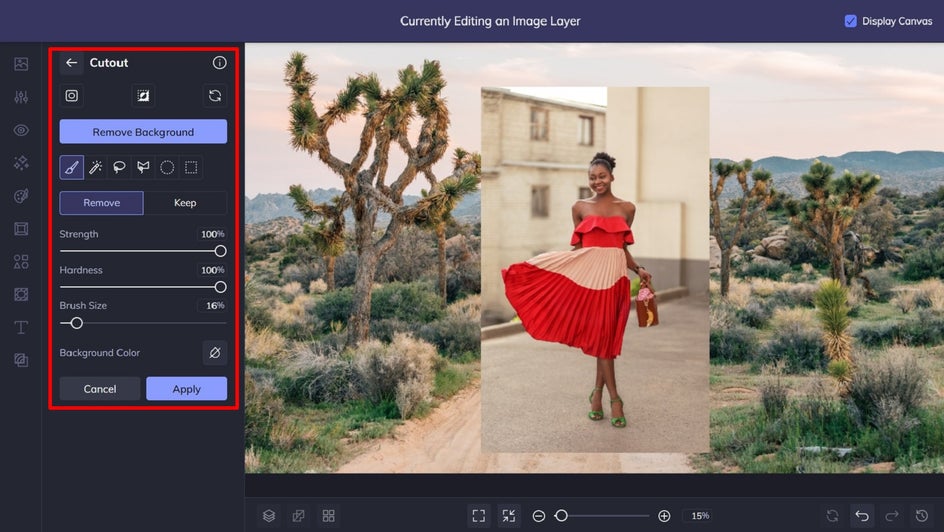
Step 1: Select the Cutout Tool
Navigate to the Edit menu on the left, then click Cutout.
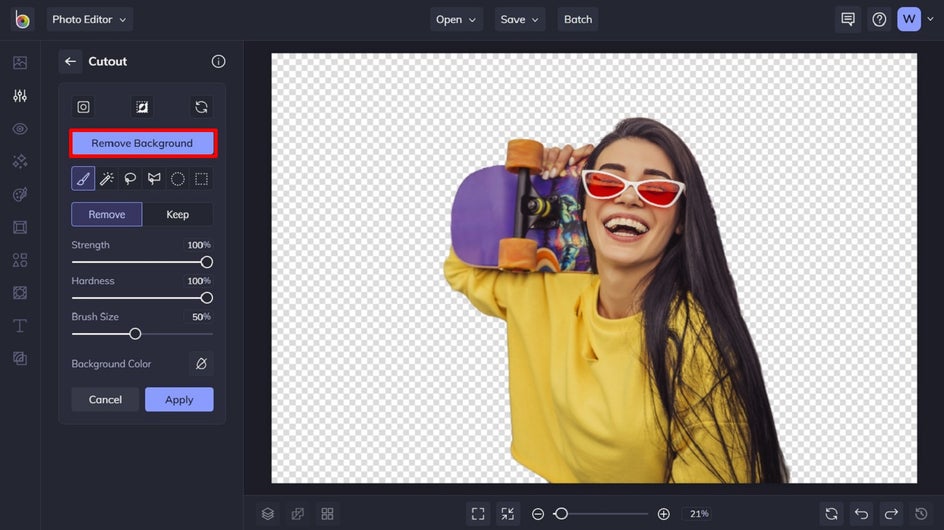
Step 2: Click Remove Background
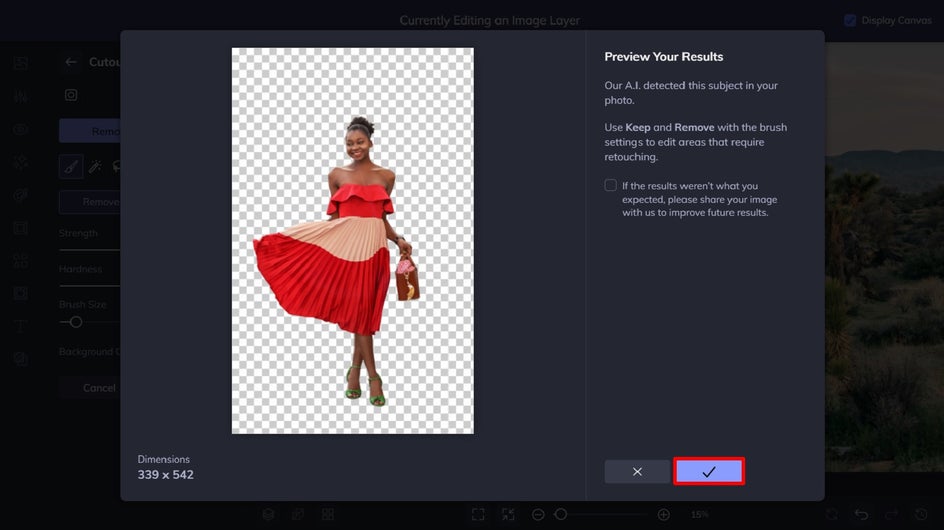
Within the Cutout Tool, click the Remove Background button. A preview of your image with the background removed will appear. If all looks good, click the blue checkmark button to continue.
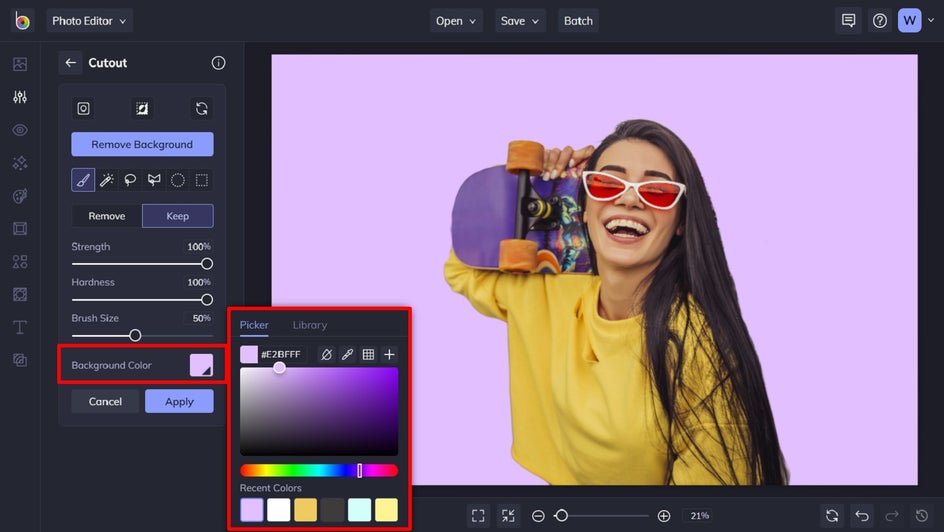
Step 3: Add a Background Color or Keep It Transparent
From here, you can keep the background transparent, choose a new background color to give your image a solid-colored background, or continue detailing your image with the Cutout tool brushes if need be.
Once you’re finished, click the Apply button.
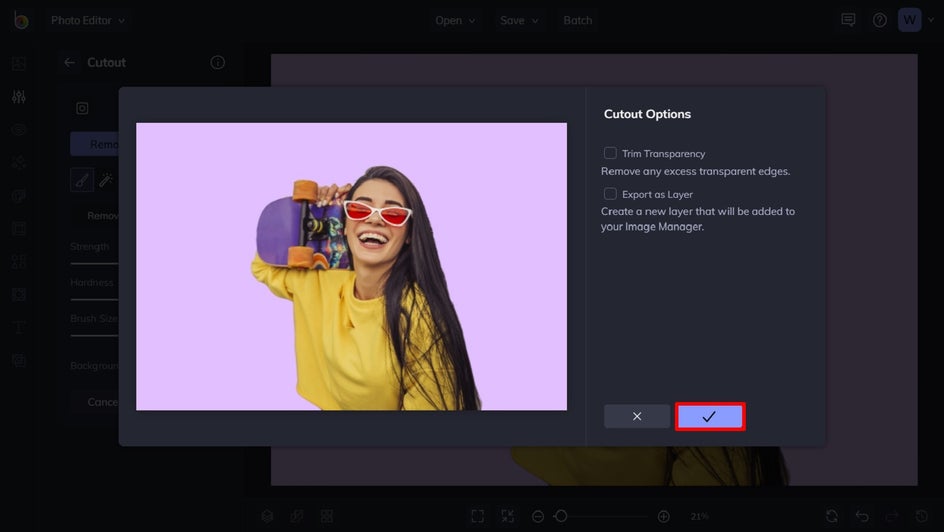
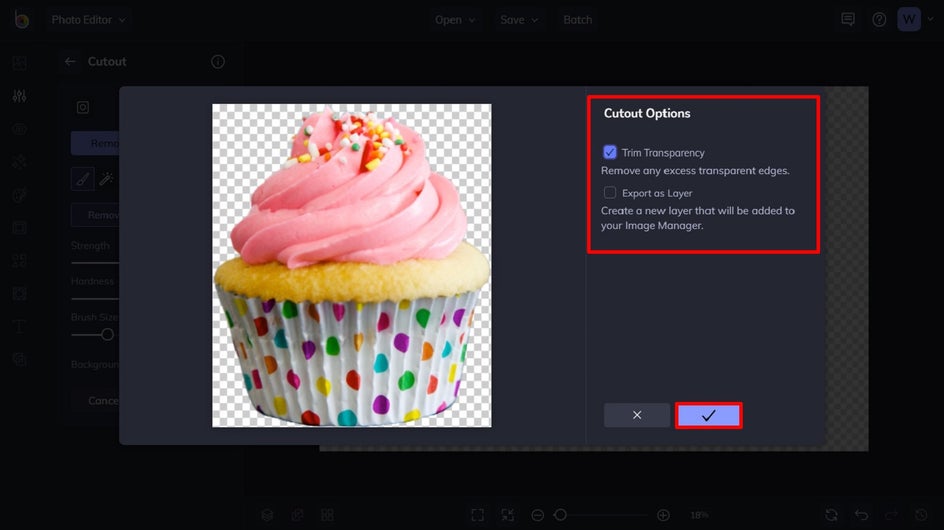
Step 4: Select Your Cutout Options
A Cutout Options window will appear. From here, you have the options to check Trim Transparency, which removes any excess transparent edges, or Export as Layer, which creates a new layer that will be added to your Image Manager.
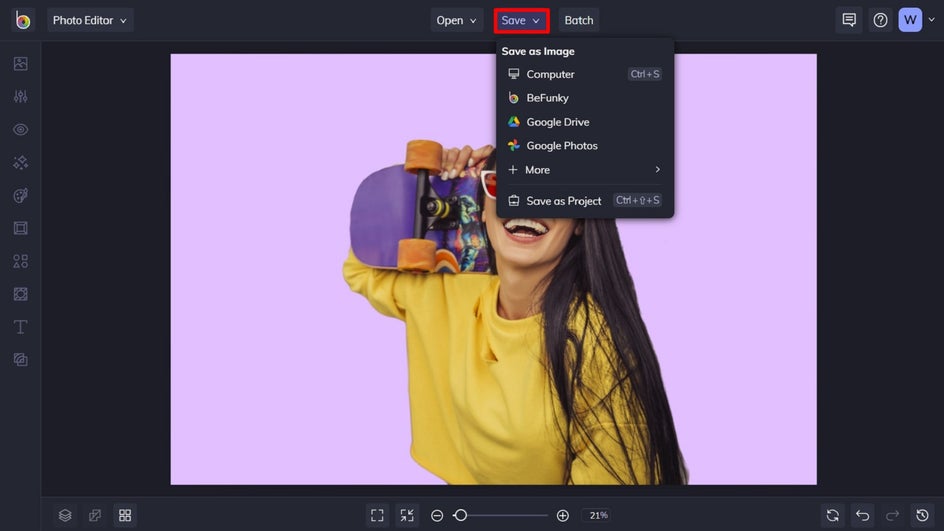
Step 5: Save Your Cutout Image
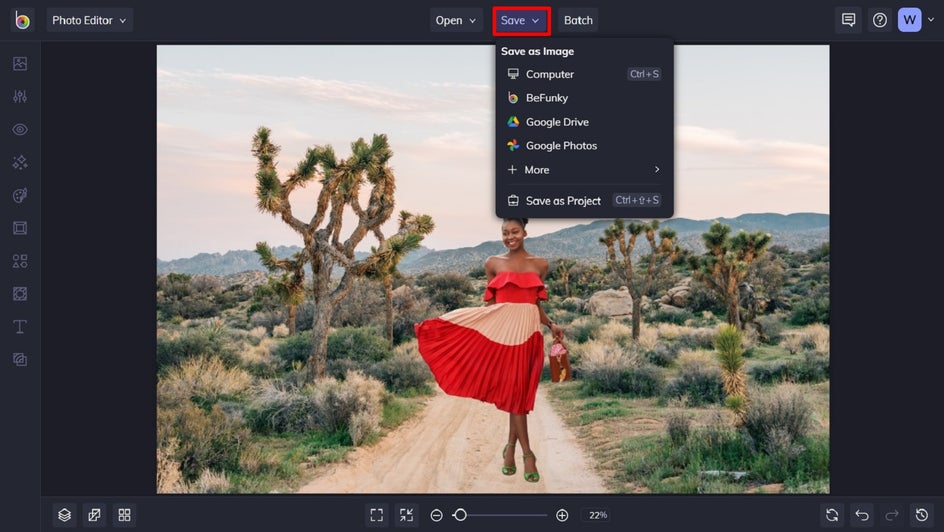
Click Save at the top of the screen, then select your desired save location.
If you’ve opted for a transparent background, be sure to save your image as a PNG to keep the background transparent instead of checkered.
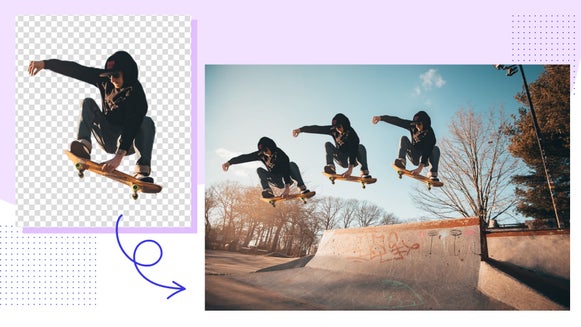
Background Remove: Final Result
The Background Remover isolates your subject and removes the background in a single click. How convenient!

How to Cut Out Objects With the Magic Brush
Before we take a closer look at the Magic Brush, let’s talk about the different brush options in the Cutout tool. Each brush provides a different approach for cutting out objects and backgrounds in your photos. You can see how they each work in the video below!
To summarize:
- Magic Brush erases the areas of your image that are alike in color to wherever the cross in the middle of your brush paints over
- Lasso lets you remove areas with freeform cutting
- Polygonal Lasso uses a series of lines that you connect to remove areas
- Circular allows you to cut out circular areas of your image
- Rectangular lets you cut out rectangular areas
- Erase allows you to paint over any area of your image to create transparency.
Ready to get started? Open your image in the Photo Editor, then navigate to the Cutout Tool within the Edit menu.
Step 1: Remove Any Extra Space
First, if there’s a lot of extra space in your image that you’d like to turn transparent, click on the Rectangular tool and make sure the Keep button is selected. Create a rectangle around your object and this will conveniently remove the background of the remainder of your image.
Click Apply to apply your changes.
Pro Tip: If you’ve accidentally erased part of the image you wanted to keep, you can click Undo or use the Reset button to start over completely.
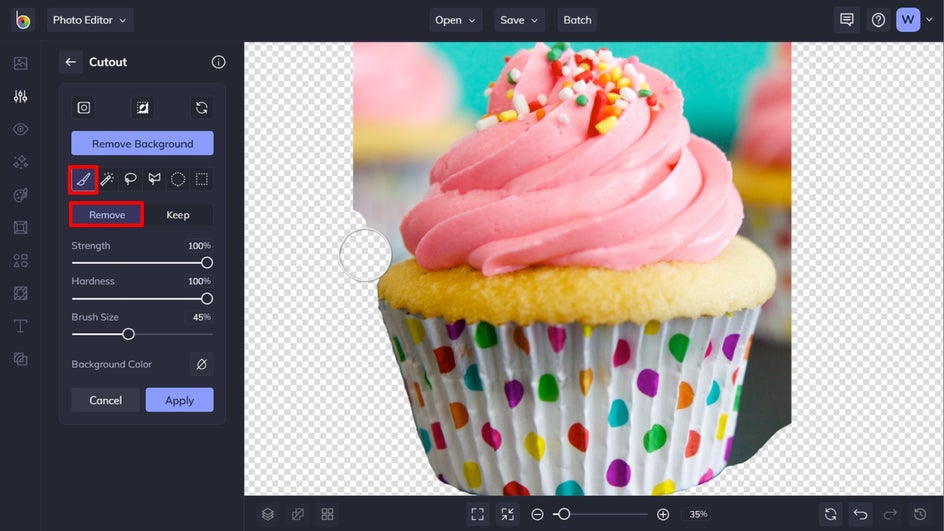
Step 2: Remove the Areas Around Your Object
Next, click the Remove button and choose the best brush for removing the rest of the background around your object. We’re using the Magic Brush because our object is organic in shape, plus it differs in color from the background imagery. Use the sliders to adjust the Tolerance and the Brush Size, then click and drag your mouse over the areas you wish to remove around your object.
Pro Tip: Increasing the Tolerance slider will include more of the color spectrum in your cutout selection, while less Tolerance will give you more agility when it comes to cutting out your object. Just keep in mind that any areas that come in contact with the cross in the center of your target will be removed, along with any areas containing the same colors within the target.
Once the outline of your object is transparent, you can continue removing the background of the remaining image. Here, we're using the Paint tool to quickly cut away the surrounding areas of the object.
Step 3: Apply Your Effects
When you’re finished using the Cutout tool, click Apply and a Cutout Options menu will appear. In the menu, you’re able to select Trim Transparency if you’d like to crop out any additional transparent space around your object. When you check this box, a preview will be shown on the left. Checking the Export as Layer box will also add your cutout selection to the Image Manager, and will automatically add your cutout selection as a layer on top of your original image.
Keeping the Export As Layer box unchecked will alter the original image on the canvas without adding a copy to the Image Manager. If you want a copy of it in the Image Manager, you can always right-click the image on the canvas and select Save to Image Manager. This way, you can add it as an image layer onto another image, design, or collage.
Step 4: Save Your Cutout Image
Once you’re happy with how your image looks, it’s time to save it. Click Save at the top of the screen, then select your desired save location. Be sure to select the PNG file option to ensure your image’s background remains transparent. Saving your cutout as a JPEG file, for example, will remove the transparency and make it white.

Magic Brush: Final Result
In just a few clicks, you can easily cut out shapes from your images!

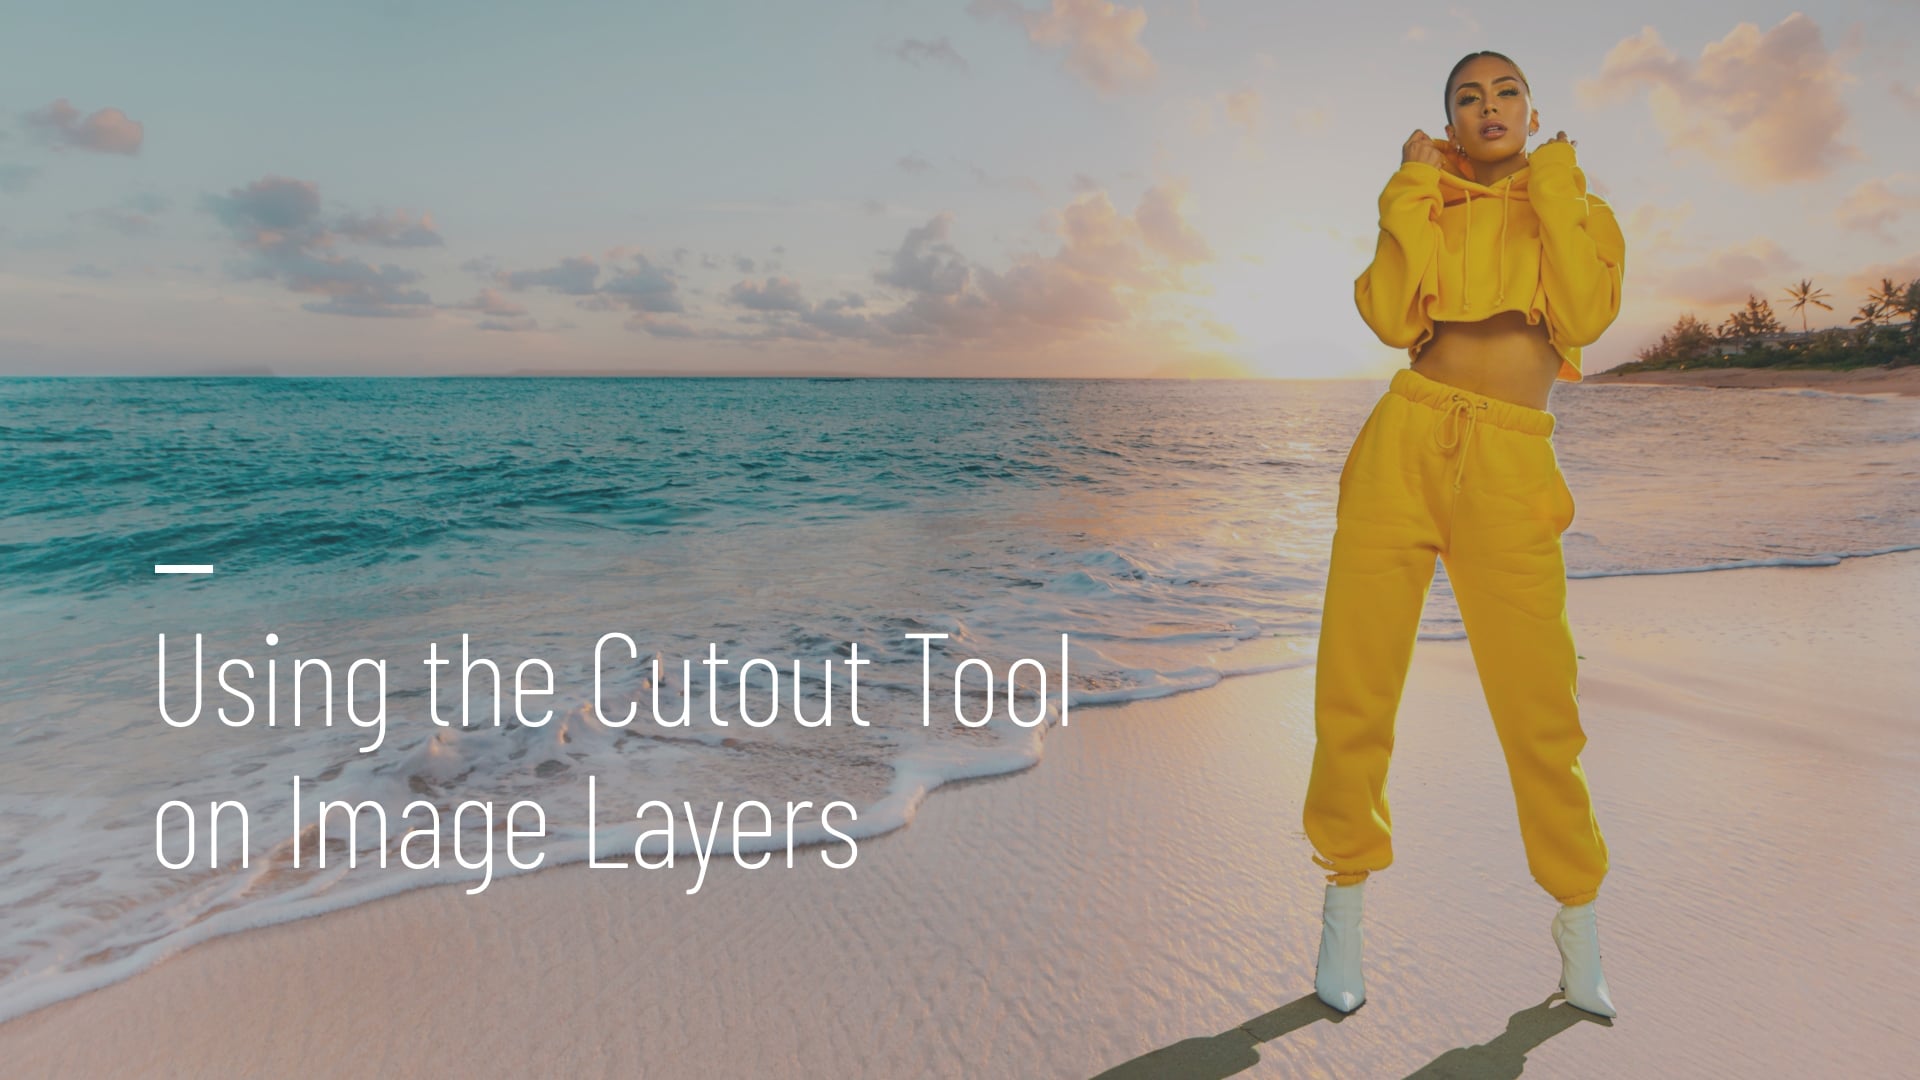
How to Use the Cutout Tool on Image Layers
You also have the option to use the Cutout tool on picture layers, in addition to using it as a standalone function! This allows you to add an image layer to a background photo or graphic design, then easily remove part of the image layer.
We'll demonstrate how to do this in the Photo Editor, but the procedure is the same in the Graphic Designer and Collage Maker too.
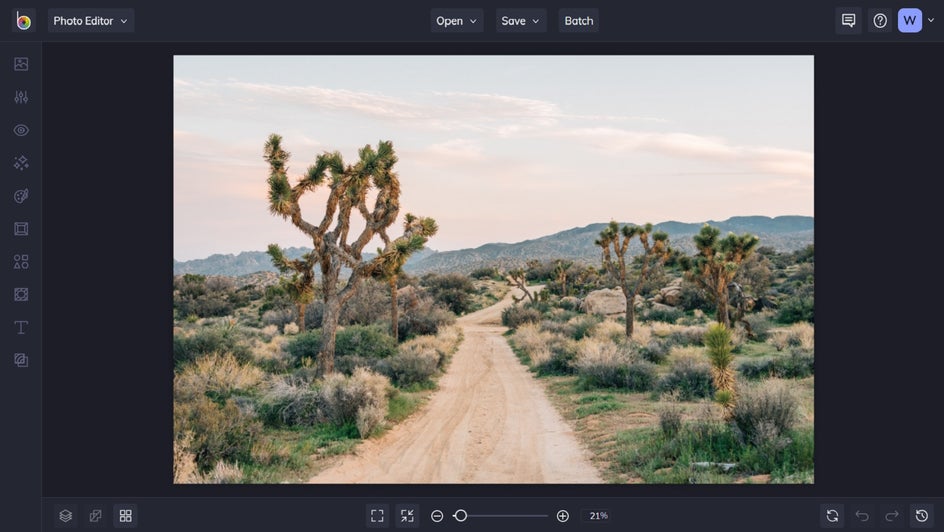
Step 1: Upload Your Background Image
To begin, open an image in the Photo Editor to use as your background.
Step 2: Upload Your Image Layer
Click on the Image Manager tab in the main menu on the left. Then, you’ll want to upload the image you wish to use as a layer on top of your background image. Simply click the Computer button to upload images from your computer, click the ... button to access images on your BeFunky account or Facebook page, or click the Search Stock Images button to access our library of over a million free stock photos to use as layers.
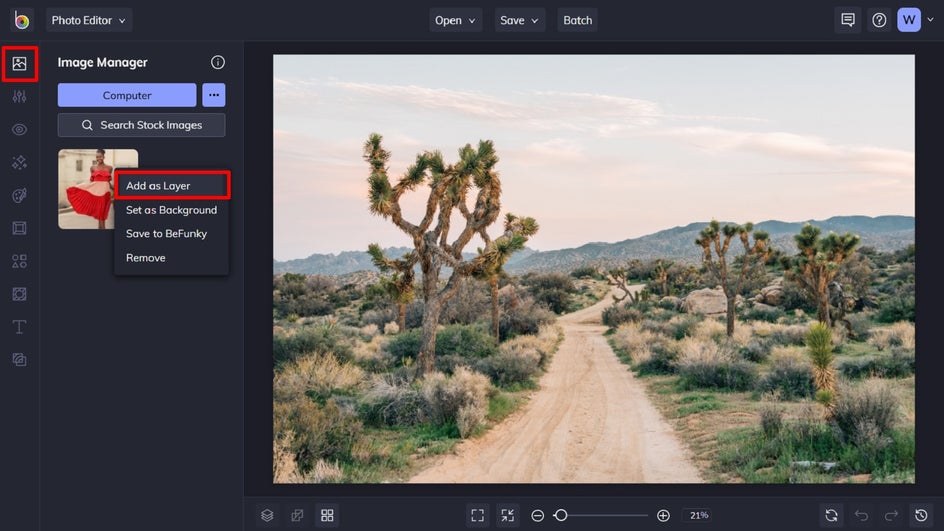
When your images are uploaded to the Image Manager, they’ll be available as thumbnails. Click on the thumbnail and select Add as Layer from the options that appear.
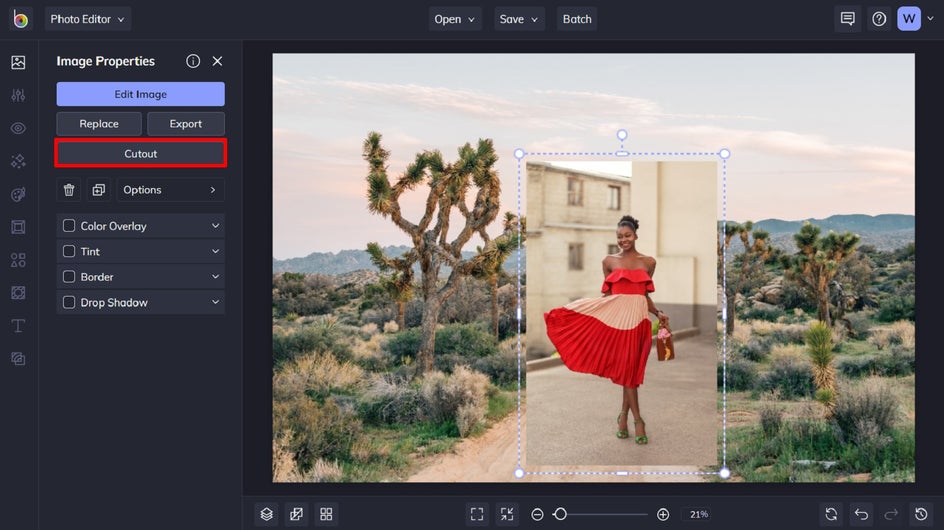
Step 3: Select Cutout
When your image layer has been added, ensure it is selected with your mouse, then click Cutout from the Image Properties menu that appears.
Step 4: Remove the Required Areas of Your Image
A Cutout toolbar will appear containing background removal options. To cut out your image layer with a brush, select the brush that most suits your needs and ensure the Remove button is selected. After adjusting brush options like Brush Size and Tolerance, use your mouse to paint around your subject and remove the background.
Alternatively, you can use the Remove Background button. Our Background Remover automatically detects the subject in your image and removes its surrounding background in just one click!
Step 5: Apply Your Changes
Once you’ve finished using the Cutout tool on your image layer, click the blue checkmark to apply your edits. From the Cutout Options menu that appears, you can select Trim Transparency to crop the additional transparent areas around your cutout, or Export As Layer, which creates a new layer with your cutout selection and keeps the original image layer intact.
Step 6: Resize and Reposition Your Layer Image
To reposition your cutout layer on your background image, click and drag it around using your mouse. When you’ve achieved the perfect placement, click the Flatten Layers button at the bottom of the screen to “glue” it down onto your background image. Once you click Flatten Layers, your cutout layer will no longer be moveable. You can, however, click the Undo button to remove this action (if you need to).
Step 7: Save Your Final Image
Once you’re happy with your final image, click Save at the top of the screen. Then, select your desired save location.
Cutout Tool: Final Result
With BeFunky, adding cut out image layers to a background photo has never been easier.

The Quick and Easy Way to Remove Backgrounds From Images Online
Whether you want to create transparent backgrounds, solid-colored backgrounds, or erase portions of your image layers, the Cutout tool is your new go-to! Ready to try out the Cutout tool for yourself? Click the link below to get started!