The Secret to Success on VRBO

VRBO might be Airbnb’s older, less popular cousin, but that doesn’t mean the vacation rental website isn’t worth your time. It was one of the first companies to help homeowners promote their rental homes online and 26 years later, it’s still going strong. VRBO is home to over 2 million listings available across 190 countries, making it an important platform for anyone wanting to successfully rent out their home, condo, cabin, or castle – just to name a few.
Now, you might be thinking: what separates the booked-out vacation rental properties on VRBO from those that can’t gain any traction? It all comes down to one thing: photos. But not just the way you capture your photos – also how you edit them too. Thankfully, our Photo Editor's DLX Effects will have you banishing the bland and creating high-quality photos for VRBO that’ll have viewers clicking 'Book Now.' Keep reading to find out how!
VRBO Photo Requirements
We’ve all heard the saying, “a picture is worth a thousand words," and this couldn’t be truer when you’re showcasing a vacation rental property. Your photos will be the first thing that a prospective guest will see, so you’ll need to wow them from the very start!
The average person’s attention span is just 8 seconds, so every second that a person is viewing your listing counts. It might sound close to impossible, but there are a few ways that you can achieve this.
1. Upload more than 20 listing photos
A study found that travelers are 83% more likely to inquire about property listings that contain over 20 photos. Luckily, VRBO lets users upload up to 50 photos per listing, so you’ll want to use this feature to your advantage.
2. Meet VRBO’s photo requirements
The platform recommends uploading photos that are 3840 x 2160 pixels or higher for the best quality. The minimum size of photo required is 1024 x 683 pixels. Files should be in formatted as a JPG, JPEG, PNG, or GIF. Additionally, each file size shouldn’t exceed 20MB.
3. Use landscape orientation
Keep in mind that you also want your photos to be in landscape orientation, as many of the devices your audience uses are optimized to show wider images best. (Even if it means rotating their phone sideways!) Landscape images also maximize what you can display, allowing potential guests to see more of your property in a single image.
The Golden Rules of VRBO Photography
We understand there are so many things to photograph to represent your property, and knowing what to capture can be tricky! If you remember the following golden rules, you’re halfway on the road to success.
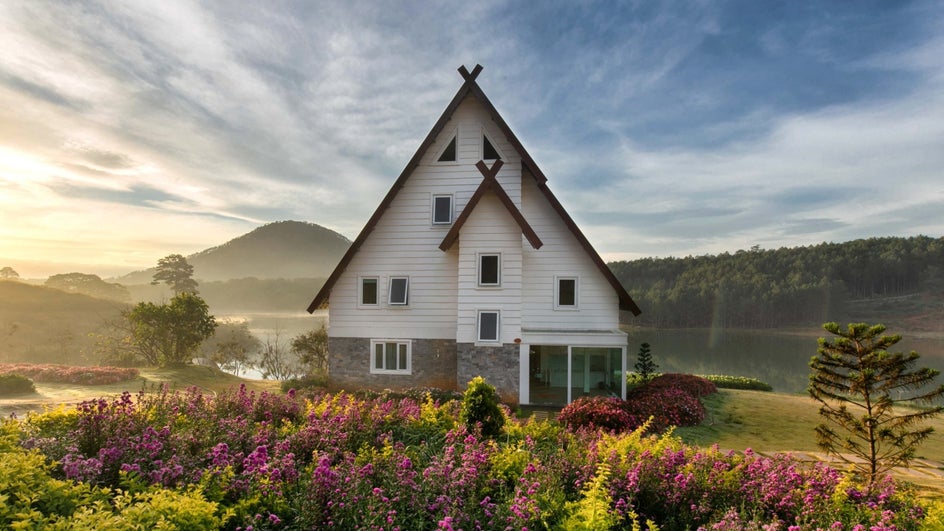
1. Highlight what makes your property unique
Is it a glittering water view from the kitchen window, or perhaps a quaint garden that’s perfect for a morning coffee? Whatever your one-of-a-kind selling point is, be sure to capture it fittingly through your photos.
2. Embrace natural lighting
You’ll also want to photograph your property in its best light. Literally. Shoot during the 'golden hour' – either an hour after sunrise or an hour before sunset, as this bounty of natural light will create brighter and warmer photos.
3. Get the most flattering angle
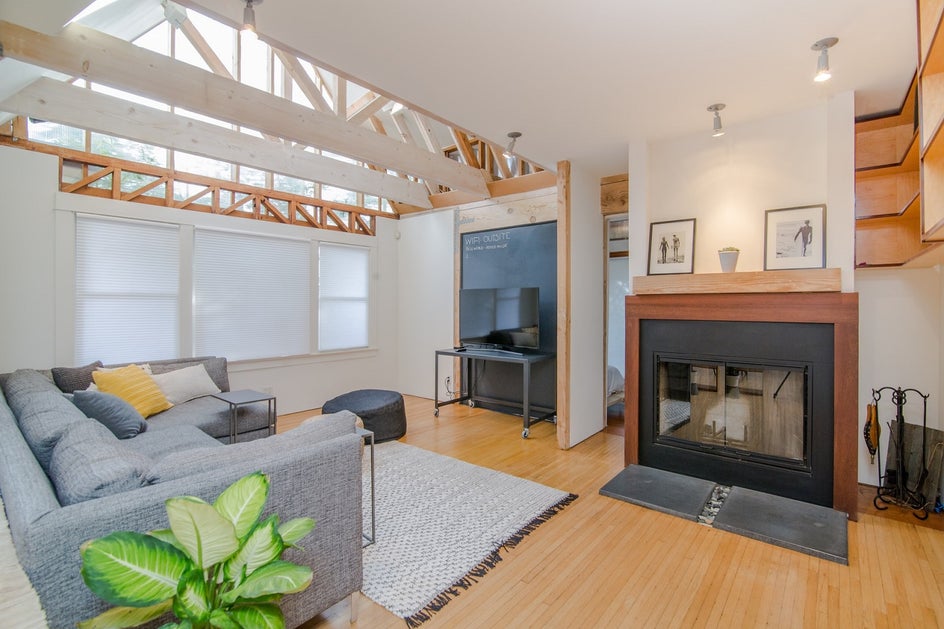
Did you know you can add the illusion of greater width and depth to your rooms by photographing them from a corner? This perspective showcases the space from its most flattering angle. Professional real estate photographers have been using this trick for decades!
4. Keep your property front and center
Listings with a photo of the property’s front exterior also tend to perform better, as they give potential guests a more wholesome idea of the property, along with where it’s situated in relation to its neighbors.
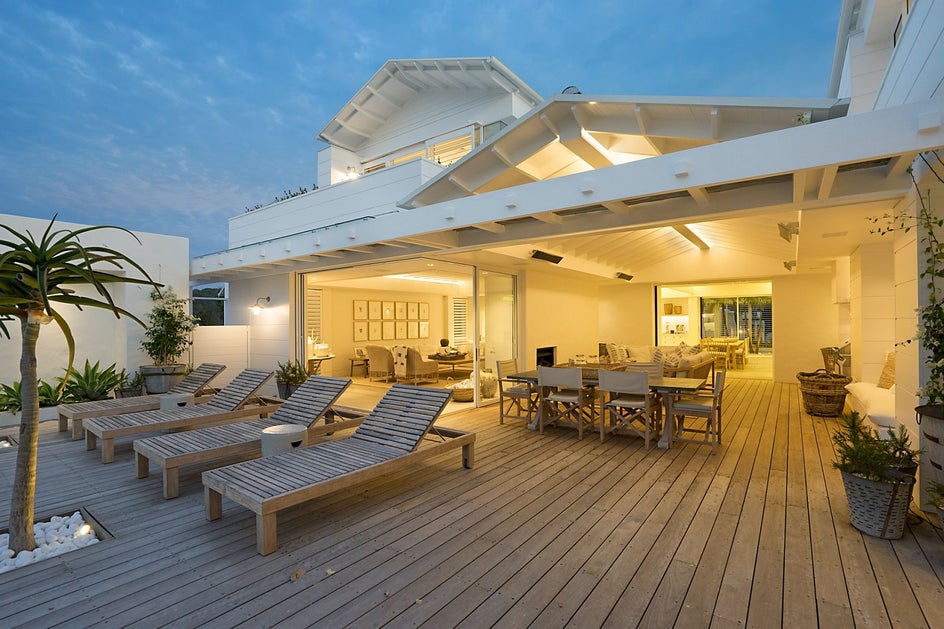
5. Capture the lifestyle
Lastly, don’t forget to capture images that are inviting to your viewers. Think about the scenarios that they’d love to be in and communicate these through your photos. For example, a shot of a bubbling spa with a towel perched nearby not only showcases a unique feature of the vacation rental, but also helps potential guests visualize themselves in this environment. How can they resist?
How to Use BeFunky’s Photo Editor to Edit Your VRBO Photos
When you've got your VRBO photos ready, just head to BeFunky's Photo Editor and upload the photo using the Open tab or by dragging and dropping the image into the interface.
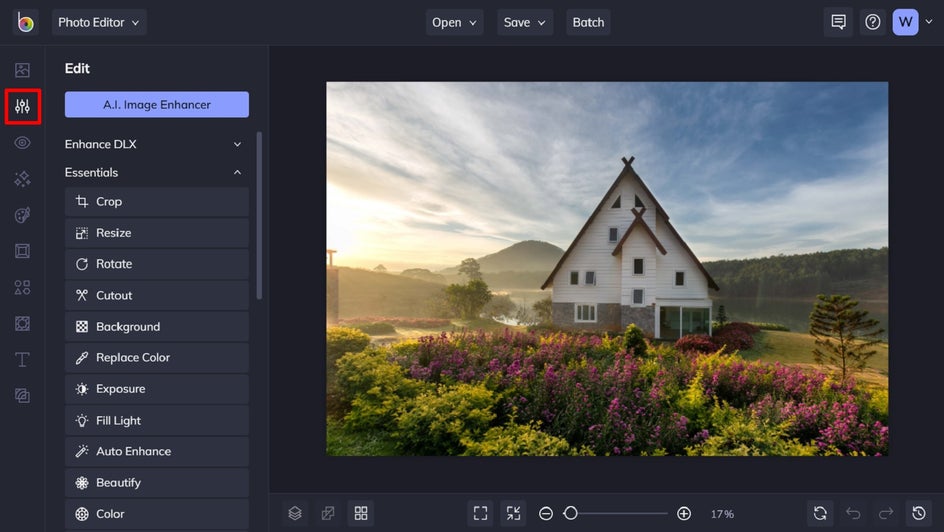
Step 1: Navigate to the Edit Menu
This is the section where you’ll find all of the tools relevant to perfecting your VRBO listing photos.
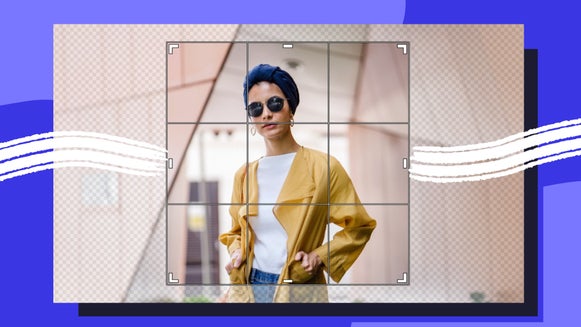
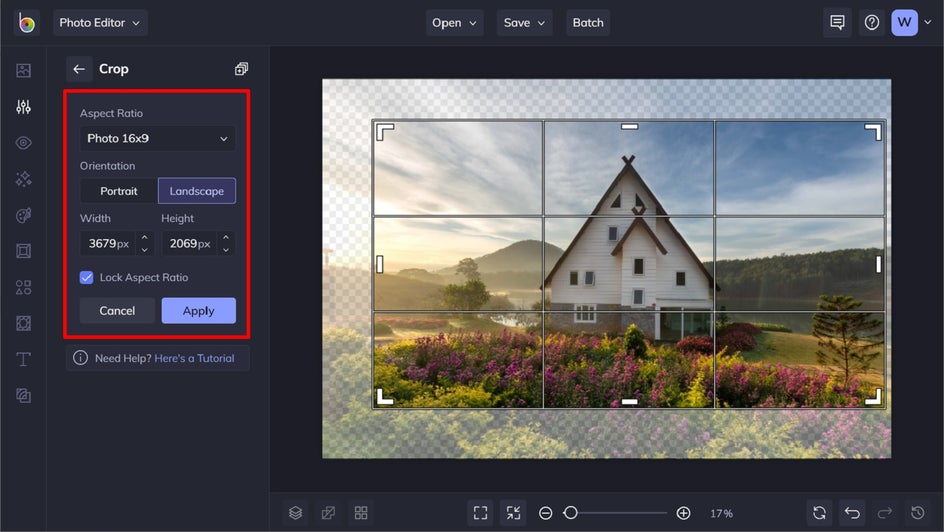
Step 2: Crop Your Photo
VRBO recommends uploading images measuring at least 1920x1080 pixels, but most cameras don’t capture photos at 16x9. This means no matter how great your photo looks, chances are you’re still going to have to get your crop on.
You’ll find Crop located in the Edit menu, underneath Essentials. Select Photo 16x9 in the options underneath Aspect Ratio, followed by Landscape underneath Orientation. Simply reposition the crop selection by clicking on it and dragging it into place. To make the crop selection larger or smaller, click and drag its outer corners, ensuring Lock Aspect Ratio remains checked. Once you’re happy with your edits, just click the blue Apply button.
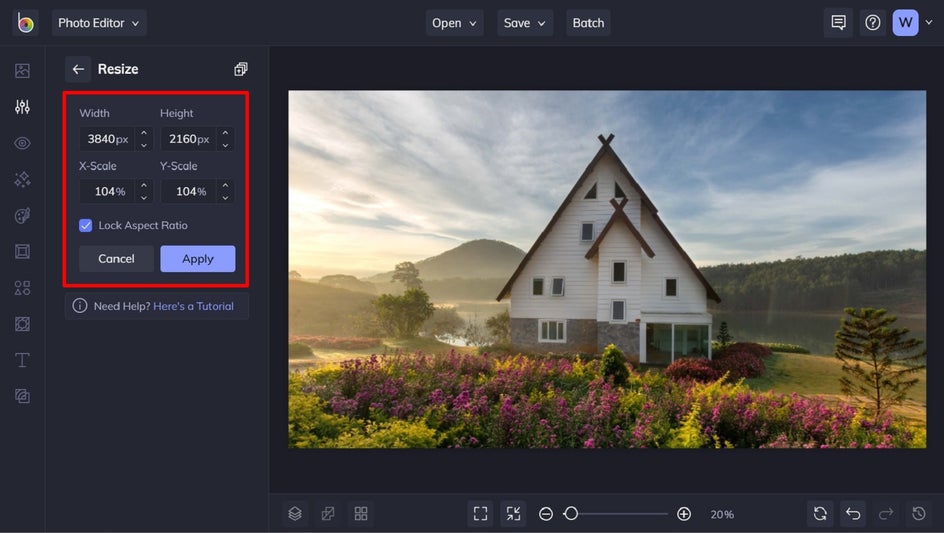
Step 3: Resize Your Photo
After cropping your image to the 16x9 ratio, resizing to the ideal measurements for VRBO should now be a breeze!
You’ll find the Resize tool in the Edit menu, located underneath the Crop tool in Essentials. You can then enter your desired measurements into the Width and Height section or use the up and down arrows to adjust. Ensure the Lock Aspect Ratio is checked, as it alters the height and width in relation to one another, ensuring your image keeps its proportions. Then, click the blue Apply button.
Remember, the minimum size of photo required for upload is 1024 x 683 pixels, but VRBO recommends photos that are 3840 x 2160 pixels or higher for the best quality.
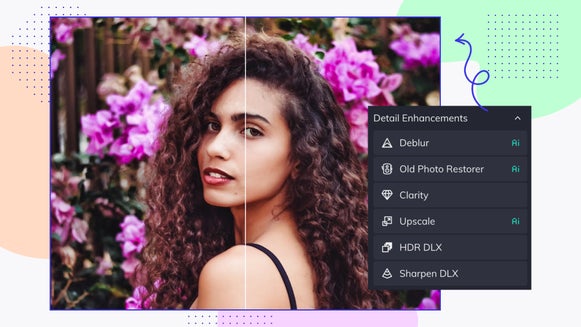
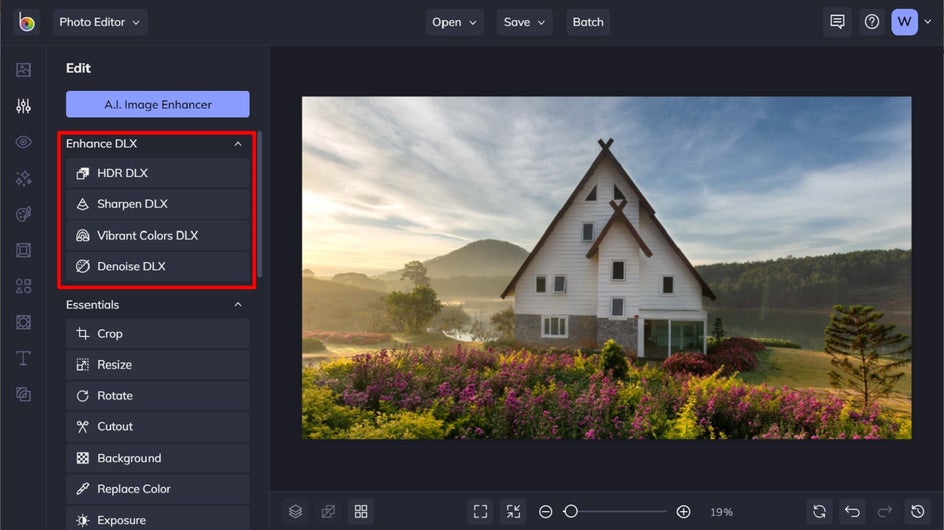
Step 4: Choose an Enhance DLX Effect
Are your property photos undersaturated, oversaturated, lacking detail, or low-lit? Forget expensive software – there’s now an Enhance DLX Effect to fix every one of those issues! In the Photo Editor, you’ll find these effects at the top of the Edit menu, underneath the A.I. Image Enhancer button.
- HDR DLX is perfect for positively enhancing any photo, as the effect closely examines the light and dark sections of the image to even out contrast and brightness, while adding additional sharpness for a true masterpiece.
- Sharpen DLX is so intelligent that it can sense the edges in your image, knowing to avoid sharpening near-flat areas and very sharp edges. This gives your photo a new level of contrast and clarity that catches the eye, without combating unwanted graininess and halo effects which are commonly seen when an image is sharpened beyond its capabilities.
- Vibrant Colors DLX is perfect for making the colors in your photo 'pop' – without becoming oversaturated of course. Many interior photos often feel flat due to poor lighting and this tool is the perfect way to bring new life to colors that may otherwise go unnoticed.
- Denoise DLX fixes the unwanted graininess or discoloration experienced when you shoot in a low-lit environment (such as an indoor space) or when you capture a uniform color (like a blue sea). Using a special noise reduction algorithm, it instantly assesses which parts of the image require fixing.
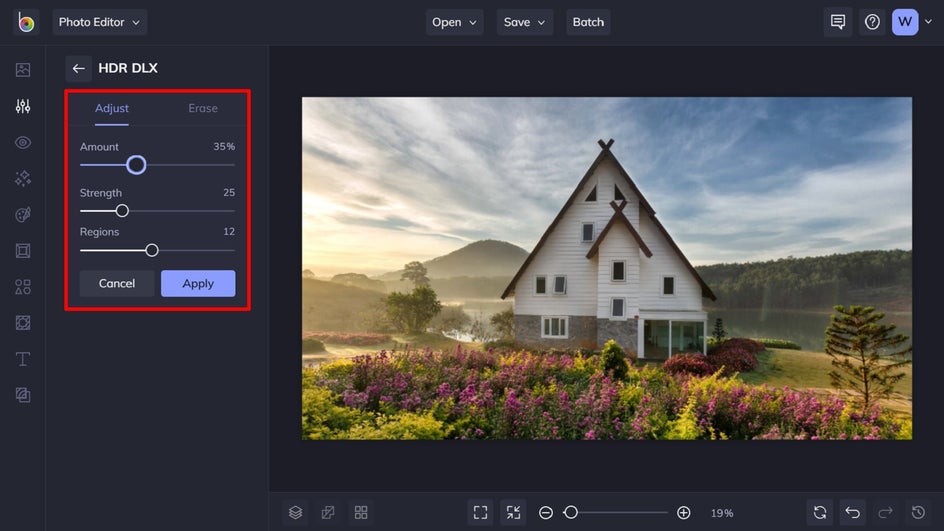
Step 5: Adjust and Apply Your Desired DLX Effect
Click on the DLX effect you wish to apply and alter elements such as Amount, Strength, Smoothness, and more, if desired. When you're satisfied with the outcome, click the blue Apply button.
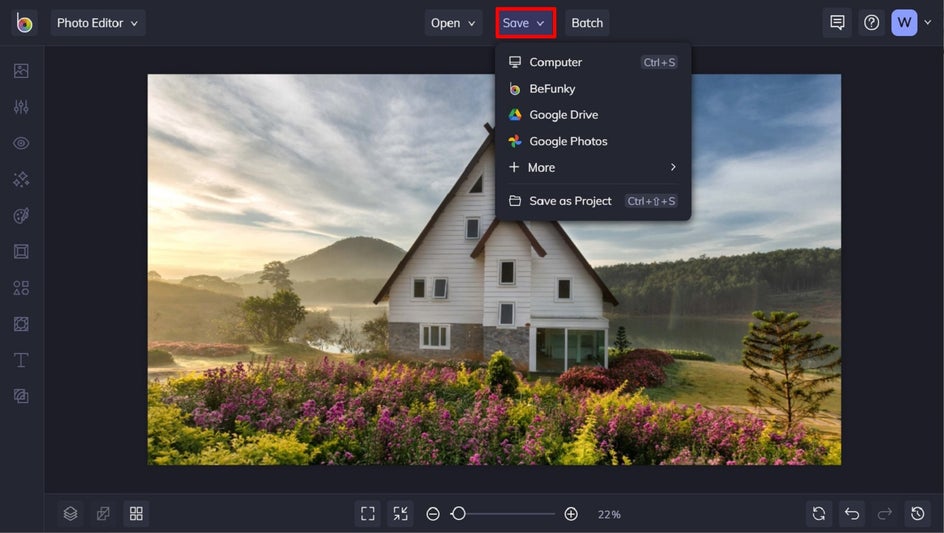
Step 6: Save Your Photo
Finally, all that’s left to do is click Save at the top of the screen and select your desired save location and format!
Achieve Professional Photos for VRBO
While knowing what to photograph plays an important role in creating a successful listing, it’s the editing process of these photos that allows you to take your VRBO property to a whole new (and booked-out) level.
Thankfully, BeFunky’s Photo Editor makes this simple with easy-to-use tools and the groundbreaking Enhance DLX effects. They’re one-click wonders! Try these for yourself today and see just how much they can boost your VRBO listing’s success.