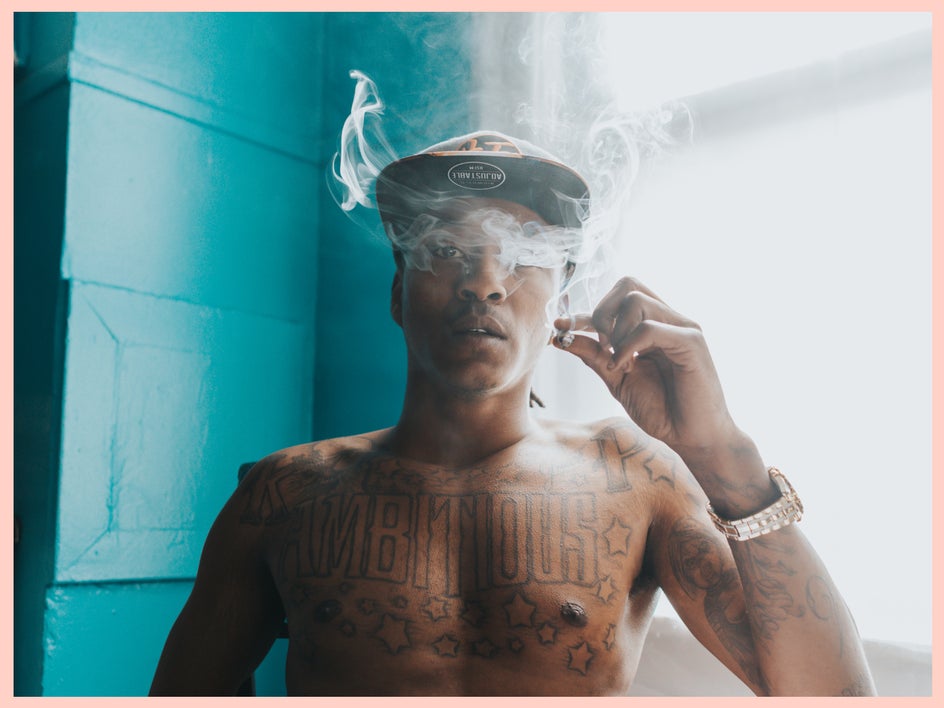
Little-Known Tips to Capture Personality in Portrait Photography
We’ve all been there; you take someone’s photo and it turns out looking nothing like them – the pose is all wrong, their expression is flat, and they immediately exclaim, “delete that one!” – cue the retakes. The thing is, without properly directing your model, even the prettiest person can look unattractive in photos.
On the flip side of the camera, when you are getting your portrait taken, it can be an incredibly vulnerable situation. Most of the time when I am getting ready to photograph someone, they tell me that they don’t know what to do with their body, to which I promptly respond, “As your photographer, it’s my job to direct you. You just breathe and I will let you know what to do.” We then have a conversation about how they have never experienced a photographer who directed them.
Photographers, it is your job to know someone’s body, their good and bad angles, and be able to position them so that they are comfortable and look natural and un-posed. This is called directing. Being a photographer is more than just going on shoots and pushing a button.
If you want to learn how to take better photos as a photographer, take a look at these suggestions below and adopt them into your photographer toolbox. We’ll show you how to capture your subject’s personality and create dynamic portraits, plus how to enhance them with BeFunky’s selection of Touch Up tools! Let’s get started.
5 Tips for Capturing Personality In Your Portraits
If you want to enhance your subject’s personality and produce dynamic portraits, you need natural movement, genuine laughter, and true facial expressions. As a photographer, the only way to achieve that is by making your subject feel comfortable, directing the photoshoot well, and using your camera lens to discover their best features. Simply telling your subject where to stand or sit will make your photos look just like that; posed and uninteresting.
Here are some of our favorite ways to break the ice, create compelling portraits, and above all, capture your subject’s personality:
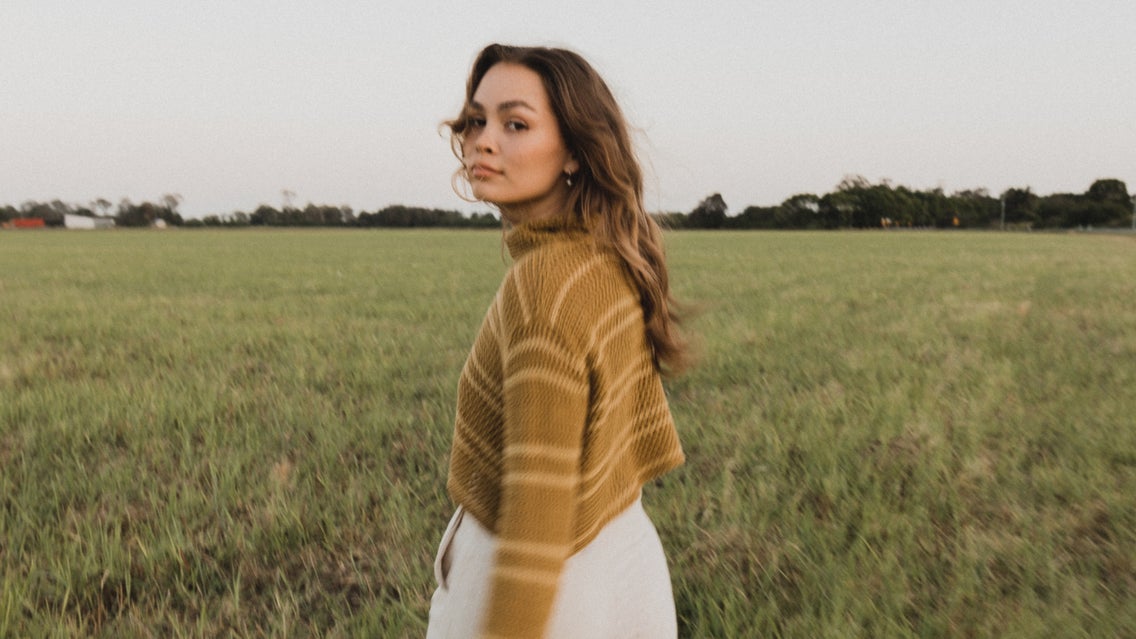
1. Create Movement
You can start small, but get your subject moving. Give them a prompt like moving their arms above their head and back down to their waist or have them walk from one side of the frame to the other, taking photos the entire time. This way, you’ll be able to capture the in-between shots that add candid movement. Using this method will make your photos look natural, plus your subject will get more comfortable in front of the camera as they move around the frame.

To take things a step beyond, ask your model if they want to listen to some music. Before you arrive at your photoshoot, make a playlist of some tracks that fit the overall vibe you’re going for. Playing some tunes on your phone can really help people loosen up.
2. Provoke Genuine Laughter
Capturing natural laughter is a tool you want in your toolbox. Nothing is worse than telling your subjects something like, “Okay, we are laughing. Pretend I am funny, Ha-Ha-Ha.” When I used to follow professional photographers in my early years, this is how they would “direct” – it was as painful as it reads.
Tell your subject to do something that’s actually funny, like whisper the name of a vegetable in their sexiest voice. If you have one, tell them about a funny situation that you had on a previous shoot with a similar shot or pose (just keep your previous client’s embarrassment confidential!), or something hilarious that recently happened to you. It’s the perfect way to break the barrier that cameras can often create between photographer and subject.

Most of the time you can get your subject laughing from the poses you ask them to do. When photographing men, one of the directions I give is, “Look down at your hands and pretend that you are washing them.” Even saying things like, “This might feel really awkward, but I promise you don’t look like you’re actually washing your hands. I forgot to tell you these photos are going to be an ad for antibacterial hand soap.” The candid laughter you produce is exactly what you’re going for, so continue to take photos as they respond.
3. Read Up On Body Language
Even if you’re taking someone’s headshots, it’s important to find out a little bit about them and their personality. If they are someone who is very poised and preppy, you probably are not going to want them to take photos that are hunched over or look grungy. Make sure that the way you are posing them fits their personality.
Research different poses before your photoshoot and save some of these to your phone if you need a reminder for your shoot. For example, crossing your arms in front of you with your chin propped up can make someone look more powerful, or loosely crossing your arms with both hands visible can make someone look relaxed. These small nuances can help your portraits come to life.
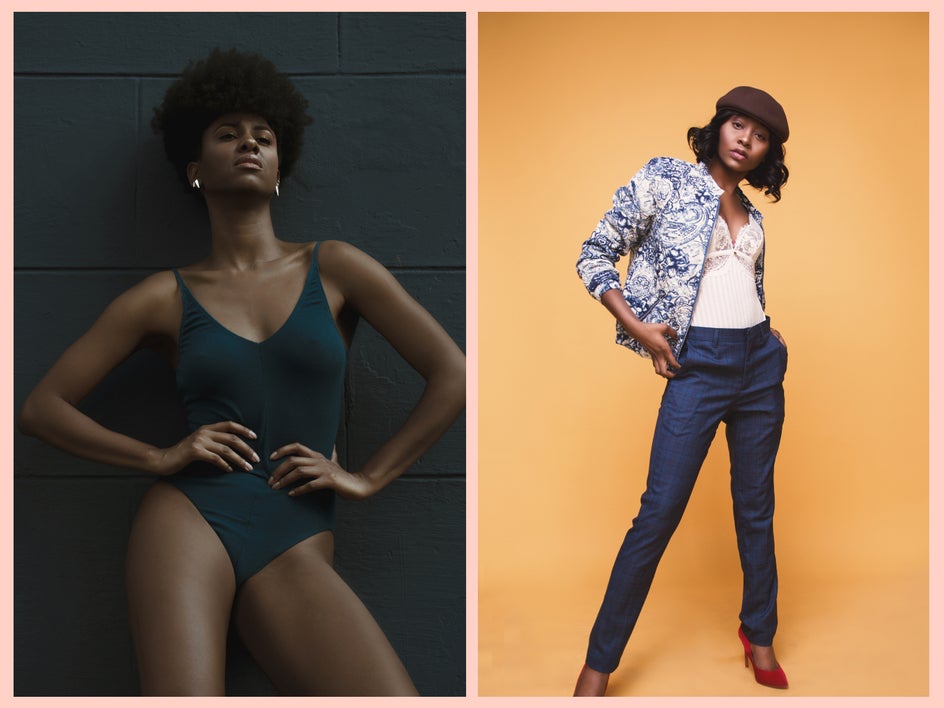
4. Discover Your Subject’s Best Angles
Everyone has good and bad angles, your job is to find them. Depending on how someone positions their body towards you, the person can look thinner or curvier. If you are trying to make someone look curvier, have them stick out their hips or sit with their thighs squished against a chair. If you are wanting them to look slimmer, have them separate their legs or stand on the balls of their feet and bend one knee.
For headshots, chin definition is key for both men and women. Finding defined angles helps create shadow and definition. Although it may feel weird to your model, telling them to stick their neck out or forward can dramatically change their posture for the better. Don’t be afraid to tell someone to tilt their chin up or down slightly a few times in a row. Be candid and communicate what is and isn’t working for them. I have found that the more honest I am to my subject, trust begins to develop and they end up relaxing their body in front of me. Also, most people don’t know their good or bad angles and they really appreciate it when you tell them. A simple, “Hm, that pose isn’t working, let’s try this.”
Tip: Be mindful of your own angles as well when shooting! I used to be so self-conscious about looking like a fool when I was a photographer, but good photographers look like fools. This means that if you need to lie on the ground in public, climb on top of something, cross the street, or hold a squat – do it. Get lower to the ground and shoot up at your subject, stand on a stool and shoot down, bend at the waist if your subject is shorter. A good photographer will be moving around and getting right into the shoot with their subject.
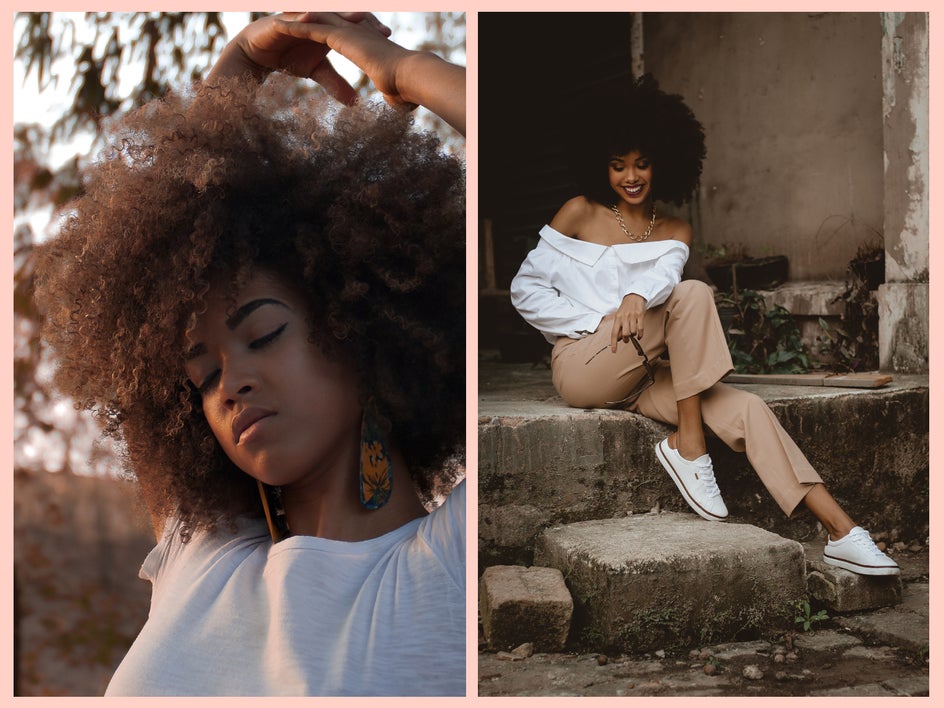
5. Set the Scene
Tell your subject the emotion you want them to portray by describing a scene to them. If you want them to look happy, rather than say, “look happy,” tell them to imagine walking around an amusement park with their friends in the summertime. Paint the scene for them. Once you create the scene, you can then direct their body language.
Once you have your photo session complete, it is time for some editing! BeFunky’s Photo Editor makes it easy to tweak and fix your images. So many people will tell you upfront that they have a giant blemish on their forehead or that they are looking really tired that day. Put them at ease during the shoot and assure them that they look good. Remind them that tweaks to blemishes and the like can be made possible during editing and to just have fun during the session.
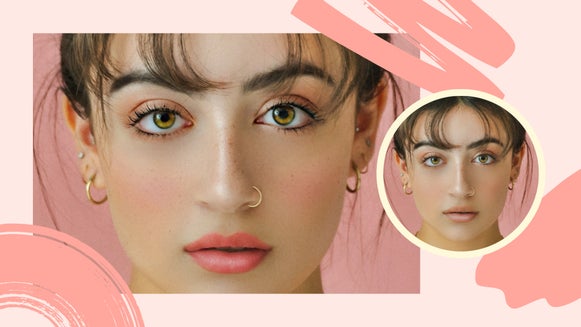
Touch-Up Tools for Editing Portrait Photography
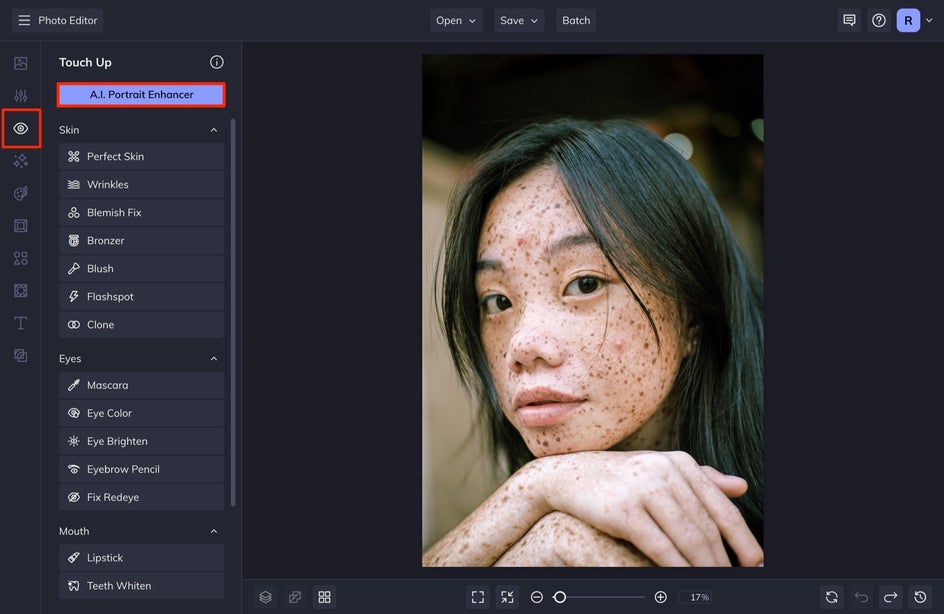
Once you’ve nailed your photoshoot and have some personality-filled shots, upload one into BeFunky’s Photo Editor. You’ll find a huge library of editing tools and effects. To enhance your subject, select the Touch Up tab from the menu on the left. Here you can find all the Touch Up tools you need to erase blemishes, whiten teeth, brighten eyes and more!
Enhance In Seconds With the Power of A.I.
Before you get into the details, try using the Portrait Enhancer to see instant results. This tool uses the power of A.I. to correct exposure, balance color, and more to enhance your subject's best features.
Achieve a Clear Complexion
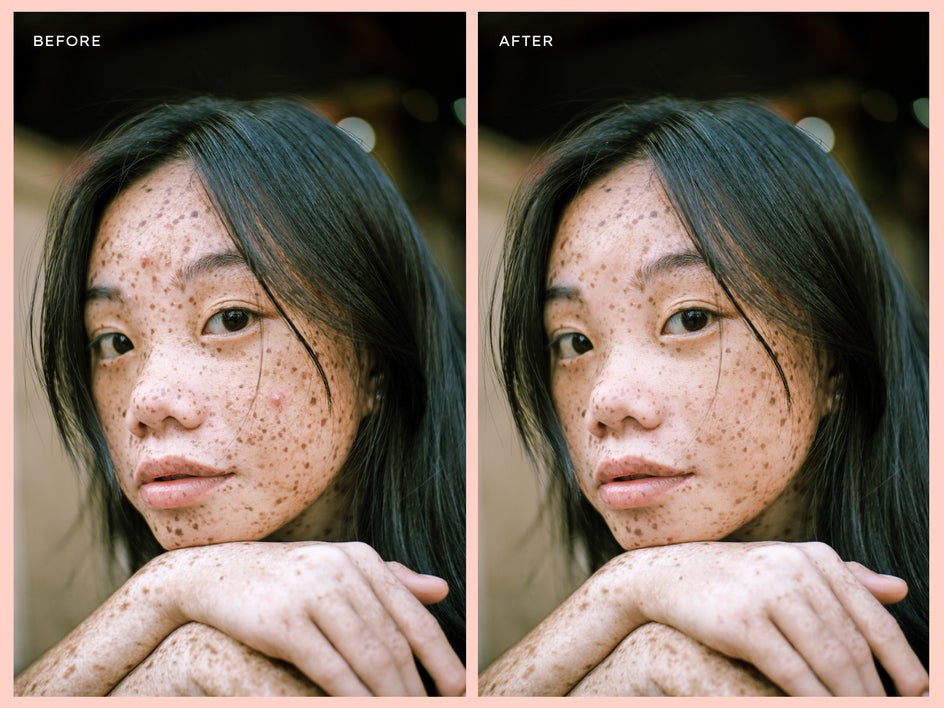
One of the best tools to start with is the Perfect Skin Tool. It’s a really intuitive tool, as it erases blemishes while maintaining the skin’s natural texture. That means blemishes, wrinkles, scars, and dark circles are eliminated without making your model’s complexion look unnaturally airbrushed!
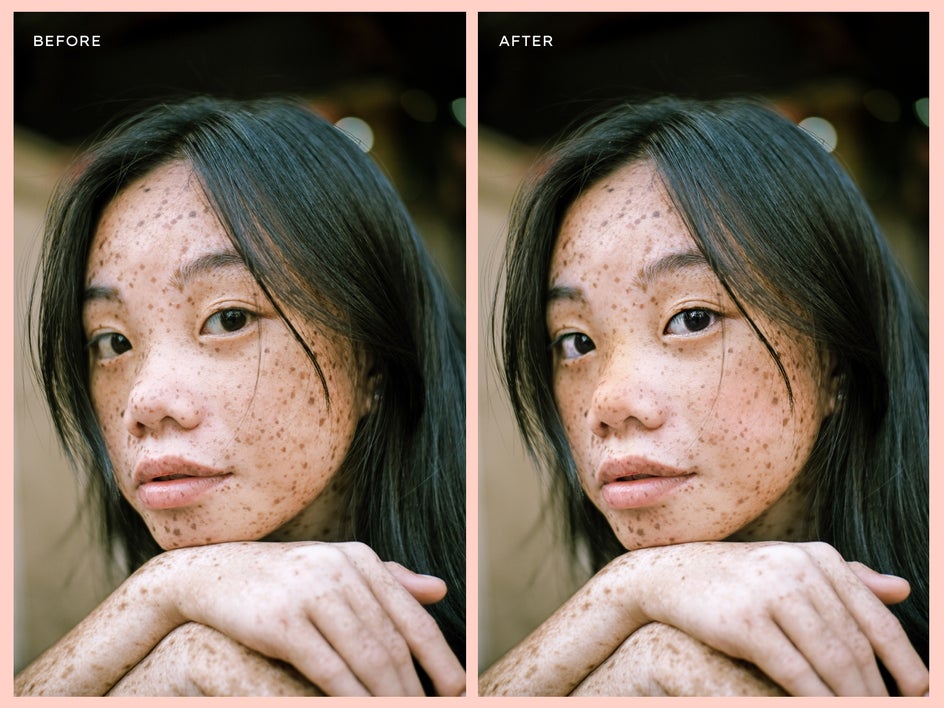
Pro Tip: Make sure you don’t remove aspects of the person’s skin that makes them unique. Unless they ask, don’t airbrush out freckles, moles, or birthmarks.
You’ll find the Perfect Skin Tool at the top of the Touch Up tab. When you click on it, it will analyze your model’s skin before presenting you with a paintbrush. Simply click and drag to paint the Perfect Skin Tool over the model’s skin, making sure you avoid the finer details of the eyes, eyebrows, nose and mouth. This is a great tool for smoothing over texture, without erasing distinguishing features like freckles and such.
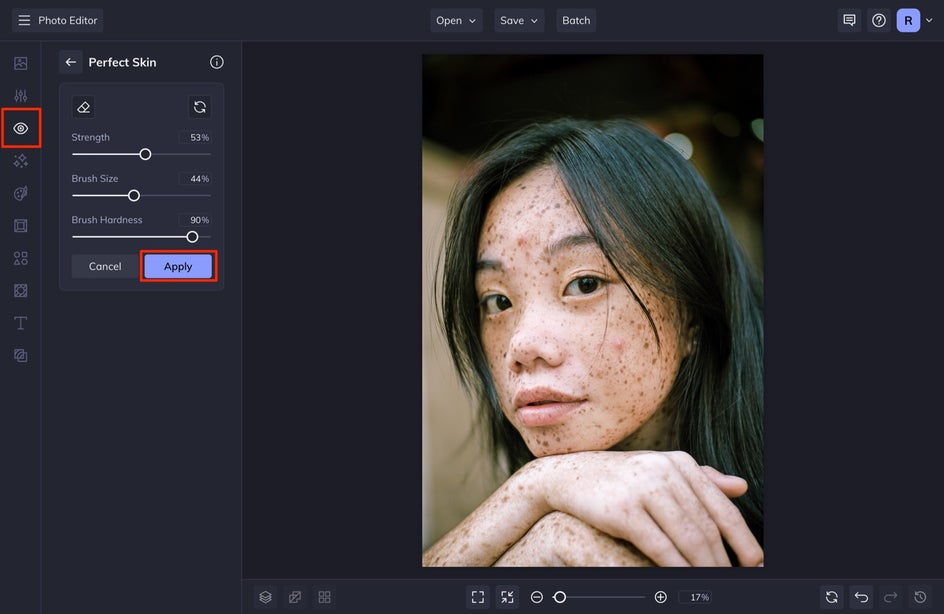
You can use the sliding scales on the left to adjust the strength, brush size, and brush hardness. Once the portrait is looking just right, click Apply. To see a quick before and after, press the ‘o’ button on your keyboard (‘o’ stands for original) to see how the Perfect Skin tool has enhanced your photo.
If you have a subject with large blemishes, the Clone tool is going to be your best friend. Simply select Source Selection or hold down Command/Control on your keyboard and select a part of your subject's face that is relatively close to the blemish, but not on the blemish itself. This will copy the part of the face you select. After this, click on the blemish itself and you will see it vanish. I typically do several small clicks around this area, as it helps to blend everything together.
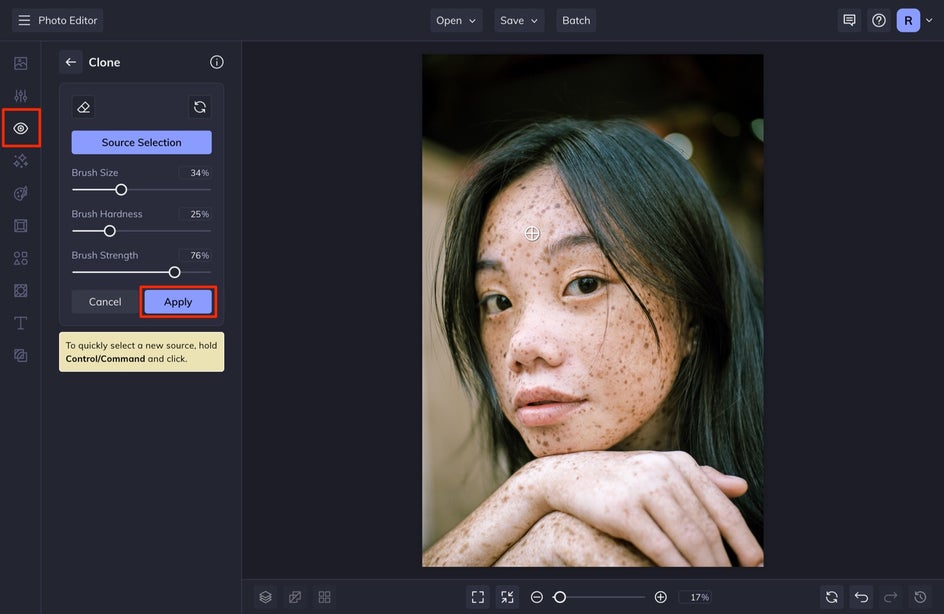
You can adjust the Brush Size, Brush Hardness, and Brush Strength in the Clone Menu. Hardness is how hard the line is around the diameter of the circle. If you increase this, you will see a harsher definition of the circular shape. If you keep this low, it will look feathered – which I prefer!
Enhance the Eyes
Having eyes that are in focus is one of the keys to taking great portraits. In the photo editing process, it’s important to make sure that your subject's eyes are clear – but you want to make sure it is subtle or else your subject will look too cartoonish.
The Eye Brighten tool does just what its name suggests; brightens the white part of the eyes and makes your subject look awake. You’ll find it in the Eyes section of the Touch Up tab, and once you click on it, you’ll be presented with a paint brush. Click and drag it over the eyeballs and be amazed at how it helps define your subject’s eyes!

You can use the sliding scales on the left to adjust the brush size and hardness. If your subject has particularly discolored eyes, whether from staying up too late or otherwise, an increase in brush hardness should do just the trick. When you’re finished, click Apply.
Another great tool in the Eye department is the Mascara tool. Using it on your subject’s eyelashes will help add contrast to the eyes and make them look extra-intriguing.
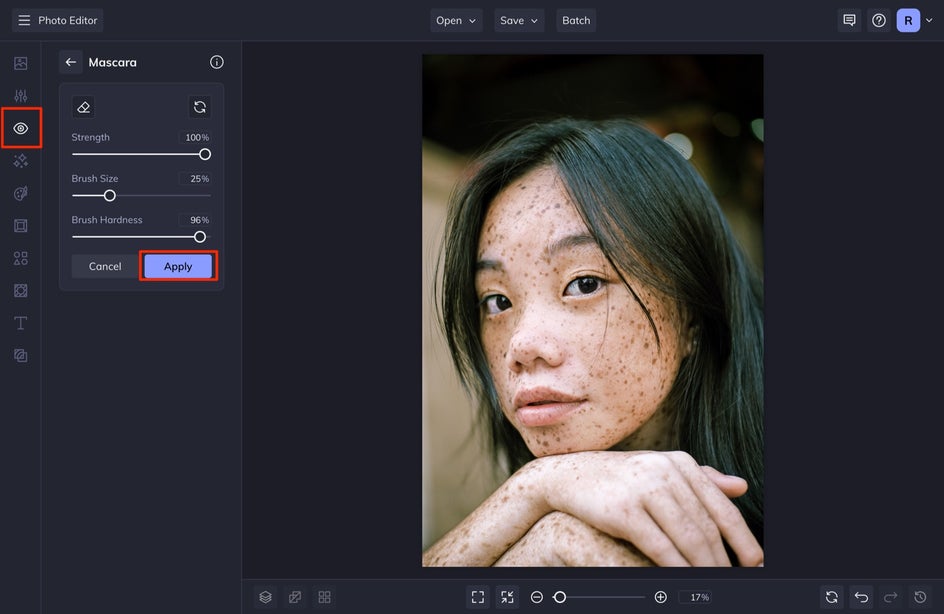
The brush you’re presented with when you click on Mascara can be used to slightly darken and define eyelashes. Click and drag it over the eyelashes, using the sliding scales on the left to adjust brush size and hardness.
Add Dimension With Bronzer and Blush
Contouring is now a staple in the beauty industry. You can use these same tricks when editing. Contouring describes the use of makeup to create highlights and shadows on the face to define cheekbones, slim the bridge of the nose, and so on. In the past year, blush has also become quite popular to bring back a youthful glow to the skin. With the help of the Bronzer and Blush tools, you can create the same subtle definition in your portraits, which is super helpful if any of the previous edits caused your subject’s face to look flat and undefined.
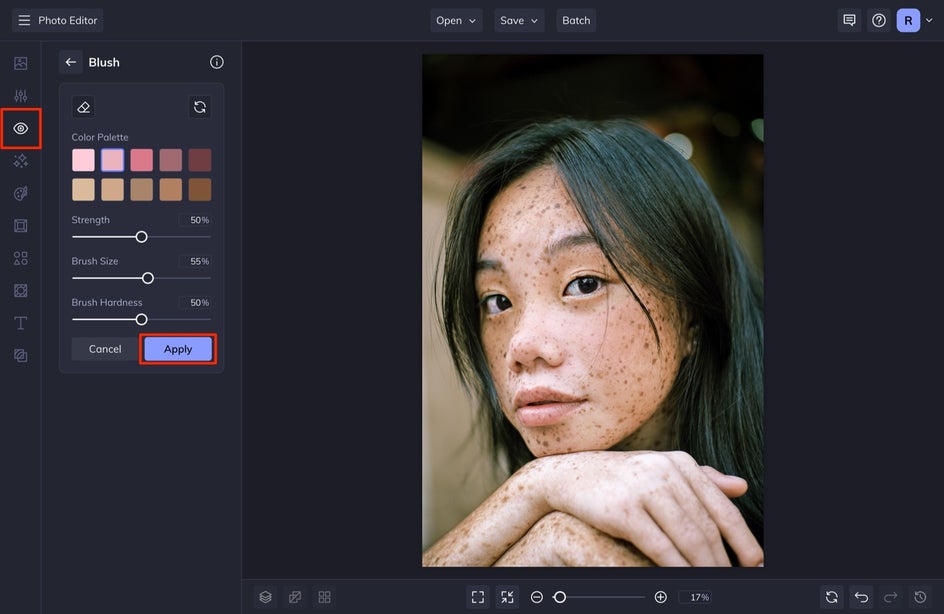
When you’re using the Bronzer tool, choose a color that is a shade or two darker than the subject’s skin tone and decrease the brush hardness. When you contour, you want to stay near the outer corners of the face, under the cheekbones, and on the side of the nose. For blush, you can choose to apply it only on the apples of the cheek, on the high points of the cheekbones to create a chiseled look, or from the top of the cheeks over to the bridge of the nose for a youthful glow. See how just a few Touch Up tools can enhance your portrait photography without going overboard?
Apply Any Other Cosmetic Adjustments
If you want to take your portraits a step further you can use Teeth Whiten, Lipstick, and Eyebrow Pencil to make cosmetic adjustments. Just remember not to go too far with these changes. You always want to make sure that you are viewing the before and after of the image to make sure your edits are enhancing your subject rather than changing them into a different person.
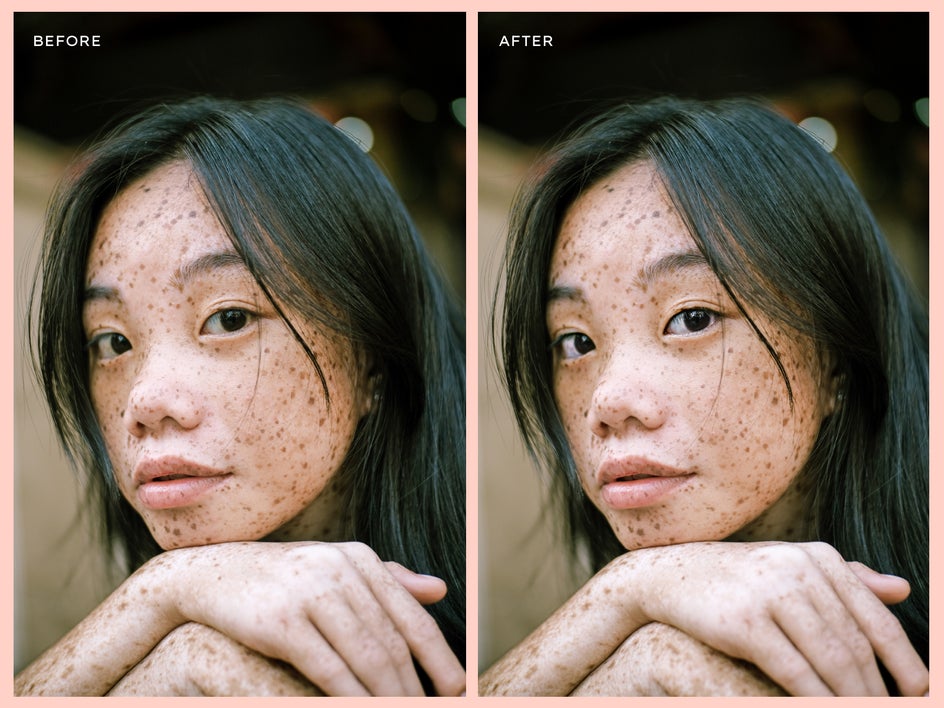
Here is the final before and after once we’ve made all of the adjustments. BeFunky's Touch Up tools offer a simple and effective way to touch up your portrait photography in a natural-looking way.
Crash Course for Portrait Photography Success
Before you go out with a model or subject, it’s a great idea to get to know what their goals are for the shoot. Will you be shooting something casual for their Instagram account, or something more professional for a website? Knowing these things from the get-go will help you go above and beyond and avoid situations where you have shots that are completely irrelevant.
Make sure you plan your shoot for optimal lighting and also how to manipulate the light with your camera settings. When starting out, choose a time of day where the light is diffused, such as early in the morning or right before the sun goes down, as these are the times when light isn’t so harsh and direct – overcast days are also extremely helpful.
Having harsh light can be a cool effect, but when starting out it can be a cruel monster to work around in the editing process. The use of harsh light should be utilized as more of a stylistic approach for specific shoots.
Always make sure that the part of your photo you want in focus, is in fact, in focus. The worst thing is when you come home from a shoot to find that you’ve focused on your subject's nose, cheek, or hairline. This can make or break a session. Always focus on the eyes!
Lastly, practice makes perfect. Ask a friend or two to go out with you and let them know you are trying to practice shooting portrait photography. Pick out a special location and style your model(s) based on the look you want to go for. Choose a location you haven’t shot in yet, like a forest or on the top of a mountain.
Start Directing Today for Better Photoshoots
Once you are all read up on these helpful tips, get to shooting! Always remember that you are the director, you aren’t just a photographer who clicks a button.
The most important thing is to have fun with what you are doing, keep practicing, and trust that Befunky’s Photo Editor will always be here to help you edit your photos after your session.