Add Rainbow Filters to Your Photos

When it comes to editing photos, filters are everyone’s go-to. And for good reason, too. Not only are they a creative way to turn something ordinary into something extraordinary, but they also allow you to achieve your desired effect with just the click of a button!

There are plenty of customizable photo filters available in BeFunky’s Photo Editor – ranging from the subtle to the bold. Some particularly bold photo effects that are sure to draw attention to your photos are the Pop Art filters in the Effects tab. Our Pop Art collection includes tons of rainbow photo filters to make your photos look abosldreamlike.
Rainbow Photography Inspiration
As we mentioned, there are plenty of rainbow photo filters that will make your images pop. Below, we’ve rounded up four of our most versatile effects to show you the amazing results that are possible. Keep in mind that each of BeFunky's Photo Effects are totally customizable - that means you'll always get the look you want!
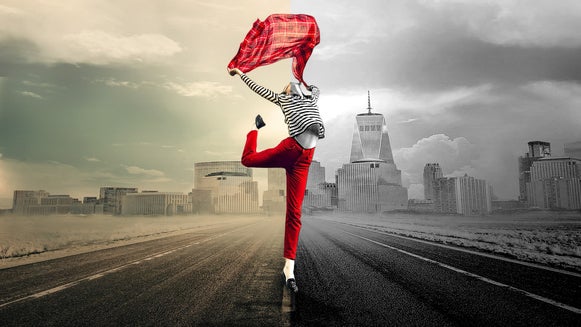
Pop Art 14
This Pop Art effect works extremely well on portraits, particularly ones taken against a plain-colored or blank backdrop. It creates a masterpiece reminiscent of Andy Warhol’s famous Pop Art portraits featuring shades of blue, red, and orange.

You'll notice that with Pop Art 14, darker rainbow colors are applied to the shadows of your image, while more pastel hues are applied to the highlights.
Pop Art 15
If you’re looking to transform a photo featuring a sky, then this Pop Art effect may be the one for you. In the click of your mouse, it instantly adds a plethora of colors to your image, giving it a rainbow effect.
You can make the colors of the effect bold by keeping the Strength slider at 100%, or decreasing the slider for more pastel hues.
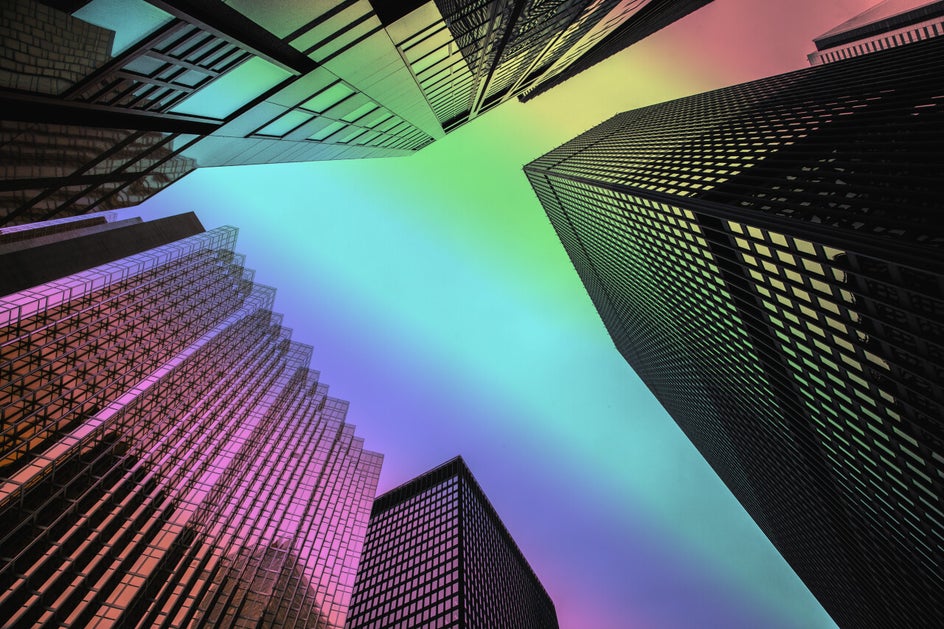
Pop Art 16
While similar to the previous effect, this Pop Art filter adds a whole lot more contrast, allowing you to make your photo as colorful and as bold as ever. Like many of the other rainbow photo effects in the Pop Art category, it applies most of the rainbow color to the lighter parts of the image, making the darker parts appear as silhouettes.
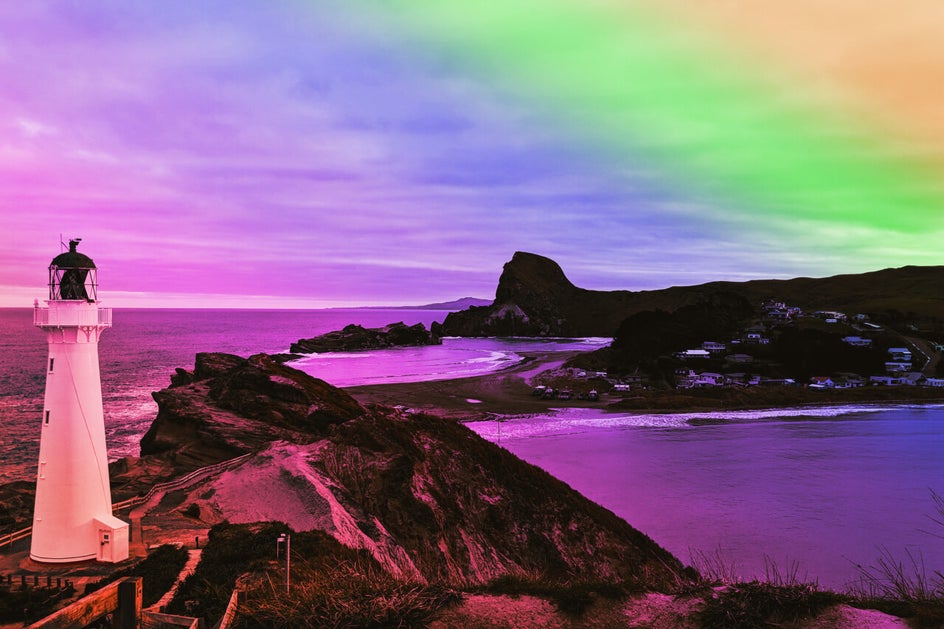
And again, if you want to make the colors in your rainbow photo effect appear bold, just set the Strength slider to 100%. Decreasing the strength will give you more pastel tones.
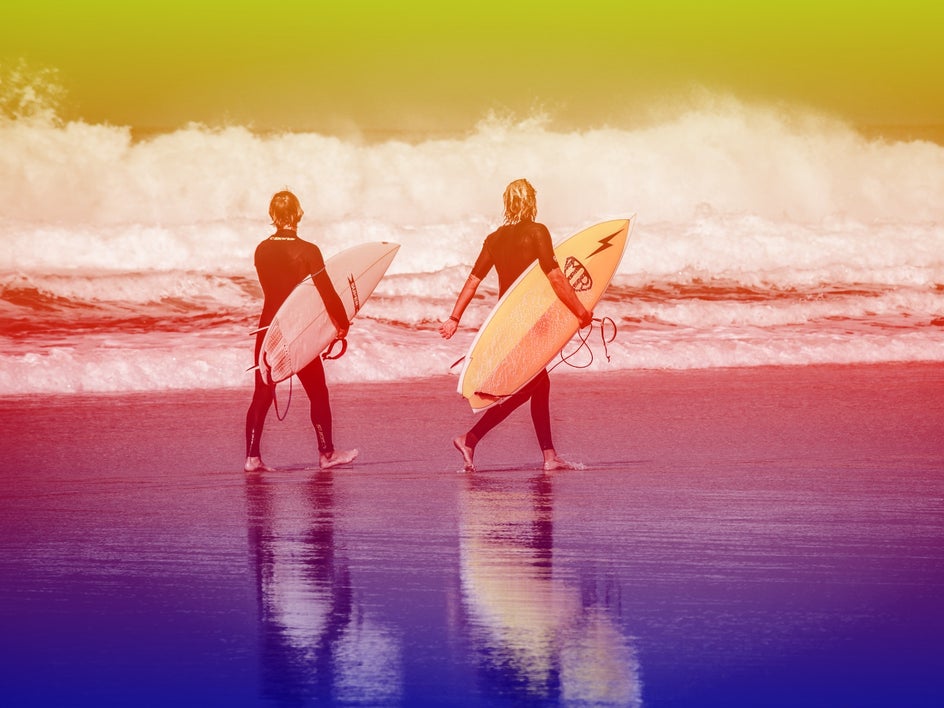
Pop Art 18
With its dreamy sunset hues, this Pop Art effect works best on light-colored landscapes or ethereal settings. See how it transforms this beach into a magical wonderland?
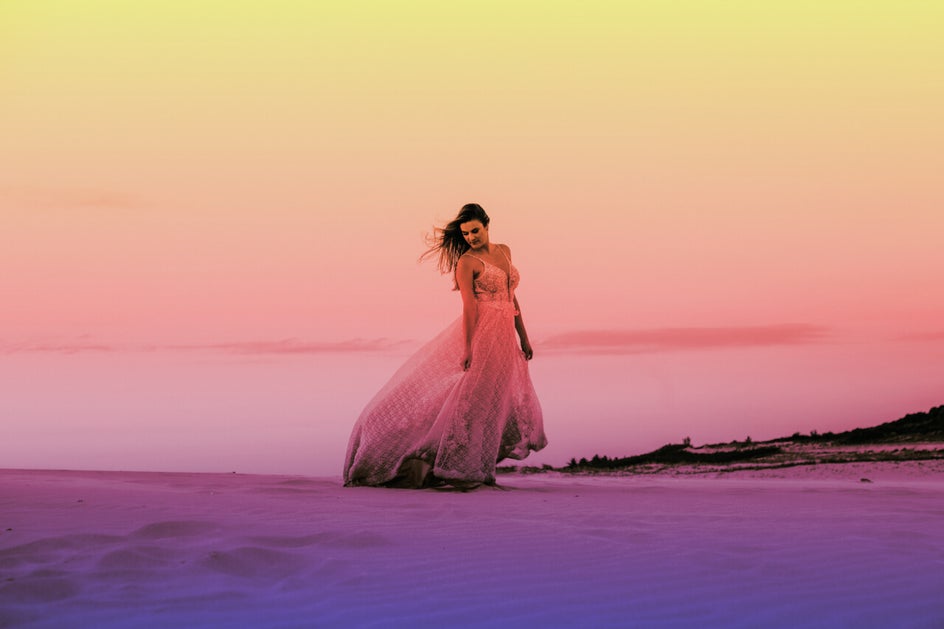
We think this collection of rainbow photo effects is just out of this world! Read on to the next section to see how to apply them to your photos and customize them to get the look you're going for.
How to Add a Rainbow Filter to Your Photo
Now that you've seen how colorful these filters can be, it's time to apply one to your own image.
Once you’re ready, go to BeFunky’s Photo Editor and upload your photo of choice.
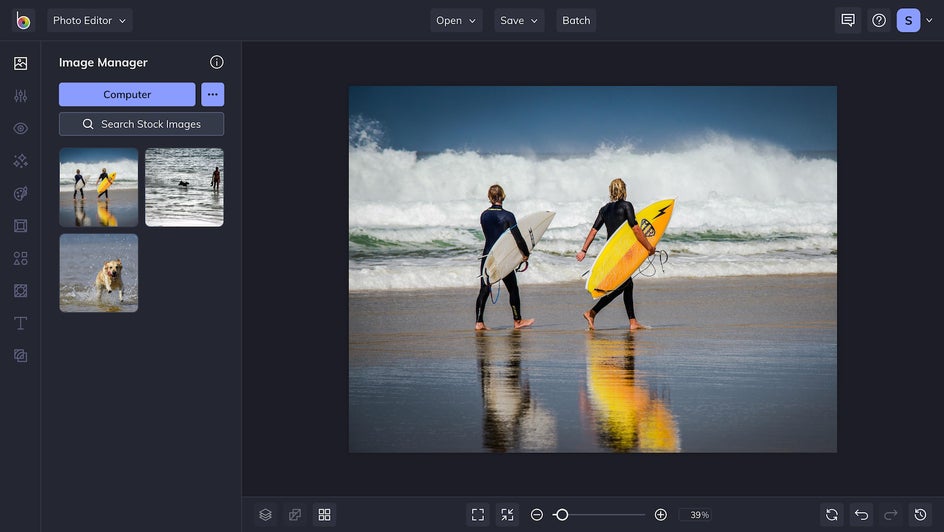
Step 1: Choose Your Rainbow Effect
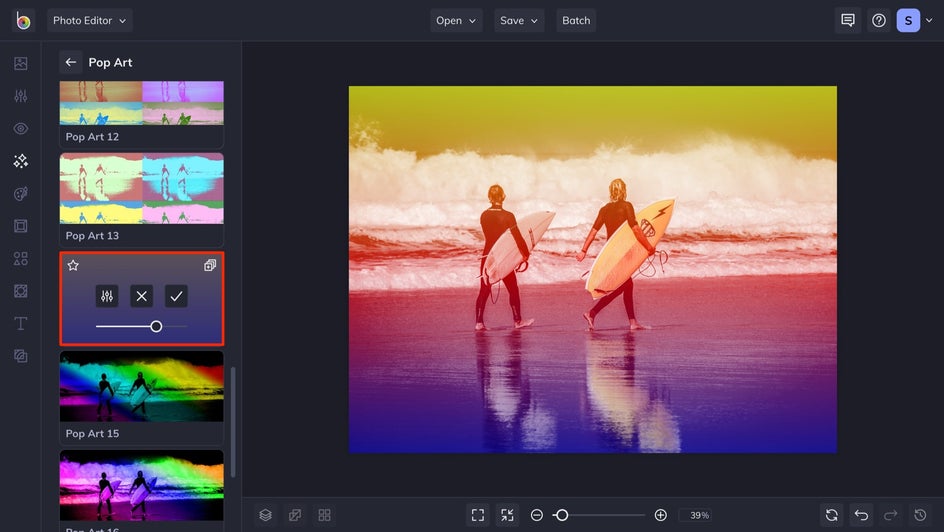
Upload your desired image, then navigate to the Effects tab (the star symbol) in the side menu. From here, you can scroll down to Pop Art and choose a rainbow effect of your choice. For this tutorial, we’ll be working with Pop Art 14.
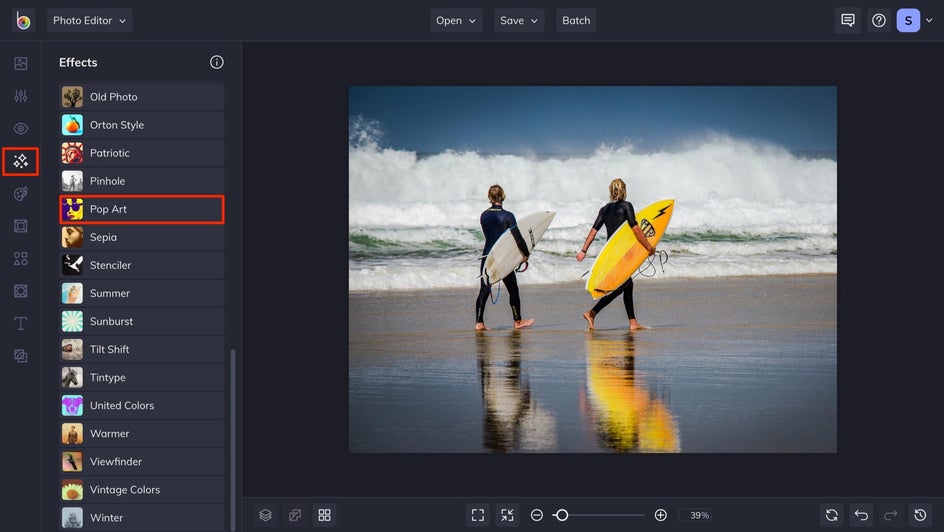
When you select an effect, you’ll notice three main options on it's thumbnail: Settings, Cancel, and Apply. While both Cancel and Apply are pretty self-explanatory, clicking the Settings menu (the mixing board icon) opens up a whole new range of possibilities!
Step 2: Adjust the Effect (Optional)
In the Settings menu, you can adjust Amount and Silhouette Amount. Amount refers to the strength of the effect, while Silhouette Amount increases or decreases the vibrance of the colors.
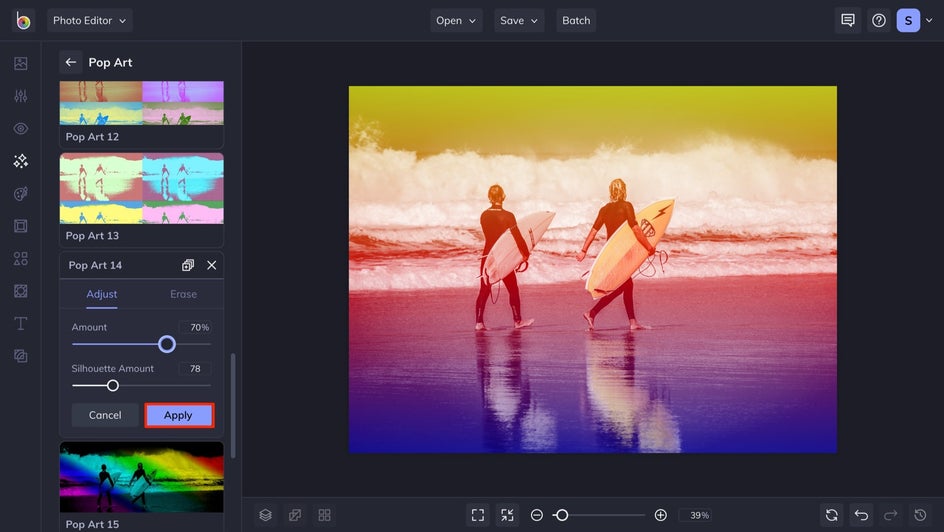
If you click on the Erase tab, you'll be able to selectively remove the effect from your photo with our array of brushes. You can also choose to use the Isolate Subject button to remove the effect from your subject, or invert it and remove it from your background.
Step 3: Save Your Photo
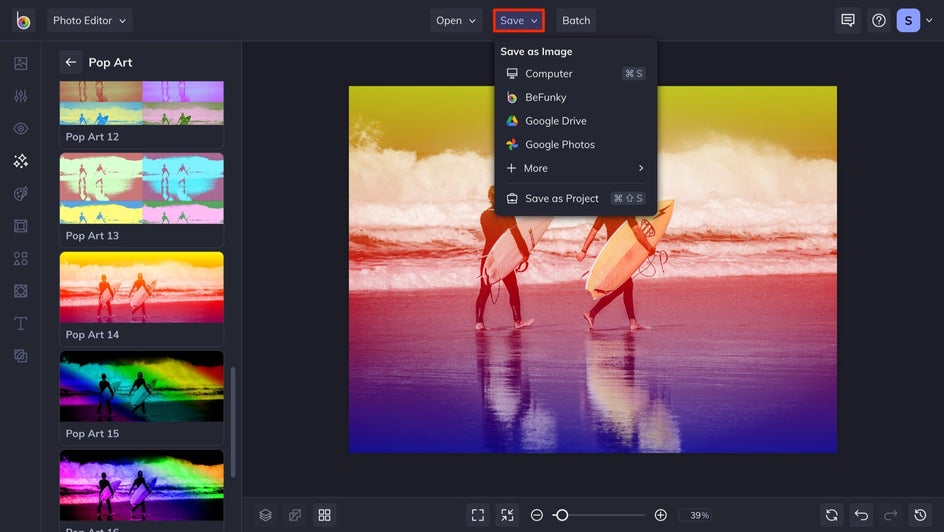
Once you’re happy with your final image, all that’s left to do is click the Apply button (the checkmark) and save your photo. Click on Save at the top of your screen to save your work to your Computer, as well as Facebook, Dropbox, and more! If you want to come back to your project at a later date (i.e., to add some extra effects to it), then we also recommend the Save as Project option.
Get Colorful With BeFunky
Ta-da! You now have your very own masterpiece featuring all of the colors of the rainbow. If you want to keep exploring BeFunky's range of effects and filters, check out the Artsy tab for some creative inspiration.
Ready to rock your own rainbow filters? Head to the Photo Editor to get started!