Replace Colors In Seconds With the Replace Color Tool
In the past, if you wanted to change the color of just one element within your photo, you’d have to manually recolor it pixel-by-pixel. Thanks to BeFunky’s incredibly easy-to-use Replace Color tool, found in the Photo Editor, those days are now long gone!
The tool lets you select a specific hue within your image and then turns it transparent, before allowing you to fill that area with a replacement color – whether that be a similar shade or something bold. Change the color of the sky, your hair, product photography, and more!
How to Replace Colors in Your Images With BeFunky
Ready to use our amazing photo color replacer tool? Head to the Photo Editor and upload your photo by selecting it from the Open menu, or simply drag and drop the image file into the interface.
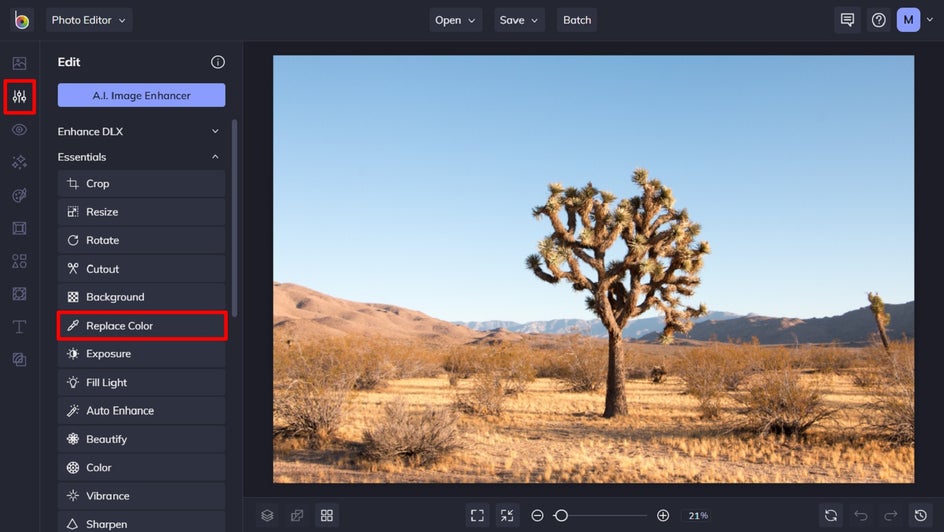
Step 1: Navigate to the Replace Color tool
Click on Edit in the menu on the left, then select Replace Color. You’ll find it within Essentials.
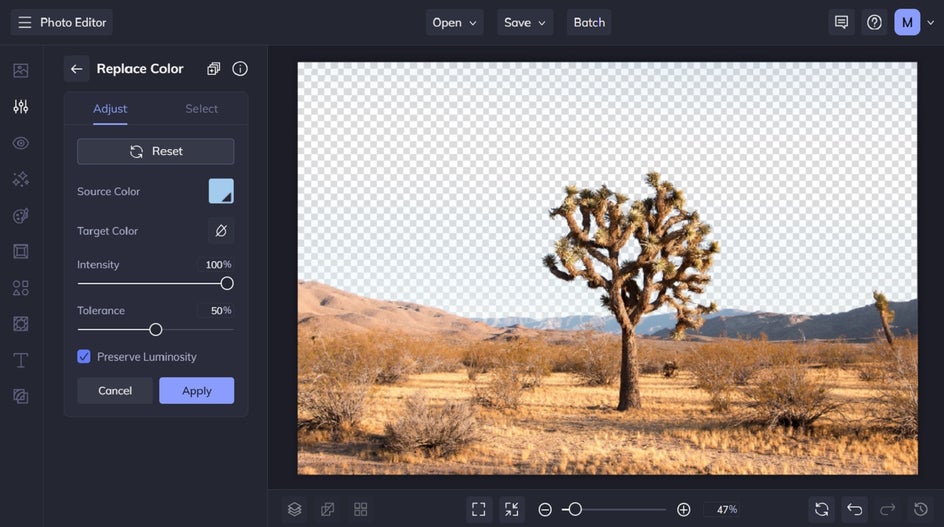
Step 2: Select Your Source Color
Next, click on the box next to Source Color and use the eyedropper tool to select the color from your photo that you wish to change. In this example, we’re swapping the blue sky for another color, so have selected that shade of blue.
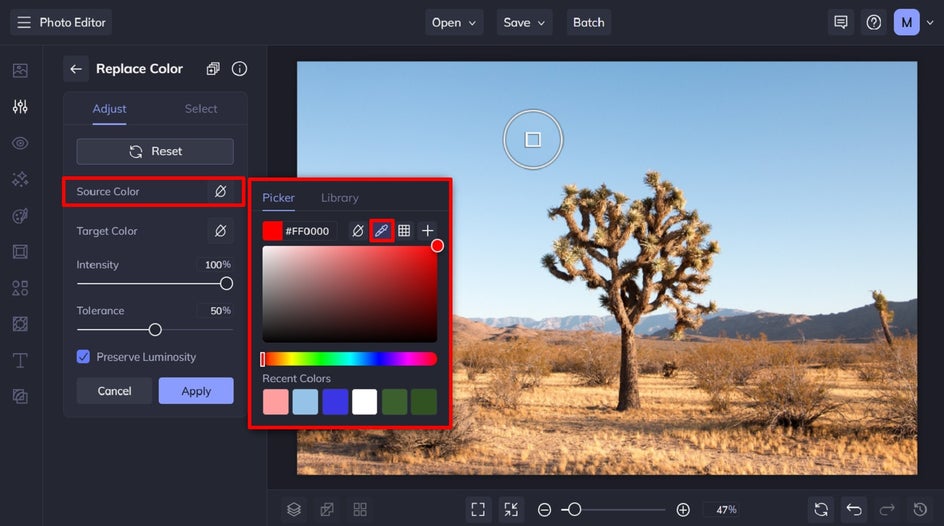
When you click on the color you want to replace, you’ll notice that any area with that particular color becomes transparent, since the Target Color defaults to creating a transparent background. You can use the Tolerance slider to increase or decrease the sensitivity of the color you're replacing.
If you want to keep the transparent background, simply click on the Apply button to confirm it. If you wish to swap it with a replacement color, however, keep reading!
Step 3: Select Your Target Color
To replace the transparent areas with a new color, click the box next to Target Color. From the Color Picker that appears, you can select a new color, type in a specific color’s HEX code, or even use the eyedropper tool to select a color already present in your photo.

Step 4: Use the Erase Tool for More Precise Editing
If there are some areas of your photo that you don’t want to replace, click on the Erase tab next to the Adjust tab. Adjust the Brush Size accordingly, then paint over those areas with the brush tool to remove the transparency.
Once you’re happy with how your replaced colors look, simply click Apply to apply your image color changes.

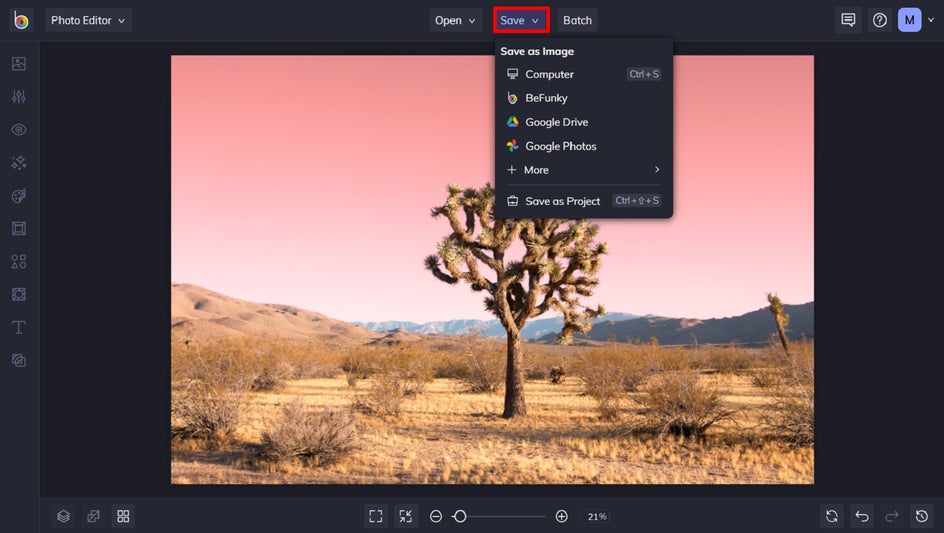
Step 5: Save Your Photo
All that’s left to do is to click Save at the top of the screen, then select your desired save location. We recommend a jpg or png format for sharing online!
Final Results – Replacing Colors in Seconds
Wasn’t that easy? Thanks to BeFunky’s Replace Color tool, replacing colors in images online has never been easier.


Inspiration: Our Favorite Ways to Use the Color Replacement Tool
The Replace Color tool is pretty versatile. So versatile, in fact, that you may be overwhelmed with all of the different ideas floating around in your mind! To help you narrow down your next color replacement project, we’ve listed just some of our favorite ways to use this tool.
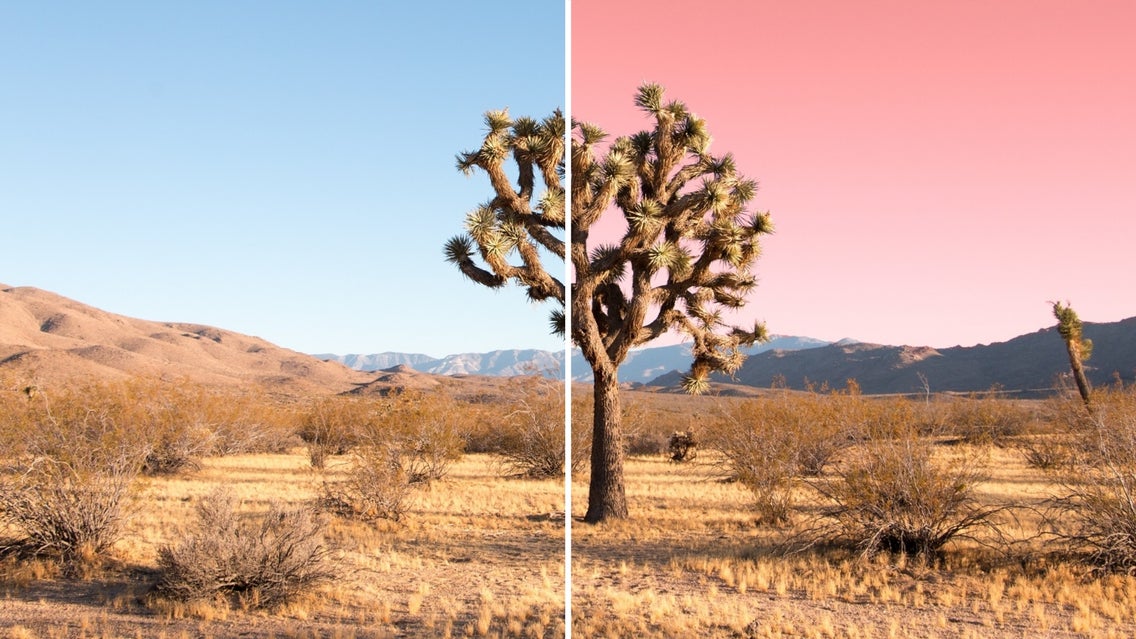
Edit the Color of the Sky
Have you ever taken a photo when the weather was overcast, but wished for a perfect blue sky? Or perhaps you captured a landscape during the day, but think it’d look better during a starry night?
With the Replace Color tool, you can essentially change the weather and time of day by creating the illusion of a perfectly blue sky, a dramatic sunset, golden hour, and more. You can also replace the sky entirely with the Replace Sky tool!
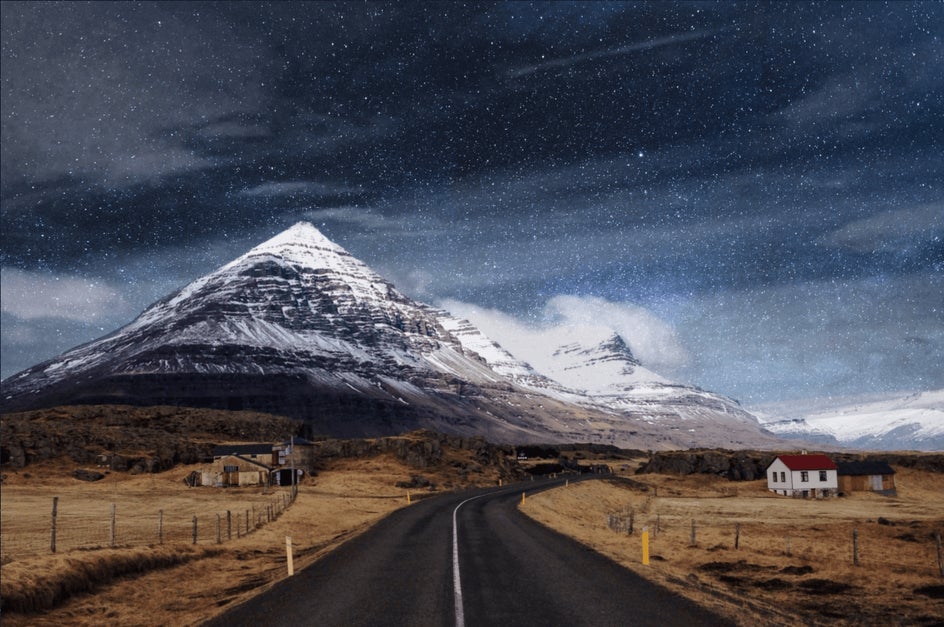
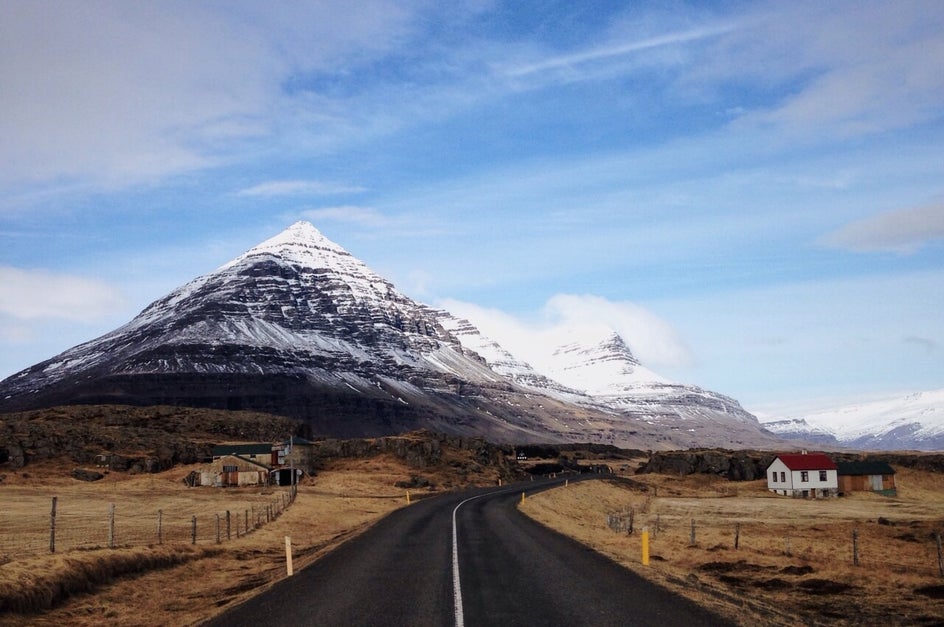
Erase the Background in a Photo
Background removal is particularly helpful if you want to create a layer to place on top of another image or even simply when you need to remove the background in product photography. The Replace Color tool is a quick and easy way to erase backgrounds in any photo!
Take this photo, for example, where we used the color replacement tool to erase the sky, then placed it as a layer onto a different image of a starry night. We were able to change the entire vibe of the photo in just a few clicks!
Make a Transparent Background for Watermarks and Logos
If you’ve already got a logo or watermark design with a solid background, you can now make the background of your logo or watermark completely transparent in seconds! To do this, simply select the background color as the source and change that specific hue to transparent.
You’ll then be left with a more functional graphic that you can use to watermark photos, add to a design, or upload to a website for a seamless appearance.


Simply select the background color as the source, change that specific hue to transparent, and you’ll have a much more functional graphic to watermark photos, add your logo to a design, or upload it to a website with a much more seamless appearance.
Edit Product Photography
Product photography works best on websites and selling platforms when the image has a transparent background. Some platforms, like Amazon, specifically require product photography that has a transparent background. This allows them to ensure the photos become the same shade of white when uploaded to their site. By using the Background Remover in tandem with the Replace Color tool, you'll get the color you want with seamless results.


Find a Background Color That Pops
The Replace Color tool is also incredibly helpful when editing product photography for commercial purposes or a portrait photo against a solid backdrop. It lets you replace your subject’s backdrop with any color you have in mind – the choices are endless! This is especially useful for flat lay photos needing a less distracting background.
Simply select your background color as the source and use the Color Picker in the Replace Color tool to find a better-suited color for your image.
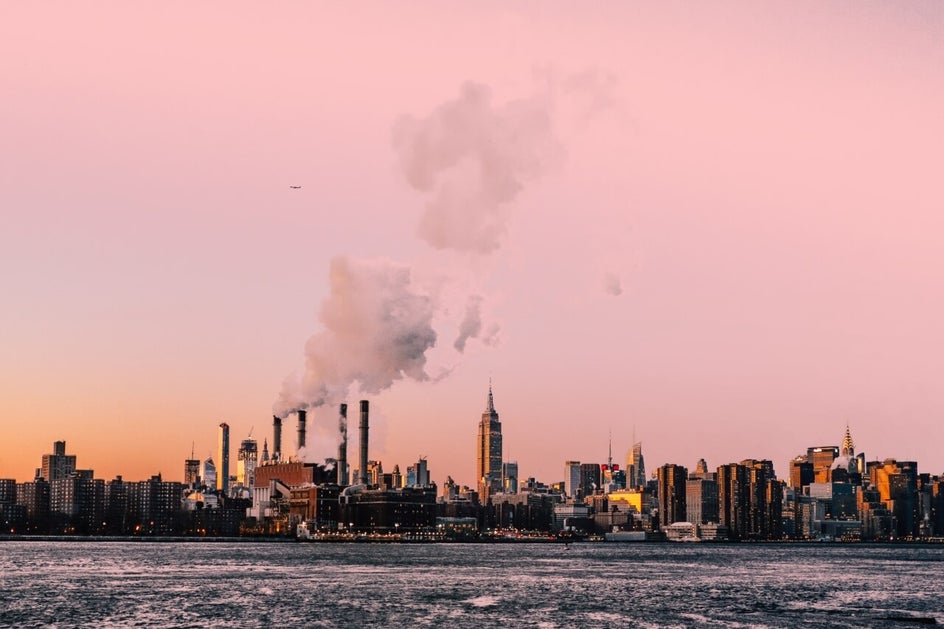
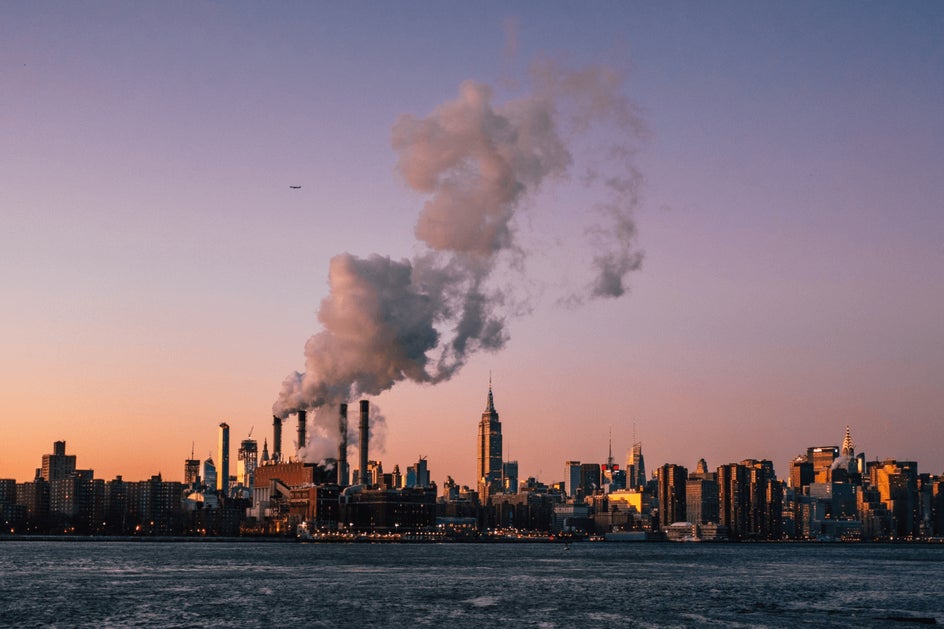
Make Monochromatic Magic
Monochromatic color palettes are on the rise due to their harmonious and eye-catching appeal. Thankfully, the Replace Color tool can also help you quickly and easily embrace the magic of monochrome in your imagery.
In this image, for example, we’ve used the eyedropper tool to choose the same color as the clouds for replacing the blue sky. The result? A pink sky masterpiece!


Incorporate Your Own Color Palette
With the Replace Color tool, you can literally replace any color in your image with a different color of your choosing. That means if you’re really into a certain color palette, you can make any image match it. You are in full control over the aesthetic of your image, and this tool makes it easier than ever to get the looks you’re dreaming of.


Add an Unnatural Shade
If you’re feeling extra creative, you can even use the Replace color tool to bring your wildest color ideas to life! How about a purple ocean, a pink forest, or a green sky? No color replacement is off-limits, no matter how quirky it may be!

Change Clothing Colors
While you may never have an infinite wardrobe, the Replace color tool can certainly make it seem as though you do. Swap out your red shirt for another if you think it matches your backdrop better, or switch your dress’s pattern for a more vibrant color scheme to really make it pop! Trust us, you’ll be amazed at how realistic the results are.


Transform Your Images With the Color Replacement Tool
BeFunky’s Replace Color tool offers a superior way to create eye-catching designs. With the option to selectively replace individual colors within your images, there’s no limit to what you can create! Want to see what all of the fuss is about? Go on, try the Replace Color tool for yourself!