Your Guide To Sizing And Printing High Resolution Photos
We’ve all been there before. You spend a ton of time editing the perfect photo for printing, only to get super confused as to what the pixel ratio for printing in inches should be. It’s ok, because we’re about to take all the guesswork out of pixels to inches conversions, plus share all our best tips for creating high resolution photos for both printing and displaying online!
How To Size Images For Printing
Chances are that if you’re wanting to print something you’ve created with BeFunky, you’re not going to be turning it into something huge like a billboard or banner. That means you’re typically going to be printing from a standard printer, which usually print images at 300 DPI (Dots Per Inch). Confused already? Don’t be. It just means that for every inch you print, the printer uses 300 dots of ink.
To ensure that you’re printing the highest quality images at the correct size (in inches), you’ll need to know how to crop photos or resize images to the correct size in pixels. If you’re using the Crop tool in BeFunky, you’ll notice that the dropdown menu features the most common photo sizes for printing, so all you have to do is select the size you want and crop away. If you’re using the Resize tool to get the size just right, you may be uncertain as to how many pixels you need for the width and height boxes. To save you from uncertainty, here’s a handy chart we’ve whipped up that tells you exactly how many pixels you need for the most common printing sizes:
If you’re a skilled mathematician, you’ll notice that one inch equals 300 pixels. That means if you want a size that’s not on this chart, all you have to do is multiply the amount of inches by 300 to figure out the amount of pixels for resizing. Too easy!
Cropping And Resizing 101
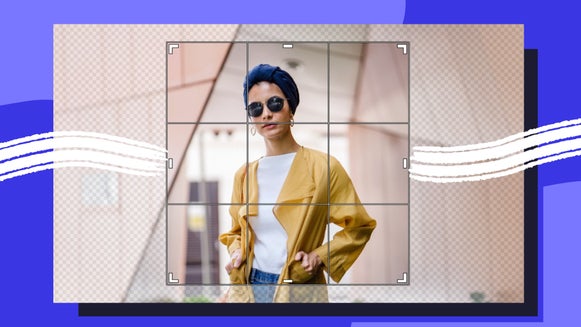
What happens if you want to use the Crop tool to create the perfect 5 x 7 inch photo, but the crop target cuts off too much of your image? Fear not, because this is where the Crop and Resize tool go hand in hand. First, select the Crop tool in BeFunky's Photo Editor and click the perfect size you want to use for cropping from the dropdown menu. Check the box that says ‘Lock Aspect Ratio.’ This handy little box will allow you to adjust the crop target, all the while keeping the Aspect Ratio the same.
When you’ve nailed the crop after locking the Aspect Ratio and making the crop target larger, you’ll notice that the Width and Height are larger than the 5 x 7 inches pixel conversion. That's ok, because we'll use the Resize tool to bring the size back down. For now, click the blue checkmark to save the crop.
Next, click on the Resize tool in the Edit menu on the left. This handy tool will help you scale the image back down to the proper pixel sizing. When you've got the Resize tool open, type in the correct measurements (for a 5 x 7 inch photo, you’d type 1500px by 2100px into the corresponding Width and Height boxes), and voila! You’ve got yourself a perfectly sized photo for printing.
Printing Designs You’ve Made In BeFunky’s Designer
The best part about BeFunky’s design templates is that they’re already perfectly sized for whatever template you’re using. That means if you’re printing a business card, the template is already perfectly sized for a standard business card (3.5 inches by 2 inches). The invitations will automatically print at 5 x 7 inches, the greeting cards at 7 x 5 inches, and so on.
If you ever wonder what size a template will print at, the sizes are displayed right after you click the template, so there’s never any guesswork as to what the sizing will end up being. This way, all you have to worry about is what style of paper to print on!
Printing The Perfect Photo Collage
It’s nice that the Designer templates already have the sizing displayed, but how do you navigate sizing the perfect collage in our Collage Maker? This is where the Customize tab comes in handy. After selecting Customize from the menu on the left, you’re presented with a set of boxes similar to the Resize tool in our Photo Editor.
All you have to do is enter in the perfect pixel ratio into the Width and Height boxes and you’re good to go.
Displaying Images Online And On Social Media
Contrary to printers, monitors and screens use pixels more sparingly. While printers use a standard 300 DPI, monitors use pixels in the 72 PPI (Pixels Per Inch) to 96 PPI range. When you’re uploading photos to your blog, website, or social media accounts, there are certain pixel size requirements that will vary from platform to platform. Even if you upload a large image file, the place you upload the photo will usually size it down or automatically crop it to fit these requirements.
The best thing you can do is research what the image size requirements are for each platform. If your blog favors images that are 1280 pixels by 800 pixels, it’s best to use the Photo Editor’s Resize tool to get the perfect size before uploading. Perfectly sized photos take up less storage space online, so using the Resize tool to get the ideal pixel ratio is going to be the key to saving yourself some storage (and making your site run a whole lot quicker).
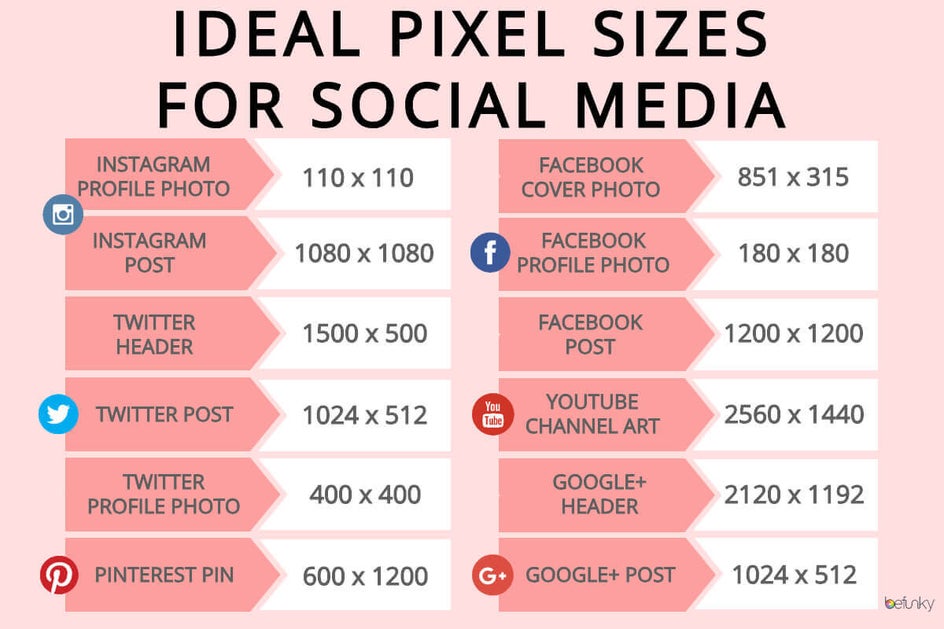
For specialized size requirements, like a Twitter header or a Facebook profile photo, it’s best to use the Crop tool to ensure everything you want displayed is present after cropping to the proper Aspect Ratio, then use the Resize tool if necessary to size it down perfectly. Here’s a handy chart we made as a cheat sheet for the most common social media image sizes:
Whatever you’re trying to accomplish with your photos and designs, BeFunky has your back when it comes to creating quality, high resolution goodness. The images you save are always 96 PPI (better quality than most monitors!) and designs meant for printing (invitations, menus, greeting cards, and more!) are always set to 300 DPI to accommodate standard printers. This way, all of your projects will look ultra professional.