Make Your Smile Shine With the Teeth Whiten Tool

You’re never fully dressed without a smile, it is the accessory that is always with you. However, most folks are self-conscious about one aspect of their smile or another and hide them from the world. With BeFunky’s Teeth Whiten tool in the Photo Editor, you can share your smile with the world once more. Whether your smile is discolored from lipstick or years of coffee drinking or smoking, the solution is simple with this easy-to-use free tool.
Get Shining White Teeth for Free With Teeth Whiten
If you have a photo in mind that you want to whiten your teeth on, open it up in the Photo Editor to get started. Or, if you don't need to make any prior edits, head right to the Touch Up tab by clicking here.

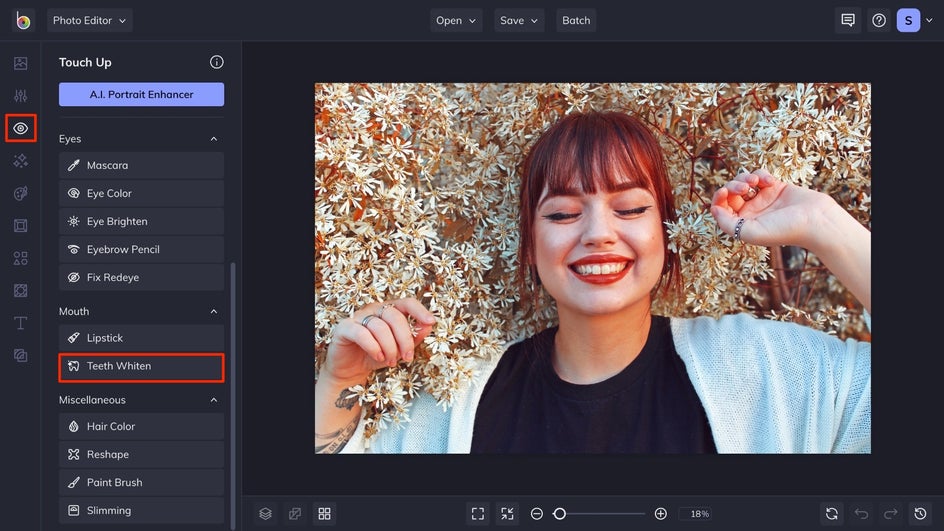
Step 1: Navigate to Teeth Whiten
Select the Touch Up tab from the menu on the left side of the canvas, then you will scroll to select Teeth Whiten under the category titled Mouth.
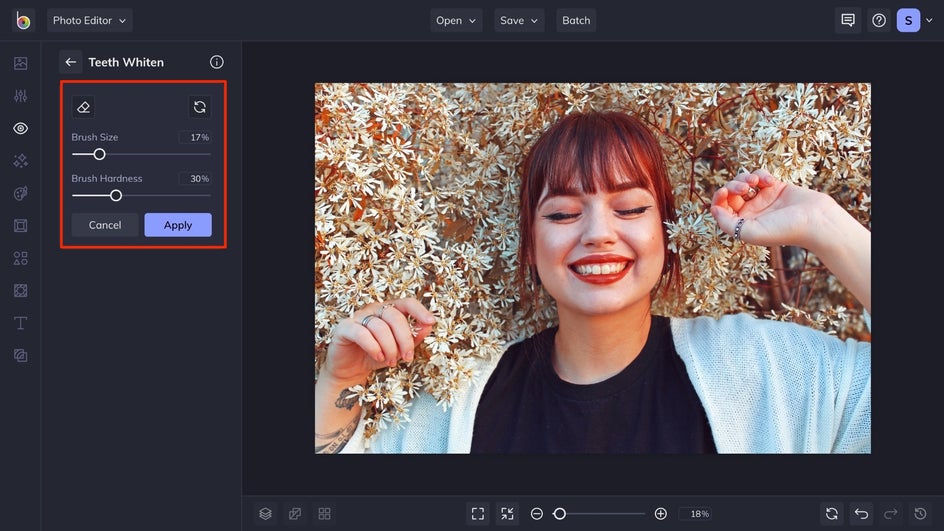
Step 2: Make Adjustments to the Brush
To whiten your smile in a matter of seconds, and for free, you’ll need to make some adjustments to the brush that applies the whiteness to your smile. The first adjustment is the Brush Size, you’ll want to adjust the size of the brush to fit within your smile, but not be larger than your teeth. To zoom in on the smile, you can use the plus and minus signs at the bottom of the canvas, and then hold the space button and use your cursor to drag the photo to have your smile centered within the canvas. This will allow for more precise use of the Teeth Whiten tool. The second brush adjustment is the Brush Hardness. This will allow you to control how much of the effect is applied right away. More hardness means more effective, less hardness allows you to make changes gradually to the image.
Step 3: Use the Tool and Apply the Changes
To use the tool, you use your cursor as the brush. To make targeted changes to each tooth, you can hold your brush over one tooth and then click until you achieve the desired result. If you want to make changes to the whole smile at the same time, you can click your cursor down and drag it across your teeth. Once you have achieved your desired result, click Apply.

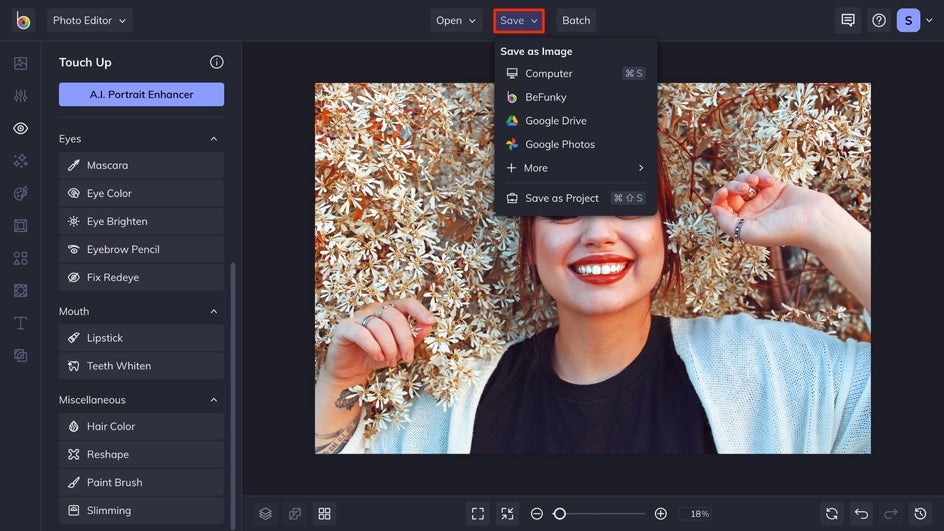
Step 4: Save Your Image
To save your image you will select the Save button at the top of your canvas and choose the desired location to save your image.
Whiter Teeth in 4 Simple Steps
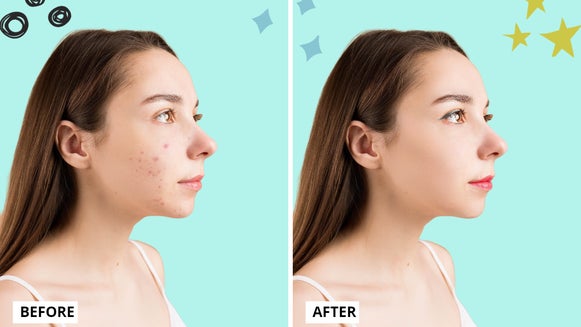
Take a look at how we whitened this subject's teeth in 4 easy steps! Instead of spending thousands of dollars on teeth whitening products or countless hours in the dentist's chair, you can whiten your teeth in seconds with this free BeFunky tool.


Start Whitening the Teeth on Your Favorite Photos
With the help of the BeFunky Photo Editor and the Teeth Whiten tool, you can have shining white teeth and a smile that you want to show off to the world. Try your crack at having the white smile of your dreams by clicking here!